Gary Jackson: Fire When Ready Pottery
A Chicago potter’s somewhat slanted view of clay & play
Categories: kiln firing, process

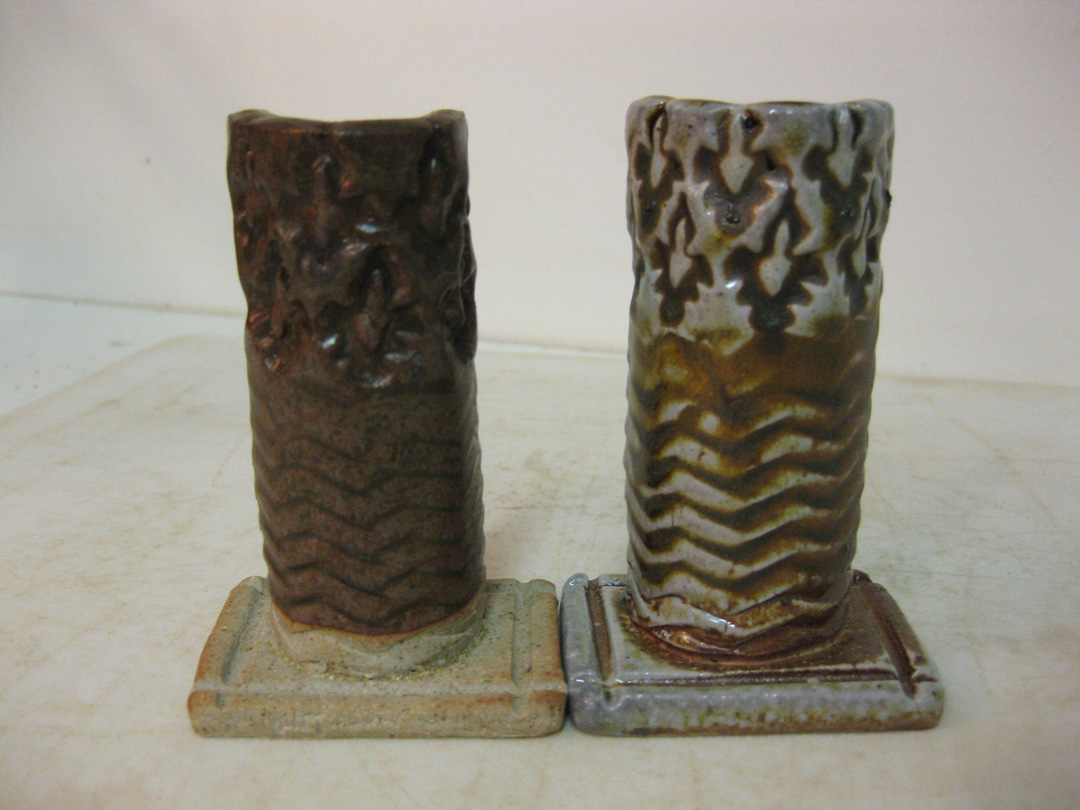
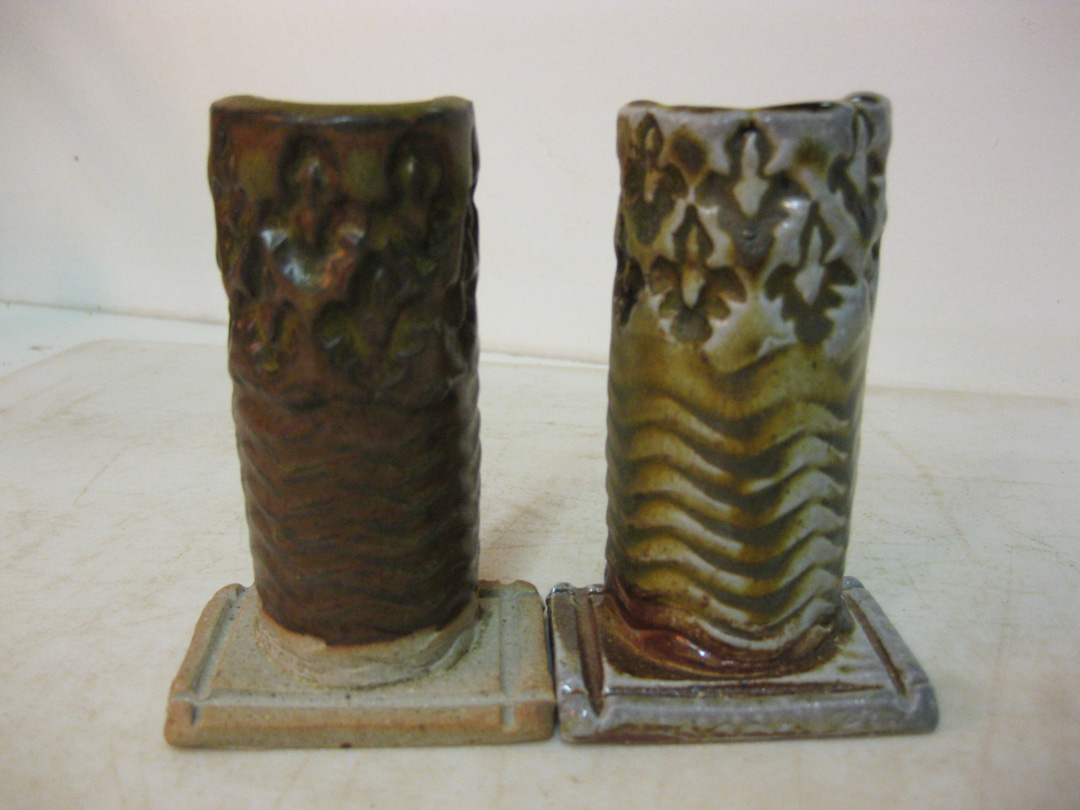
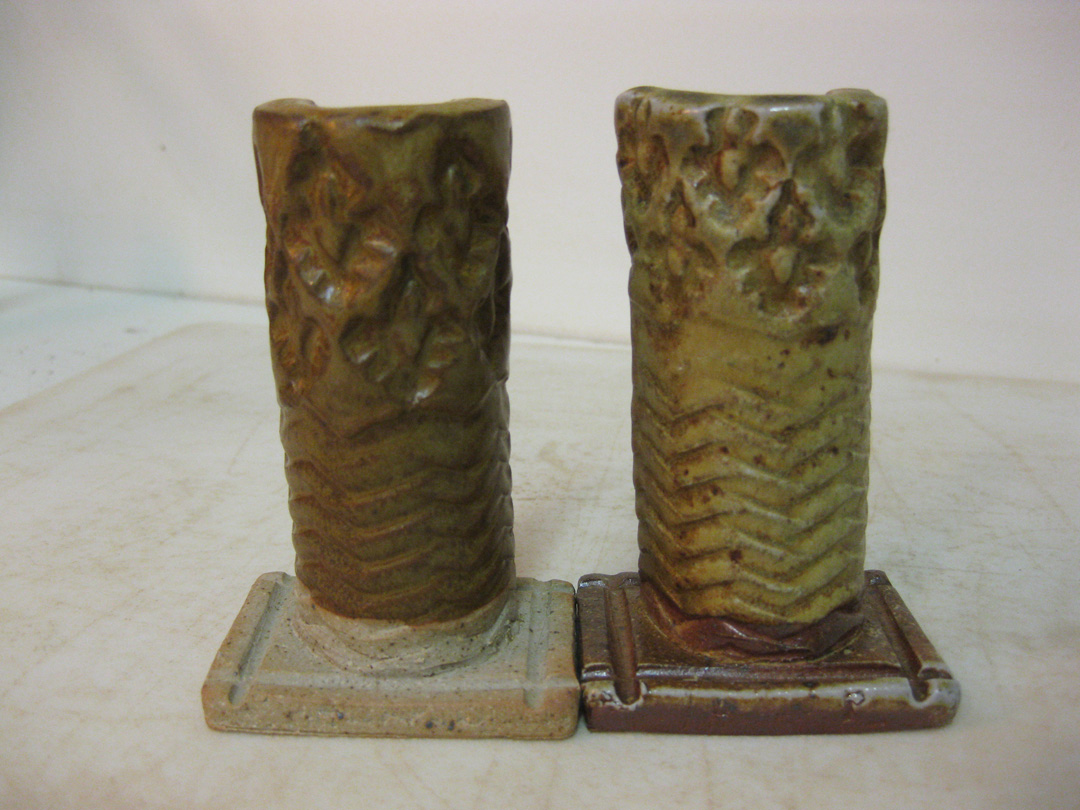
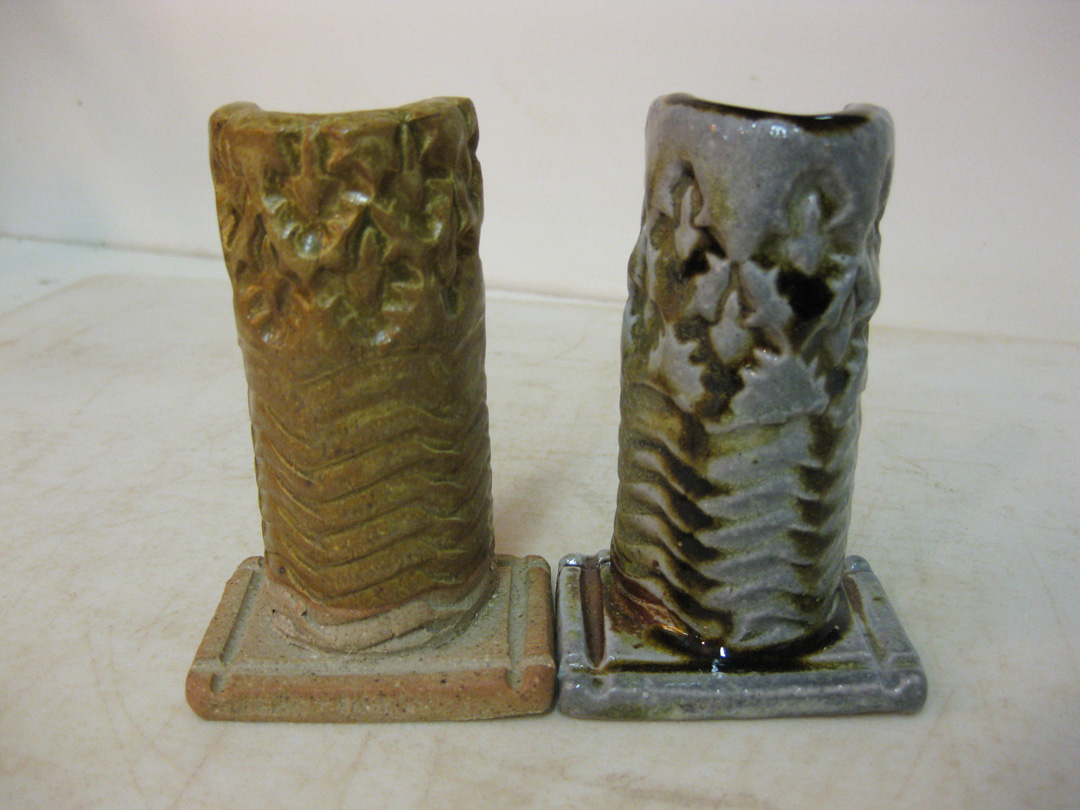
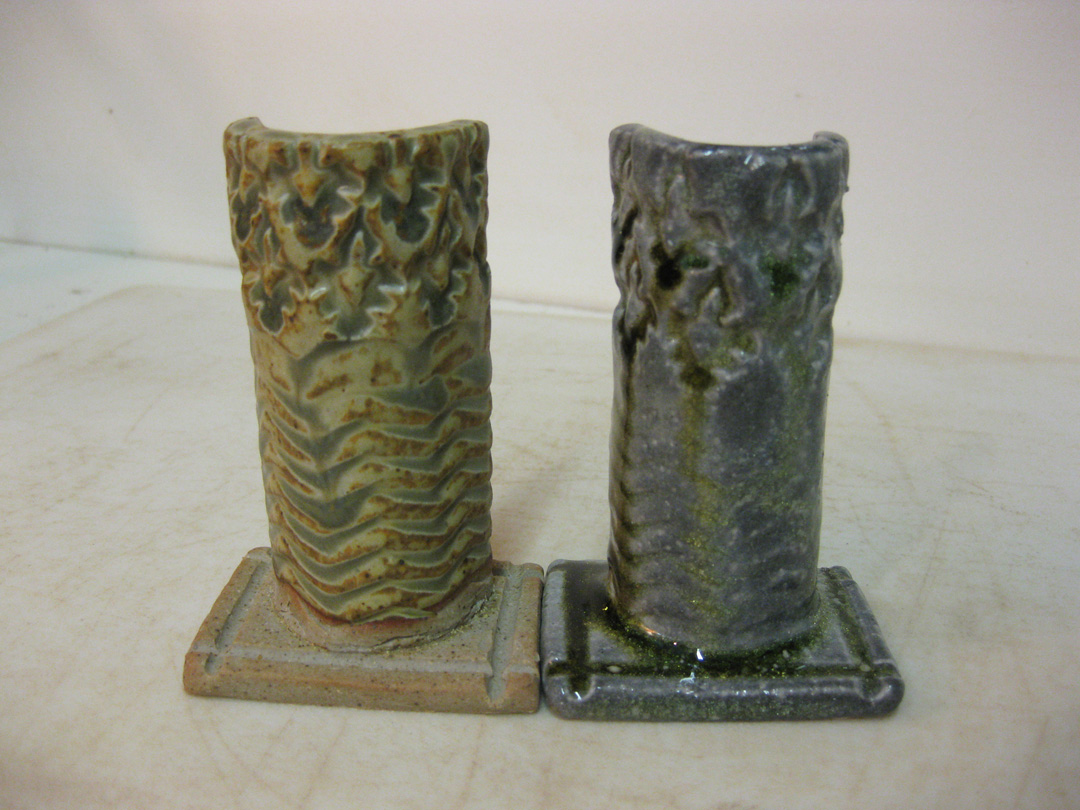
So my textured glaze test tiles have made it through their kilns.
Some in a regular cone 10 reduction gas kiln, and others in a cone 10 soda kiln.

Remember, I was testing some new glazes that were “abandoned” in the studio and I claimed.
Free glaze is free glaze! But I wanted to see what they looked like on top of my textures –
as well as how the soda kiln atmosphere would affect the glazes. Keep in mind that the soda
mixture we add to the kiln works as a flux, the “melty” part of a glaze. So frequently, when
a glaze is used in the soda kiln, it can change colors chemically, and become a lot runnier.
Here are my results, side by side, with the soda fired test tile on the right.
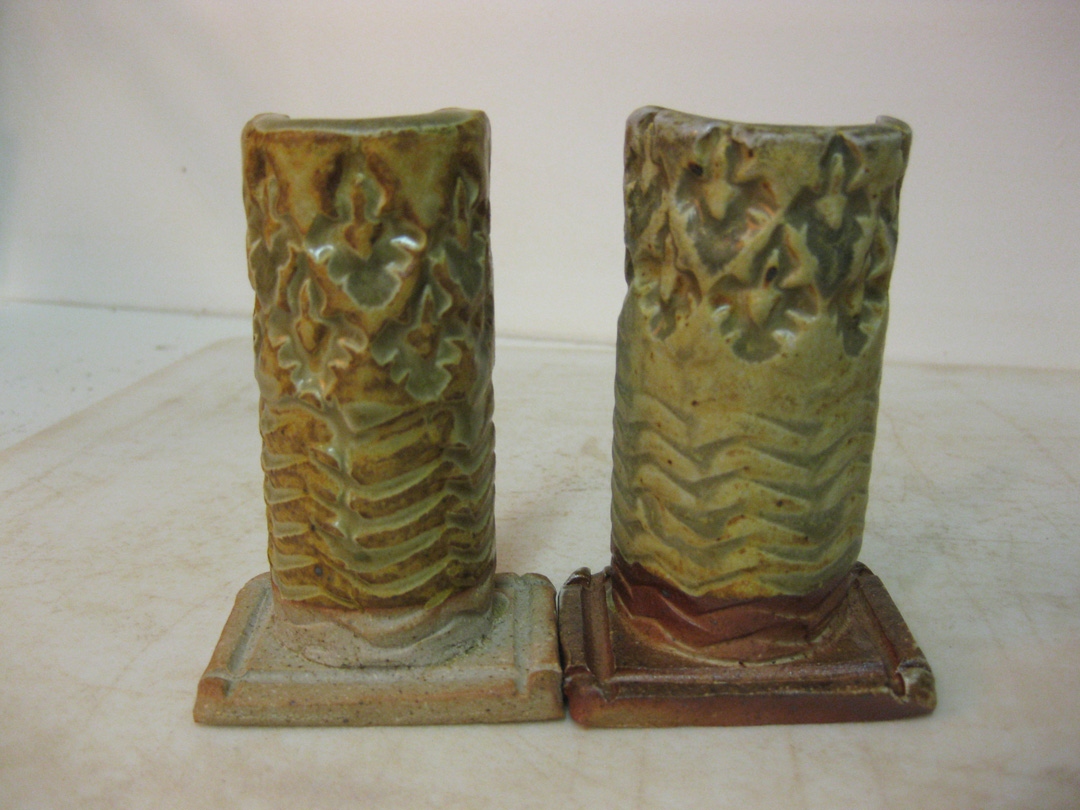
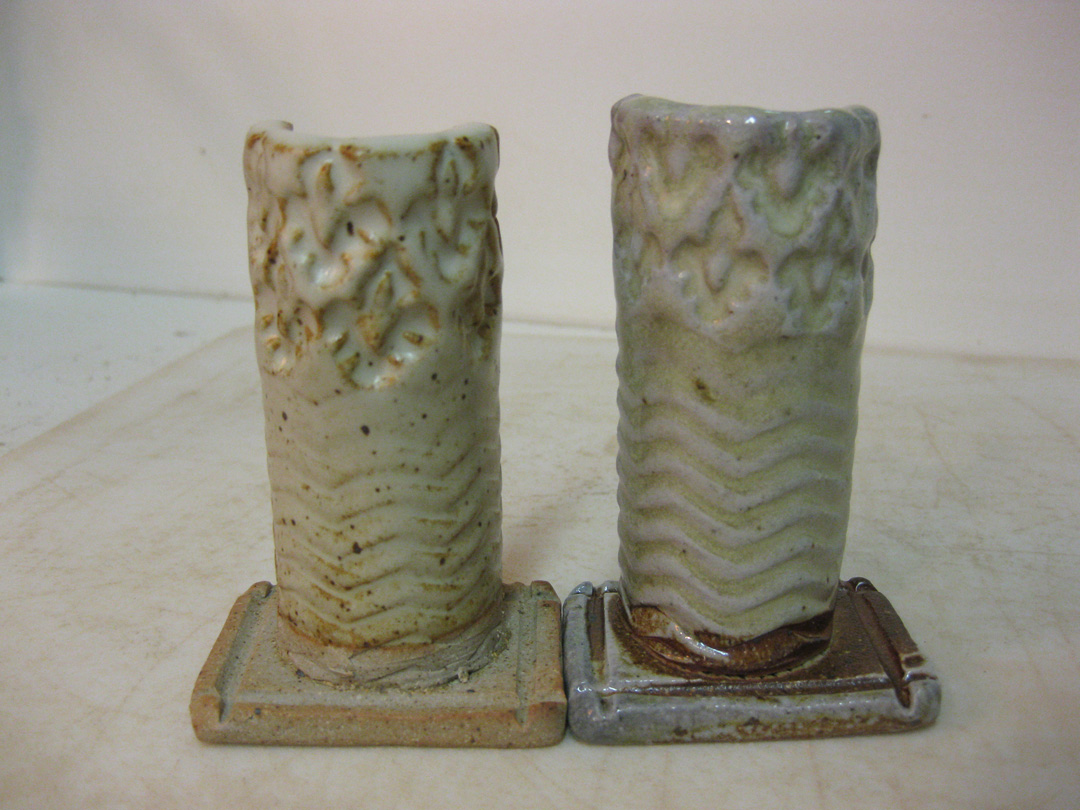
Some of the glazes worked well. Some didn’t. Some are just brown. Some are just beige.
As you may already know… I’m not a fan of BEIGE. In my colors, my pots, my food, my life!
I am intrigued by some of them though. I especially like how some of the samples worked well
in the soda kiln and helped to accentuate the stamping textures without obliterating it in glaze.
The test was a success, as I now know a lot better what these “bonus” glazes look like.
The downside being that the glaze recipes weren’t left behind with the buckets of glaze.
So when they’re gone, I may or may not be able to make more glaze… I’ll need to do some
glaze recipe research for those glazes that work well.

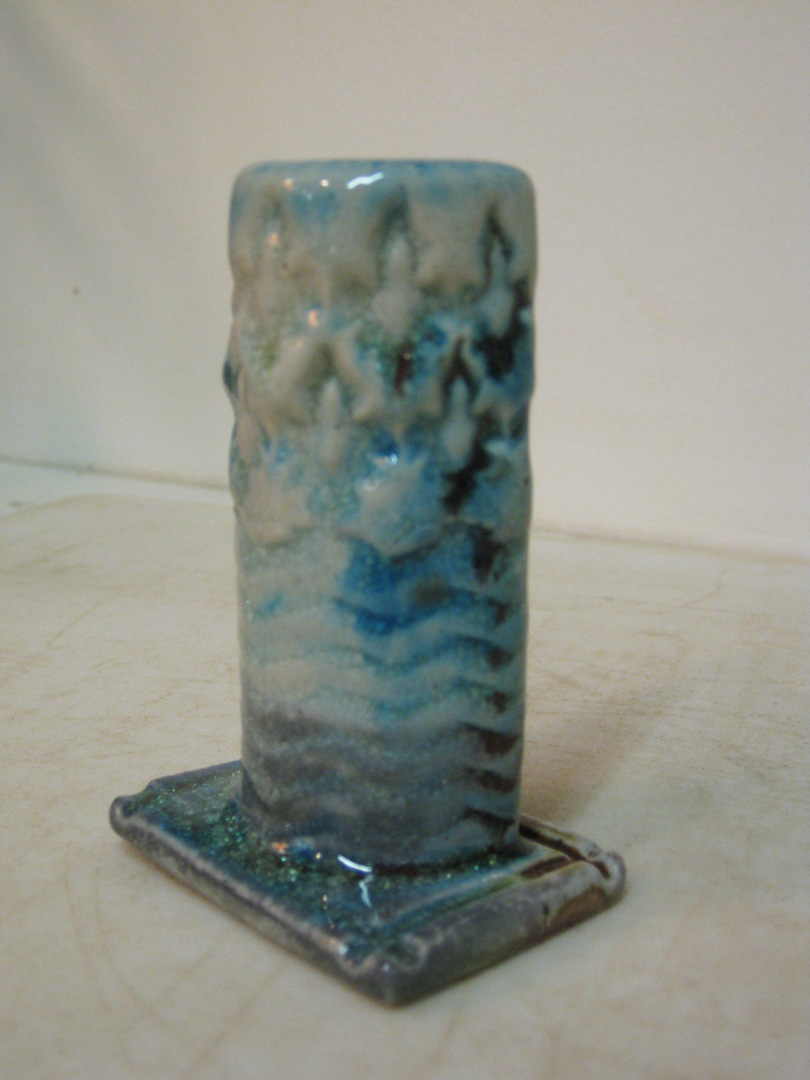
Also, while I was testing, and had a few extra test tiles to use, I decided to try a
low fire glaze that I had heard rumors of working really well in the soda kiln.
I’ve never used it before… but after seeing this test tile, I’m definitely intrigued.
Categories: pottery, process, production

In between all the bike rides… I do find time to throw!… trust me.

Categories: pottery, process, production, stamps

This evening I set about to turn the plain flower pots I threw yesterday
into more decorative flower pots with a LOT of stamping & rim fluting.
Some with some traditional stamping, and more with the newer, “bulgier” stamping
with fluted rims. A mix of old & new styles… still not sure how I’m going to glaze these?

Tomorrow I hope to trim them all and paint some slip accents.
And don’t forget to punch the drainage holes too!

Categories: process, studio

This evening I glazed up the test tiles with the “mystery” glazes
that I scored from Tony when he moved out of his Lillstreet studio.
I’ve glazed two tiles for each glaze – one test is going into a cone 10
reduction kiln, and a second set is going into a soda kiln. I’m hoping to see
how they turn out and if the soda atmosphere does anything cool to the glaze.
Fingers crossed…

Categories: kiln firing, pottery, process, production

So I unloaded my electric bisque kiln this afternoon, layer by layer…
and just for fun, counted the number of pieces in that firing.
I included the seven bowls by Karen Patinkin, but not the maquettes
by Lisa Harris… nor did I count my glaze test tiles. I guess I was just
counting the “real” pieces?!… either way, there was a LOT of work in there!

The final bisque tally?… 135 pieces!!!

Categories: kiln firing, pottery, process, production

Today I loaded another electric kiln to bisque my latest batch of work.
And you know my theory… pack it in as tight as possible to get your money’s worth!
So I did. And here it is, layer by layer…

Layer One: bowls, mugs, soap dispensers – and a new oval planter for my windowsill.

Layer Two: bowls, mugs, test tiles and new garlic keeper lids!

Layer Three: bowls, test tiles, garlic keeper plates… and a stack of beautifully
decorated bowls made my my studio friend Karen Patinkin.

Layer Four: a tumbled-stacked pile of fun!… soap dispensers, vases, mugs & more!
Plus a couple hand-built maquettes by Lisa Harris for a show she’s going to be in soon.
She’ll be using them as glaze tests before the finishes off the full size versions.

Categories: pottery, process, stamps, textures

Okay… so one of the studio potters at Lillstreet moved out of his studio
a few months ago. In his wake, he left a lot of mess, supplies, and buckets of glaze!
Now since I already have enough supplies & mess of my own – I claimed the buckets
of glaze! Sadly, I’m not really sure what they are, and I definitely don’t have
the recipes to make more. But free glaze is free glaze!!!

So… tonight I made a batch of test tiles for these “mystery” buckets of glaze!
Complete with stamps & textures to see how the glaze would work on my own
textured work. I’m going to test the glazes in both cone 10 reduction and the
soda kiln. I want to find out if any of them do really cool things in the soda kiln
atmosphere?! Or if they do really terrible things BEFORE I start glazing
a kiln full of work. Wouldn’t that be a bummer?

Categories: pottery, process, production, stamps

So the latest “batch” of bowls are now trimmed and drying. I’m really diggin’
the newer “twist” on the stamping adventure. We’ll see where it goes from here!

Categories: artists, inspiration, process, production, stamps

So last night I watched Kristen Kieffer’s new DVD about surface decoration.
Chapter One dealt with stamping… which you know I love. But one of her techniques
includes stamping that “bulges” and alters the shape a bit more than I’m used to.
And since I had some “plain” bowls waiting for some stamping… I thought I’d give it a try.
I like the result… however, I really want to make a few new stamps to go a little further
and “explore” the possibilities a little more! Thank you Kristen for the inspiration…

Categories: kiln firing, pottery, process, production, studio

So I loaded another electric bisque kiln tonight before class. I love loading kilns.
It’s like a three-dimensional, spatial-relationship puzzle trying to fill every space,
fit it all together and get as much in as possible! The beauty of a bisque kiln is that you can
carefully stack the greenware to optimize the spacing in the kiln. I always do good
at the bottom layer, but it always seems tougher as you get towards the top and start to
run out of “options” and no more smaller pieces to squeeze in. I hate leaving open spaces.
It seems like a waste of space. I should have made more!

Layer One: All mugs!

Layer Two: More mugs, bowls and berry bowls…

Layer Three: Bowls, berry bowls, berry bowl plates… and a couple mugs!

Layer Four: Plates… and my new butter dish “prototypes”!!!