Gary Jackson: Fire When Ready Pottery
A Chicago potter’s somewhat slanted view of clay & play
Categories: bowls, classes, pottery, process, production, wheelthrowing

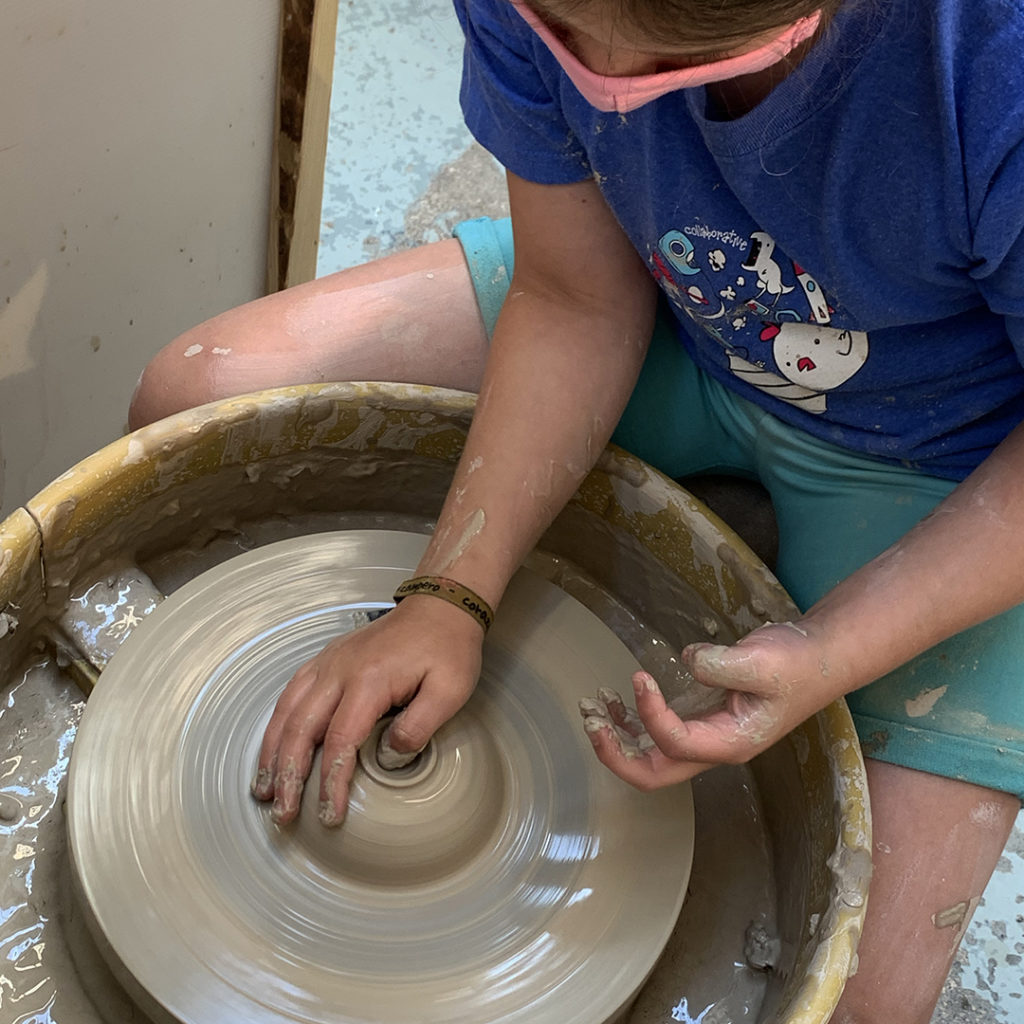
Last night in my Beginning & Advanced Beginning Wheelthrowing class we did my FAVORITE demo of the session! I started with a class demo on how to throw a basic bowl on purpose… and NOT just a cylinder gone bad. A nice smooth curve though the bottom of the bowl… and no “beginners ledge” near the bottom! So we did the demo… made a bowl and they went back to their wheels to start making their bowls… on purpose!

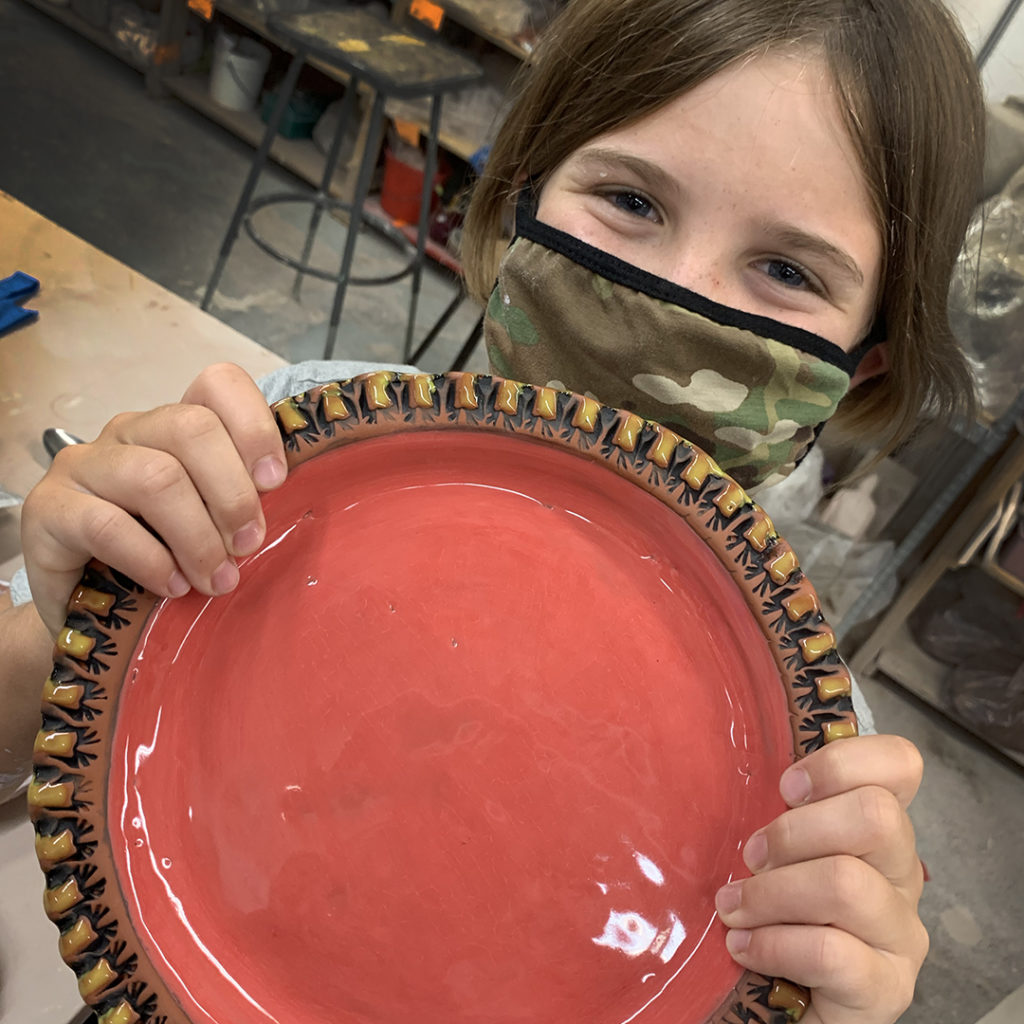
While they were throwing their bowls, I continued to throw more of mine. After throwing a bunch of basic bowls, we reconvened for more demo. Where I showed them some quick decorative tricks, rim alterations and colored slip to make their bowls not-so-basic anymore!

Bowl #1 – four fluted edges

Bowl #2 – if four is good, maybe eight fluted edges is better?

Bowl #3 – flared out rim

Bowl #4 – an even wider flared out rim

Bowl #5 – combined flared rim and four fluted points

Bowl #6 – two indents… with the intention of adding a basket handle over the top from indent-to-indent.

Bowl #7 – a split-rim… pinched back together in eight places.

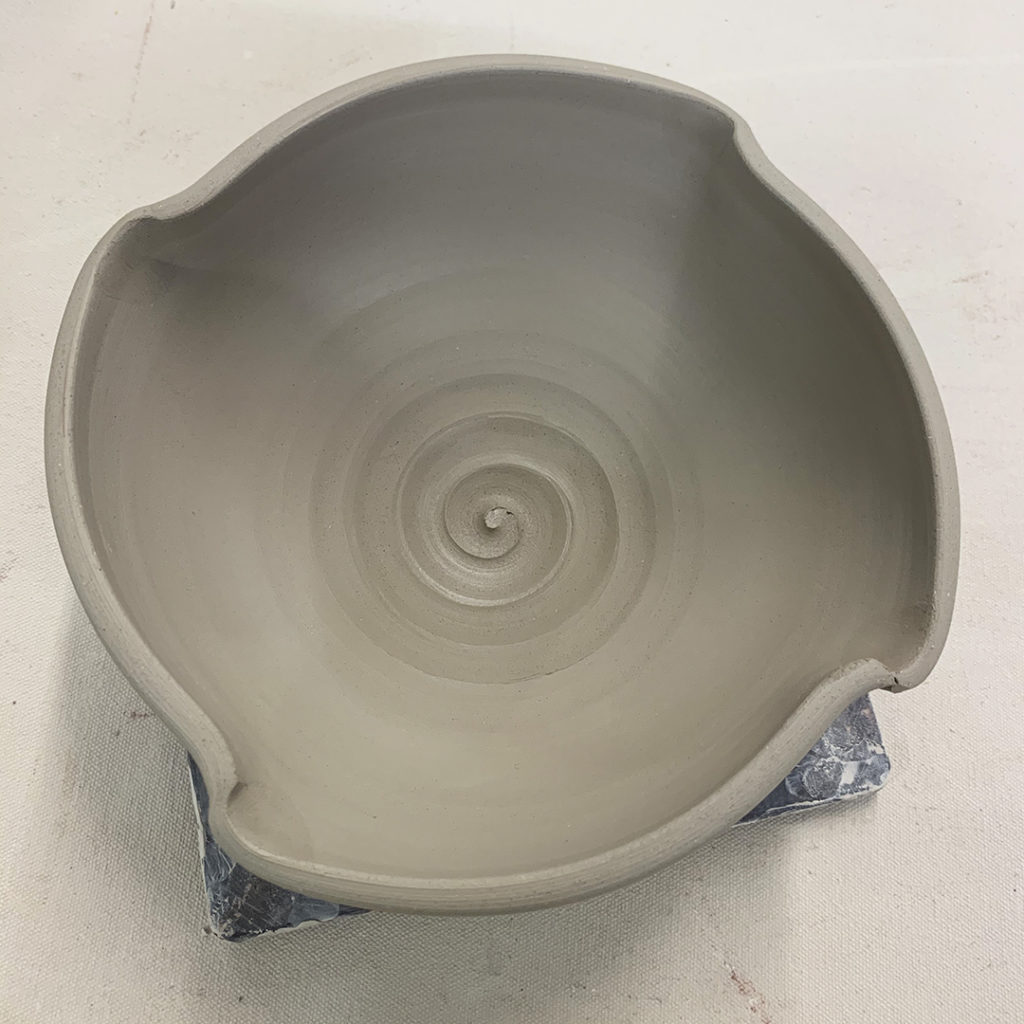
Bowl #8 – a split-rim with four indents to make it kind of like a quadrefoil shape

Bowl #9 – another split-rim with four INdents & four OUTdents.. giving it kind of a lotus shape!

Then we switched our focus to colored slips… again with the plan of just showing them some “quick tricks” and encouraging them to play & try more things!

Bowl #10 – a full coating of white slip inside with a paintbrush spiral

Bowl #11 – a fuill layer of white slip with a wooden tool dragged through it while the wheel was turning to reveal the darkness of the clay as a spiral.

Bowl #12 – finger-painting a squiggle through the white slip while the wheel is spinning.

Bowl #13 – rhythmic chattering with a plastic rib through the white slip while the wheel is spinning.

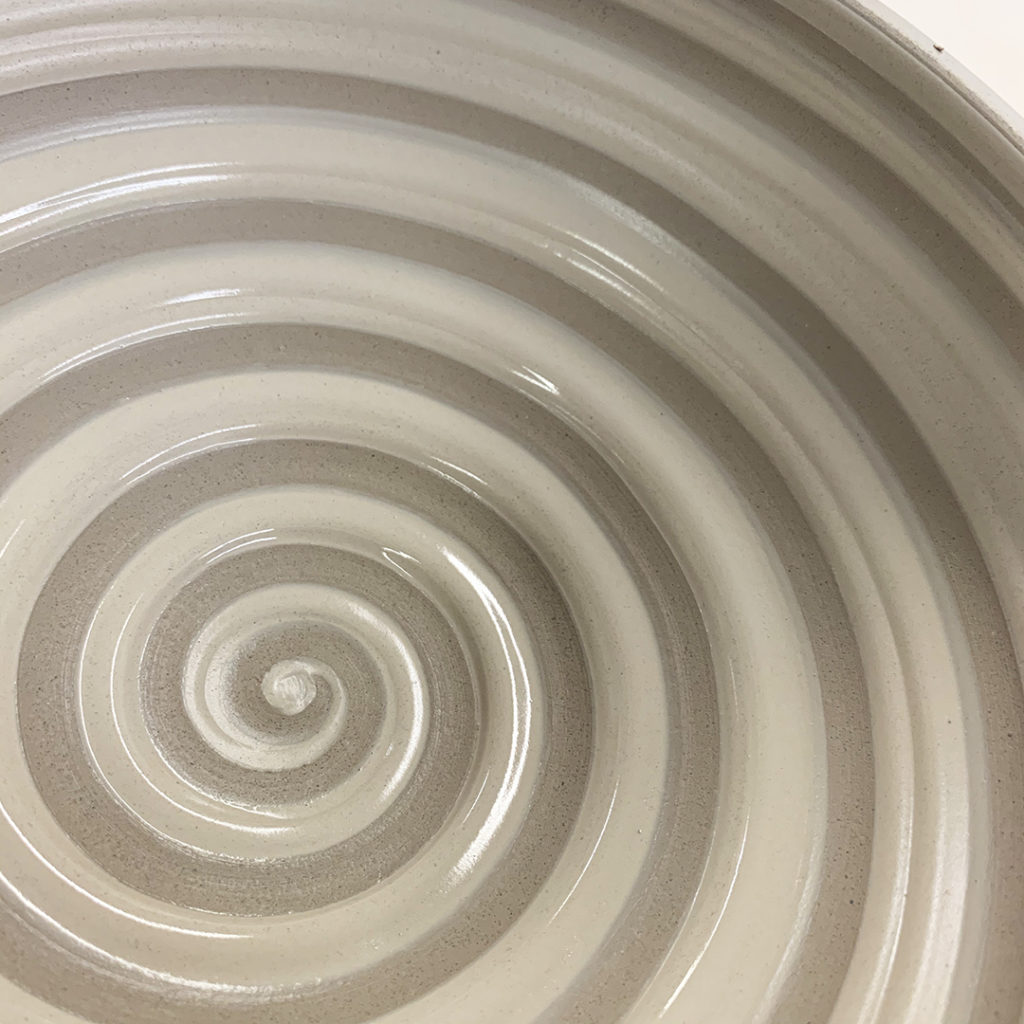
Bowl #14 – a full coating of white slip, the vertical lines dragged through with a rubber rib, and then the center re-applied & smoothed out with just the cutest little spiral ever!

Bowl #15 – I introduced using two colors of slip with simple banding.

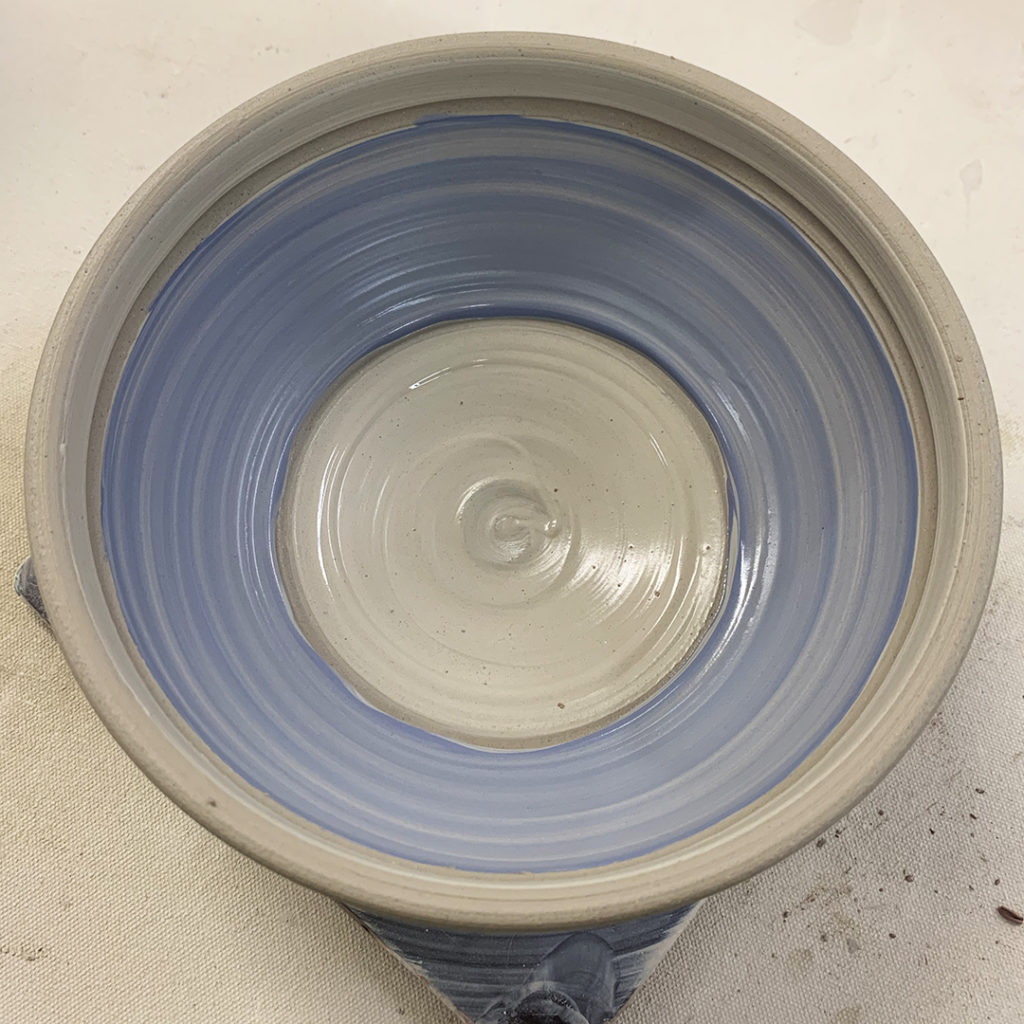
Bowl #16 – and then an ombre blending, with a spiral dragged through.

So for now they’re under plastic so they don’t dry out too quickly… as there’s a “good chance” that there just “might” be a bit of stamping, texturing & embellishing of these bowls before the dry too much.

MORE IS MORE!!!… right???

Categories: handbuilding, lillstreet, summer camp, wheelthrowing

This week was a combination of Wheelthrowing & Handbuilding. We work on wheelthrowing for the first couple days, and then switch to handbuilding on Thursday. Friday is reserved for glazing of their wheelthrown pieces, as well as finishing & slip painting of their handbuilt pieces.

But first… it’s the messy fun of WHEELTHROWING!!!
And many of them are excited to finally have a chance… as they need to be at least 8-years old to take a Wheelthrowing Camp at Lillstreet. Some of them have “waited” to be old enough to come take the wheel for a spin!

And then on Tuesday after camp… THIS happened…
This year all of our campers’ tools & clay were stored separately in Ziplock bags to keep everything safe. And then we roll this cart back & forth to class & storage afterwards. Imagine my surprise as I was turning the corner after camp… and three of the wheels popped off the cart!!! Good grief. Always something exciting to keep you on your toes!

On Thursday, we switched to handbuilding… so we had to have separate & dedicated slip containers for each camper so there would be no “sharing” of tools to contaminate anything. Luckily, I had a camper “volunteer” to fill the containers with slip for me!

So we worked all day Thursday making handbuilt dinnerware pieces & parts. A lot of making slabs by hand, draping them into Chinet plates as molds… and then “maybe”… just “maybe” a little of my stamping addiction may have rubbed off on them?!

Then on Friday they started painting their dinnerware sets with colored slips as they would be glazed with clear glaze the week after camp by one of our Lillstreet Monitors.

And as always… I keep encouraging the kids to do their fair share of the clean-up. And if that includes pushing all of the reclaim clay scraps through the grid, and then wiping it off, so be it. Someone’s got to do it, right?!

Categories: garden, stamped, terra cotta

Looks like Diane’s eucalyptus plant is enjoying its new home… she picked up the stamped terra cotta pot at ART IN THE GARDEN. And then proceeded to plant her own “garden” at home! Looks happy!

Categories: clay, process, summer camp

So I keep telling the kids to keep their wet clay under plastic so that it doesn’t dry out. Spray it water if necessary… but keep the extra scraps under plastic!!! We talk a LOT about not letting their clay dry out too fast.

And THIS is why!!!
Because now they need to reclaim it themselves… making terra cotta slip out of their scraps. Because dry clay is not usable for their dinnerware sets!!! So now they need to do some manual labor… all part of the clay process. And an important lesson to learn.

So we start by having them pulverize their dried terra cotta pieces – pounding & crushing with rolling pins. For once,. it was a good thing that everyone has to be wearing masks!!!… as this can be a bit of a dusty process.

And then as they get it crushed down to small pieces & powder, we scoop it into plastic buckets.

Then we add water and they get “the privilege” of stirring forever to make it smooth! After all of this work to make something out of the clay they let dry out too much… they might re-think keeping their clay wet under plastic a bit more next time!

And if not… at least we have a LOT of really nice smooth slip now!!!

Categories: handbuilding, lillstreet, summer camp

We started camp this week with the usual introductions and discussion of our class projects. For FIRE, FORGE & FEAST, we have a LOT to get done in a short amount of time. So I need all of my campers to stay focused & engaged in the process. We do a lot of handbuilding in this camp… so there’s a LOT of scoring & slipping to be done.

And to make it one step tougher for them… I threw them a curve-ball by telling them that they needed to design their entire dinnerware set based on a Famous Artist. Somehow incorporating their style, imagery, color palette or characters into their pieces! So we started the class off with some Flash Cards of famous artworks by Famous Artists. Enough for them to get some ideas of who they might want to focus on for their project. Little did they know that the Flash Cards “Game” would continue all week long until they had them ALL memorized!!!

We started glazing everything on Wednesday. For the kids’ terra cotta projects, we use a once-fired color glaze so we can get their pieces back on Friday. The colors are limited, but easy to use… and they will be darker, shiny & more colorful after firing.

As the glazing continued, I set up a fun splatter glazing station for Graham in the hallway. We set out his pieces on a large piece of paper and let him go! Of course he had a full understanding of Gary’s Summer Camp Rule #3… whatever mess you make, you WILL be cleaning up! So he did a great job of keeping his splatters as contained as possible!

And one of the best parts… as he made painter’s palette platters…
he now had JACKSON POLLOCK PAINTER’S PALETTE SPLATTER PLATTERS!!! Say that three times fast!

And while the splattering was going on… Eve had a little more time to make a few more side plates. Such attention-to-detail… as I would expect… as this was her THIRD TIME taking my Fire, Forge & Feast Camp!!!

As the first kiln was unloaded, we got their ceramic handles for the cutlery. They figured out which ones fit best, and then I epoxied them together. Not quite as much fun as previous years when we actually made them in the Metalsmithing Department of Lillstreet… but these desperate times called for desperate measures!

So their dinnerware sets started coming out of the kiln… still warm, bit now more colorful. We started setting them out as a set to see how everything goes together. Unfortuantely, not everything made it out of the kiln… as some of it was put into a “second kiln” that wasn’t quite done by the end of camp on Friday. So the kids had to come back later to pick-up their stuff… and I didn’t quite get photos of everything!

So here are some of the FIRE, FORGE & FEAST dinnerware sets…
based on the work & style of some Famous Artists!!!

ALEXANDER CALDER –

Including a “plate-elevating-stand” based on the Calder sculpture downtown called “The Flamingo.”

JACKSON POLLOCK –
Every kids favorite when they realize the get to splatter everything!!!

JIM DAVIS – cartoonist of the “Garfield” series
Complete with chopsticks as whiskers!!!

WASSILY KANDINSKY –

PIET MONDRIAN –

VINCENT VAN GOGH –

WALT DISNEY –

HAYAO MIYAZAKI – Artist & director of the anime’ classic “Spirited Away.”

And then potluck on Friday… the FEAST portion of Fire, Forge & Feast.
It was questionable as to whether or not we could pull-off a potluck feast during Covid Pandemic times. No such things as bringing homemade treats in any more. No more sharing. No more finger-licking!!!

Luckily, we did it… all with pre-packaged, individual serving foods that the kids brought in. We separated them onto plates so everyone had one of each. They then went back to their “assigned” safe work space to feast! I did have to tell them there would be no sharing, exchanging or passing around of their treats. Once on their plate – it was theirs!!! And it was one of the weirdest conglomerations of potluck food that Lillstreet has EVER seen!!!

At the end of camp, we did a little Pop Quiz on the famous artists that they had been memorizing all week long. They had over fifty artists on the list… so I had them write them all down as I showed the flash cards. And here’s the kicker… they needed first AND last names!!! I told them that spelling didn’t matter unless there was a tie.

After fifty-some flash cards, Jo was the big winner!!!
Just missed one… just one FIRST NAME!!!
Had the last name… but forgot Anish.

So the BIG PRIZE was the demo plate I had made earlier in the week!
Looks like Jo was pretty pleased with the prize!!!
And I was more than pleased with another successful week of Summer Camp!!!

Categories: process, production, terra cotta, The Ghouls Collection

So it was a productive afternoon in the studio playing with pumpkins! Each one getting a little personality of its own… quirky little smiles, shifty eyebrows of warts or maybe even a little cowlick of vines & leaves! Next up… some fun color accents to make them pop!

Categories: terra cotta, The Ghouls Collection

The new harvest of pumpkins is coming to life in my studio! They’re getting faces, warts & some are even getting leaves & vines! It’s also a little bit of “weather-therapy” for me.. to help gradually accept the grim fact that Summer might actually be over?! I’m still hangin’ on…

Categories: classes, platters, stamped

It’s always gratifying as a teacher to see your students soaking up everything you’re showing them, embracing the project and then doing the demo themselves in class. So it was fun to see Darcy “loving” every part of the stamping demo… soaking up every little trick… and then working her magic on her own platters that she threw last week in class.

But here’s a question…
Is there such a thing as teaching them TOO WELL and now their work looks like mine?… or perhaps I just found my first studio apprentice??? HA!!!

Well done Darcy – your platters look GREAT!!!

Categories: classes, platters, stamped

Last night in my Intermediate Wheelthrowing class, I did a demo on how I stamp my platters. We threw the platters last week in class, so it was perfect timing for a demo when they also had platters to decorate!!!

Categories: process, production, terra cotta, The Ghouls Collection

Now they’re starting to look a bit more like pumpkins… but now they’re gonna need to get some personality… and maybe some warts too?!!! Would love to keep going but I’ve gotta teach class tonight… so the “pumpkinizing” will continue tomorrow!