Tonight was the night that we tackled throwing bowls on the wheel.
Making bowls on purpose, not a cylinder gone bad.
So the way it goes, I start by teaching them all how to throw the bowl.
I introduce them to the beauty of throwing on bats, and using a plastic rib to create
the smooth curve inside. And then once we’ve thrown the first demo bowl, I then
let them go back and try making their own bowls. And while they’re throwing,
I continue throwing bowls. Tonight I was throwing 2-pound bowls with a very simple,
smooth round profile. Nothing fancy. And then once I had thrown my eleven bowls,
we reconvened for ‘demo part two.’ At this point, it’s my goal to show my students
some quick tricks to make each of the “fairly identical” bowls different from the next.
Plus, it’s a great time to introduce them to slip as a decorating option. All in all,
I think the demo went well. I think most of them were intrigued by the simple techniques
and the “ah-ha” results. And I’m always trying to get them past the “each pot is too
precious to mess with” mentality. I’m always trying to get them to push things further,
and realize that it is “just clay.”
Now I have eleven bowls in my studio… waiting for some stamping, finishing & trimming!

But just in case you missed the demo… here’s a quick recap of tonight’s eleven bowls.
Remember, they all started out pretty much the same.
Bowl #1 -Fluted
A simple finger flick, with one finger inside and another outside side-by-side.

Bowl #2 -Flanged
Adding a simple flange by flaring the top inch of the bowl out over the outside finger.
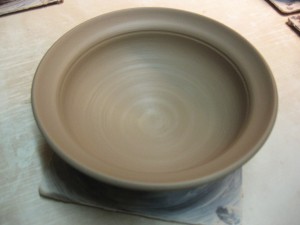
Bowl #3 -Flanged, Fluted… and Flopped?!
Yes, this was supposed to be a fluted flange. But it was a little wonky when I finished it.
When I was setting it up on the shelf, you could see it was no longer level. So I set it down
“hard’ on purpose… letting the bang force the flange to drop down into a “skirt” of sorts.

Bowl #4 -Wide Flange & Spiral Center
A much wider flange (soon to be stamped) and a nice spiral in the center.

Bowl #5 -Divided & Pinched
I used the pointed tip of my wood knife to divide the rim of the bowl,
and then pinched it back together in eight places.

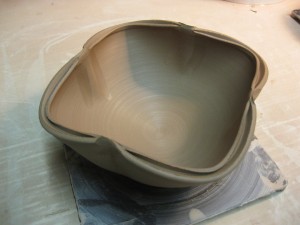
Bowl #6 -Divided, Pinched & Squared
Same trick of dividing the rim, but then I think I shocked them a bit when I took
the nice round bowl and pushed it in to square i toff a bit.
Bowl #7 -Impressed Flower
With a simple, metal dragon-scaling tool that I bought for like two dollars, I press
it in twelve times in a certain pattern to create a fun flower in the bottom of the bowl.

Bowl #8 -Solid Slip
A simple coating of thick white slip… allowing the thickness to create a subtle spiral.

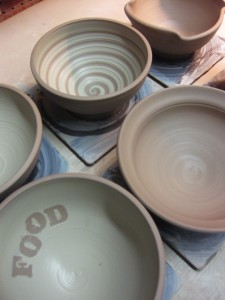
Bowl #9 – Spiral Slip
So I coated the interior of the bowl with thick white slip, and then dragged the rounded
end of my wood knife through the slip to reveal the clay color for contrast.

Bowl #10 – Chattered Slip
First, I gave the bowl a solid coat of slip on the interior… and then took my
rubber rib and “tapped” it rhythmically against the bowl while it was rotating.
The tapping frequency and wheel speed combine to make the pattern.

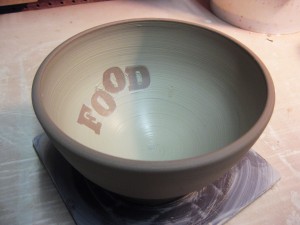
Bowl #11 -Slip Resist Lettering
Kind of the antithesis of a stencil… instead, I took letters cut out of the newspaper,
wet them, and then pressed them gently to the bowl interior. After you smooth the edges,
add a simple layer of covers the newspaper, followed by a complete layer covering the
interior. Once it’s all smoothed out & coated, carefully peel out the newspaper letter.
So now I have more bowls to finish tomorrow… some stamping, some embellishments,
and a lot of trimming to finish them all off.


Plus, it was great to have a Facebook fan & blog follower stop by class tonight!
Corbett stopped by from South Carolina to visit, say hello, chat a bit, see my studio
and then play in the clay! Thanks for stopping by Corbett… I hope you had fun!!!
