So this week we made bowls again in my Tuesday night Beginning & Adult Beginning Wheelthrowing class. I always like to show them how to make “bowls on purpose” instead of a cylinder gone bad. We talk about getting a nice smooth rounded interior, no flat bottoms, no beginner’s ledge, and a nice rim.
So I start the class with a quick demo on how to make a bowl on purpose… and how to avoid all of those problems! After my demo, they all go back to work on their wheels… while I continue to throw more demo bowls during class. When I’ve thrown all of my bowls, we re-group and then I start doing some fun demos on how to alter & decorate them. I just want to give them new ideas on how to make their bowls more special… and their own. I tell them that the wheel pretty much makes a round bowl for them… but it’s up to them to make it their own!

Bowl #1 – Four simple fluted edges… one finger inside, one outside and flick.

Bowl #2 – And if four fluted edges are good, eight might be better?!

Bowl #3 – A flared out flange edge… kind of folding the top inch out over a stable finger on the outside of the bowl.

Bowl #4 – And if a small flange is nice, maybe a bigger flange is even cooler???

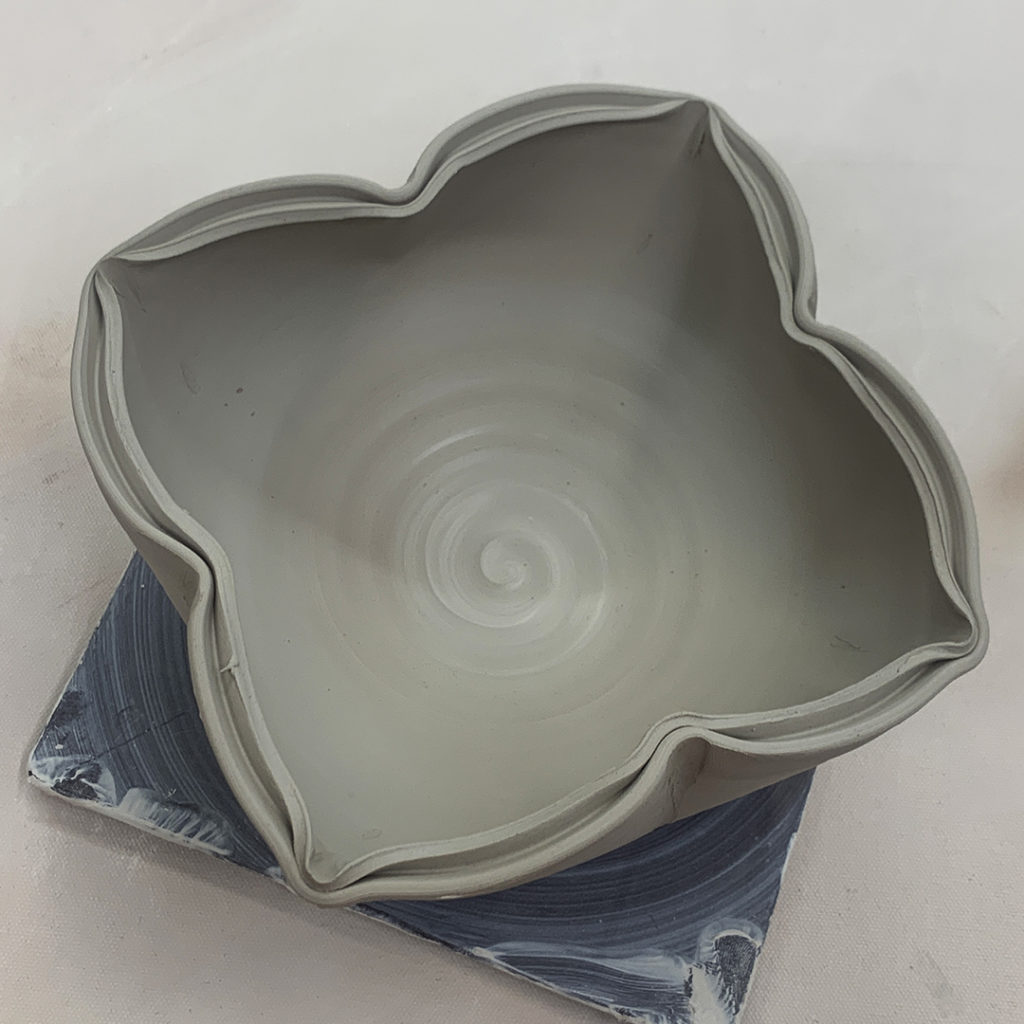
Bowl #5 – A nice split-rim using the point of my wooden knife. Then I dented in two sides… and we decided to leave it this way as I’ll add an “up & over” handle to make it more like a basket.

Bowl #6 – Another split rim… and then pinched back together in eight place.

Bowl #7 – The same split rim technique… this time more of a lotus style. Four inward indents, and four outward to make the squared “lotus” shape.
So after altering a few of the rims, I moved on to introduce them to adding slip as a decorative technique.
Bowl #8 – We started with a thick layer of think white slip. And then I dragged the rounded end of a wooden knife through to create this spiral.

Bowl #9 – Another layer of thick white slip, this time with a fingertip squiggling through while the bowl was spinning on the wheel!

Bowl #10 – Thick white slip with a chattered surface using a stiff rubber rib, rhythmically tapping while the wheel spins to create this pattern.
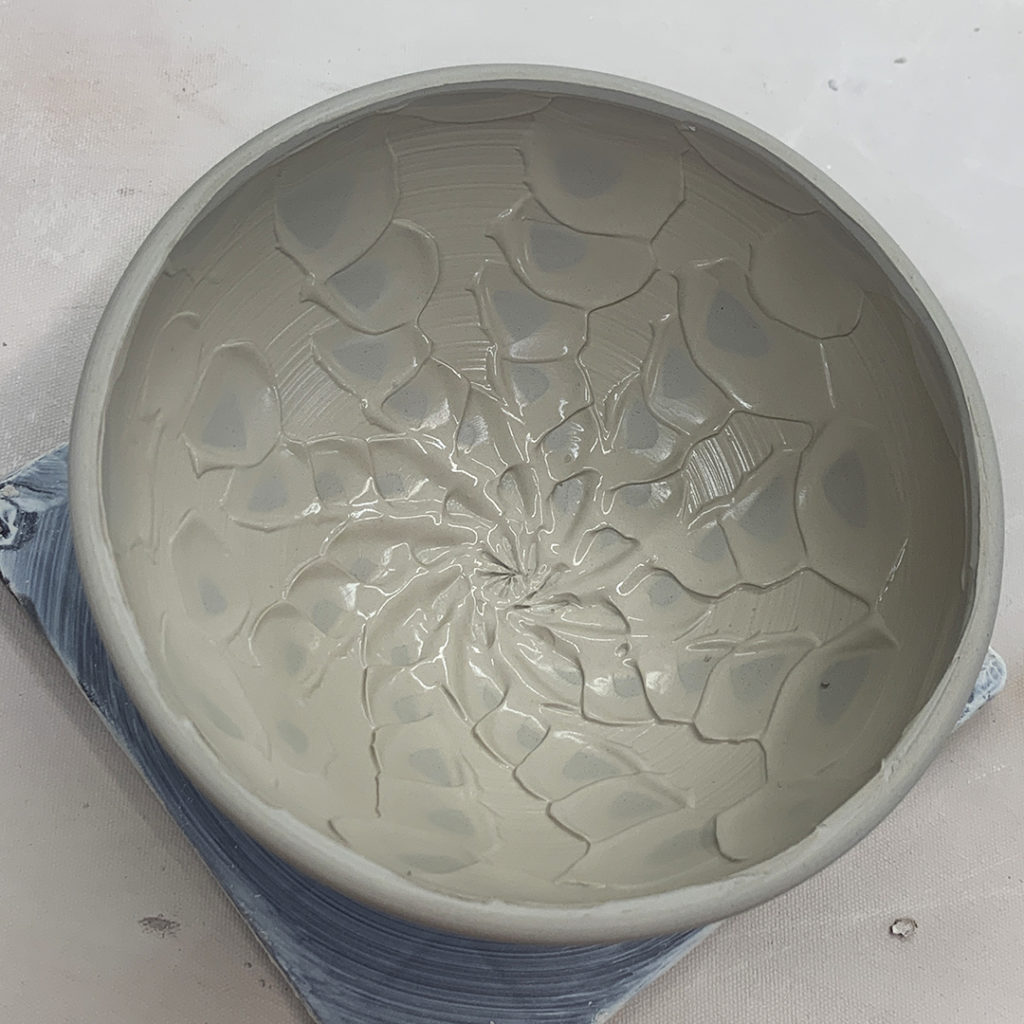
Bowl #11 – We started with a ombre’ blend of white & iron red slips. It looked nice enough… but more is more... so I dragged my wooden knife through it to make a cool spiral!!!

Bowl #12 – For our final bowl, my friend & fellow Lillstreet teacher Chelsea “made the mistake” of stopping by my classroom at just the right time. I gave her the final demo bowl for her to do something with it. She didn’t hesitate… instead doing this wonderful “organic” squiggle technique reminiscent of her of style!


And for now they’re all in my studio under plastic… waiting for some more detailing! Perhaps a little bit of stamping, detailing, carving or attachments. And then some trimming of the footring on the bottom before I call them done… then dry… then bisque… the glaze… then fire again… then DONE!!!

