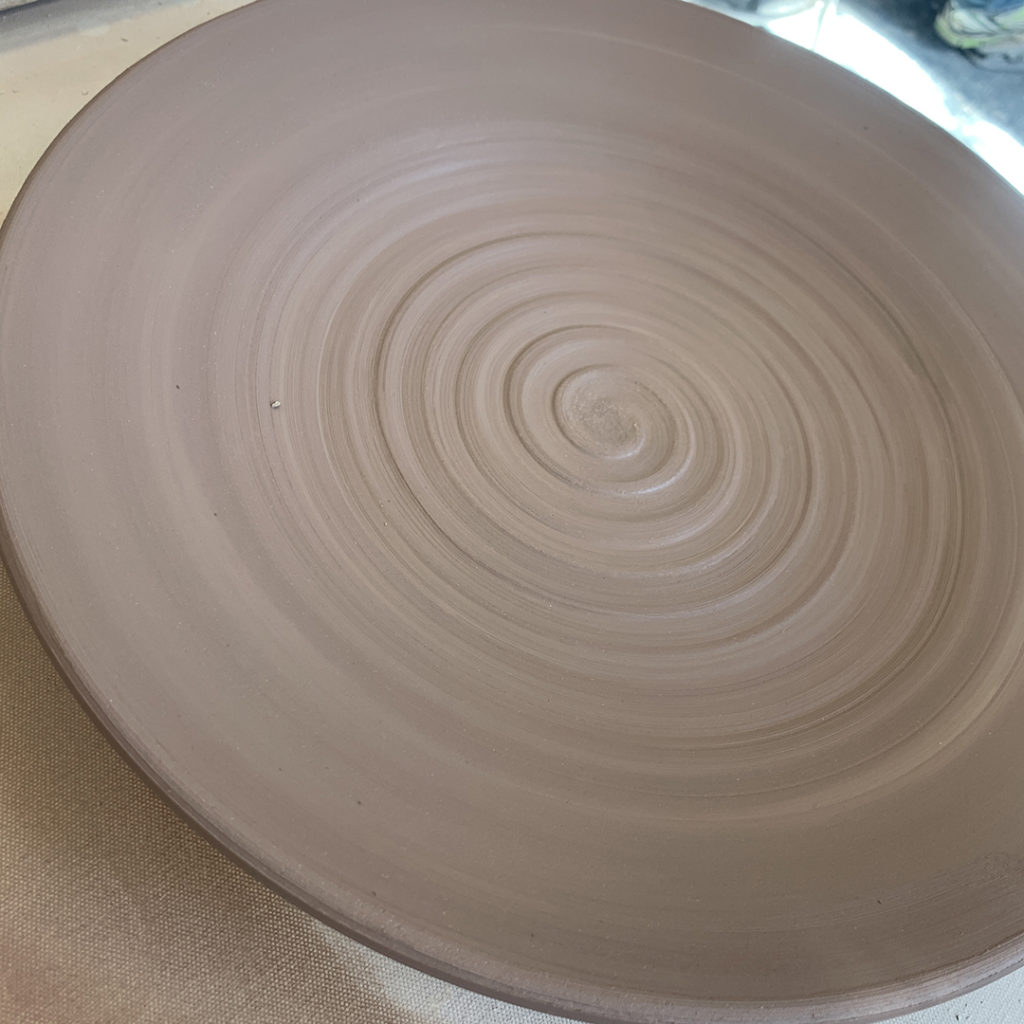
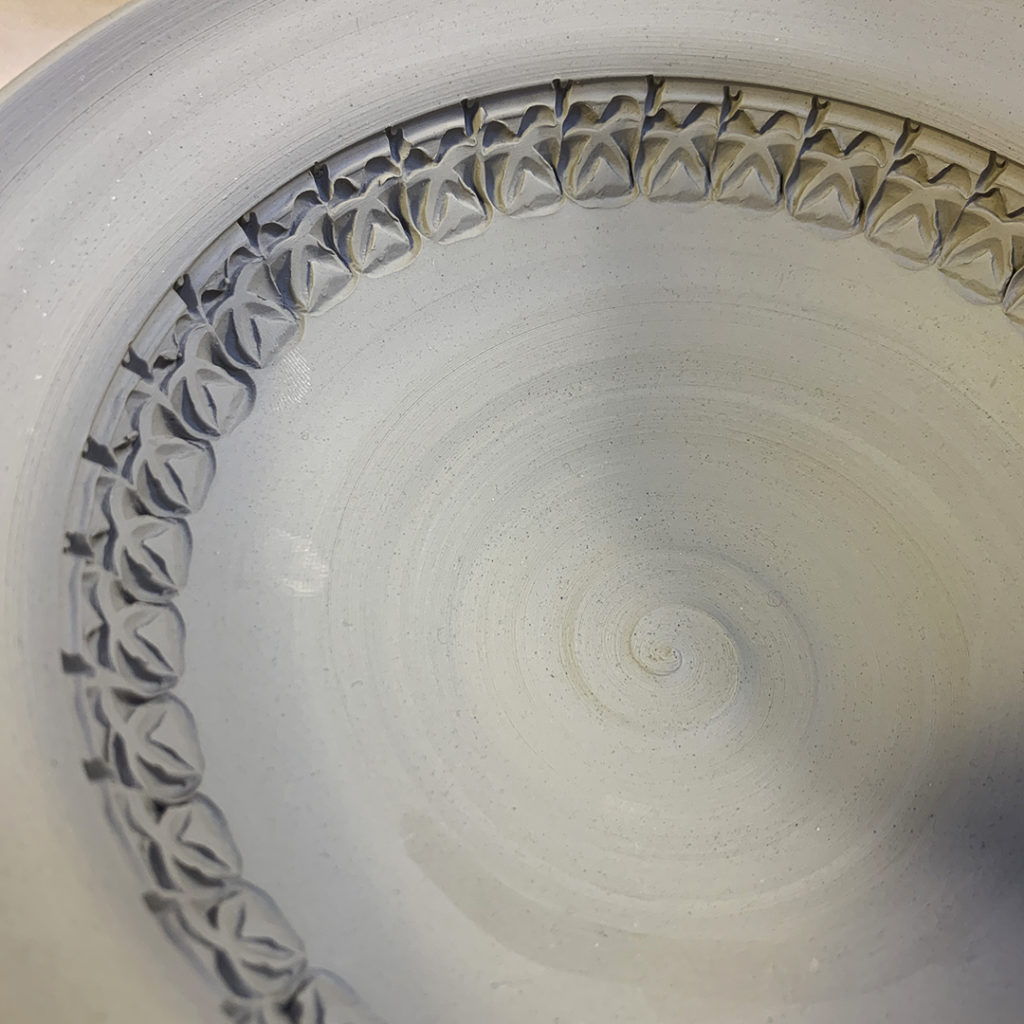
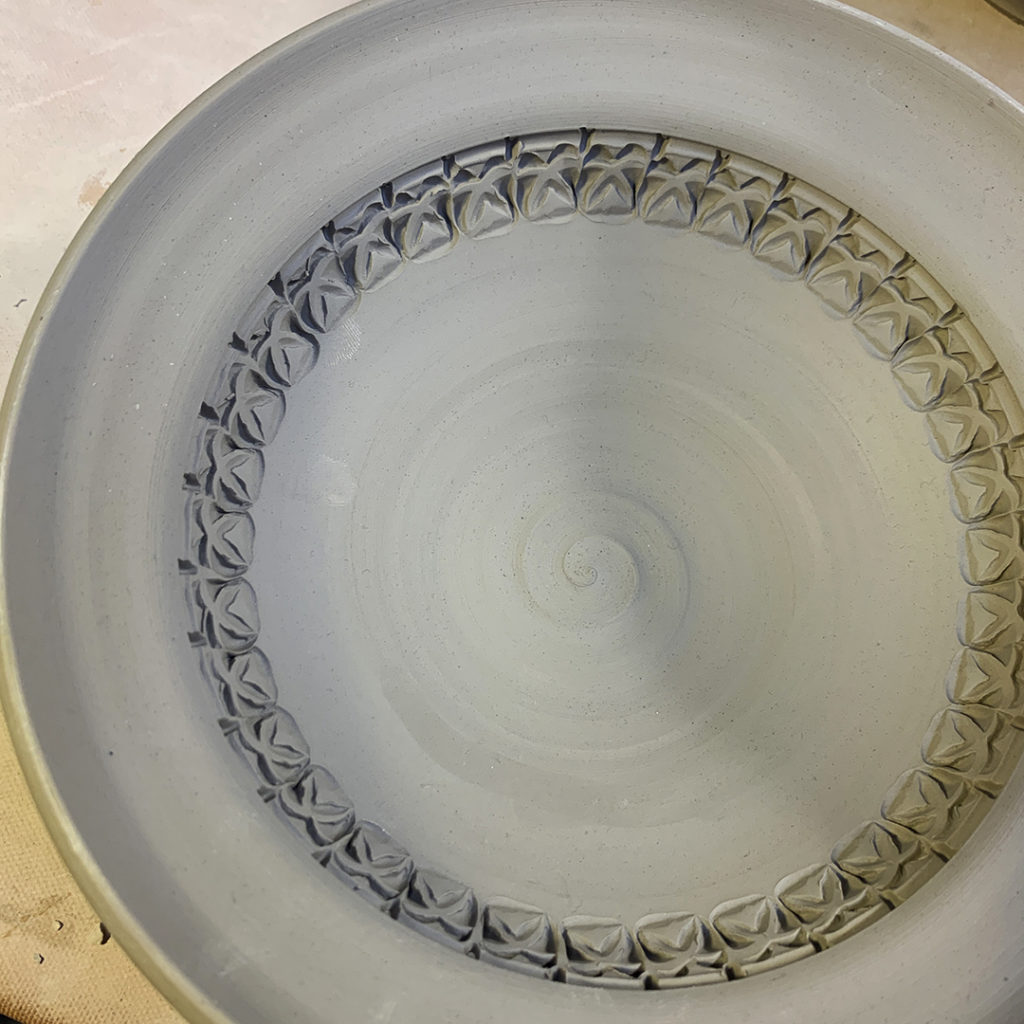
This morning I subbed for an intermediate wheelthrowing class. We talked & laughed… and then I did a couple demos. We started with throwing a large platter. And then, with a little “Julia Child kitchen switch-out magic” I switched to a platter that I had thrown a couple days ago and did a fun stamping demo for them. I think I may have won them over?…
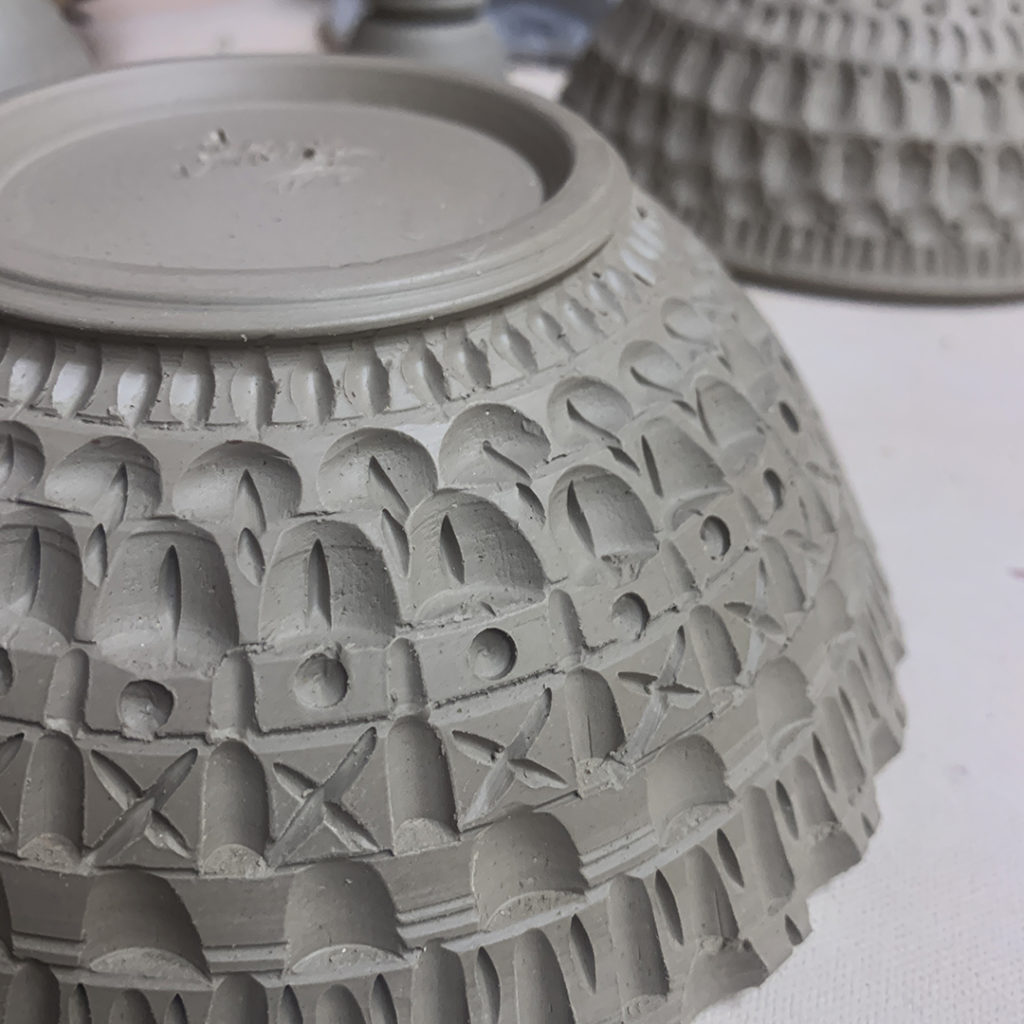
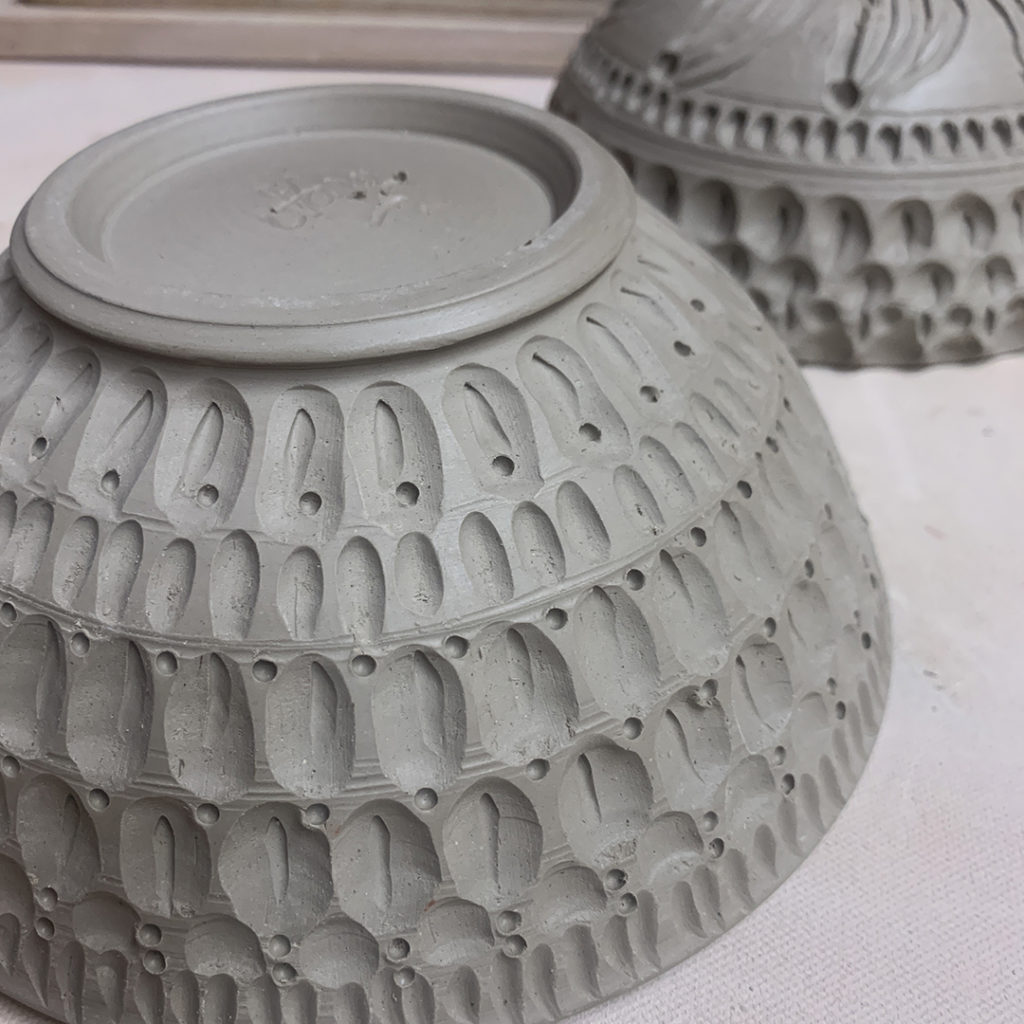
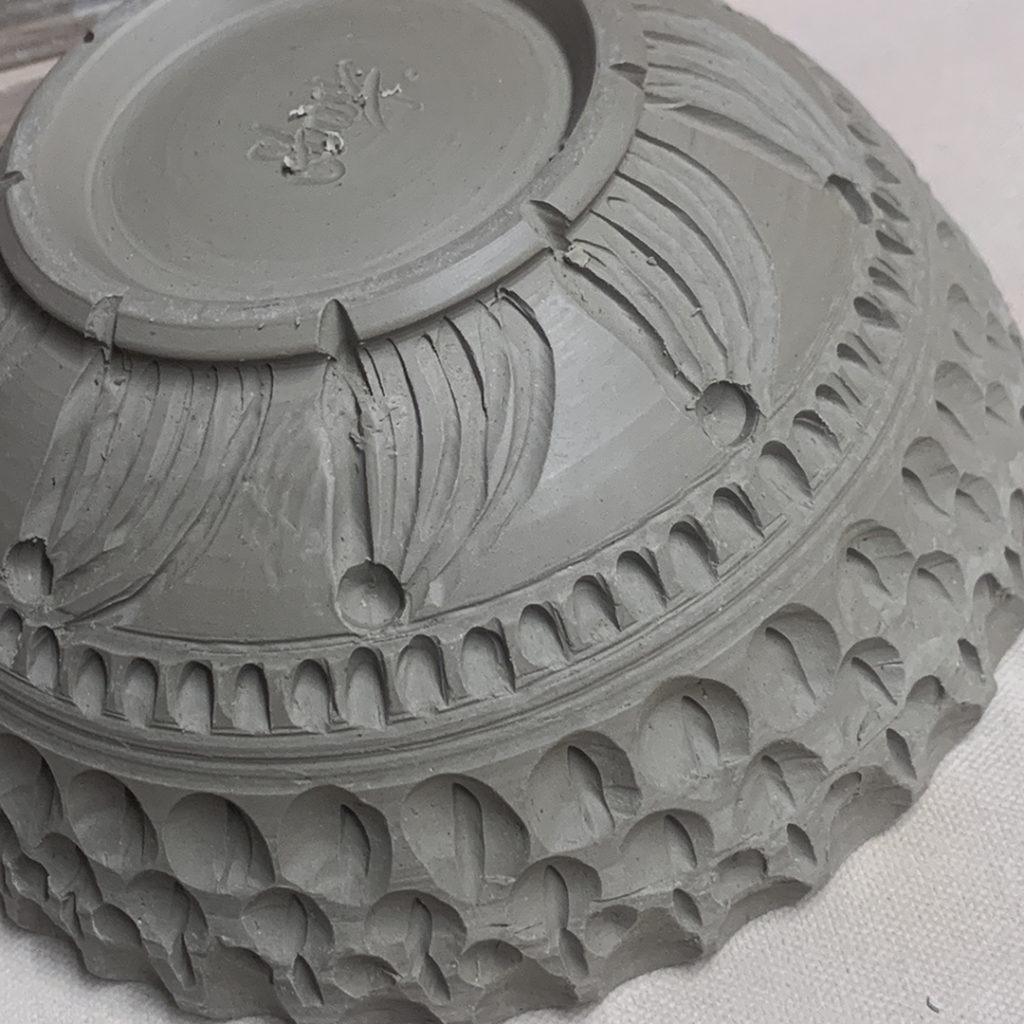
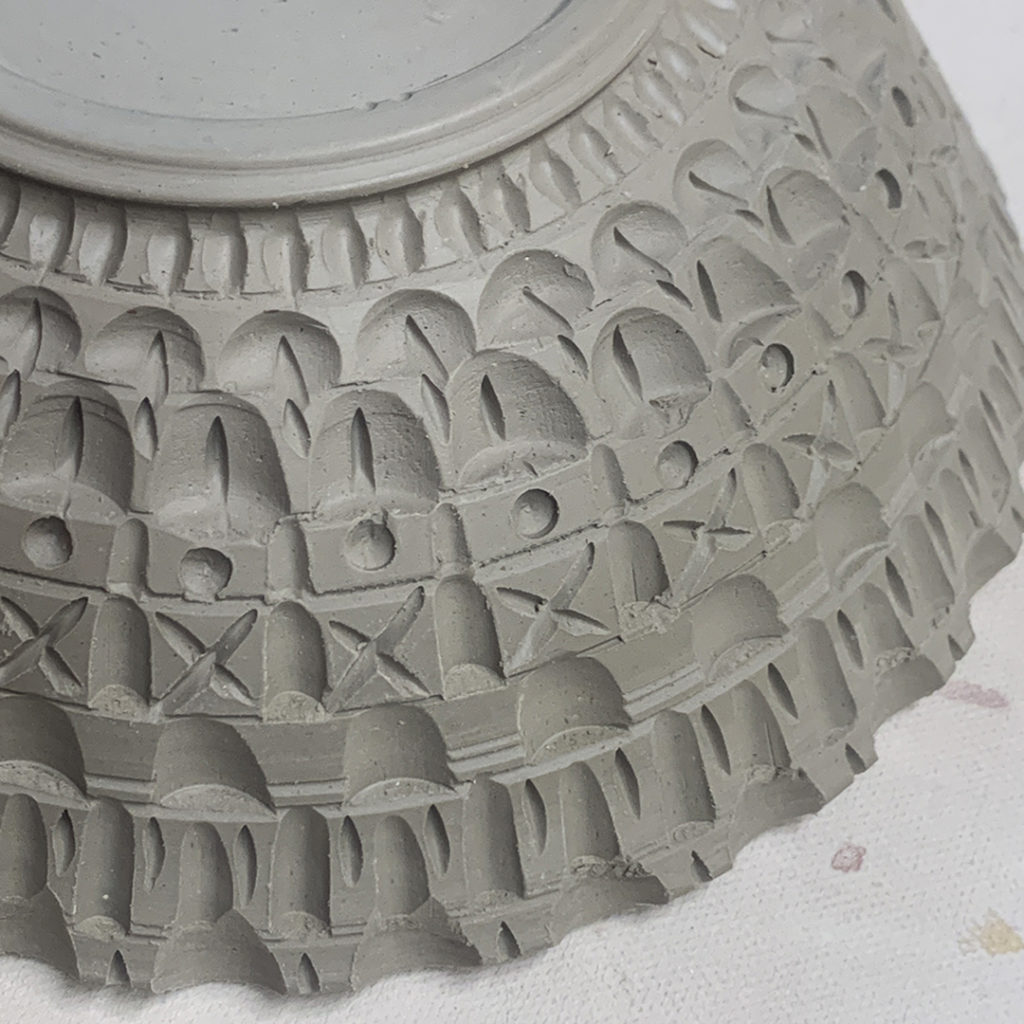
After a fun evening of carving with my Monday night intermediate students, we ended up with some pretty groovy textured bowls to send into the kiln. I can’t wait to figure out some glazing options for these to show off the carved textures?! Ugh… everyone knows that glazing is my least favorite part of the whole process!
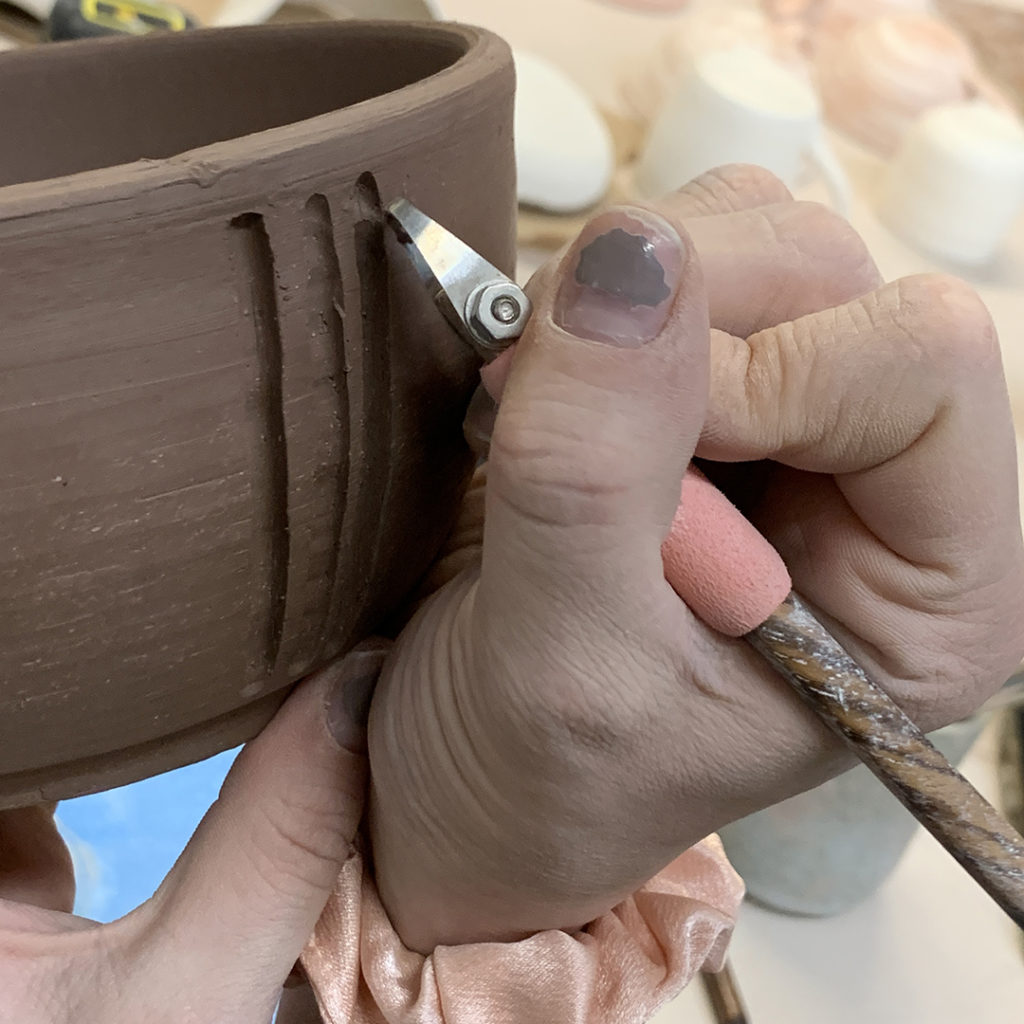
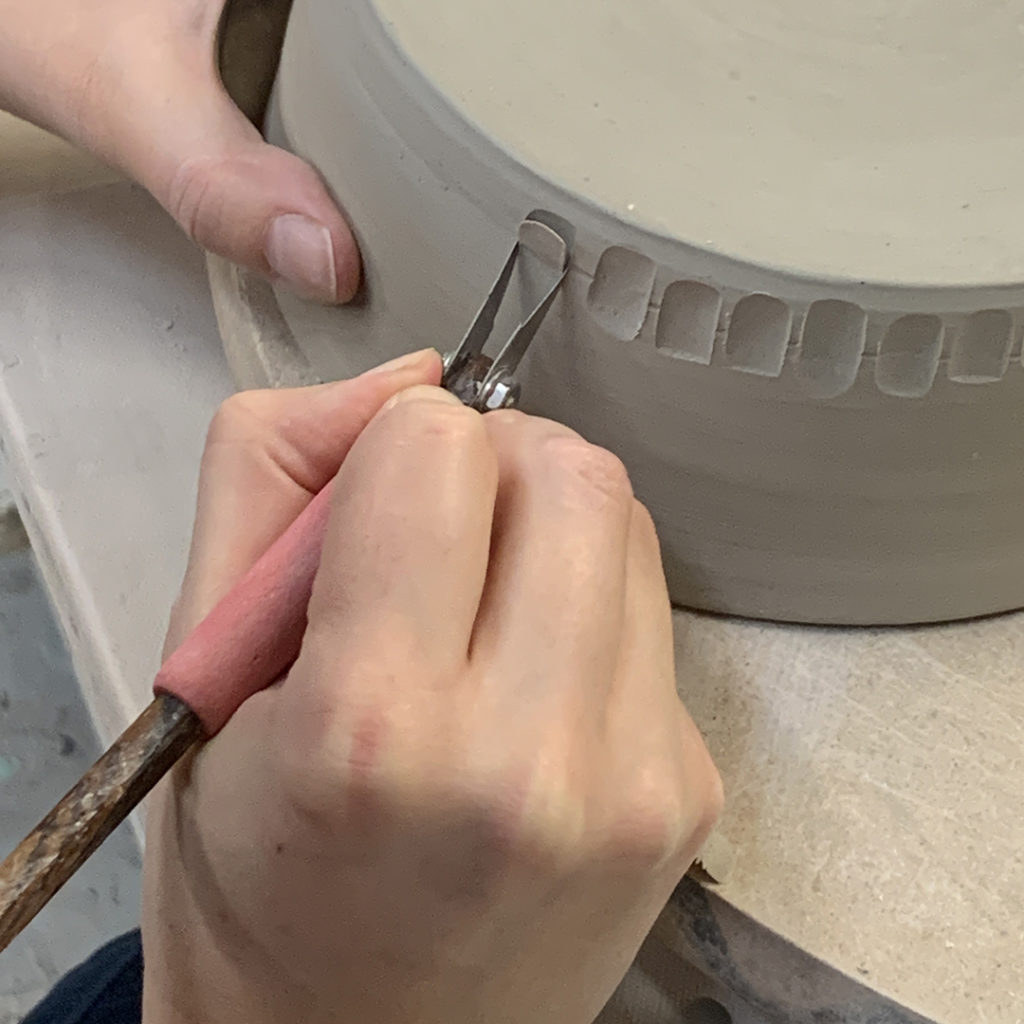
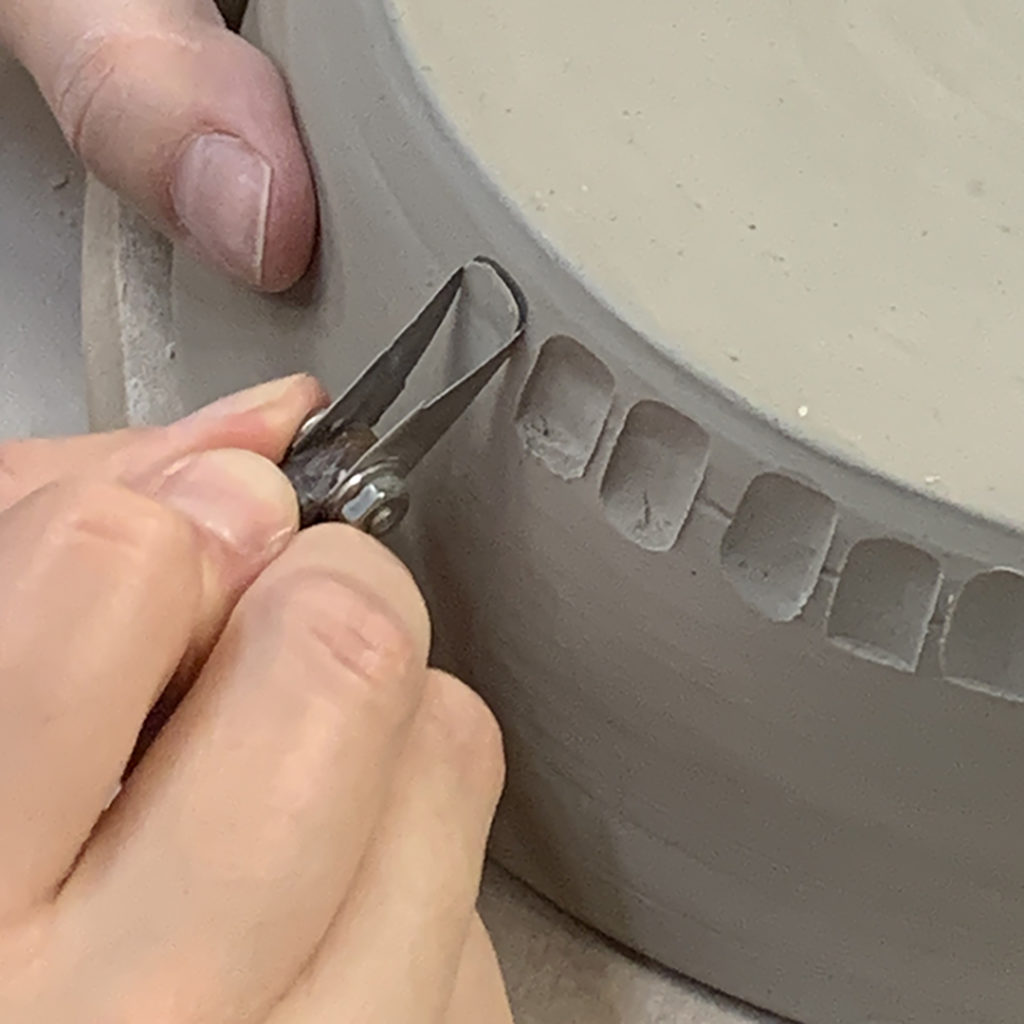
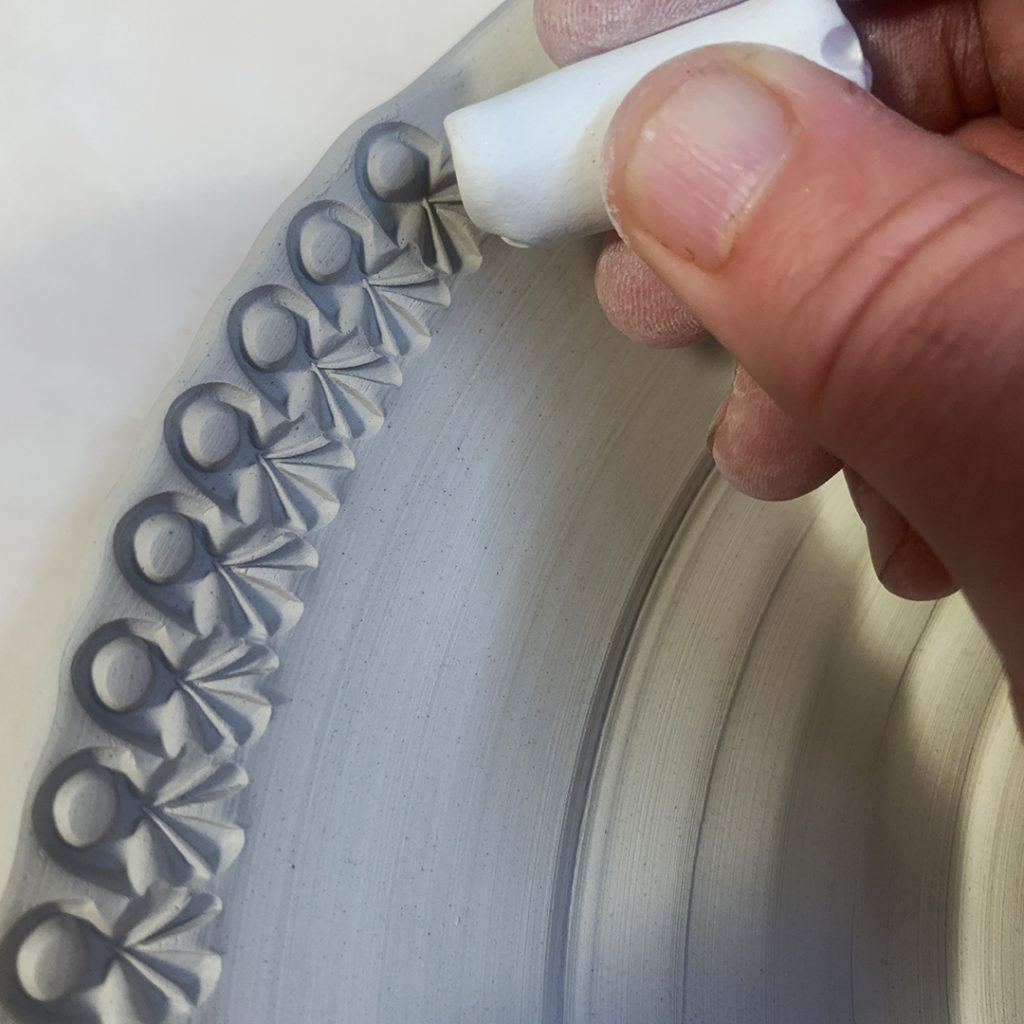
Here’s a few shots of my students getting started… a bit tentative at first… but quickly got their groove on!!!… and loving the sharp carving edges of my DiamondCore Tools!
So we’ve seen a recent interest & surge in underglaze transfers around Lillstreet Art Center! Tons of students are starting to use these pre-made, commercial underglaze transfer sheets to add some surface decoration to their pots. We’ve had some recent discussions on whether these transfers are “cheating” or not?! I’ve also enjoyed watching some of my students trying different techniques to modify or use these transfers in different ways.
In my Intermediate Wheelthrowing class, Darcy has been using a lot of underglaze transfers on her work. We’ve all sort of fallen in love with this great mandala pattern.
We’ve also been giving her a hard time… by telling her how much better they would look if the back & white mandala were painted-in with bright colors! You know, kinda like a little paint-by-number fill-in situation. Luckily, also in this class is Christine who is all about bright colors & underglazes. Sounds like the perffect match, right?!
So we keep teasing Christine that it’s HER job to paint these in… and that’s going nowhere fast. Christine is not bowing to any sort of fun peer pressure!
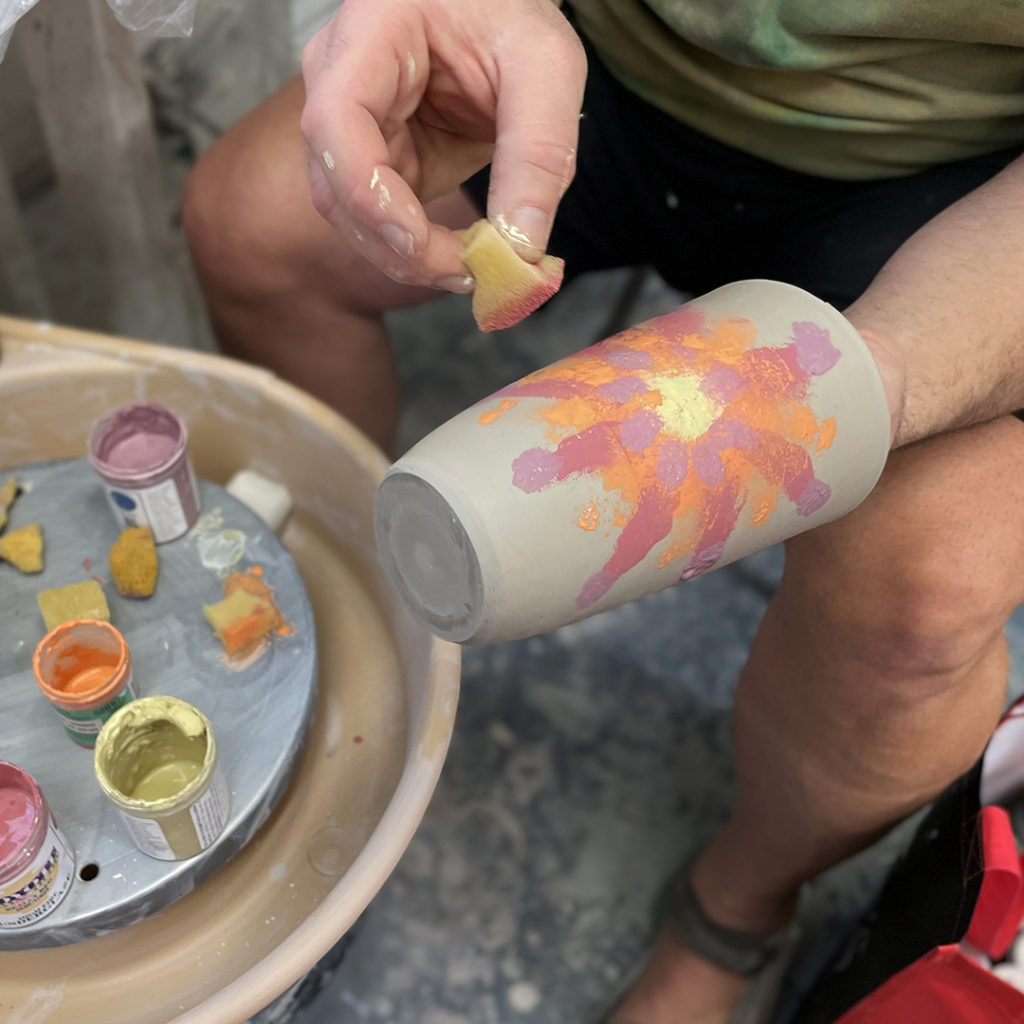
But then Darcy came up with a great idea… and a fun challenge. She offered to make some basic cylinders, and then let us decorate them with colorful underglazes… and then she would put the underglaze transfers OVER the colored underglazes. She offered it up to our whole class… but only Christine & I took her up on it. So we each got two cylinders to decorate as part of Darcy’s challenge!
So my thought was to sponge-paint some blended colors onto the cylinder that might “mimic” and possible align a bit with the underglaze transfer.
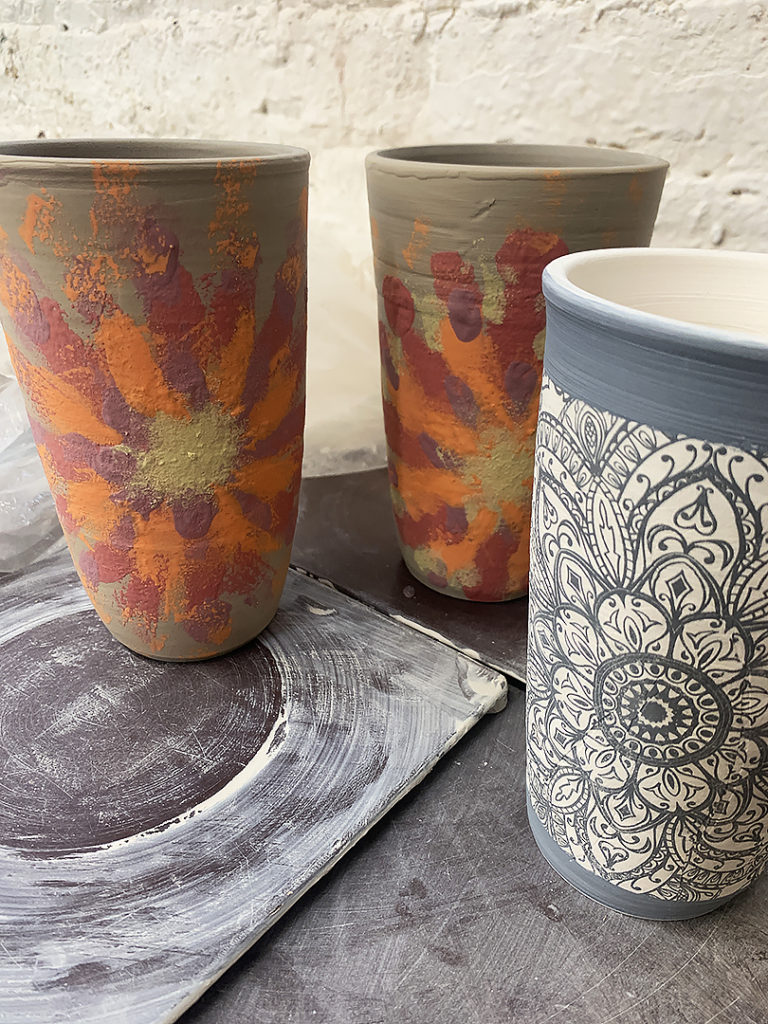
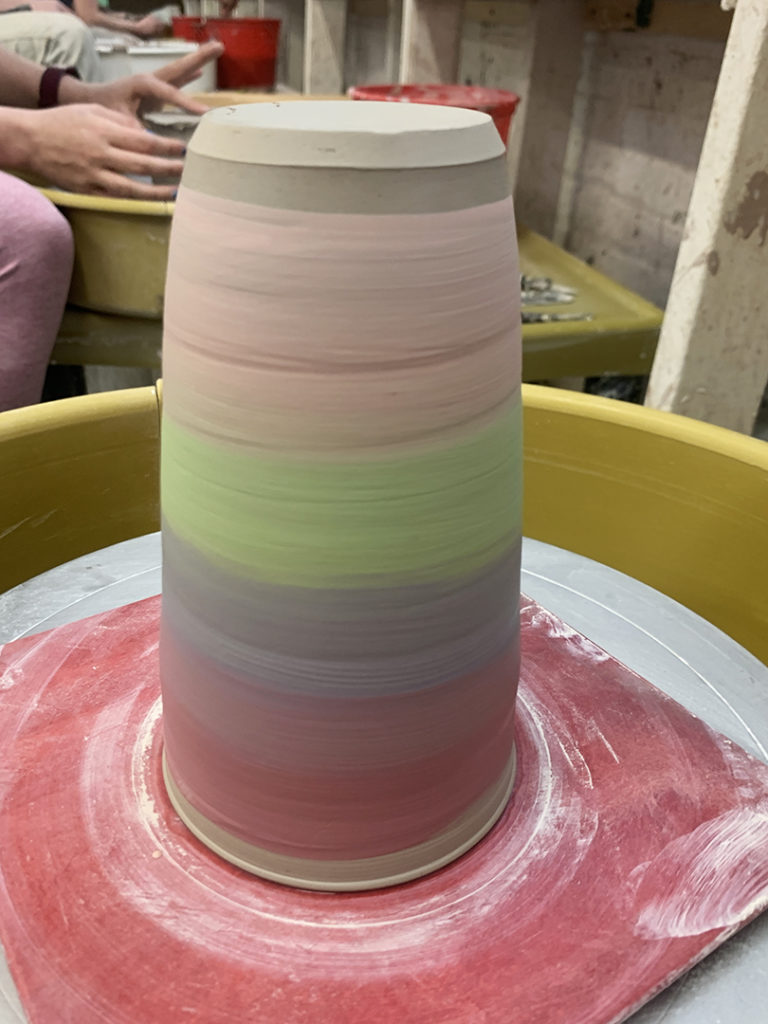
And Christine went a different route with her ombre’ blend of underglazes. She had chosen a different pattern for her underglaze transfer… so she wasn’t as concerned with her pattern “matching-up” with the transfer pattern. Instead she went with two different ombre’ blends.
Luckily
Luckily, Christine has a great assortment of underglazes that she has tested, tried at different firing temperatures and made amazing test tiles with. Thanks to Christine for sharing her high-fire underglazes… and for letting me use her colors for this fun little challenge!
After a couple layers of underglaze, we both called the “done” for our part of the Darcy Challenge!
And then Darcy came in later that night and added the underglaze transfers OVER our underglaze paintings! Pretty impressive… I think they look pretty great so far. Can’t wait to see what they look like after firing and a light layer of clear glaze to really make the colors pop!
Thanks for the challenge Darcy!!! You know how much I LOVE a good challenge… and having people prove me wrong about the underglaze transfers being a way of “cheating.” I might need to reconsider when these come out of the kiln???
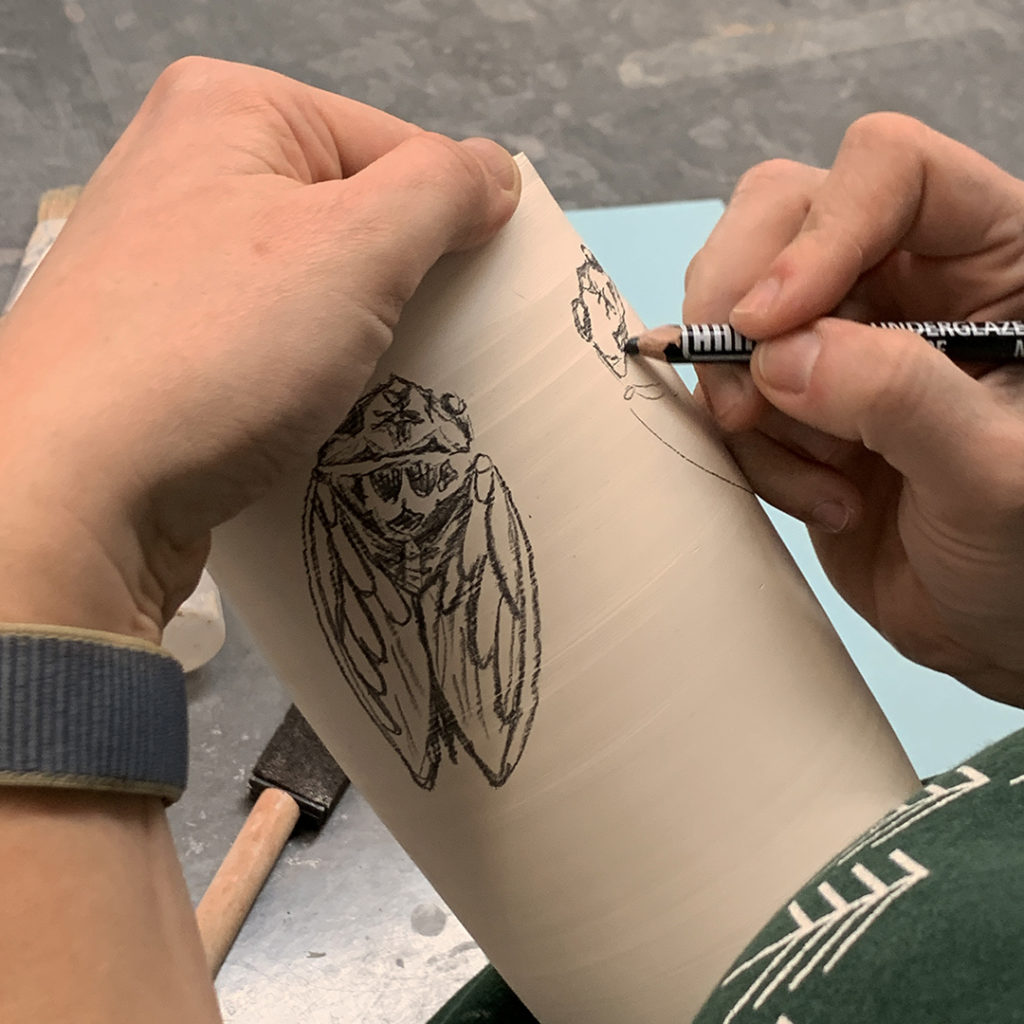
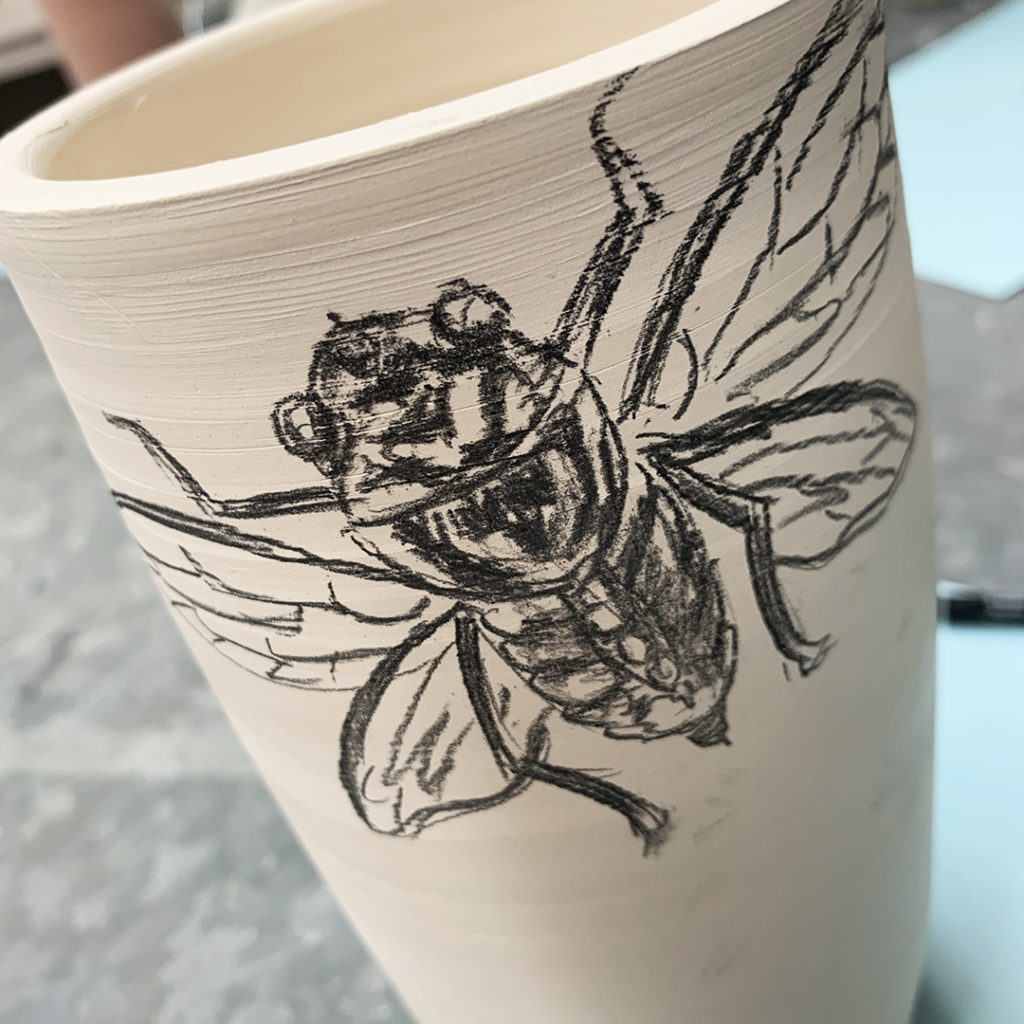
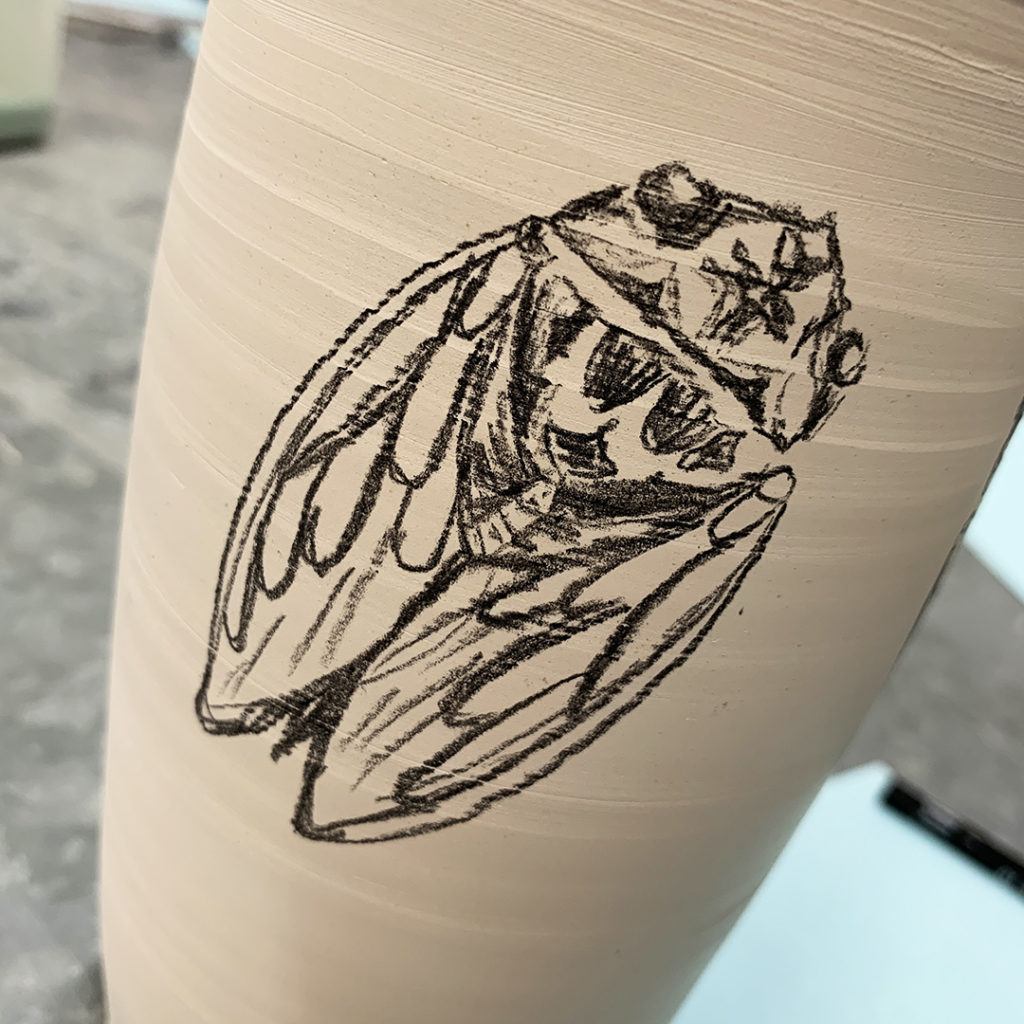
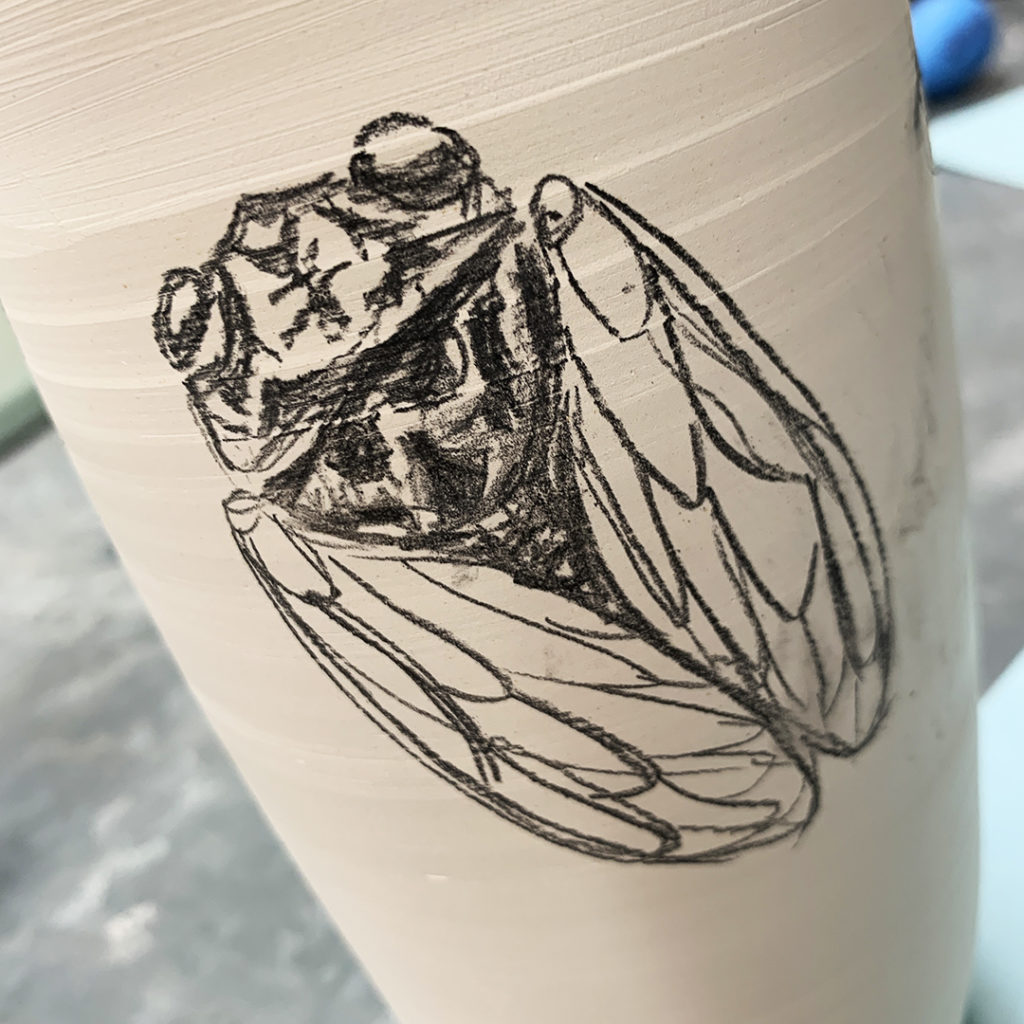
One of my favorite surprises during our Glaze Throwdown Challenge?… watching Clara pull out an underglaze pencil and do these wonderful doodles on the side of her cylinder! I can’t wait to see how they look after the glaze firing… hoping they don’t get bugged out!!!
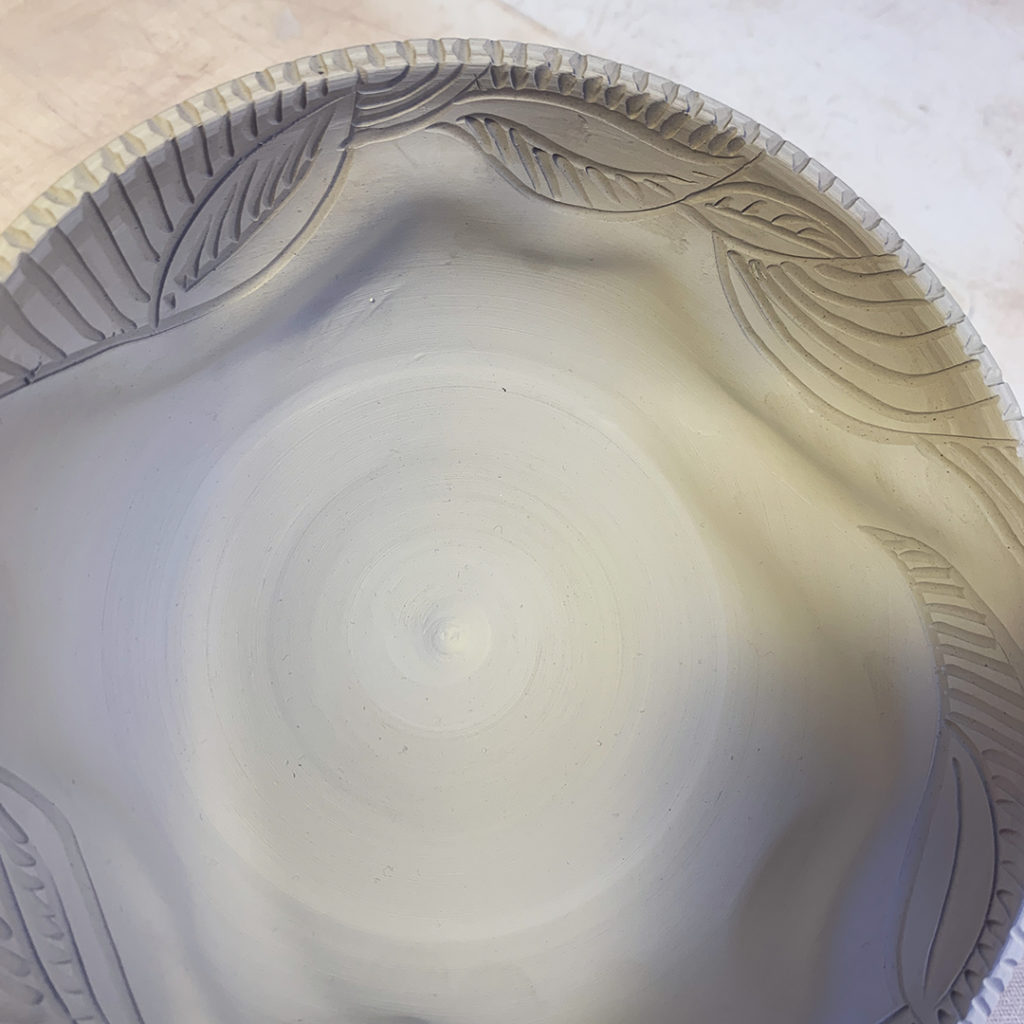
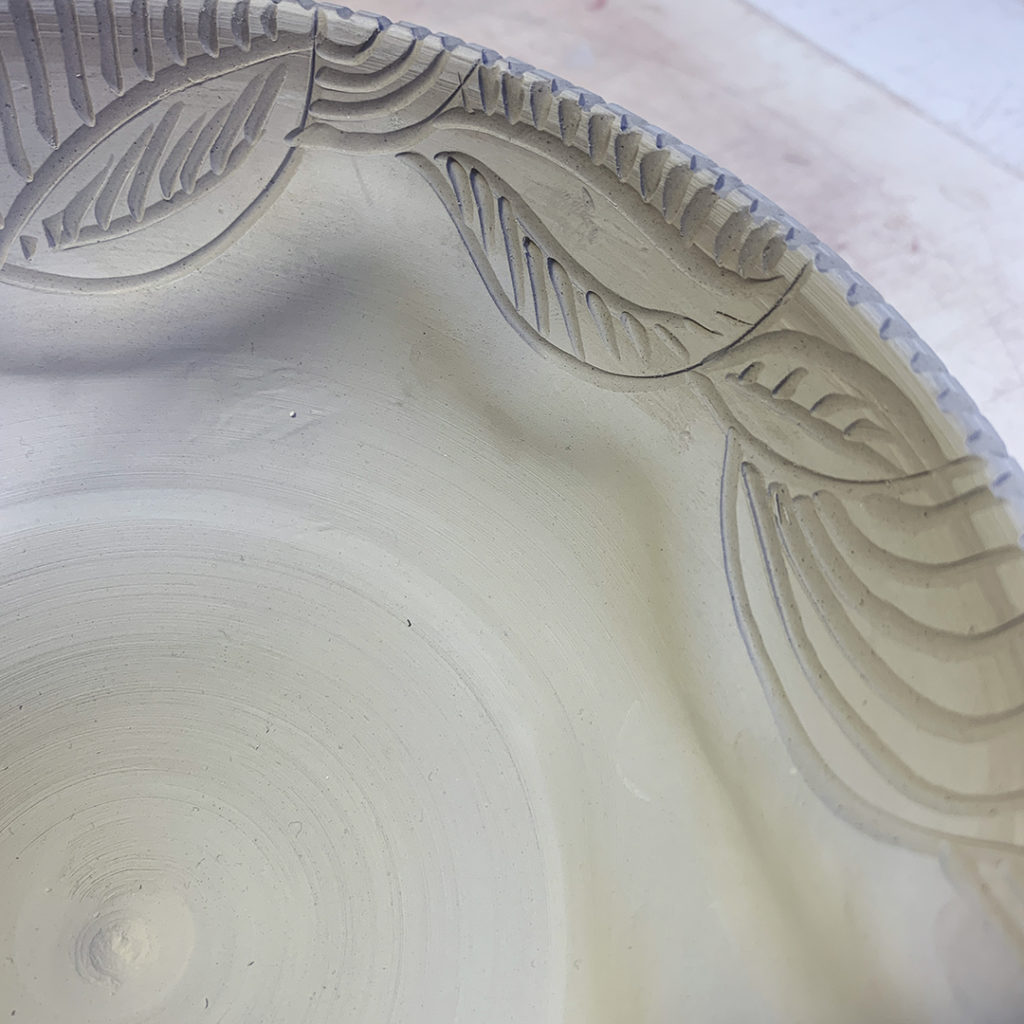
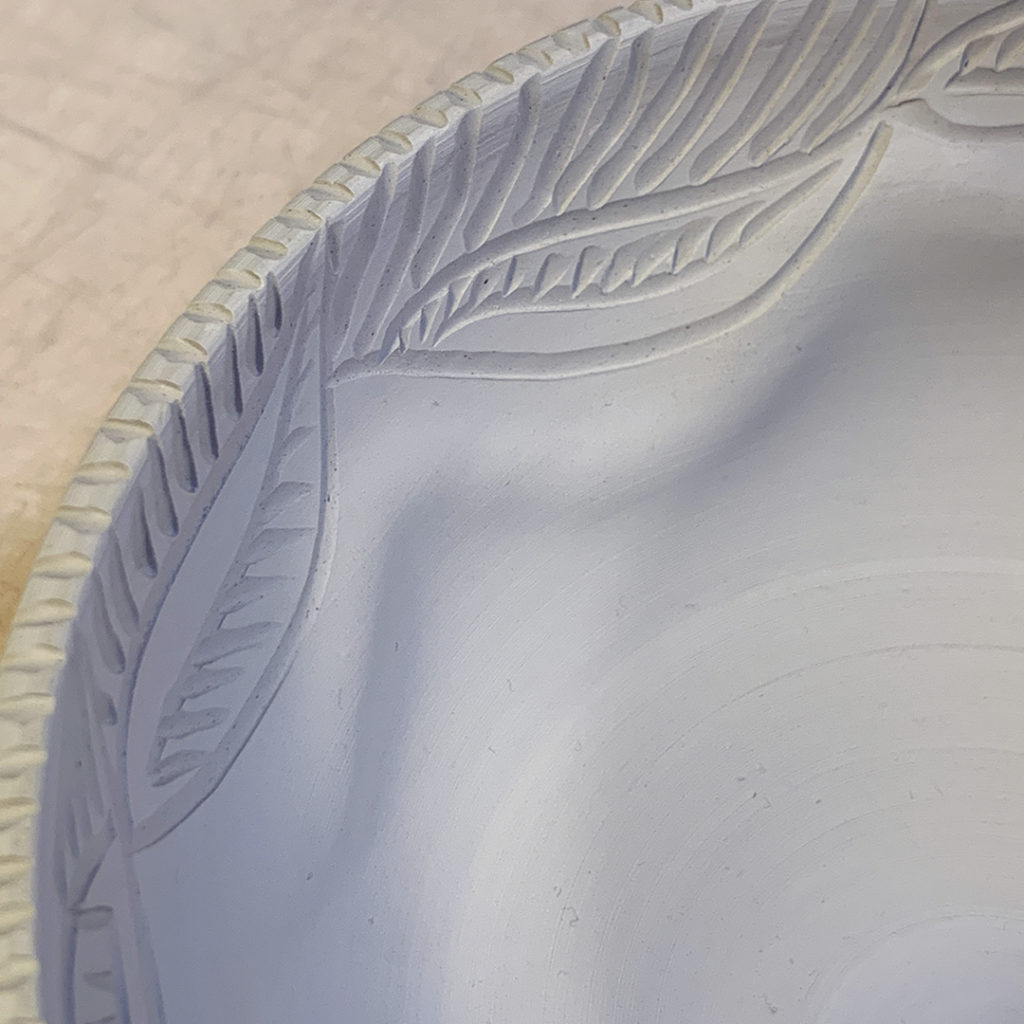
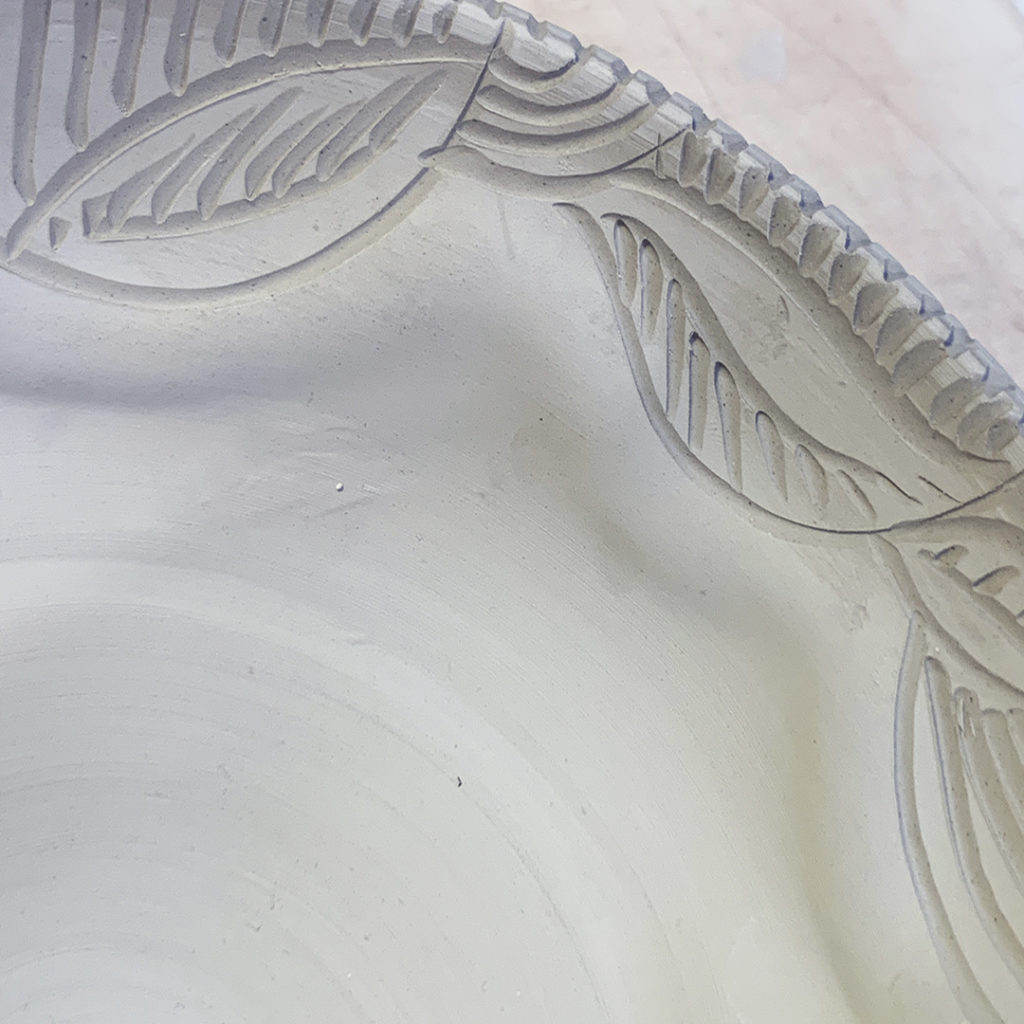
While working on adding some details & accents to the bowls from our class demo, I ran across the one that Chelsea did for us… and I didn’t quite know what to do with it. So I started carving… and then THIS happened!
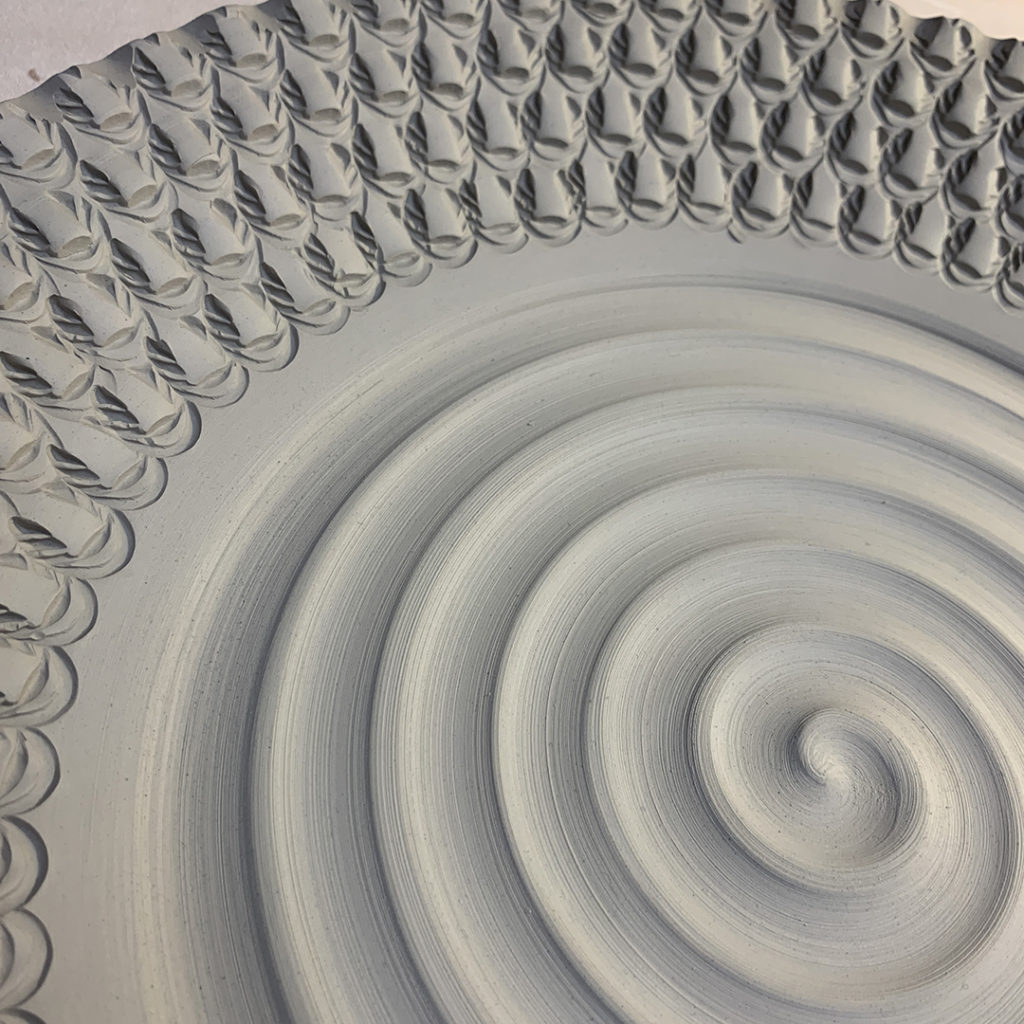
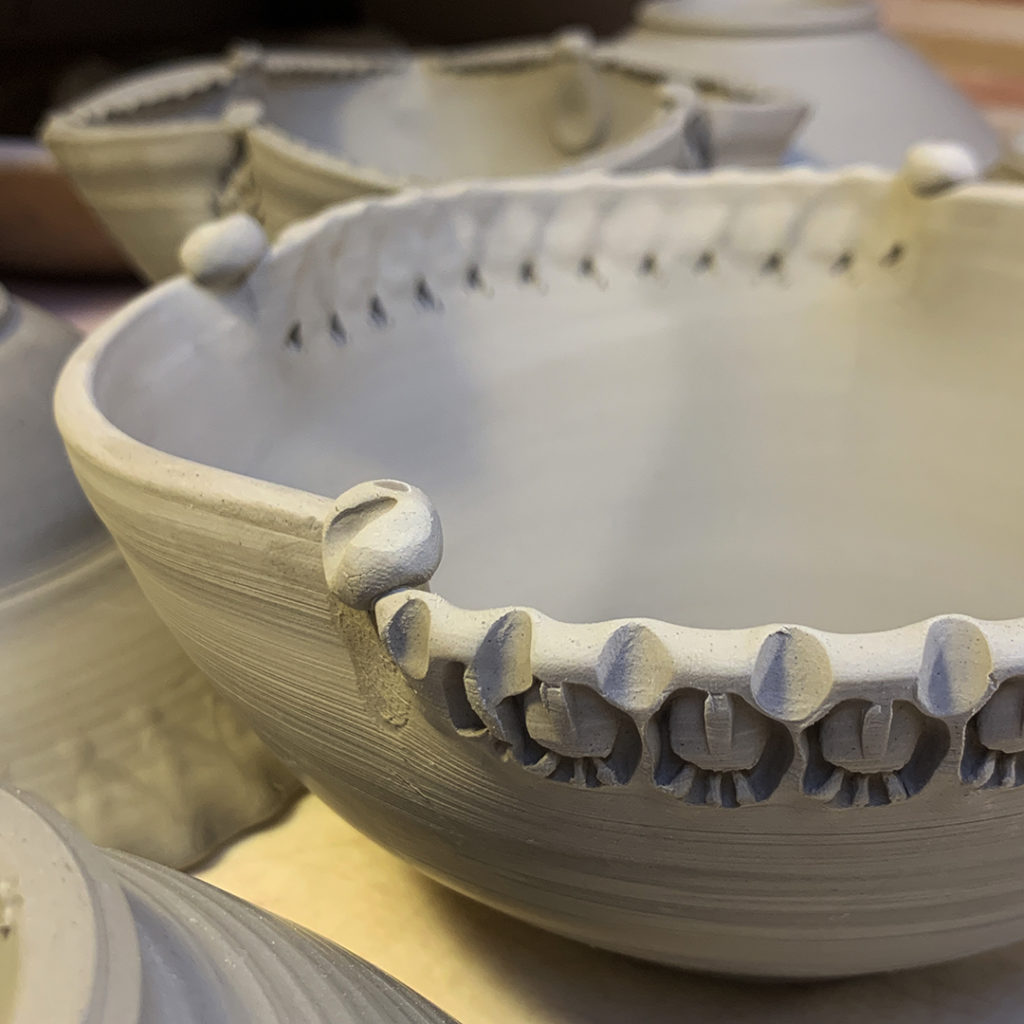
Just spending a little time in the studio today doing a bit of stamping… adding a few more details to the bowls I made during our recent “not-so-basic-bowls” class demo!
Just a few close-ups from my class demo where we introduced colored slips as a great opportunity for textures, patterns & surface decorating! Gooey spiral, chattering & squiggly fun!!!
So this week we made bowls again in my Tuesday night Beginning & Adult Beginning Wheelthrowing class. I always like to show them how to make “bowls on purpose” instead of a cylinder gone bad. We talk about getting a nice smooth rounded interior, no flat bottoms, no beginner’s ledge, and a nice rim.
So I start the class with a quick demo on how to make a bowl on purpose… and how to avoid all of those problems! After my demo, they all go back to work on their wheels… while I continue to throw more demo bowls during class. When I’ve thrown all of my bowls, we re-group and then I start doing some fun demos on how to alter & decorate them. I just want to give them new ideas on how to make their bowls more special… and their own. I tell them that the wheel pretty much makes a round bowl for them… but it’s up to them to make it their own!
Bowl #1 – Four simple fluted edges… one finger inside, one outside and flick.
Bowl #2 – And if four fluted edges are good, eight might be better?!
Bowl #3 – A flared out flange edge… kind of folding the top inch out over a stable finger on the outside of the bowl.
Bowl #4 – And if a small flange is nice, maybe a bigger flange is even cooler???
Bowl #5 – A nice split-rim using the point of my wooden knife. Then I dented in two sides… and we decided to leave it this way as I’ll add an “up & over” handle to make it more like a basket.
Bowl #6 – Another split rim… and then pinched back together in eight place.
Bowl #7 – The same split rim technique… this time more of a lotus style. Four inward indents, and four outward to make the squared “lotus” shape.
So after altering a few of the rims, I moved on to introduce them to adding slip as a decorative technique.
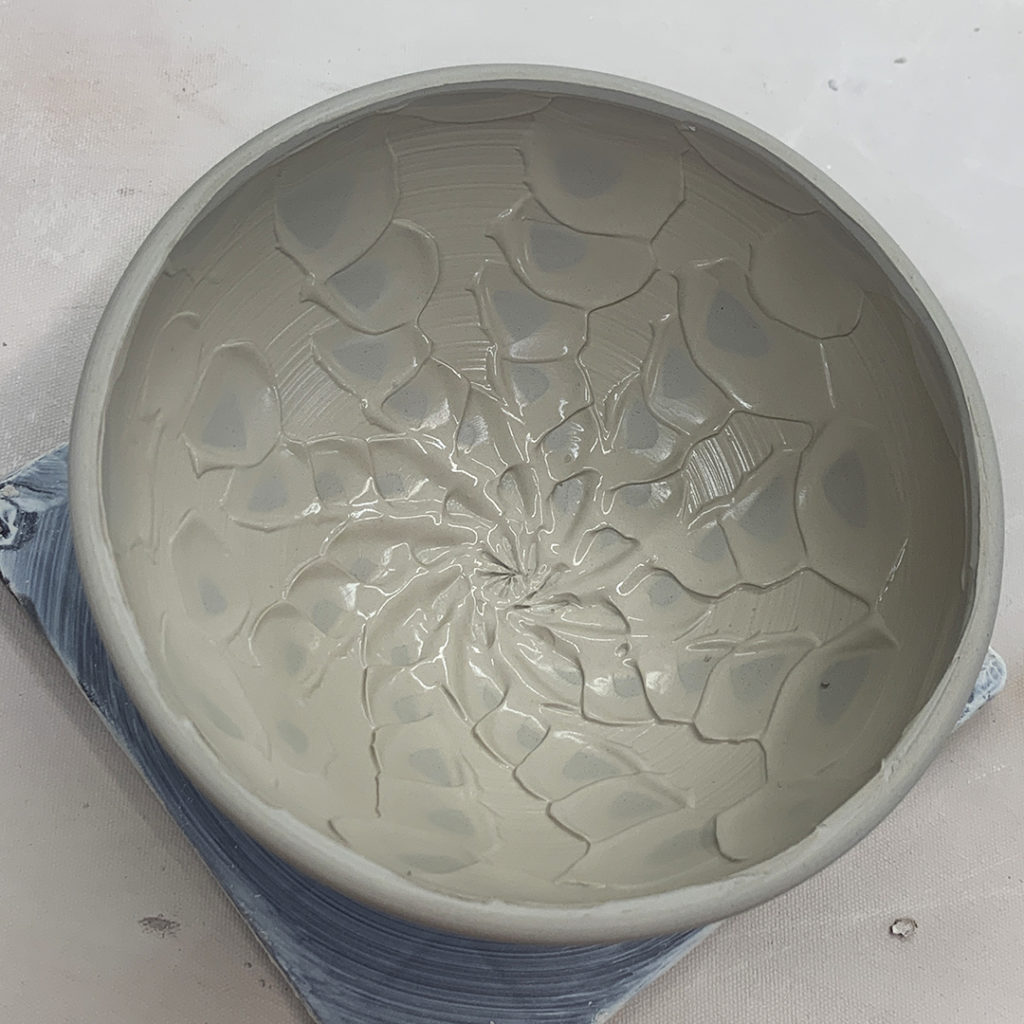
Bowl #8 – We started with a thick layer of think white slip. And then I dragged the rounded end of a wooden knife through to create this spiral.
Bowl #9 – Another layer of thick white slip, this time with a fingertip squiggling through while the bowl was spinning on the wheel!
Bowl #10 – Thick white slip with a chattered surface using a stiff rubber rib, rhythmically tapping while the wheel spins to create this pattern.
Bowl #11 – We started with a ombre’ blend of white & iron red slips. It looked nice enough… but more is more... so I dragged my wooden knife through it to make a cool spiral!!!
Bowl #12 – For our final bowl, my friend & fellow Lillstreet teacher Chelsea “made the mistake” of stopping by my classroom at just the right time. I gave her the final demo bowl for her to do something with it. She didn’t hesitate… instead doing this wonderful “organic” squiggle technique reminiscent of her of style!
a
And for now they’re all in my studio under plastic… waiting for some more detailing! Perhaps a little bit of stamping, detailing, carving or attachments. And then some trimming of the footring on the bottom before I call them done… then dry… then bisque… the glaze… then fire again… then DONE!!!
Stamping another large platter for another Texture Tuesday! With just two handmade stamps doing all of the hard work. One-by-one pressed in while the clay is leatherhard… creating a groovy textured pattern for the glaze to play with later!