Because one sunrise is never enough…
and this morning’s was stunning – and then got even better!!!

Gary Jackson: Fire When Ready Pottery
A Chicago potter’s somewhat slanted view of clay & play |
Because one sunrise is never enough…
and this morning’s was stunning – and then got even better!!!

As I prepare for my soda kiln firing this weekend, there’s been a lot of glazing
& wadding going on in the studio. Few people realize the huge number of steps
a piece goes through before it’s ready for use at the table. It’s not just a few minutes
of fun on the wheel… there’s countless hours of decorating, trimming, finishing
and firing… twice!
So I’m working every night this week trying to get everything glazed & wadded
for my firing. One of the benefits to the soda firing process, is that my glazing
is somewhat minimal. It’s mostly liner glazes and a few accents… with great
anticipation that the soda atmosphere will create the glossy “glazed” effect
on the sides of the work, along with some great flashing marks!
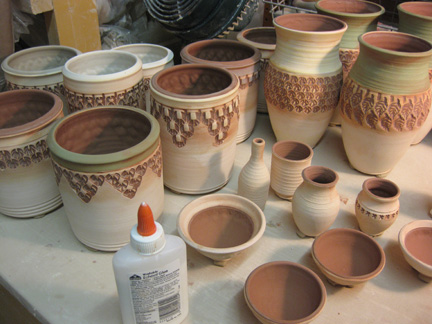
So every pot is glazed and cleaned up. You want to make sure that edges are crisp,
drips are wiped off and everything is ready to go. After liner glazes & cleaning, I then
glue on little balls of wadding to the bottom of the pots. Wadding is a “soda-resistant”
clay-like material that helps lift the pot off the kiln shelves during the firing. The
concept is that it will keep pots from sticking to the shelves if there is an excess
of soda build-up.
Once they are lined & wadded, I separate them into different categories… some
of them waiting to be lightly sprayed with accent colors. Just a bit of color to work
along with the colored slips I’ve applied before bisque firing and the color flashings
the firing will create in the kiln.
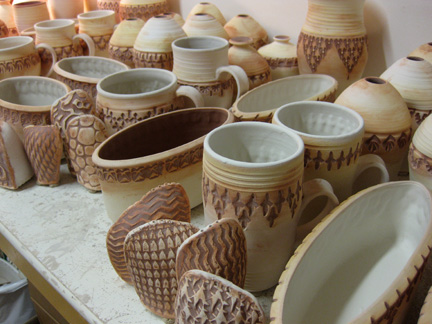
Then the pots get stacked back onto my rolling cart… which will make the journey
downstairs, in the rickety freight elevator, tomorrow to the kiln room for loading.
My hope is that all pots & tiles will be wadded and ready to go by the end
of tonight’s studio session. We’ll see… still have a long ways to go!
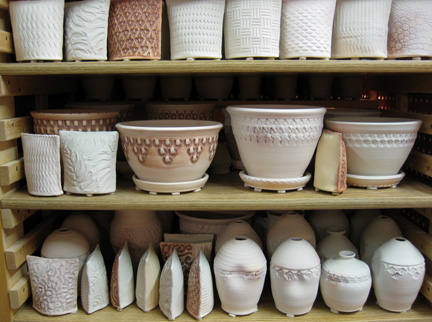
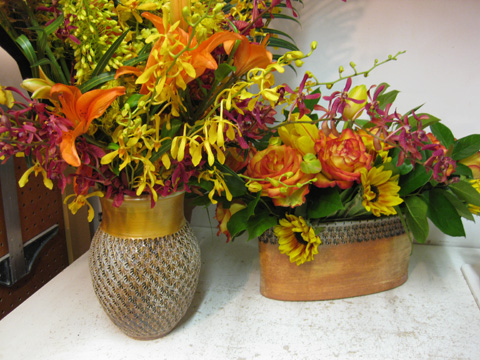
After another good day at the freelance special events gig… and some very successful
“dumpster diving”… I scored a lot of flowers that had just returned from another event.
So before they were trashed, I pulled them aside to give them a few more days of life!
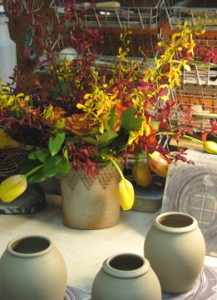

And who better to share flowers with than a bunch of potters who already have
a lot of vases on hand… all of them handmade! So several of my studio friends were
the beneficiary of today’s “floral reclaim process”… and may not find their floral
“surprises” until their next visit to their studios!
Pictured left to right: Karen Patinkin, Emily Murphy & Lisa Harris.
No candles… no silly hats… no singing… and sadly, no cake.
But it was a big birthday day today… for my bike!
Yep, today is my new bike’s first birthday.
A year ago today, I finally upgraded from my old neon yellow Trek 1200
and purchased a new black Trek 2100. Who knew that a new bike
would so much nicer to ride?! Smoother… easier… faster!!! Love it.
It’s just a year old… and already has over 3,00o miles on it!
And hoping to at least double that this year…
Oh, what to do with all those dry clay scraps?…
Well, turn them back into new clay again of course!!!
Yep, all of those dried trimming scraps can be re-hydrated into new clay
and used again to make a new pot!
So I take all of my trimming scraps and allow them to dry out completely.
I keep them in a large plastic bin for “safe keeping.” When there’s a good amount
of them, I fill the container with water just above the clay level. The water will soak
into the dry clay and allow it to “slake” down. After the clay has absorbed the water,
I let it sit for weeks… or at least until I feel I have time to deal with it.
When I feel that the dried clay is rehydrated, and the majority of the water has either
soaked in or dehydrated, I scoop out handfuls of the new clay mixture and place it on
a large slab of plaster. This will help draw the excess water out of the mixture. I typically
leave the pile of clay sitting on the plaster bat for a few days until enough moisture has
been drawn out and the mixture is now close to a normal clay consistency. Then, I take
the clay off the plaster bat and get ready for some “heavy lifting.”
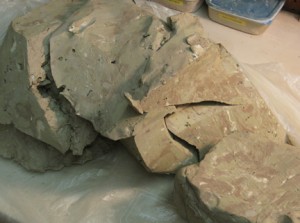
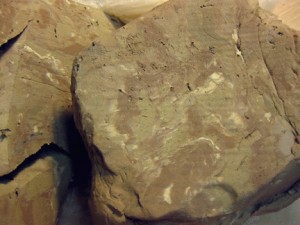
As you can see, I don’t worry too much about what kind of clay scraps get into my reclaim.
In fact, some of my other studio mates don’t reclaim their scraps… so them give them to me!
You just need to make sure that all clay going into your reclaim bin is rated for the same
kiln firing temperature.
I then take slices of the new clay, and interleave them with layers of fresh clay straight out
of the box. As the majority of my work is fired in the soda kiln, I generally use fresh
soda clay when I’m layering so that I know that at least half of it is for the soda kiln.
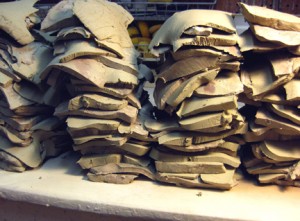
Now that I have stacks of mixed clays, I start pounding them together. It’s actually
easier than it sounds. Just pick up the entire stack, and slam it back down onto the
table. Cut it in half, stack the halves on each other – and slam it down again.
Slice-stack-slam-repeat. Slice-stack-slam-repeat. And so on… and so on…

Seen above, I’ve only sliced, stacked & slammed once. See the layers are still apparent?
Assume you are starting out with 10 layers. Slam them down, cut it in half, stack it on itself…
now you have 20 layers. Repeat… and now you have 40 layers. Repeat… and now you have
80 layers. Then 160 layers… 320 layers… 640 layers… etc. So the more times you do it,
the thinner the layers become and the more incorporated your different layers become.
Once I have sliced & slammed the clay and feel that they clay is well incorporated, I pound
roughly into cubes and store it in recycled clay bags. This reclaimed clay is now ready to go!
Yesterday, I reclaimed over 175 pounds of recycled clay – that would have otherwise been
thrown away. Even better… with just a little effort, it’s like FREE CLAY !!!
So tonight I put some “finishing touches” on the mugs!
As part of the soda-firing process, a lot of the color accents achieved
come from colored slip applied to the surface. Slip is just watered down clay
with special chemical colorants added. These chemicals react to the
soda atmosphere and create dramatic colors and random flashing marks.
Slip generally needs to be painted onto the clay body while it is wet
or leather-hard. I typically paint the slip on after stamping, trimming
and applying handles. It’s usually the last step before I let the pieces air-dry.
Tonight I painted slip accents onto the mugs… both along the top rims
and some of the smaller details inside each of the stamps. Yes, it’s true…
each and every little stamp, one by one… each one with a touch of slip!

Now that they are all painted, I can let them air-dry… and then bisque fire
the mugs when I accumulate a kiln-full of greenware (dry clay). Once fired,
the mugs will be glazed and fired again. A few more steps in the process…

okay… picture this if you will…
I’m driving home late last night on a Chicago side street. Minding my own business.
The blizzard had ended and the streets were pretty clear and the coast was clear.
So I’m headed north on Cicero, getting ready to drive under the Edens Expressway.
As I entered the overpass bridge area, surrounded by fellow drivers…
I see from above in the all-too-familiar, soon-to-be-an-accident slow-motion…
a snow plow is above me plowing the Edens Expressway – and sending all of the excess
snow & mush over the edge… plummeting down right onto my windshield!!!
Smash… splash… and a little panic.
Maintain control. Don’t freak out. Don’t veer from the path.
It wasn’t until I flipped on my windshield wipers that I realized that the
smashing sound was a lot more than just the splatter of icey goo…
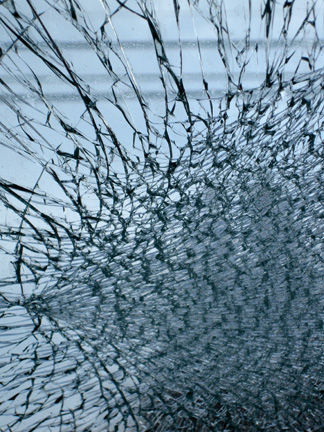
My entire windshield was smashed!!!
I made it home safely and called my insurance agent. As I reported my claim,
the girl on the other end of the line actually laughed at my story – go figure.
She said she’s never heard of anything like that. Just my luck.
So this morning I took pictures and tried to find a place to fix it on a Sunday…
with no luck. So it will be fixed tomorrow… and winter continues in Chicago.

At least the was a little “beauty” in the smashed glass if you could look past the damage!
After a summer full of sunrise bike rides and subsequent sunrise photos…
I kept being asked what I was going to do with all of the photos?!
Truthfully, I had no plan. I just love my early morning bike rides and the
photo was just a great way to capture the breathtaking beauty I so love.
Oh… what to do? what to do?…
So this Christmas, after talking with my friends Amy & Emily, I decided to turn my
collection of sunrise photos into a book. And what a great chance to share my book
with family & friends as my Christmas gift of the season!
So I took my summer sunrise photos and created a leather-bound, photo book
thanks to Shutterfly.com. It was a fairly simple process uploading my photos
and designing my book. They offer a lot of different page layout templates, colors,
page backgrounds and cover materials. You can upload a maximum of 1,000 pictures
and use a maximum of a hundred pages in each book. I decided to go with a clean,
simple design to emphasize the natural beauty… with no text to get in the way!
Simple black leather cover and clean white pages… filled with colorful sunrises.
Oh, and of course, my bike is each of the photos too!!!
I would highly recommend Shutterfly.com. The process was pretty painless and their
turn-around time was quite impressive. I will definitely be using them again
in the near future. But keep it quiet… my Aunt won’t be getting her copy of the book
until a week after Christmas! So if you see her… don’t spill the beans!
|
Gary Jackson: Fire When Ready Pottery
Lillstreet Studios ∙ 4401 North Ravenswood, Chicago, Illinois 60640 ∙ 773-307-8664 gary@firewhenreadypottery.com |