Gary Jackson: Fire When Ready Pottery
A Chicago potter’s somewhat slanted view of clay & play
Categories: mugs

Sadly, my health club is closing in a few days. They were bought out by LA Fitness
who is now systematically closing the old Bally locations one by one. I’ve been
doing Step Classes for many years, and yesterday was the last Friday morning
class with our instructor Kristy. Since she’s been teaching us for the past 15 years,
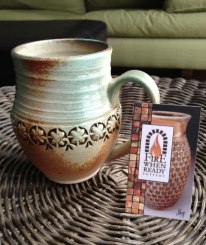
I thought it was only appropriate to give her a little “thank you” gift mug.
I’m glad she liked it… and here’s her response via a Facebook message…

THANKS Gary! This is really beautiful, and I’ll be soooo sad
when my kids break this.
Will have to hide it from them for sure.
You are super talented. I wish you the best
& hope to see you around
sometime. Thanks for coming to my classes all of
these years.
CHEERS!                                                                              – KRISTY

And now I’m going to need to find a new gym… or just get fat?!!!

Categories: artists, process, stamps

I’ve seen this technique before done by a few artists I reallly like.
It’s a much better way to get clean linework & details in your stamps. Because you
actually draw the design you want to see first, and then carve it out so the stamp
is the same as your drawing. A much better way if you want illustrative, figurative,
lettering or intricate lines. I’ve only “played” with it before, this time, I’m going to
focus & make more… and we’ll see where this new direction may take me?!

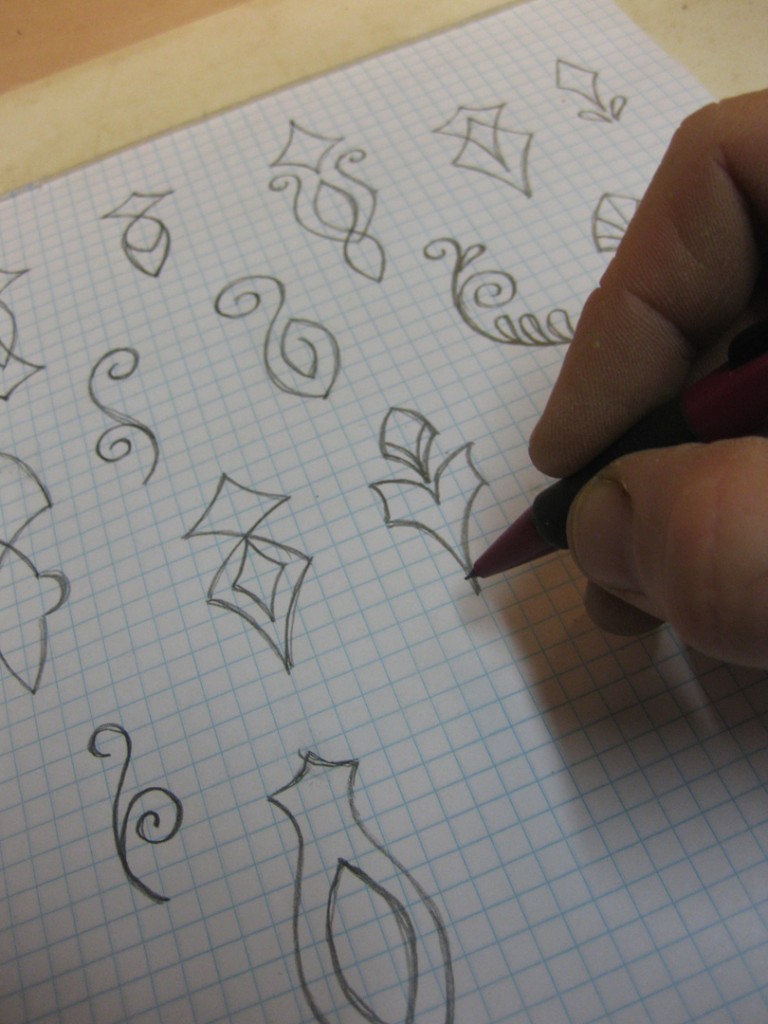
First off, I started drawing some different patterns on grid paper. I love using grid paper
for all of my doodling. I find it so much easier for me to get good proportions and more
balanced designs. Trying to remember that they’re just doodles. Draw lots of them!!!
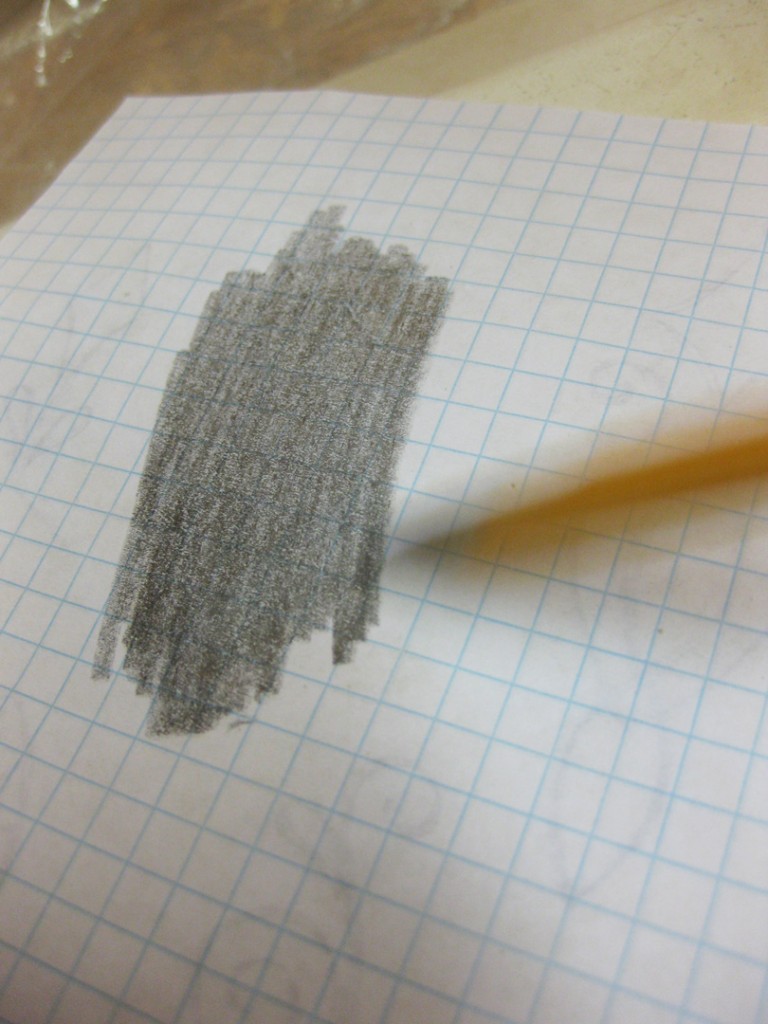
Once you find a few designs that you think would make good stamps, the design needs
to be transferred to a sheet of plaster. So I started by flipping over the paper and rubbing
my pencil all over the back side of the design. Basically leaving carbon all over the “back”
of the design. Then you flip over the paper, place it on the plaster slab and trace over the
design. If you press hard enough, the carbon transfers to the plaster. Then you can trace
over it easily to get an “exact” replica of your doodle.
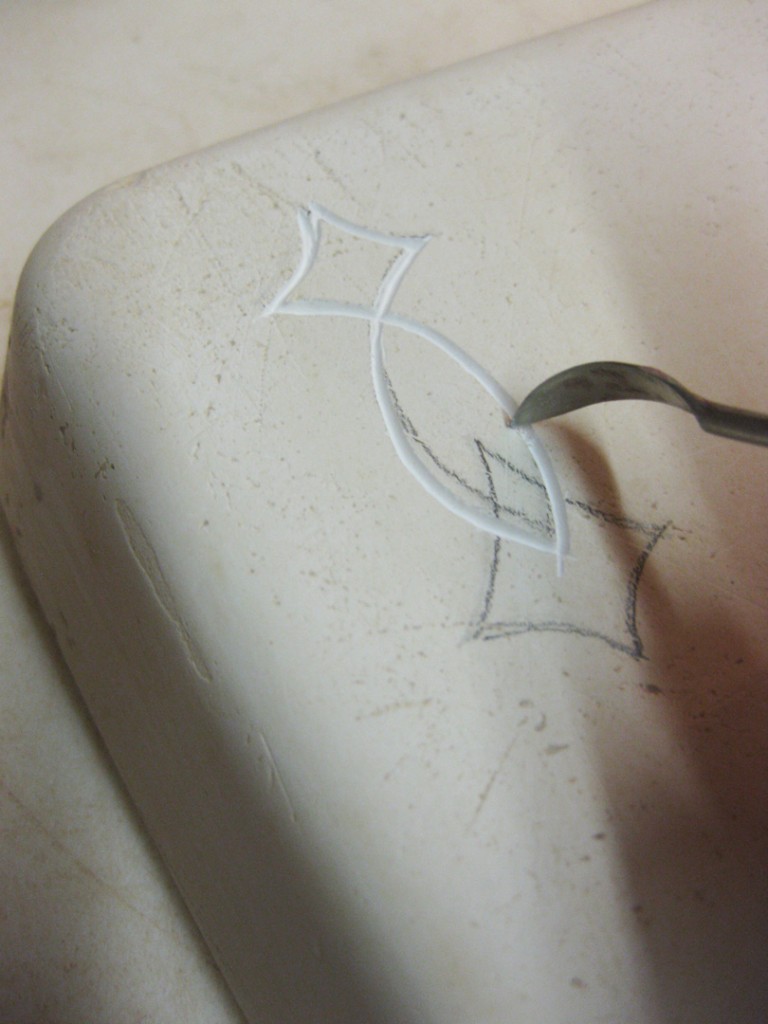
Once your design has been transferred onto the plaster, you can start carving away the
plaster “under” your design. Basically tracing over your design with a sharp tool. Use
whatever tool seems to work the best for you. A needle tool was a little too thin & pointy
for my liking. This tool has a pointed Xacto blade on one end and this curved tip on the
other. It seemed to work the best for me. But of course, different tools with different
points & different widths will give you different results. I must admit, it’s not as easy
as Kristin makes it look in her video. The plaster is very scratchy, and somewhat tough
to keep a clean, straight line. But… the cleaner your lines, the cleaner your stamps!
You do need to be very careful to keep your work area clean of the plaster dust.
I covered my work area with a sheet of plastic to catch the dust. I can then empty it easily
into my garbage can. Plaster dust & chips can ruin your clay if it gets mixed in. So by all
means DO NOT let the dust carvings get mixed in with your clay, fall in your splash pan,
or get into your reclaim buckets. And as always, be sure you are not breathing in any of
the plaster dust as you are carving your designs.

Once you design has been carved out, take a piece of clay and carefully press it into the
carved relief pattern. Be sure to press hard enough to get clay into all parts of the pattern.
One good thing about this technique is you can press a stamp at any time in your carving.
Carve part, press a stamp. Carve some more, press another stamp. Keep testing it until
you love the results! And then press a couple stamps... and save the mold for later!!!

When you get to the the “final” stamp, press in your clay and keep a little extra clay
in the center to act as the knob. Press all around the design and what clay “pops up”
through your fingers becomes the knob.

After you press in the clay, give it a couple seconds and then remove the clay very carefully.
The resulting stamp will be on the bottom of the clay.

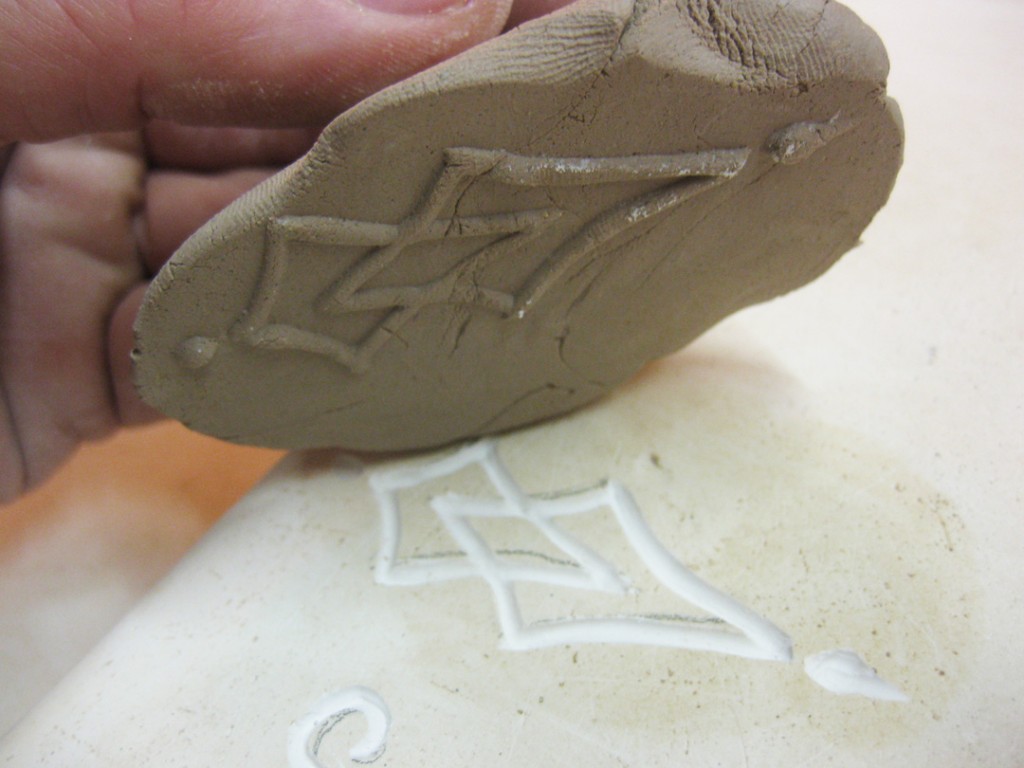
But when you’re going to be using them as stamps, remember that what you’re pressing
into your clay will leave a lasting impression. So it’s not just the raised design, but it’s also
the perimeter of the pressed clay. So to clean them up a bit, and get the perimeter to go
along with the design, I took my Xacto blade and trimmed away the excess edges.

And when you’ve made a couple, do it again and make some more!!!
You can use the same slab of plaster over & over again. Put your carvings all over the place.
Doodle. Draw. Carve. Test. Carve. Refine. Press. Trim. Finish. Repeat. Repeat again.

After making a couple of these “raised line” stamps, I was wondering if I could add a bit more
of my own technique? So I added a few impressions ala my own stamp making style into the design.
My thought is that it might add a nice contrast to the clean line work of the raised stamp pattern.
Nice lines AND a little geometric “pop-out” in between!

After I had made a few, it was time to let them sit out to dry. Once they’re dry they can go
into a bisque kiln. Remember, you want to keep your stamps porous so they release cleanly
from the leatherhard clay.

We’ll see how they work after they’re bisqued. I’m excited to be trying something new…
and yet a bit apprehensive to see how I can work them into my own style.
Categories: process, stamps

Over the past year, I’ve gotten a lot of comments on this blog and Facebook asking for me
to show how I make my stamps. To me, it’s pretty simple. It’s a piece of clay. Some tools.
A little squishing & carving. Nothing too technical. In case you’re still feeling a little
apprehensive, here’s a photo tutorial of how I make my stamps. And thanks for asking.

I start by rolling some simple coils. Different sizes. Different widths. I try to keep them
clean, uniform and smooth. But that’s just me. I do roll a few of them out so they have some
time to stiffen up a bit before adding the designs.

Then I pull out a collection of tools. Anything I can use to press into the clay to make an
indentation. Nothing special. Just some random tools.

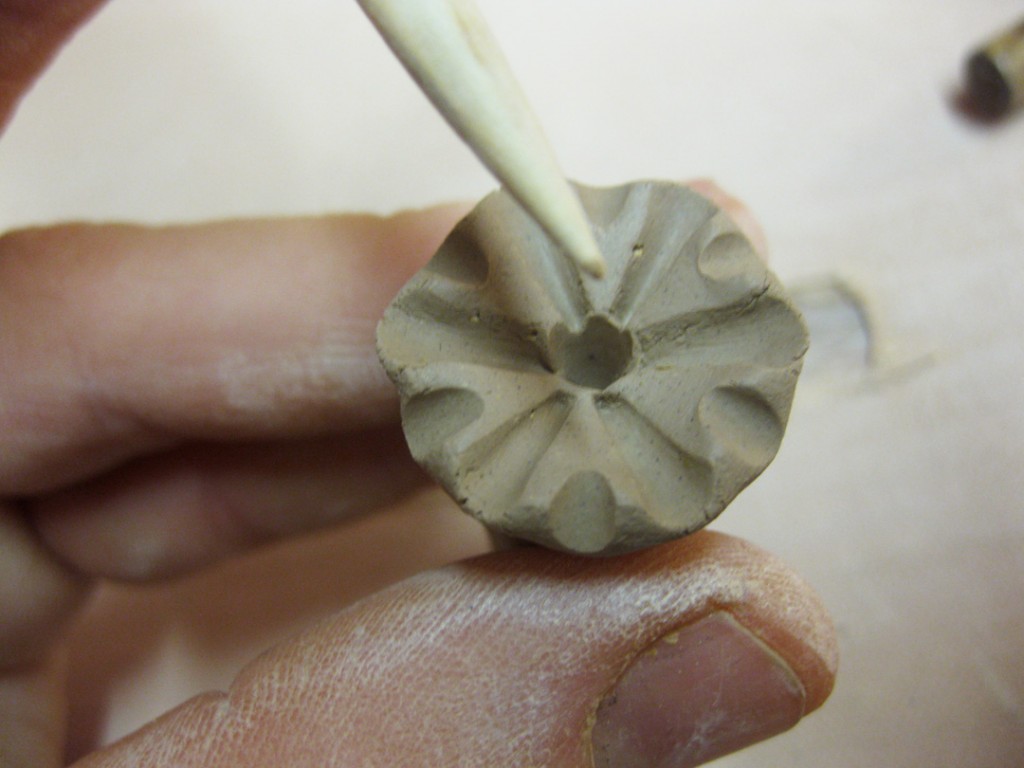
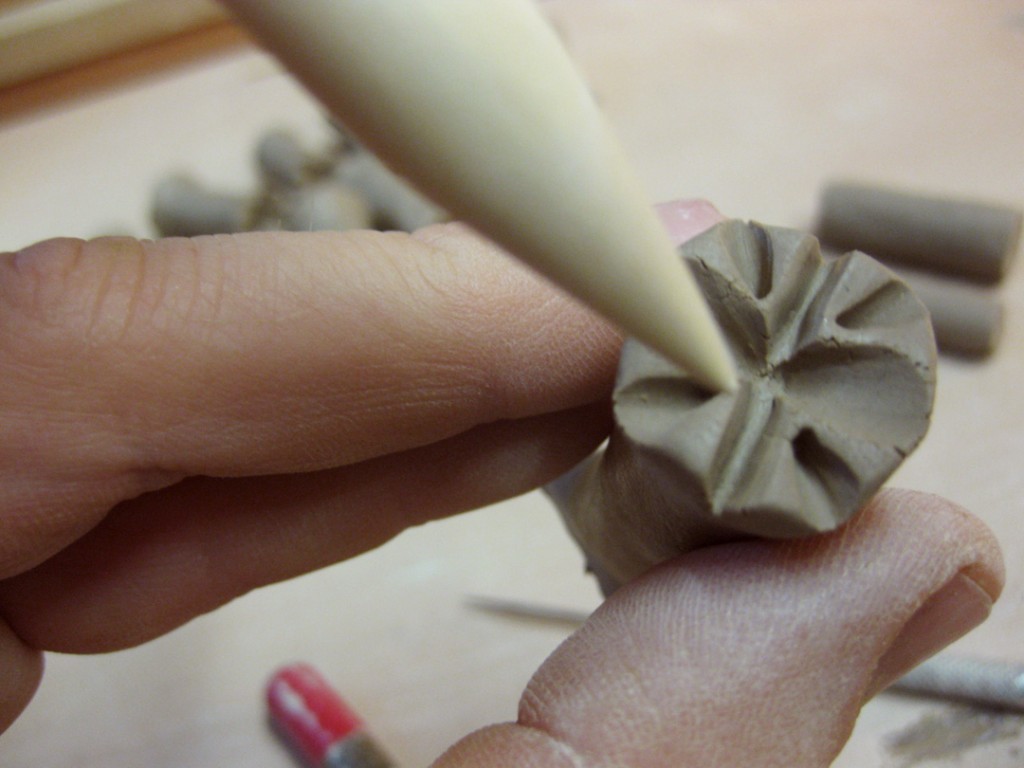
Then I start pressing the tools into the ends of the coils to make my stamps. I always put
a different design on each end of the coil. That way I get two stamps for one piece of clay!
What could be better?!

But before you start randomly pressing in patterns, there are a few things to remember…
1. Whatever pattern you press IN to your clay coil will be what sticks OUT where you press
it into your pot.
2. The impression left in your pot will appear to be the opposite of design on your stamp.
3. If you try to do letter stamps, they’ll need to look reversed on your stamp to turn out
correctly when you press them into your clay.
4. It’s not just the design, but also the perimeter shape that will make impressions.
5. You need to make sure your indentations & lines are wide enough & deep enough for clay
to be able to get in there. A lot of people try to “draw” with their needle tool, but then find
out later that they’re not getting a clean impression. That’s because they either left it all
scratchy from the needle tool… or more likely it’s too thin – no clay can get squished in there!
6. All of your stamps need to be dried and then bisque fired prior to pressing into clay.
7. I generally wait until my pots are on the slightly wet side of leatherhard for good stamping.
If your pot is too wet, the stamps will stick too much. If your pots are too dry, the stamp
won’t go in far enough to make a clear impression… or worse yet, crack the pot.
8. When pressing my stamps into the pot to create the design, I make sure that I have a finger
inside the pot opposite where I’m pressing the stamp. So that I have even pressure –
stamp pressing in, finger pressing out, squishing clay between the two.

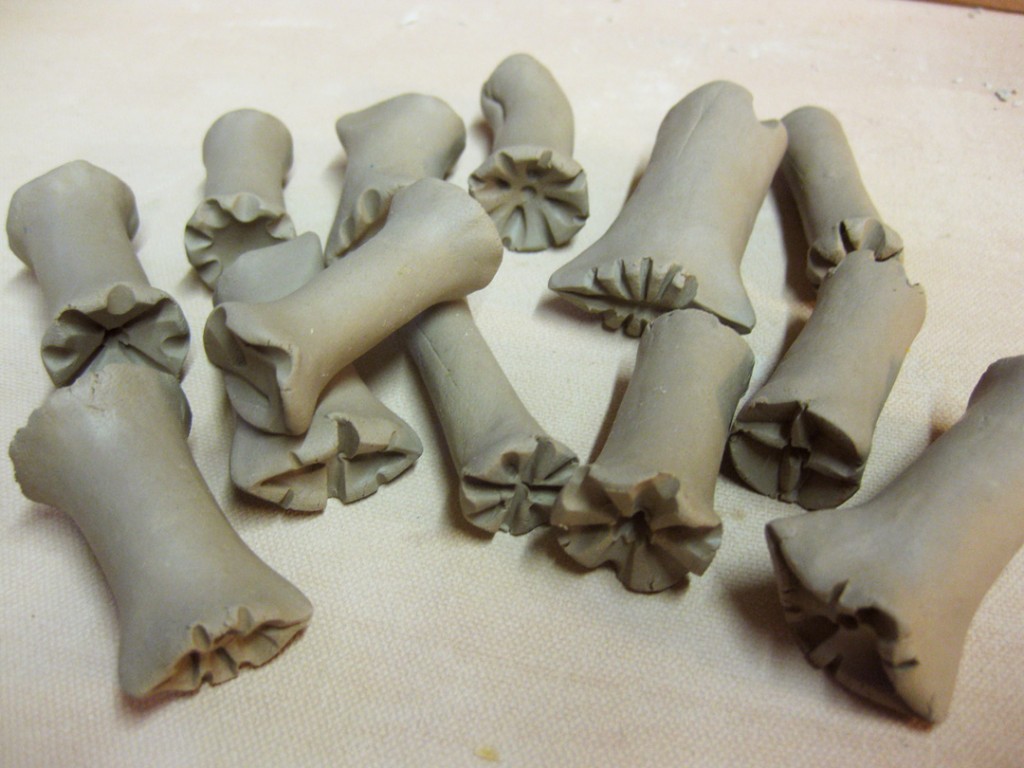
So here’s a few examples of a few new stamps. I won’t really know how they’re really going to
work until after they’re bisqued and I can actually use them for the first time.

After some time, I’ve made a few new stamps. Each one a little different. Of course,
when they come out of the kiln and I use them for the first time, there will be favorites….
and there will be some that aren’t quite what I was looking for. But that’s okay. You can always
make more. And just because they’re not making the mark you intended does not mean that it
is a bad stamp. Save it for awhile, try it a couple times, and you may grow to love it more later.

One last thing before I set them out to dry… I print my name on the side of each one.
Working in a group studio area and teaching classes, you never quite know where your
stamps may end up. I don’t think that I’ve ever really “lost” one, but it never hurts to label
your things just in case. So yes, every stamp gets labeled before they dry.

Once they’re dry, they will go into a bisque kiln firing. All of my stamps are fired once
so they are sturdy and porous. If they were fired to cone 10, they would become vitrified
and no longer porous – which also means they would stick to the clay. If your stamps stick,
they will not release from the clay cleanly and your impressions will not look as clean.

So there’s my quick photo tutorial of how I make my stamps.
My biggest suggestion is to make LOTS of stamps, and learn from every batch.
Learn how to make the stamp you want. Learn how to use your stamps on your pots
to get the stamped designs you want. Learn to make pots with stamps you love!!!

Categories: art fair

After three days in Dover, Delaware… it was great to get back home
and find out that I was once again one of the Top Ten Sellers
at “Art In The Barn” last year! Good news to come home to.

Mark your calendar now for “Art In The Barn 2013.”
Saturday, September 28th & Sunday, September 29th, 2013.

Now I need to send in my applications for the rest of my summer art fairs!
It’s always a busy time of the year… trying to make plans for the rest of the year!

Categories: holiday, inspiration

Today’s his day… A day to remember… Martin Luther King Jr.

It was a beautiful day back in November 2012 when I had the chance to see the inspiring
Martin Luther King Jr. Memorial for the first time in Washington, DC.

So thoughtful as he looks out over the Potomac River towards the Jefferson Memorial.
You enter through the large boulder rocks to see that one “slice” as been taken out and
“slid” forward. It isn’t until you walk around that slid rock slice that you see Martin Luther
King Jr. and many of his inspiring quotes chiseled permanently into the stonework.

Categories: totem pole

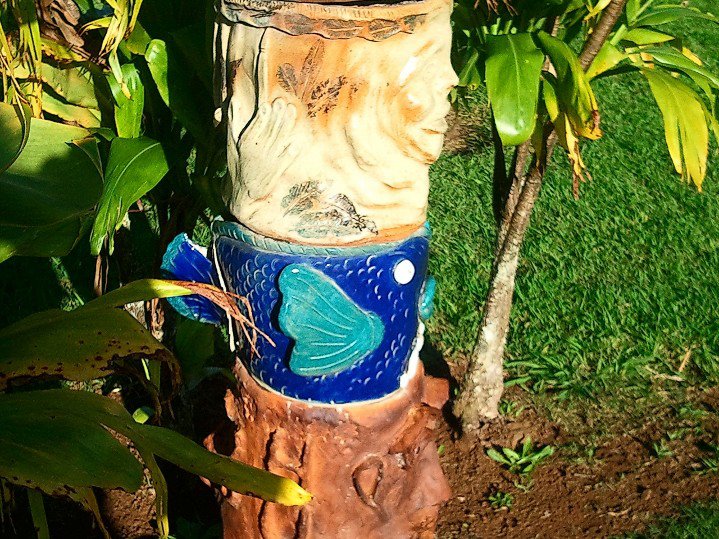
My friends Pam & Pat are once again vacationing in Hawaii, as they do every year,
and went to the Hui No’eau Visual Arts Center. While they were there, they found
a wonderful totem pole on the grounds. Pam posted the photos – and I love them!!!

It reminds me of the totem poles my Summer Camps kids have made over the past
couple years! It looks like they’ve created their totem pole section-by-section as we do!
I especially love the face on the second one from the top… as well as the “handle”
sticking out the side for apparently no reason!!! Too cute…  thanks Pam!!!

Categories: bike, sunrise

This morning started out surprisingly warmer than I expected.
And I was riding surprisingly faster than I expected.
Until I got to the Beach House and turned around.

It was only then that I realized that I was enjoying a good tailwind. Uh oh.
So the second half was straight into the wind. A little colder with the combination
of a headwind & windchill. Thus, my new word for the day… headwindchill.


Categories: creativity, inspiration

Here’s a fun game of color-matching. It’s addictive. Be careful.
Just click your cursor on the small circle on the big color ring. Then move it around
to “match” the center color before time runs out. You get a lot of chances…
matching hue, saturation, complementary, analagous, triadic and tetradic.
Who knew there could be so many colors to match?! Have fun!!!

Click here for the game… COLOR.

Categories: classes, lillstreet, stamps

It’s the second week of our new session of pottery classes at Lillstreet.
My students are still working on basic cylinders, basic trimming and handles for mugs.
But I also “needed” them to make some stamps tonight so we can use them later in the
session after they’ve been bisqued. The sooner they get them back, the sooner they can
start decorating their pots!!!

To make tonight’s class even sweeter, one of my students brought in some yummy
homemade s’more cookies… complete with a graham cracker cookie base, a gooey chocolate
center and “torch-roasted” marshmallows!!! And you know how I love a good s’more!!!

Categories: bike, seasons

And sure, my feet were a little cold while riding… but not nearly THIS frozen cold!!!