Over the past year, I’ve gotten a lot of comments on this blog and Facebook asking for me
to show how I make my stamps. To me, it’s pretty simple. It’s a piece of clay. Some tools.
A little squishing & carving. Nothing too technical. In case you’re still feeling a little
apprehensive, here’s a photo tutorial of how I make my stamps. And thanks for asking.
I start by rolling some simple coils. Different sizes. Different widths. I try to keep them
clean, uniform and smooth. But that’s just me. I do roll a few of them out so they have some
time to stiffen up a bit before adding the designs.
Then I pull out a collection of tools. Anything I can use to press into the clay to make an
indentation. Nothing special. Just some random tools.
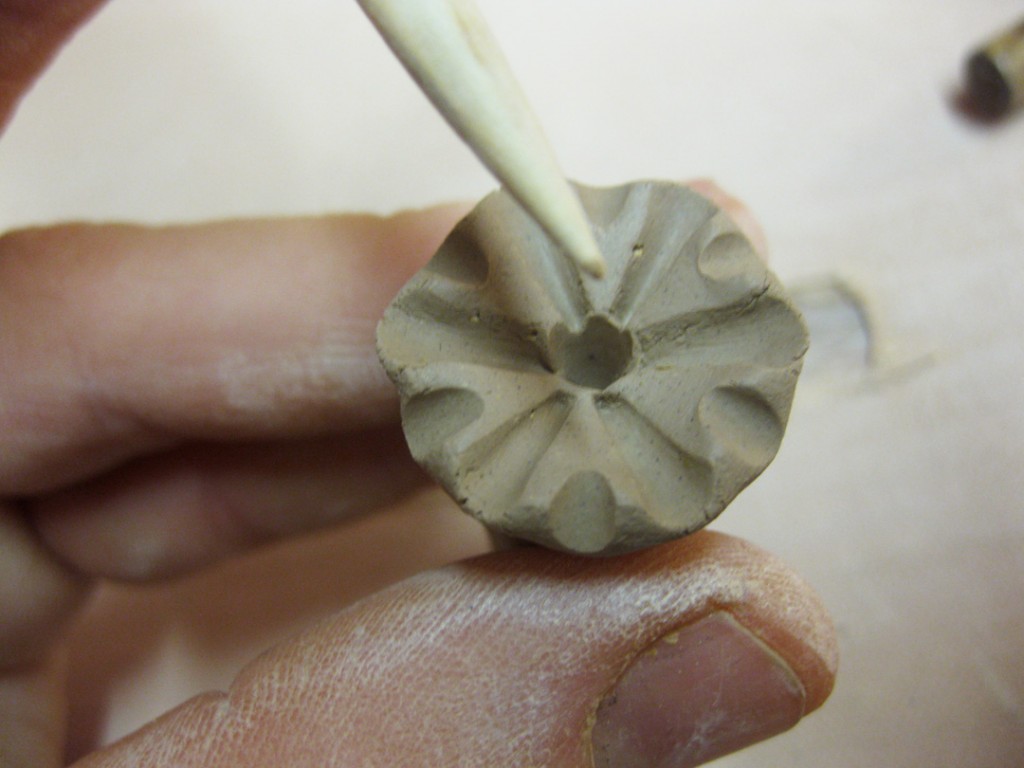
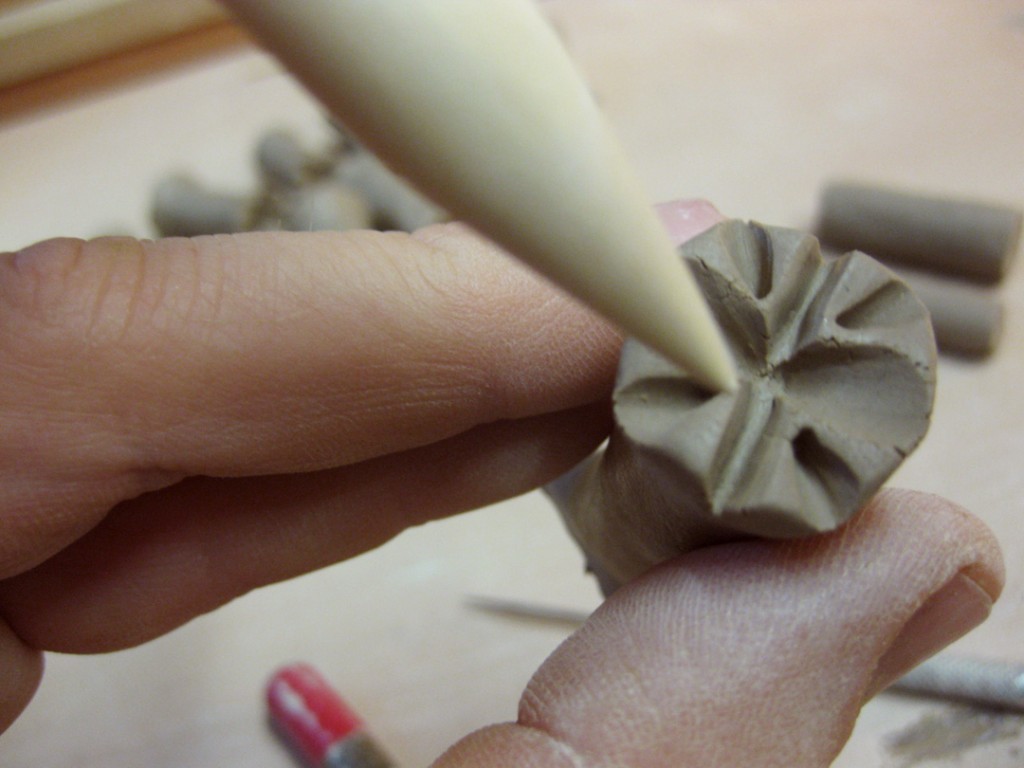
Then I start pressing the tools into the ends of the coils to make my stamps. I always put
a different design on each end of the coil. That way I get two stamps for one piece of clay!
What could be better?!
But before you start randomly pressing in patterns, there are a few things to remember…
1. Whatever pattern you press IN to your clay coil will be what sticks OUT where you press
it into your pot.
2. The impression left in your pot will appear to be the opposite of design on your stamp.
3. If you try to do letter stamps, they’ll need to look reversed on your stamp to turn out
correctly when you press them into your clay.
4. It’s not just the design, but also the perimeter shape that will make impressions.
5. You need to make sure your indentations & lines are wide enough & deep enough for clay
to be able to get in there. A lot of people try to “draw” with their needle tool, but then find
out later that they’re not getting a clean impression. That’s because they either left it all
scratchy from the needle tool… or more likely it’s too thin – no clay can get squished in there!
6. All of your stamps need to be dried and then bisque fired prior to pressing into clay.
7. I generally wait until my pots are on the slightly wet side of leatherhard for good stamping.
If your pot is too wet, the stamps will stick too much. If your pots are too dry, the stamp
won’t go in far enough to make a clear impression… or worse yet, crack the pot.
8. When pressing my stamps into the pot to create the design, I make sure that I have a finger
inside the pot opposite where I’m pressing the stamp. So that I have even pressure –
stamp pressing in, finger pressing out, squishing clay between the two.
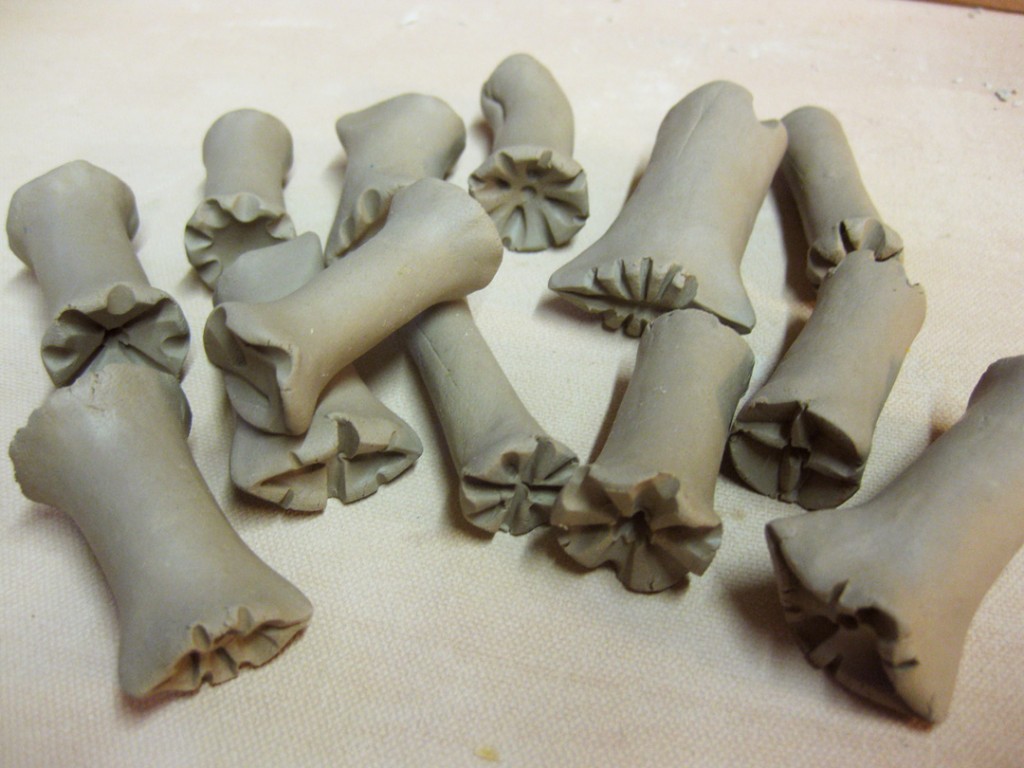
So here’s a few examples of a few new stamps. I won’t really know how they’re really going to
work until after they’re bisqued and I can actually use them for the first time.
After some time, I’ve made a few new stamps. Each one a little different. Of course,
when they come out of the kiln and I use them for the first time, there will be favorites….
and there will be some that aren’t quite what I was looking for. But that’s okay. You can always
make more. And just because they’re not making the mark you intended does not mean that it
is a bad stamp. Save it for awhile, try it a couple times, and you may grow to love it more later.
One last thing before I set them out to dry… I print my name on the side of each one.
Working in a group studio area and teaching classes, you never quite know where your
stamps may end up. I don’t think that I’ve ever really “lost” one, but it never hurts to label
your things just in case. So yes, every stamp gets labeled before they dry.
Once they’re dry, they will go into a bisque kiln firing. All of my stamps are fired once
so they are sturdy and porous. If they were fired to cone 10, they would become vitrified
and no longer porous – which also means they would stick to the clay. If your stamps stick,
they will not release from the clay cleanly and your impressions will not look as clean.
So there’s my quick photo tutorial of how I make my stamps.
My biggest suggestion is to make LOTS of stamps, and learn from every batch.
Learn how to make the stamp you want. Learn how to use your stamps on your pots
to get the stamped designs you want. Learn to make pots with stamps you love!!!


Gary, Awesome stuff as usual. I sense you are very busy these days due to the frequency of posts. at least when you do post it is worth the wait. I noticed that in your stamp tutorial you scratch your name into the stamp. This made me wonder why you don’t make a Gary stamp and mark them in true Jackson style. Just a thought. Thank you, for sharing all you do.
ALLEN – Good question. I kind of made that decision a few years ago. I’ve never made a signature stamp because I think it’s important for artists making handmade things to sign them by hand. If I were to make a signature stamp, well then ANYONE could be making and stamping pieces and passing them off as mine. Whether it’s an intern, apprentice or con-artist… I think it’s important that I sign each piece personally. Now of course that doesn’t matter so much for these stamps that stay in my studio… but that’s why there’s no GARY signature stamps!!! Thanks for asking…
Gary, Thank you so much for sharing. I have been waiting for a long time, even e mailed you to ask for instructions. you told me you would do it…again thanks again…I love your work…so beautiful. I just wish I were closer so I could take classes from you..
Thanks so much for the tutorial. Love your work, wish I could visit your studio but I don’t live close enough!
I just discovered this tutorial! It’s pretty cold here in South MS today (and in my pottery studio shed!), so I think I bring some clay in and make an attempt to make some stamps. I love your work. It’s so sad that you haven’t made a video. sigh…..(hint, hint)
I so second the “hint, hint” idea of a video. Your pieces are such an inspiration and I have had so much fun making my own stamps. Thank you for the tutorial!
Thanks a million for the tutorial. I found your work on Pinterest just this week and am intrigued. I make tiny stoneware vessels for essential oil necklaces, and hand paint all my designs. I have wanted to make some stamps for a long time, but never knew how. Now I will give it a try this weekend! Thanks again… totally LOVE your work and attention to detail
Muchas gracias por su generocidas.
Thanks for sharing…
Úžasný nápad, který nelze než hned zrealizovat.
Too expensive and limited to buy stamps, your site makes all the sense to make your own.
Thanks.
Thanks for this information. I’ve been trying be not much success. Will give it another shot.
Have tried your ideas – many thanks- have only done decoration with pressed-in pattern – like this.
Really an excellent tutorial! Easy to follow and very helpful. I appreciate your taking the time to offer your expertise to beginners.
Thanks for this wonderful tutorial. I plan on making some this week.
What is that pointed stylus that you are using to make the design with. It looks like the perfect tool for this application
SUZN – In the photos it shows two different “points” in use. One is just a pointed wooden stick that I picked up somewhere along the way… and the other is just my metal needle tool. Nothing specific. Nothing overly glamorous. Just some basic tools. Sorry I couldn’t share any “magical” secrets here. Just basic stuff here. Sorry.
Thanks for sharing Gary!