So my handmade studio rolling cart made it safely down to the first floor kiln room.
The masking tape “safety belts” really did the trick again as we traveled down the rickety
freight elevator. Nothing jumped off the cart as we hit every bump along the way.
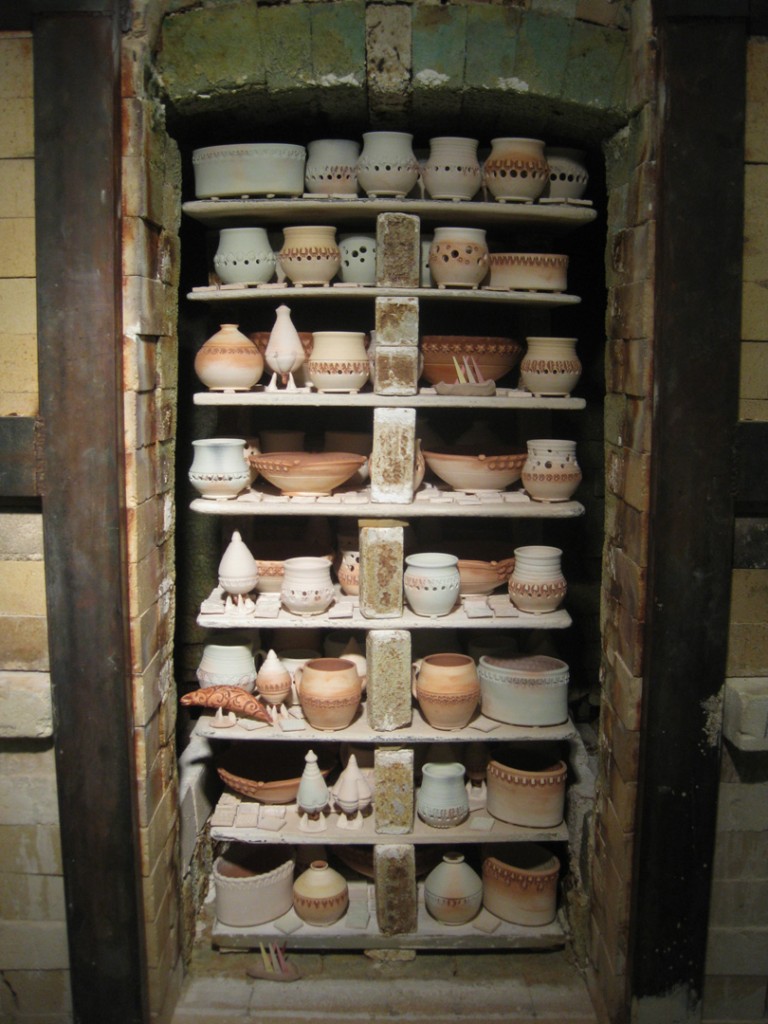
And then the loading began… an arduous task as I try to pack in everything I can!
The back stack of the kiln always seems to load a lot faster. Not only because it’s only
one shelf deep, but I think it’s also that there’s a lot of work to choose from. Later on,
your searching and hoping for that perfect sized piece to fit that precise spot.
I finally squeezed in pretty much everything I possibly could. It took hours!
It’s a delicate balancing act as you stack shelves and try to leave enough space so that the
soda vapors can travel through – versus packing it tight to get the most work you can into
the kiln to help justify the kiln & gas fees. So as you can see, I err on the side of packing it
tight. And I love have smaller pieces like ornaments & tiles that make the perfect kiln filler.
Very little of the white, kiln-washed shelf even show after I place hundreds of tiles in the kiln!
After housr of packing the kiln, you still need to bulid the dor brick-by-brick.
It’s very “old-school” but still a lot more fun than a new-fangled metal door!
So once I have it closed up, I turn it on low for maybe 15 minutes while I’m gathering my
things from my studio. As I’m ready to leave for the night, I turn off the kiln and close the
dmaper to try and hold in some heat. As I know that it’s just a few short hours until I’ll be
back to start the firing early tomorrow morning!


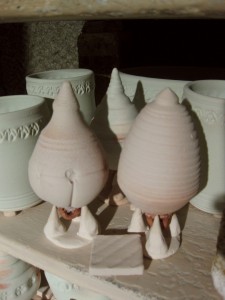
Your images of the interior of your kiln are absolutely stunning! How did you make your stilts? they look handmade. I love everything about your website!
HEY MARY JO – Thanks for checking in during the hectic holiday season. I do make the stilts myself. Just some simple slab bottoms and pointed “coils” to make the tripod. I just use any reclaim clay in my studio and bisque them. I then dip all of the pointy tips in kiln wash before the final firing so they don’t stick to the soda-fired ornaments. Pretty simple… although I do make a new batch of stilts for each firing and batch of ornaments. I’m not sure if the differing shrinkage rates might affect the “security” of the ornament; if I were to use an already-fired-and-shrunk tripod again with a full-size-waiting-to-shrink in the firing ornament?! Would the balance of the ornament be compromised during the firing & shrinking of the ornament?! I feel it’s better to be safe than sorry. And I make a new batch each time. Takes a little more time, but I can sleep better while my kiln is cooling!