Gary Jackson: Fire When Ready Pottery
A Chicago potter’s somewhat slanted view of clay & play
Categories: bike, friends, studio

So as I paint the color slip details onto the thrown & stamped pieces,
I need to make sure that every stamp gets highlighted and none
of them are missed along the way. Problem is, some of the soda slips
look surprisingly similar to the natural clay color. So as I go around
dabbing a little bit of slip into the stamps… how do you keep track
of what you’ve done if the slip matches the clay?

Well, after years of struggling to keep track… a simple suggestion
by fellow-potter-friend Amy Higgason may have resolved my problem.

Why not simply color the slip so it contrasts more?

Sounds simple, right? Why did I never think of that?
Amy suggested using simple food coloring to tint the slip
as it will easily burn out of the slip at a low temperature before
the “real firing” starts to affect the pots.

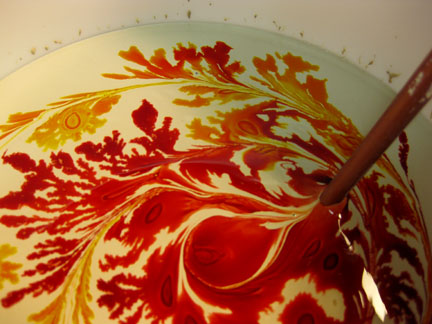
So I added some food coloring to the slips that “match” the clay,
especially to the “smooth orange” slip – so I added red & yellow
to make it “oranger”… and look what happened…

gary-jackson-food-colored-slip

Not only is the slip easier to see as I apply it to the pot…
it was also a really groovy process! As the drops of food color hit the slip,
it seeped & spread, made really fun patterns that evolved as I stirred it together!!!
Who knew?…

Categories: bike, photography, pottery, process, production, stamps, studio

So tonight I put some “finishing touches” on the mugs!

As part of the soda-firing process, a lot of the color accents achieved
come from colored slip applied to the surface. Slip is just watered down clay
with special chemical colorants added. These chemicals react to the
soda atmosphere and create dramatic colors and random flashing marks.
Slip generally needs to be painted onto the clay body while it is wet
or leather-hard. I typically paint the slip on after stamping, trimming
and applying handles. It’s usually the last step before I let the pieces air-dry.

Tonight I painted slip accents onto the mugs… both along the top rims
and some of the smaller details inside each of the stamps. Yes, it’s true…
each and every little stamp, one by one… each one with a touch of slip!

gary-jackson-slip-painting-mug

Now that they are all painted, I can let them air-dry… and then bisque fire
the mugs when I accumulate a kiln-full of greenware (dry clay). Once fired,
the mugs will be glazed and fired again. A few more steps in the process…

gary-jackson-mugs-drying

Categories: bike, nature, pottery, process, production, stamps, studio

One of my favorite things to make… mugs!

Many potters despise the process; mostly because of their fear of handles.
But I enjoy making the smaller, personal items that become part of people’s
everyday rituals. The morning coffee, the winter’s hot chocolate, the cup of tea
for those feeling under the weather… or in my case… ice cold grape pop!!!

So I’ve spent the past few days working in the studio on a new batch of mugs.
Nothing fancy – just trying to get back into the swing of things and restock
the “art fair inventory.” And I thought I would try to show you some of the steps
along the way.

First, I start by throwing the basic cylinder shapes. I prefer to work
in “batches” instead of singles. I like the production aspect of it all.
Creating a quantity of something… then moving on to the next.
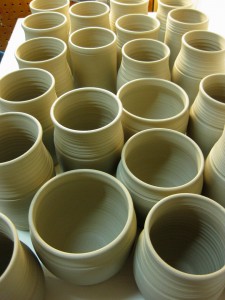
gary-jackson-thrown-cylinders

When they are a fairly damp “leather-hard” I begin the stamping decoration.
I make my own stamps out of a piece of clay. I roll it into a coil, carve a pattern
into both ends and bisque the stamp. One stamp pressed in repeatedly can create
a wonderful pattern around the cups. The trick is to get the pattern to line up
when you get back to where you started!!!
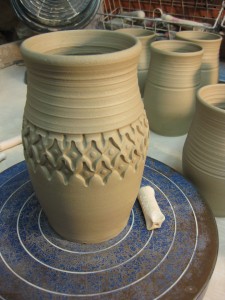
gary-jackson-stamped-mug

After they are stamped, the bottoms are trimmed. It’s a fairly simple process
where you turn the cylinder upside down on the wheel, center it, attach it,
and then trim away the excess clay while it is spinning. Think of it as very
similar to a wood lathe. Spinning fast, trimming fast. Trimming helps remove
the excess clay where it attached to the wheel, as well as allowing me to trim out
the bottom to create a finished looking foot ring.
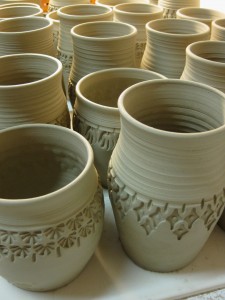
gary-jackson-stamped-mugs

After trimming, the handles are pulled and allowed to stiffen up.
Once they are no longer sticky, wet or mushy, I can apply them
to the side of the cylinders to create a “not-quite-so-instant” mug!
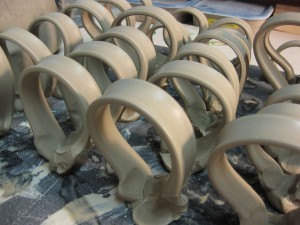
gary-jackson-pulled-handles

To attach the handles, I cut out the section of the strap that I need…
then scratch & slip both the ends of the strap and the attachment points.
The scratching works like Velcro, the slip works like clay glue. Together,
it creates a strong bond when attaching clay to clay.

gary-jackson-attaching-handles

After attaching the handles, I take a few extra moments to smooth them out
and give them a finished look. I then set the mugs aside and cover them with
plastic to help them dry more slowly. I like to keep them covered for at least a day
to help the moisture level of the mug and handle equalize a bit before full drying.
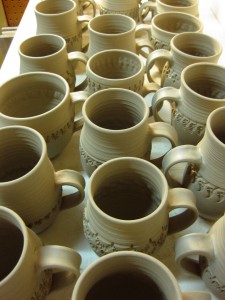
gary-jackson-rows-of-mugs

Once the mugs are done and all handles are attached, I will paint some colored slip
on the mugs that are going to be soda-fired. The colored slip will help add some color
to the final mugs – as well as reacting to the soda environment of the kiln to create
some wonderful flashing effects.

After slip painting, the mugs are allowed to dry slowly. They then need to be bisque fired
to approximately 1850-degrees. This makes them hard yet porous. Next they are glazed,
wadded and fired again. The final soda firing takes around 13 hours to reach the top
temperature of 2350-degrees. The kiln will cool for a full day, and be unloaded the next.

All of that for a simple mug.
Categories: computer

It’s been a long time coming… trying to convince myself I needed it…
but I finally took the “technology plunge” last night!

My original iPod was failing…
my cell phone is one of the oldest out there!
And I’ve been working extra hard for the past few weeks…
so why not treat myself to a new toy?!

I’ve had it less than 24 hours and I’m already addicted!
It now has thousands of songs, a few fun video games, my favorite
new movie “Across The Universe” and some great “aps.”
Plus Internet access anywhere, anytime with the touch of a finger!

iphone

I’ve downloaded a few fun “aps”… or “applications” for the unaware.
Including a few favorites – “Tipulator” as seen on the latest Apple commercials
where you can easily determine restaurant tips & instantly split the bill
by the number of people in your party. How many dinners have ended with
an awkward session of determining who owes what?! No more.

Plus “One Tap Movies” which will tell you with “one tap” where the closest
movie theater is to wherever you are at that time – plus the shows & showtimes!
Oh, but wait there’s more… it also shows you the movie’s preview trailer!!!

And that’s just the beginning of the iPhone fun… I’m hooked.

Categories: art fair

A quick thank you to my loyal art fair friends!

It’s still winter… it’s cold, it’s freezing, it’s windy…
But it is also time to start thinking about the summer art fair season!
The applications are arriving in the mail, .pdf forms are being downloaded
and I’m starting to plan my summer season.

In today’s mail, I received the application for “Art In The Barn.”
Along with that was a nice letter stating that I was one of last year’s
“Top 10 Selling Artists” at last summer’s fair. Yeah!!!

So it’s a quick thanks to all of you… for making last season a success
and for once again “winning me” a double-booth for this year’s
“Art In The Barn” in Barrington. I’ll see you there in the Lower Barn…

Art In The Barn – September 26th & 27th, 2009
Mark your calendars… more details to come!