Gary Jackson: Fire When Ready Pottery
A Chicago potter’s somewhat slanted view of clay & play
Categories: artists, classes, lillstreet, platters, textures, wheelthrowing

For class tonight I did a couple demos of throwing plates & platters. For this dinner plate I channeled my inner Steven Showalter… trying out some of his amazing textural slip work! Thanks Steven for being such a great teacher & sharing so much online. Love your work, your techniques & your willingness to share! I just payed it forward!!

Be sure to follow Steven on Instagram – @stevenshowalterpottery

Categories: classes, tiles

This week in my Lillstreet Throwdown class, they all returned with their “blindfold-thrown bowls” as they had to refine & trim them a bit. I think most of them thought we would be working on decorating them in class as “part two” of the assignment. Instead, I had them spray their bowls with water and wrap them up with plastic. We “might” decorate them… but not right away!

Instead we switched to tile-making!!!
They were tasked with making nine 4″x 4″ tiles in twenty minutes. The goal was even thickness, clean edges & good corners. So they started by wedging their clay, throwing slabs and then cutting them into flat tiles. It was fun to see them approach the task… most with rulers… none of them considering the slab roller… and Melanie making a template to use to cut them all nice & square!

After we critiqued & judged the tiles, they began to decorate them with colored slips. They had 45 minutes to finish all nine tiles… which sounds like plenty of time, until you start figuring out how many minutes per tile that works out to be! The challenge for this project was that their group of tiles should coordinate with a common color palette. Their tiles should NOT match as they had to utilize a different slip application technique on each tile. We were looking for creativity, technique, style, cleanliness and overall impression. Basically I was looking for people to embrace the spirit of the challenge… and have a good time exploring different slip possibilities!

Just a couple tile close-ups… loving the textures, patterns and techniques!

At the end of their time, we went around and looked at all of the sets of nine. Some people kept it simple with one color, some went for multiple colors. Some when over-the-top while others kept it minimal. Some kept exploring a common pattern in different ways, while others went for deconstructed versions of the same!

Alwasy fun to see how they all approach the project… and then what they come up with. And with a bit of a time-restraint, they also had to work a bit faster and not over-think things too much. Maybe have a little more fun… and trip upon some new, fun decorative techniques!

Save

Save

Categories: bowls, classes

Okay, so I’ve been trying my best to follow the new “standardized & mandated” syllabus for all Beginning & Advanced Beginning Classes at Lillstreet. So we did the demo for throwing a taller cylinder as listed.

And then we were also supposed to introduce colored slip as a decorative technique.
Maybe the assumption was that we would slip paint the demo cylinder???…
but I think it makes a lot more sense to demo some fun, quick tricks inside bowls.
But with bowls now being the Week One demo… I guess my big “Bowls On Purpose” and multiple rims & decorative techniques demo doesn’t quite fit the new syllabus???!

So I scaled it back a bit… only eight bowls with some slip techniques as “mandated”…
and a couple rim techniques as requested by my students! Which is a shame, because I’ve always thought that demo was one of my best ever… and my students were always WOW’ed by it!!! Hope they liked the shorter, smaller, scaled back version too?!

Bowl A – A simple flared flange rim.. with a thin layer of white slip.

And then there were a couple requests from students who have seen “the full” bowl demo before… and they asked if I could do the split rim bowls again.

And who am I to say “NO”?… even if it’s NOT on the “standardized syllabus?

Bowl B – Ashley’s requested split rim bowl with some quick pinches back together!

Bowl C – Another split rim fluted in and flared out…
kind of a lotus “squared off” bowl as requested by Michelle.

So then I got back on track… and back to the slip demo as “prescribed” by the syllabus..

Bowl D – I was going to paint on a full layer of white slip on the interior… but once I put that one first paintbrush swoosh…. we all kinda liked it and decided we should leave it there! So NOT my normal style, but they all voted to keep it this way! Especially because of that one “perfect” round drop!

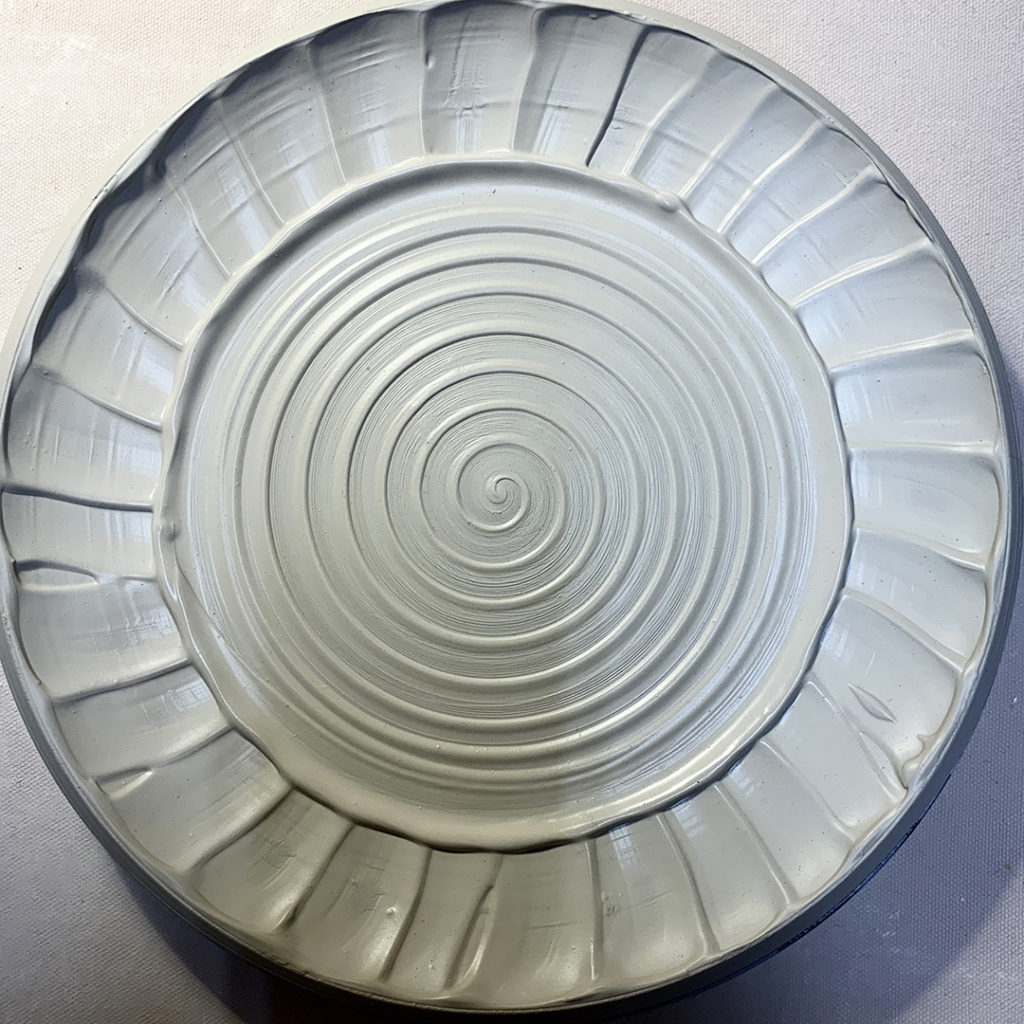
Bowl E – This time I did fill the interior with thick white slip,a nd then dragged the rounded end of my wooden knife through the slip as the wheel was spinning… ‘cuz everyone loves a good spiral.

Bowl F – Another bowl covered with a layer of thick white slip…
and then squiggled & wiggled through with my fingertip!

Bowl G – After a layer of thick white slip again, I used a rounded rubber rib for some rhythmic chattering trough as the bowl was spinning.

Bowl H – Another student request… “Can you mix or blend two colors?”… so we did!
A nice ombre blend of white to black… and then a squiggle spiral through it.

After class I brought them all up to my studio and put them under plastic. I want to keep them soft… because there may just be a little stamping & detailing to be done to them still before trimming. Maybe?… Hypothetically?…


Categories: process, production, stamped, vases

Another productive night in the studio… finishing up a batch of stamped vases by adding some colored flashing slip accents. When these are fired in the soda-kiln, the slip accents will change colors and react in cool ways to the soda atmosphere in the kiln. Fingers crossed.

Categories: mugs, process, production, stamped

Adding colored flashing slip accents to my latest batch of mugs
to celebrate another MUGSHOT MONDAY!

Categories: mugs, process, production, stamped

Mugs assembled… but needing some colored flashing slip accents. So each stamp is getting a little touch of colored slip that should change color and become more vibrant during my next soda-firing… in about two weeks!

Details. Details. MORE IS MORE!!!

Categories: clay, process, summer camp, terra cotta

Apparently no one can resist a bucket full of smooth & creamy terra cotta slip?!

As part of camp, I teach the kids how to make slip.
Actually, it’s kind of a “punishment” for letting their clay dry out too much to use.
We try to keep everything under plastic while they’re working to avoid drying out.
But sometimes they just “forget.”

So to encourage them to remember, I make them flatten the clay out so we can let it dry completely. The next day the use a rolling pin to pulverize it as best they can so we can re-hydrate it back into a nice smooth slip. Apparently, the “punishment” is a bit too FUN for the campers!!!

Save

Save

Categories: process, tools

So while those freshly-thrown bowls are stiffening up a bit, I thought I’d do a little carving on one of the bowls from my class bowl demo. So with some banded areas of green slip on B-Clay that has dried to leatherhard, I set out with my Zebra Tool from Diamond Core Tools.

This one is my favorite… it’s the #P1 V-Tip Pencil Carver.
Nice sharp blades give clean lines and a beautiful v-shaped incision cut.

Okay, so I’m kinda regretting carving in the center. I think I liked it a lot better before I messed it up?!

Categories: bowls, clay, textures

Finger painting with thick slip on the inside of a bowl!!!

Save

Save

Save

Categories: bowls, stamped

Early morning detailing with a dab of colored flashing slip on every stamp.