Gary Jackson: Fire When Ready Pottery
A Chicago potter’s somewhat slanted view of clay & play
Categories: artists, nature, photography

As seen on Colossal.com
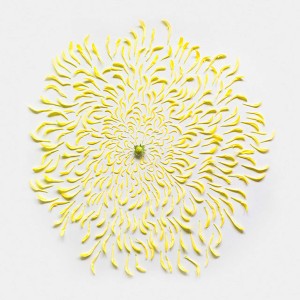
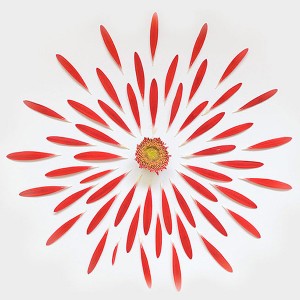
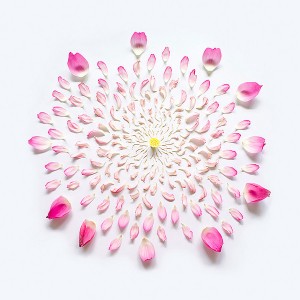
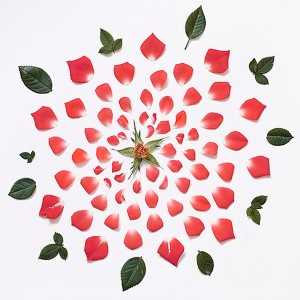
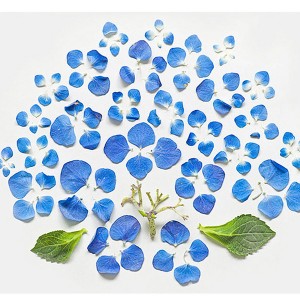
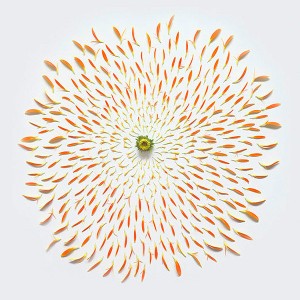
Exploded Flowers
is a series of photos by artist Fong Qi Wei that shows a variety of flowers dissected into individual components. Reminiscent of exploding fireworks, it’s fascinating to see the radial footprints each flower makes relative to the size of its actual bloom. The series placed second in the 2012 International Photography Awards. You can see more from the series on Wei’s website.

Categories: artists, creativity, friends

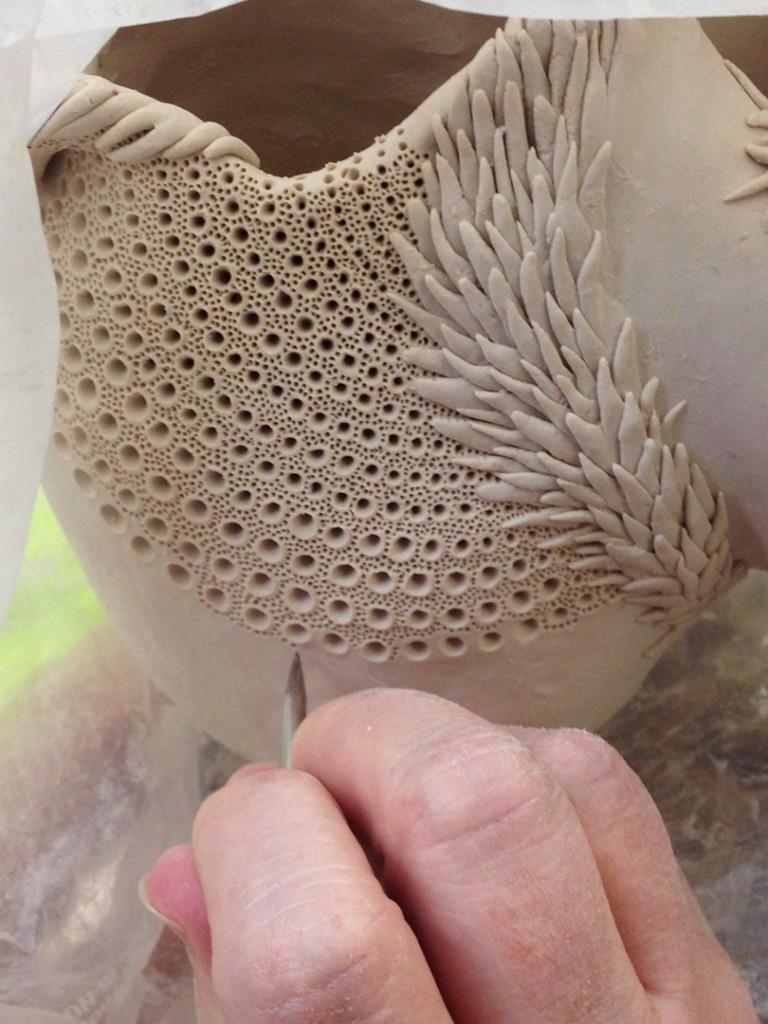
Last night I hung out with some friends at Lillstreet Art Center before making it upstairs to my studio. Such a fun distraction to have the classrooms downstairs with a lot of great fun & art going on down there. Last night my friend Terry Hogan was once again working on her incredibly intricate pierced porcelain creations. Up until recently, they’ve been on the smaller size. But lately she’s been expanding (literally) and going for some larger, sculptural pieces. Still with that crazy perfection & attention-to-detail.

And how does she do it one might ask? Well, with a crazy amount of creativity & patience!!! But also a pretty cool pile of tools for poking, piercing, pricking and pointilism-ing!

Categories: artists, glaze

So I just donated to Fine Mess Pottery to help in her quest to reformulate her glazes
for cone 6 soda firing. A great project with hopes of making a safer, greener & cheaper firing alternative. I love that she’s doing the work, and more than willing to share her results on her blog. So we all benefit… especially when her glaze tests work out. And as an added bonus, for my $30 donation, I’m going to receive a bound notebook of all her glaze & slip recipes!!! If you’re looking to donate a different amount, there are several other “thank you gift” levels… from thank you notes, to teabowls, to mugs, to casseroles… or even a cake stand with a cheesecake!!!

Thanks to Emily Murphy Bicking for sharing this glaze-fundraising project!
If you’d like to support her Lori Watts and her glaze reformulation project, click here.
If you want to learn more about Lori and Fine Mess Pottery, click here.

Categories: artists, creativity, inspiration

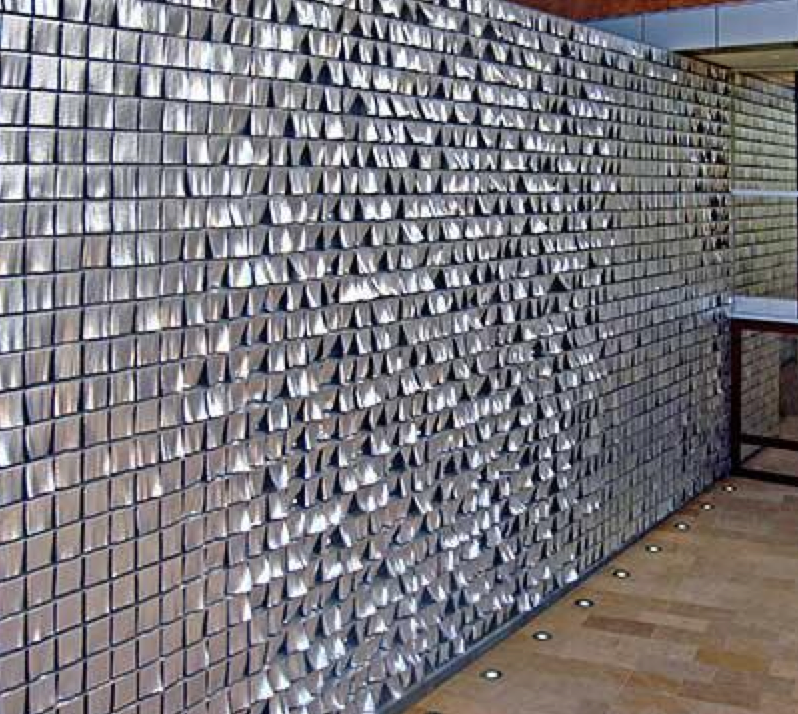
I don’t know much about this… except that I love it. And I want one.
Okay, not just one… but a whole wall. I saw it on Facebook and knew that I had to share.

According to artist Ned Kahn’s website…
A 25-foot tall by 110-foot long, wind-activated artwork that consists of 3960, 9”x 9” squares of aluminum chain maille. These hanging panels of metallic fabric are extremely lightweight and responsive to subtle changes in the wind. The kinetic facade extends inside the building and covers a floor to ceiling wall inside the lobby where it is animated by the ventilation system of the building. The artwork installation was designed in collaboration with Davis Davis Architects in San Diego.

If you want to see the video, and trust me, you do… click on Ned Kahn “Chain Of Ether.”

Categories: artists, bowls, friends

When faced with a roof full of empty bowls at Lillstreet’s “Empty Bowls Project”…
how do you choose? It’s especially tough when there are already far too many bowls
in my life. Most of them my own. Do I really need another one?! And the answer is
“of course I do.” Especially when you see one that catches your eye… and it’s made
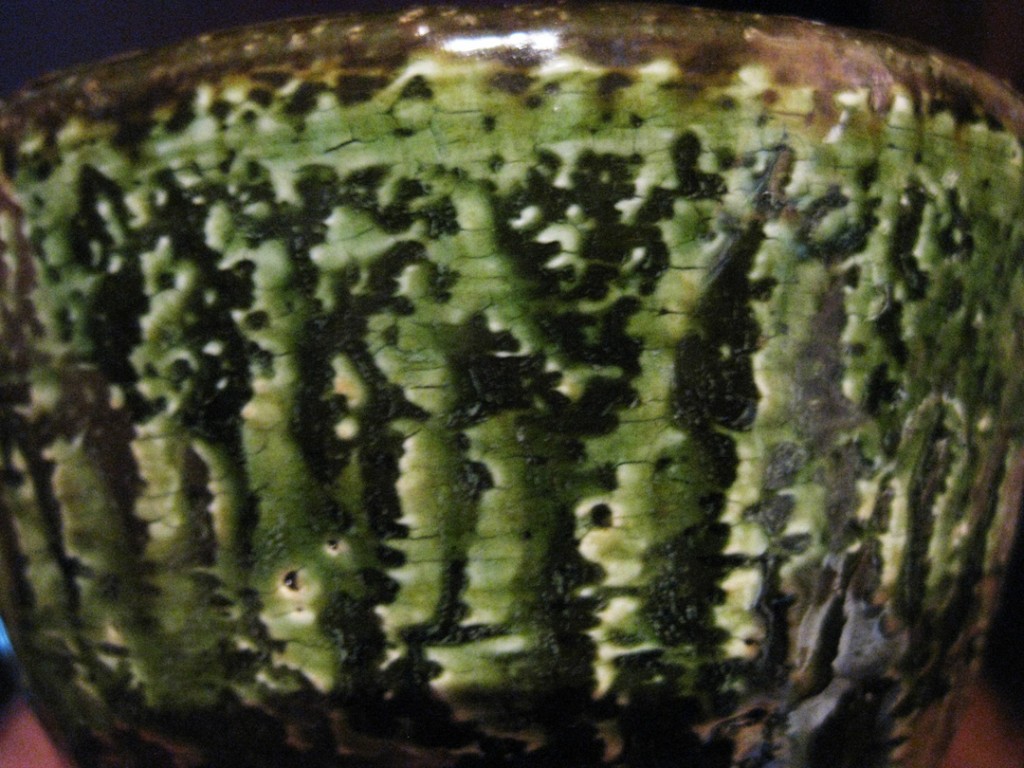
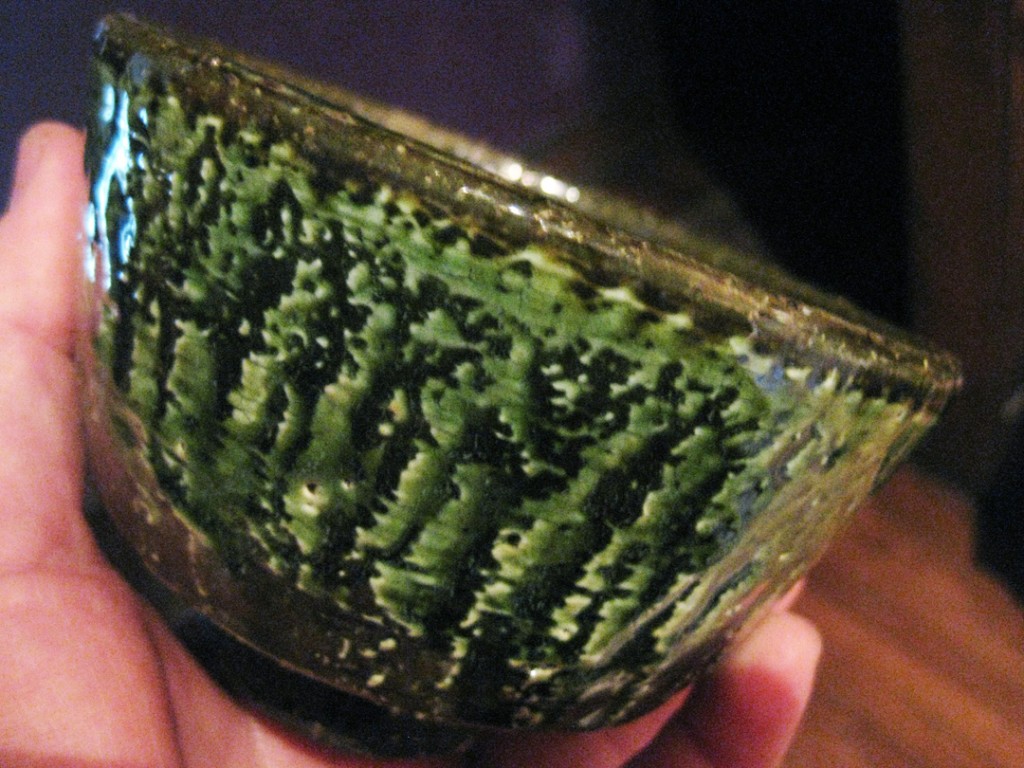
by a friend! So here’s my new empty bowl…

I was pretty sure that it was made by Jay Strommenremember?… the guy I posted
about a week ago? The one with the really cool wall pieces at the Bridgeport Art Center?!
If you missed that blog post, click here.

All of the clues pointed towards Jay and his partner Gina. The clay looks like Jay’s…
dark brown, gritty, chunky, with a ton of particles in it. The tea bowl shape looks very
Jay-like as well. The stamped “chop” signature looked familiar, but I wasn’t sure.

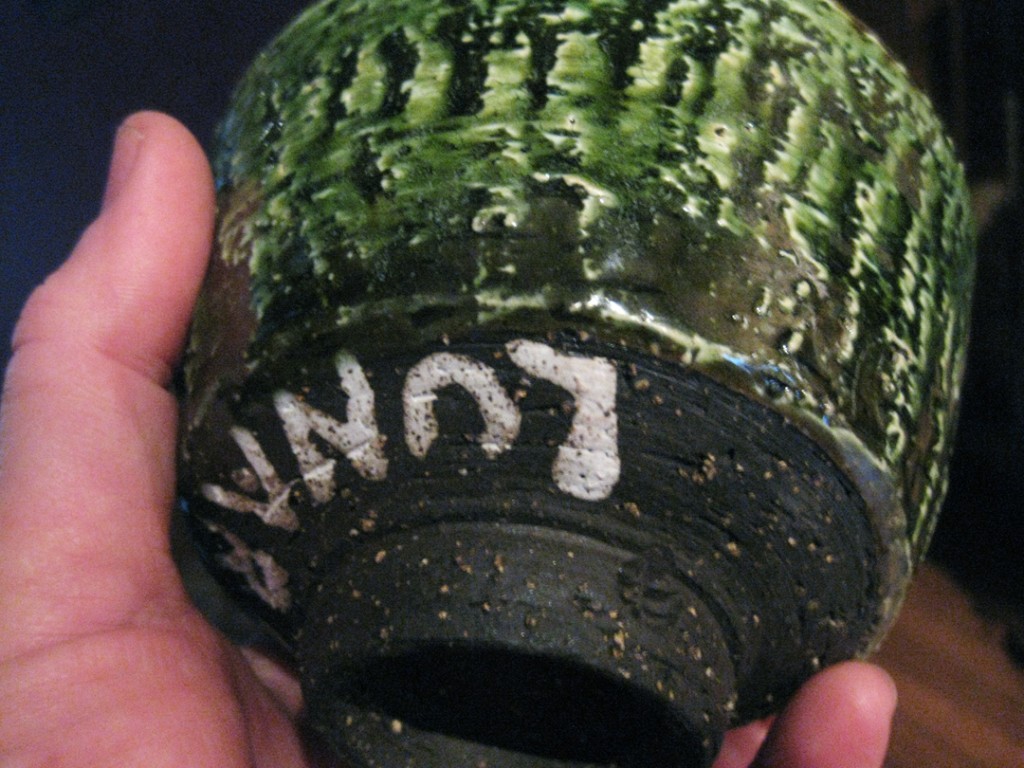
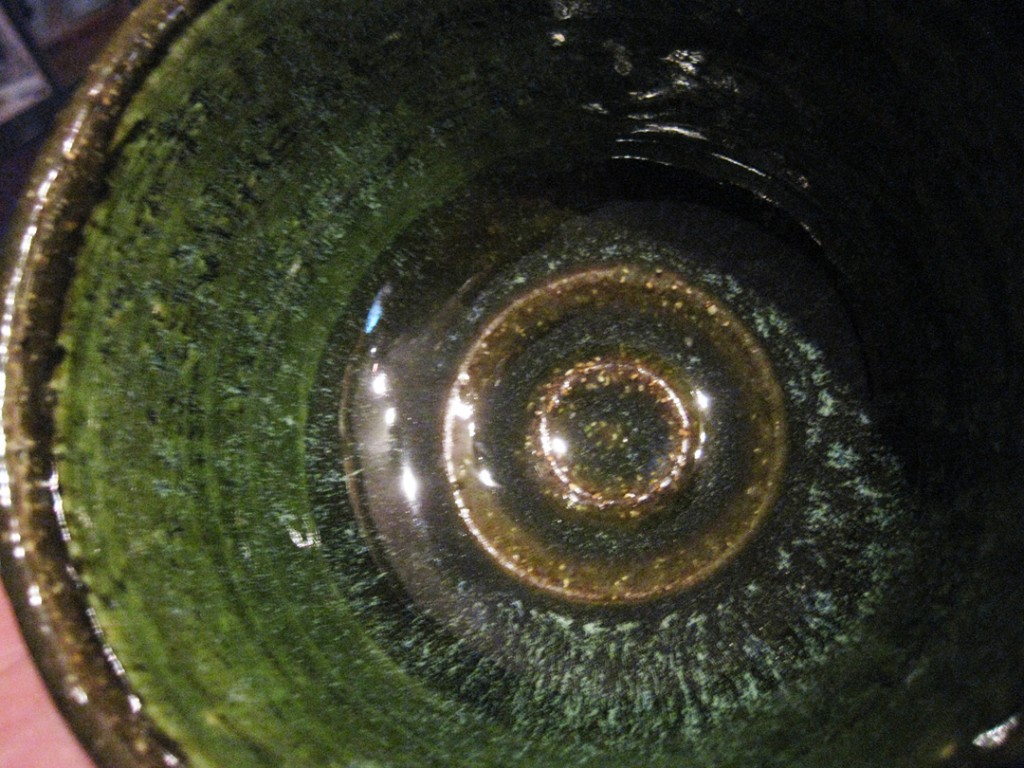
The clincher was the word LUNAR painted on the bottom in white slip. I remembered
that Gina’s company is “Lunar Media.” it all seemed too coincidental. But I went with
my gut picked this one… knowing that it just had to be from Jay & Gina.

And it was. I contacted Gina and she confirmed that it is indeed a Jay Strommen
original. Jay actually referred to it as one of their “lunar lovelies.” And I agree.
I liked it because it was beautiful… I love it even more now that I know
a friend made it!!!

Categories: artists, bowls, inspiration, pottery

Sometimes I wonder if anyone even reads this blog.
I my ramblings and photos are being seen by anyone, or if it’s just for me?
But then every once in awhile you get a note, a comment, an email that makes it all
worthwhile. That confirms that someone is out there reading… and caring. And that
maybe in some small way my blog is affecting & inspiring someone out there.

Well, today was one of those days. I received this message through my Facebook page.
It’s from a potter named Sam that checked in with me on my blog a few years ago.
Over the years, she’s posted a few comments now & again. It’s so great to see where her
work has gone. How much she’s progressed. How you can see her joy & confidence. And
that somewhere in there are a few “inspirations” from me. Or at least I’d like to think so…

So here’s her Facebook message regarding her bowl making endeavors.
Apparently she’s involved in an “Empty Bowls” project as well. And she’s been busy
making bowls for the annual event.

“You inspired me two years ago when I began this bowl making journey. Now I’m
up to three hundred bowls each year as my style has become so popular that more
and more people want one. They have actually had to turn people away this year
because they can only seat 300. I’m also the local poster child for our bowls event too.
Have a great year Gary!”

Love the stamping. The slip trailing. The split rim. The detailing. You know
how I love it when people go “a bit over the top”… too much is never too much!

Thank you Sam for sharing. Your bowls are beautiful…
and I LOVE that your doing what you love to do. It shows. And for sharing
your love with others. Especially those 300 people who will get one of your bowls!

Categories: artists, friends, My Talented Friends, process

So imagine my surprise…
I was working at the “glitter gig” today and we went to the Bridgeport Art Center
to meet a client and do a little pre-site visit for an upcoming event. We were looking
around this really wonderful lofty event space. We happened to pass the washrooms
and I saw these wonderful art installations on the entrance walls. It looked familiar.
And you know how I love grids… multiples of items… and geometric repetition!

Well, these 50 pieces are basically square plates, with square “legs” on both sides.
I believe they were stacked on each other during the firing. And curved so that the
beautiful glassy-glaze build-up can pool in the center of each plate. Stunning.

We continued walking around the event space, and then I ducked through a side door.
Suddenly I was in a small art gallery. And there were more really cool art pieces on the
walls. And then I realized… these were all made by a friend of mine Jay Strommen.

I had run into him last at SOFA Chicago back in November. We were talking and catching
up with stories about people we know from his time teaching at Lillstreet. We then got on
the topic of his current artworks. Let me just say, Jay is very much an “artist.” He lives
the part… and makes me feel so much like a “craftsman” not an artist. A lot of the “art-speak”
he gives goes right over my head. But it’s fun to hear him talking about what he’s doing…
so passionate, so eloquent, so engaging… and still quite funny!

So he then proceeds to tell us that his new work is basically “deconstructing” the entire
ceramic process. Without going into all of the details I don’t quite understand, he’s basically
putting a bunch of clay chemicals, glaze chemicals & other components on a “kiln shelf”
and then melting it all together in a high-fire wood kiln. Of course there’s some very erudite
thoughts behind it, some artistic jargon, some special blah-blah-blah… and I was scared.
Then he tells us that he’s showing at SOFA and that we should go see his work. I was kinda
concerned after all the hype that it was going to be more than a bit crazy. Imagine my
surprise when we got to the booth and his pieces were there hanging on the wall.
And they were incredibly cool!!!

Long story short…
Jay Strommen currently has an exhibit going in the Bridgeport Art Center Gallery.
And since I know that so many of you won’t wander through that same side door I did
today, I thought I would share some pictures of his show!

Now obviously these aren’t all “kiln shelves” that he’s firing onto. They’re actually slabs
of clay that he’s building. But I’m pretty sure that the basic “deconstructed” ceramics
process fired on a kiln shelf principle is still at work here!

And yes, that’s a cone melted onto the surface there… the white hook shaped thing!

If you’re in the Chicago area, be sure to stop by the Bridgeport Art Center to see Jay’s
show. You can also check out Jay’s beautiful website for some images, videos and a lot
of Jayzo’s art speak! Click here to go to Jay’s website… www.JayStrommen.com


Categories: artists, creativity, inspiration

If one or two of something is fun, a dozen is even more fun.
If a dozen is more fun, thousands of dozens is just downright CRAZY COOL!!!
And when that object turns out to be coffee stirrer sticks… even better!!!

Found this online and just had to share…

Most people don’t think twice about their coffee stirrers once they’ve fulfilled their mixing
duties, but artist Jonathan Brilliant has found another purpose for the common wooden
sticks. The Raleigh, North Carolina-based artist has constructed numerous spatial art
installations over the years that incorporate the coffee stir sticks, perhaps the most eye-
fetching of them being “The Sumter Piece.”

The site-specific structure, installed in 2007 in Sumter, South Carolina, included 60,000
wooden stirring sticks expertly woven together. Brilliant produced a meticulously crafted
sculptural piece that expanded across two floors. It reached over a second floor balcony
and suspended from the ceiling of the first floor, artistically wrapping around an
illuminated chandelier.

The abstract creation took 14 days to weave together and install on site. It’s hard to believe,
but there were no additional tools on hand. Brilliant says, “No adhesive was used and the
entire structure holds itself in place because of the tensile strength of 7” rounded end
wooden coffee stirrers. After nearly six months the piece eventually separated and the
materials were donated to a local school.”

C’mon now… No armature. No super-structure. NO GLUE!!! Really?!
And wouldn’t have loved to see it when it “eventually separated” and came crashing down?!
Now THAT’s the video I want to see!!!

And let me just say… Did anyone else see “America’s Got Talent” when “The Kinetic King”
made these incredible contraptions out of tongue depressors?! he interwove them kinda
like this… but when he knocked one stick, it started a huge chain reaction where every
stick flipped out and fell down like racing dominoes. Click here for the video.

Imagine what would happen if these two stick artists collaborated?!!!
Even crazier. Even cooler!!! But I digress…

Okay, one more thing… one more tangent…
Doesn’t this somehow have future Summer Camp project written all over it?! I’m just sayin’…

For more about the artist Jonathan Brilliant, his incredible installations and projects,
click here for his website. He’s crazy… crazy cool!!!

Categories: artists, holiday, mugs, process, production

When you’ve got twenty cylinders stamped, trimmed and at the perfect leather-hard state,
you’ve got to start attaching handles quick before the cylinders dry out. So I start by
wedging my clay, making sure it is the same clay as the cylinders themselves. Then I cut
the wedged clay up into smaller pieces and pound them against the table to create these
little “carrot” shapes.

Then I pick one up from the fat end at pull handles the traditional way. Basically by dragging
a wet hand down the “carrot” tube from top to bottom. The slippery friction makes the clay
stretch. By switching around your hand positions, you can create handles of different shapes
and widths. When I get mine to the right size & shape, I quickly give ’em a flip and loop ’em
over. They sit this way for a few minutes so that the clay can stiffen up a bit. If you try to attach
them when they are too wet, the handles don’t hold their shape… they get all mushy looking.

When they are ready, I cut off the portion for the handle that I need to attach to the mug
cylinder. Each one is then scored & slipped, and carefully attached to the cylinders.
Paying close attention to the placement & size of each handle and how they “fit” to the
cylinder itself. As I finish each handle, I put the mugs back on my plastic ware boards,
give them a quick spray of water and then wrap them up again overnight. I like to keep
them wrapped in the hopes that the moisture levels between the cylinder and the handle
might even out a bit so they can dry & shrink more evenly later.

Today, while I was attaching my handles, I was also watching this informative DVD of
Tara Wilson as she was demonstrating at the 2009 NCECA Conference. She makes these
wonderful forms, very clean, very smooth, very voluptuous. She does a lot of darting &
altering of her thrown forms, and then fires them in a wood fired kiln to create wonderful
flashing surfaces & finishes. Always fun to watch someone else show how they do
their work… as I continue to add my handles… again… and again… and again…

Categories: artists, process, stamps

I’ve seen this technique before done by a few artists I reallly like.
It’s a much better way to get clean linework & details in your stamps. Because you
actually draw the design you want to see first, and then carve it out so the stamp
is the same as your drawing. A much better way if you want illustrative, figurative,
lettering or intricate lines. I’ve only “played” with it before, this time, I’m going to
focus & make more… and we’ll see where this new direction may take me?!

First off, I started drawing some different patterns on grid paper. I love using grid paper
for all of my doodling. I find it so much easier for me to get good proportions and more
balanced designs. Trying to remember that they’re just doodles. Draw lots of them!!!

Once you find a few designs that you think would make good stamps, the design needs
to be transferred to a sheet of plaster. So I started by flipping over the paper and rubbing
my pencil all over the back side of the design. Basically leaving carbon all over the “back”
of the design. Then you flip over the paper, place it on the plaster slab and trace over the
design. If you press hard enough, the carbon transfers to the plaster. Then you can trace
over it easily to get an “exact” replica of your doodle.

Once your design has been transferred onto the plaster, you can start carving away the
plaster “under” your design. Basically tracing over your design with a sharp tool. Use
whatever tool seems to work the best for you. A needle tool was a little too thin & pointy
for my liking. This tool has a pointed Xacto blade on one end and this curved tip on the
other. It seemed to work the best for me. But of course, different tools with different
points & different widths will give you different results. I must admit, it’s not as easy
as Kristin makes it look in her video. The plaster is very scratchy, and somewhat tough
to keep a clean, straight line. But… the cleaner your lines, the cleaner your stamps!

You do need to be very careful to keep your work area clean of the plaster dust.
I covered my work area with a sheet of plastic to catch the dust. I can then empty it easily
into my garbage can. Plaster dust & chips can ruin your clay if it gets mixed in. So by all
means DO NOT let the dust carvings get mixed in with your clay, fall in your splash pan,
or get into your reclaim buckets. And as always, be sure you are not breathing in any of
the plaster dust as you are carving your designs.

Once you design has been carved out, take a piece of clay and carefully press it into the
carved relief pattern. Be sure to press hard enough to get clay into all parts of the pattern.
One good thing about this technique is you can press a stamp at any time in your carving.
Carve part, press a stamp. Carve some more, press another stamp. Keep testing it until
you love the results! And then press a couple stamps... and save the mold for later!!!

When you get to the the “final” stamp, press in your clay and keep a little extra clay
in the center to act as the knob. Press all around the design and what clay “pops up”
through your fingers becomes the knob.

After you press in the clay, give it a couple seconds and then remove the clay very carefully.
The resulting stamp will be on the bottom of the clay.

But when you’re going to be using them as stamps, remember that what you’re pressing
into your clay will leave a lasting impression. So it’s not just the raised design, but it’s also
the perimeter of the pressed clay. So to clean them up a bit, and get the perimeter to go
along with the design, I took my Xacto blade and trimmed away the excess edges.

And when you’ve made a couple, do it again and make some more!!!
You can use the same slab of plaster over & over again. Put your carvings all over the place.
Doodle. Draw. Carve. Test. Carve. Refine. Press. Trim. Finish. Repeat. Repeat again.

After making a couple of these “raised line” stamps, I was wondering if I could add a bit more
of my own technique? So I added a few impressions ala my own stamp making style into the design.
My thought is that it might add a nice contrast to the clean line work of the raised stamp pattern.
Nice lines AND a little geometric “pop-out” in between!

After I had made a few, it was time to let them sit out to dry. Once they’re dry they can go
into a bisque kiln. Remember, you want to keep your stamps porous so they release cleanly
from the leatherhard clay.

We’ll see how they work after they’re bisqued. I’m excited to be trying something new…
and yet a bit apprehensive to see how I can work them into my own style.