Gary Jackson: Fire When Ready Pottery
A Chicago potter’s somewhat slanted view of clay & play
Categories: lillstreet, summer camp

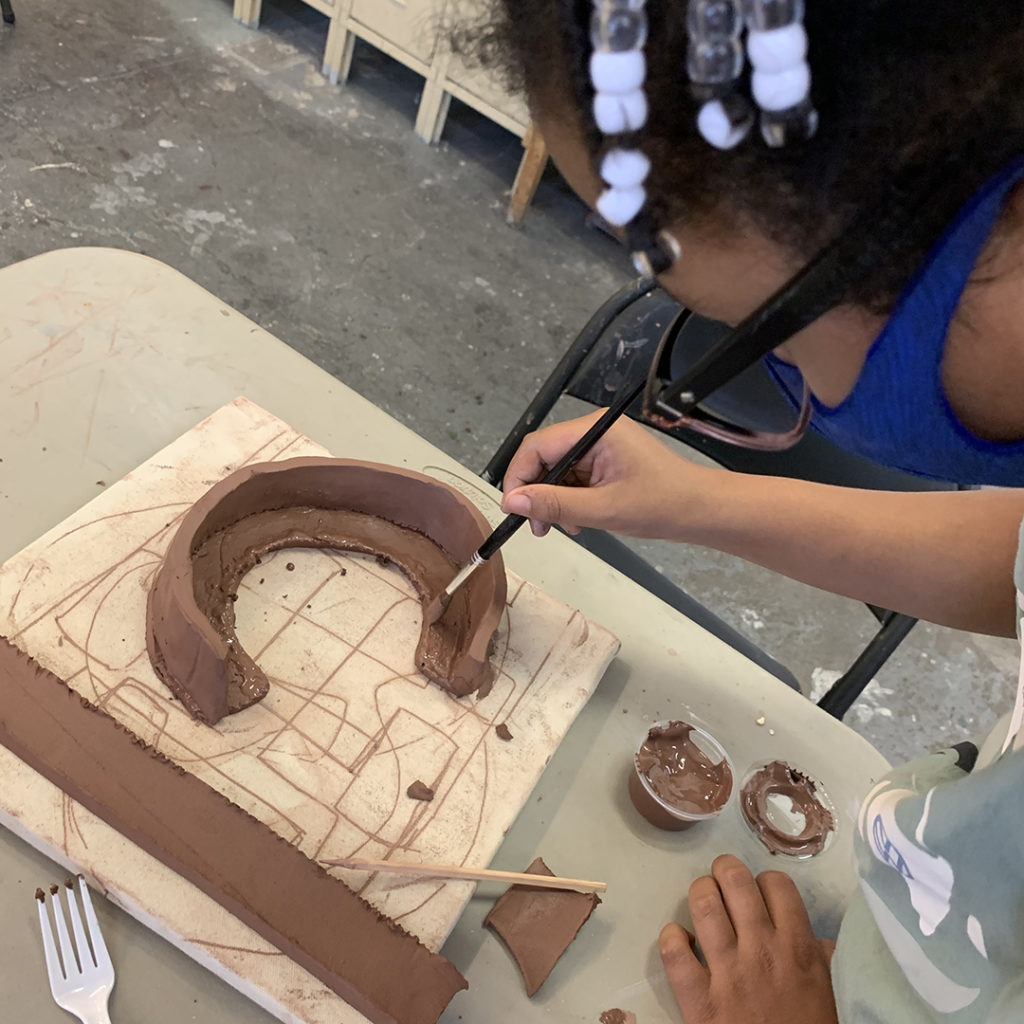
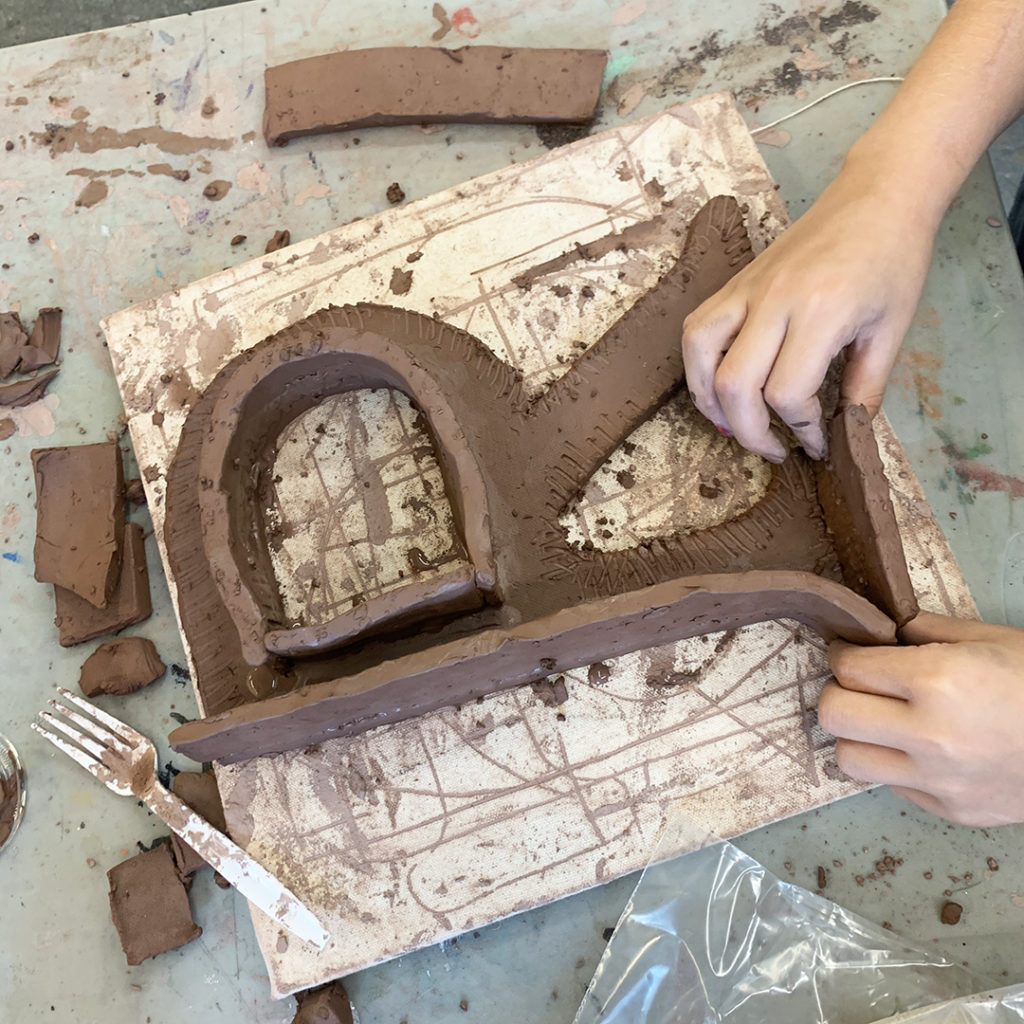
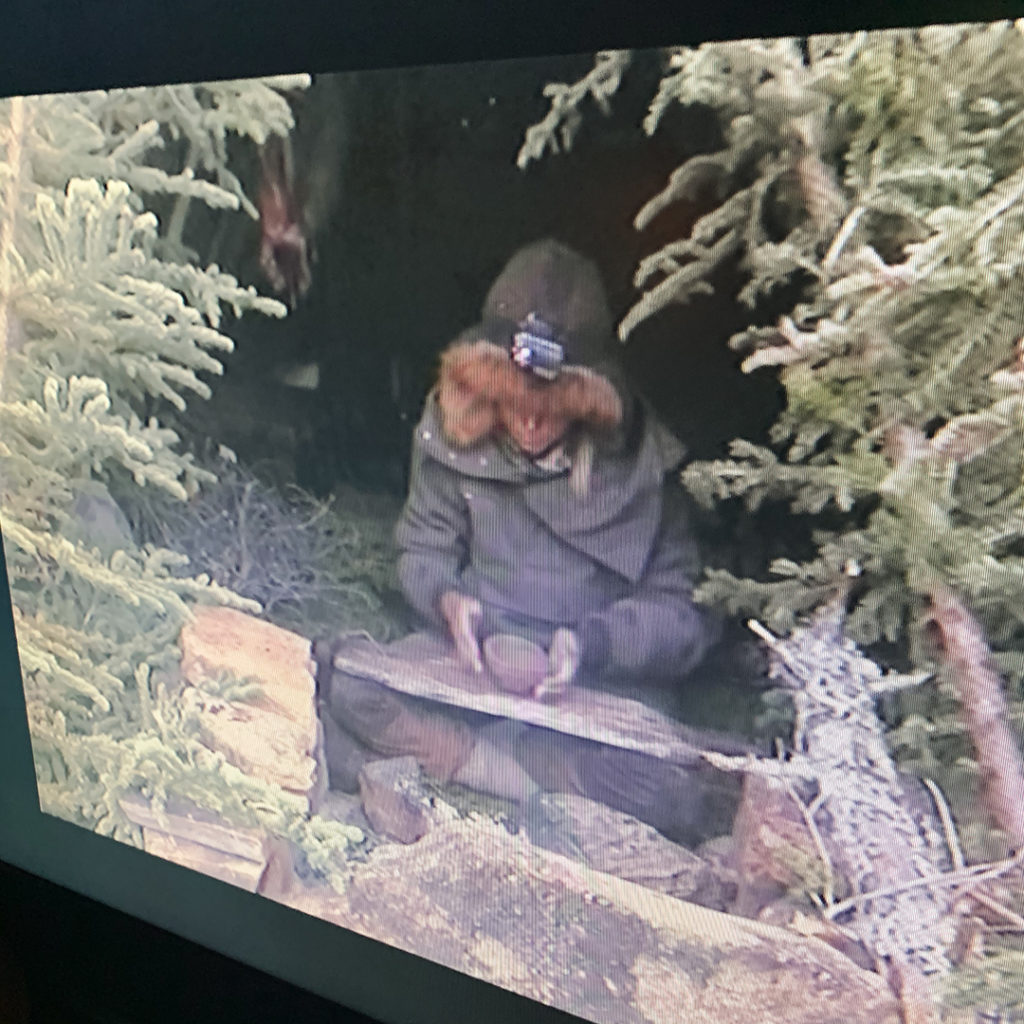
After finishing their terra cotta sculptures on Tuesday, we started our larger sculptures on Wednesday. We had a big brainstorming discussion about what they wanted to make. And then we discussed how we were going to make them and that they needed a good pose, posture & environment. We discussed the armature they were each going to need inside their sculptures to get them to stand up and hold their shapes!

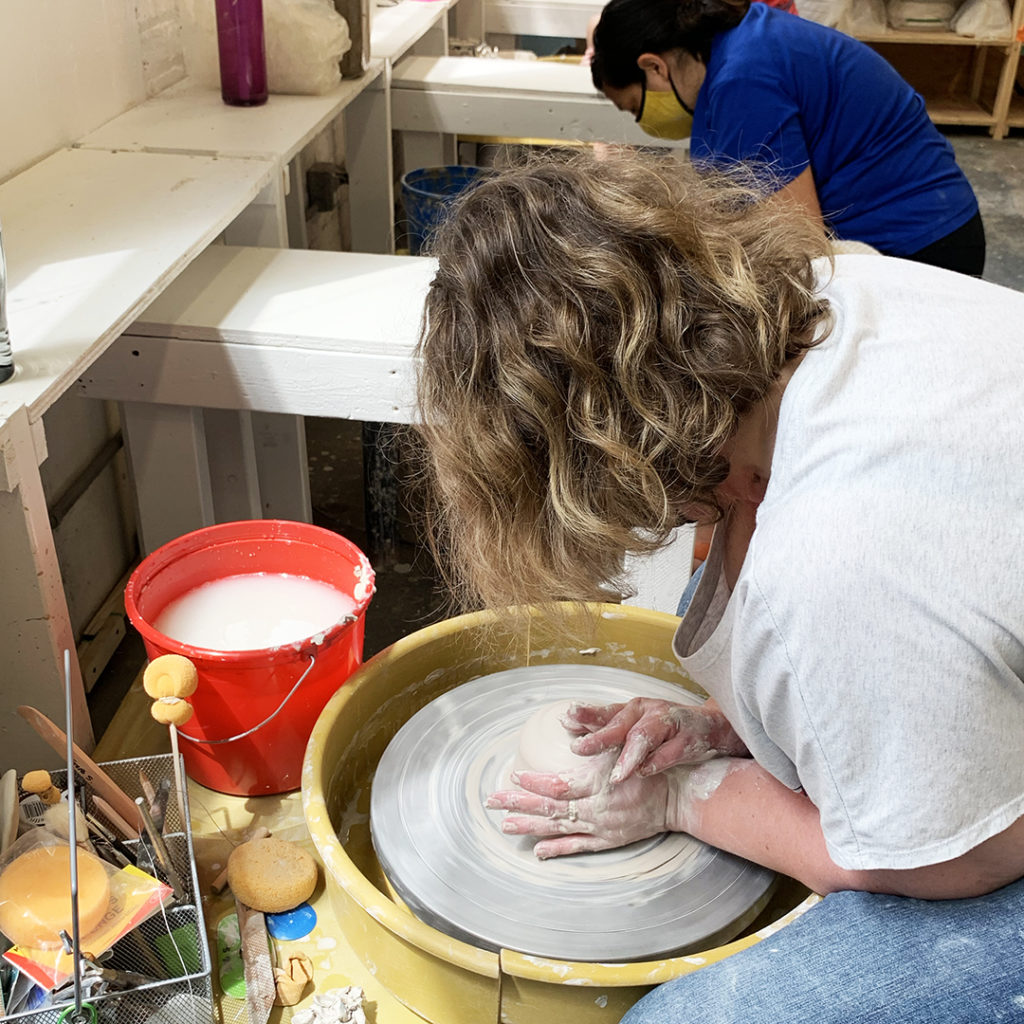
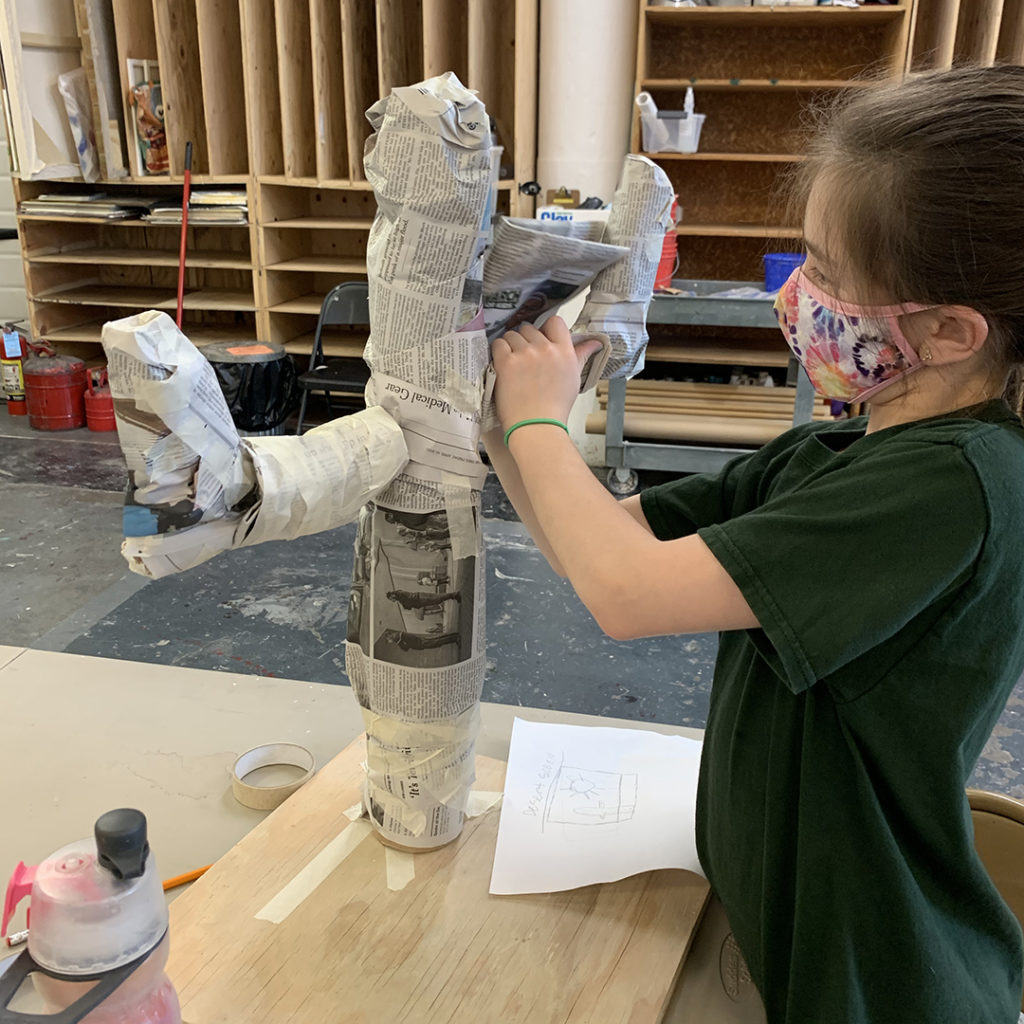
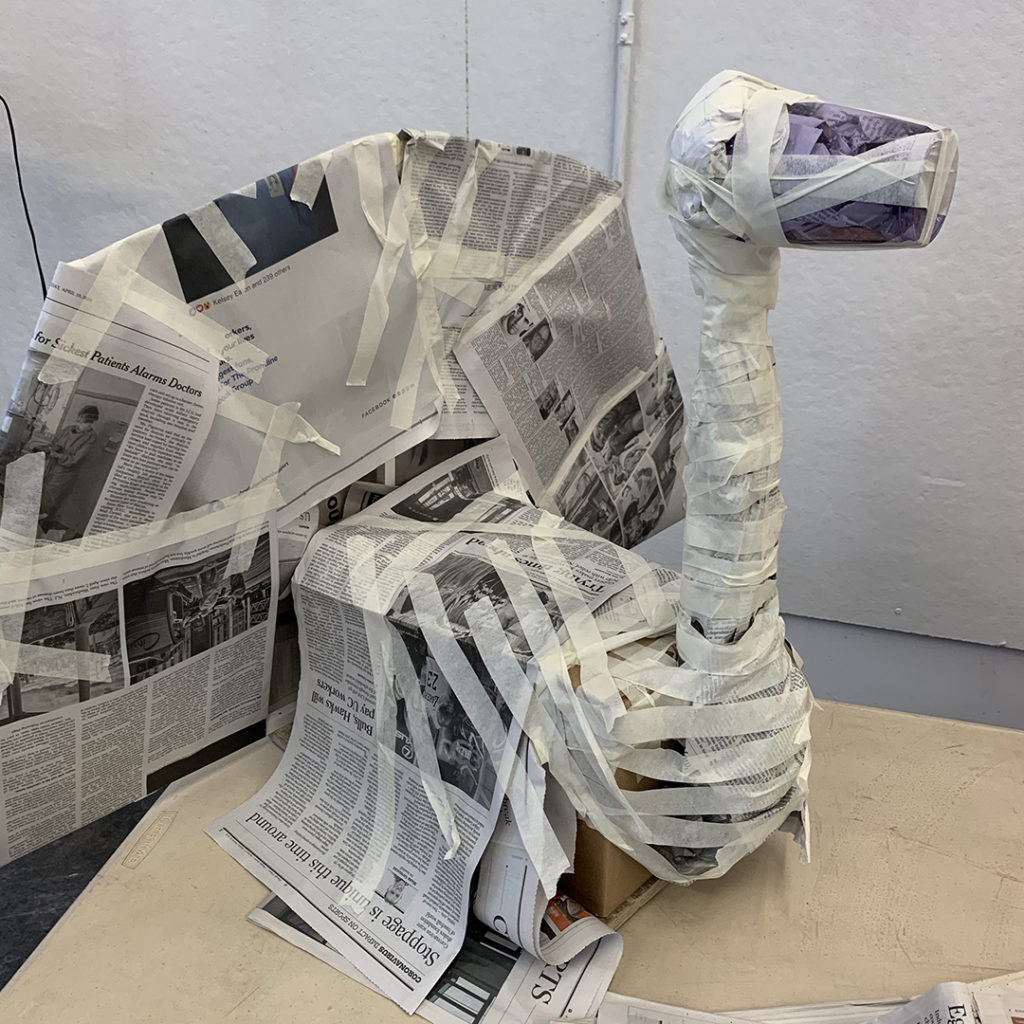
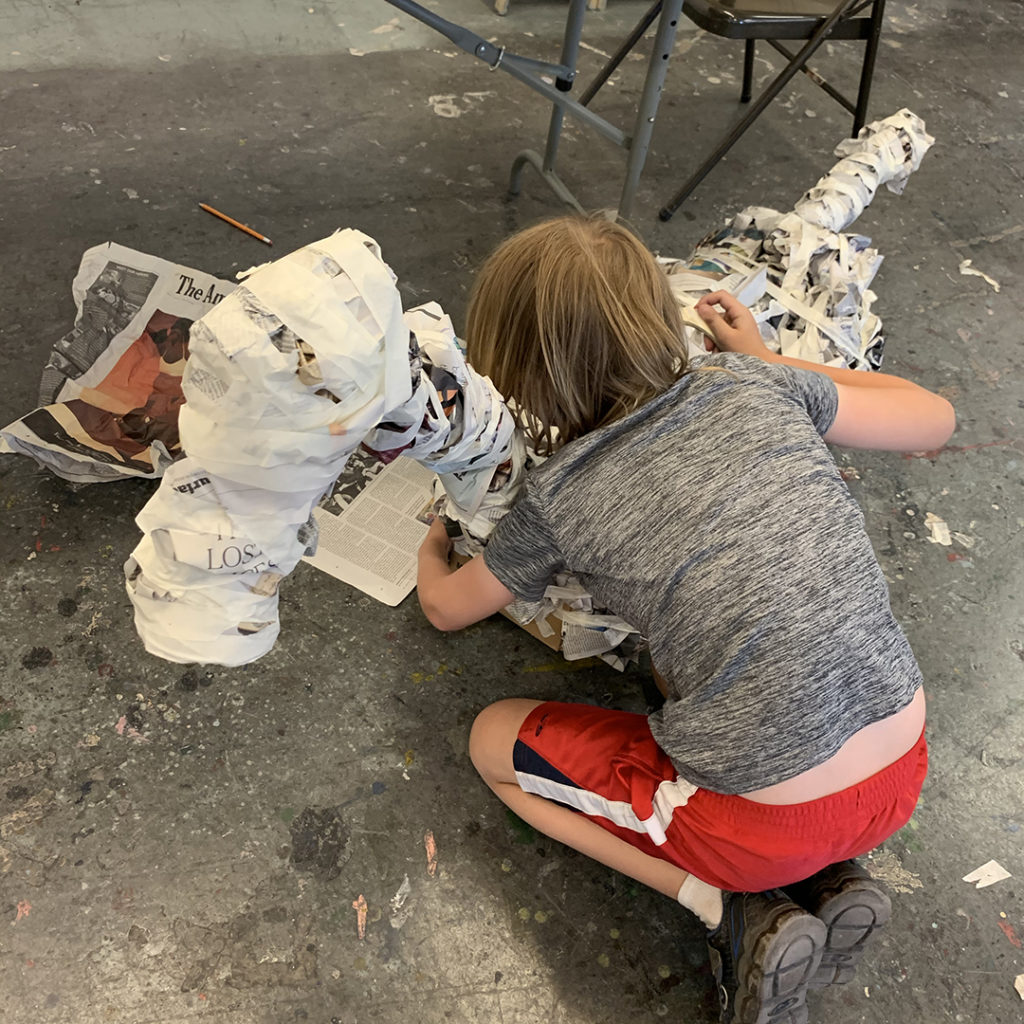
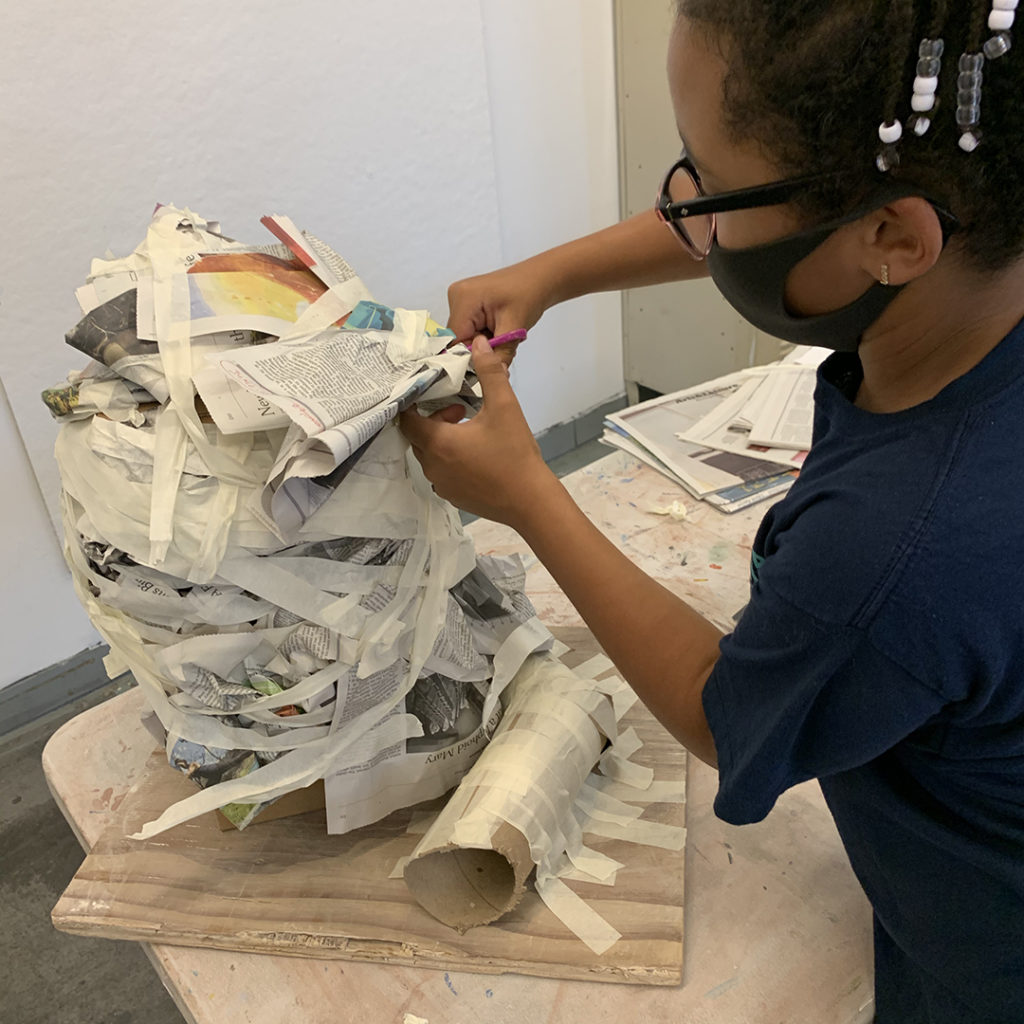
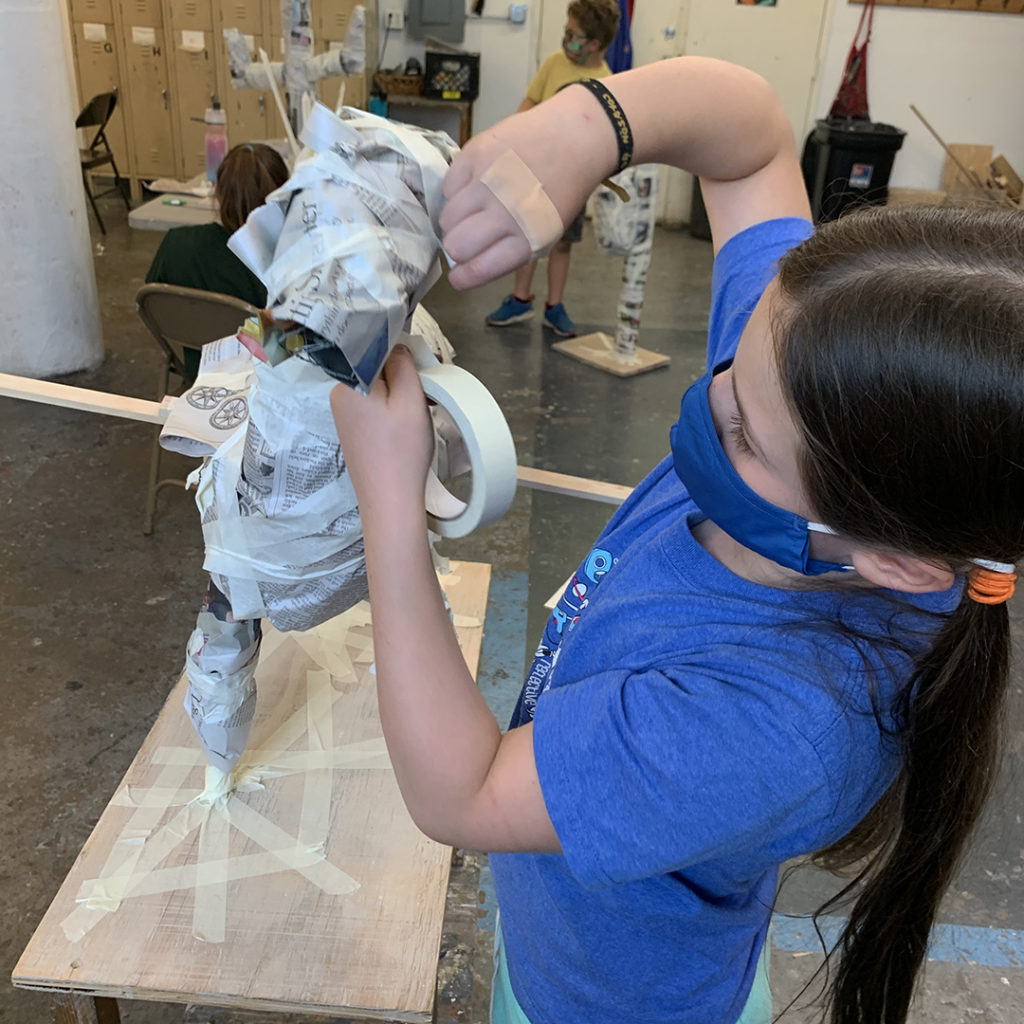
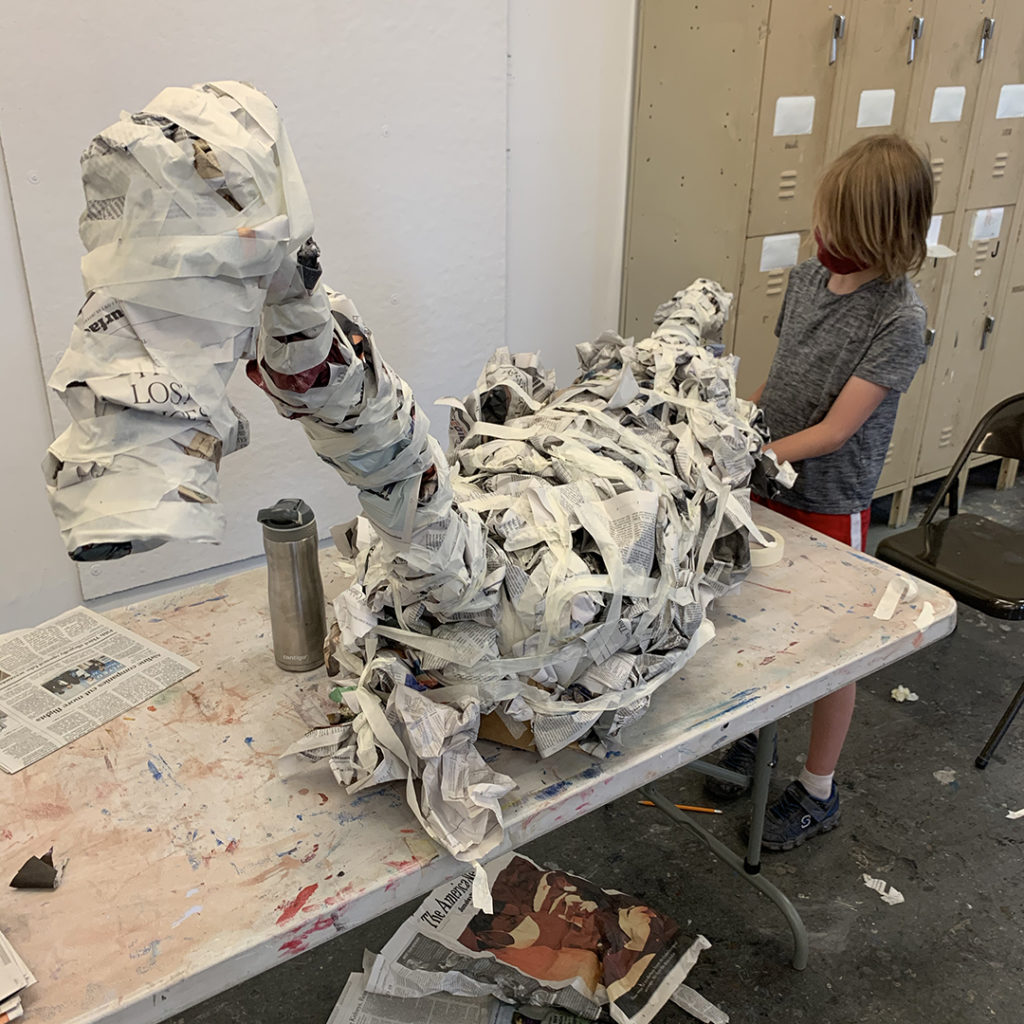
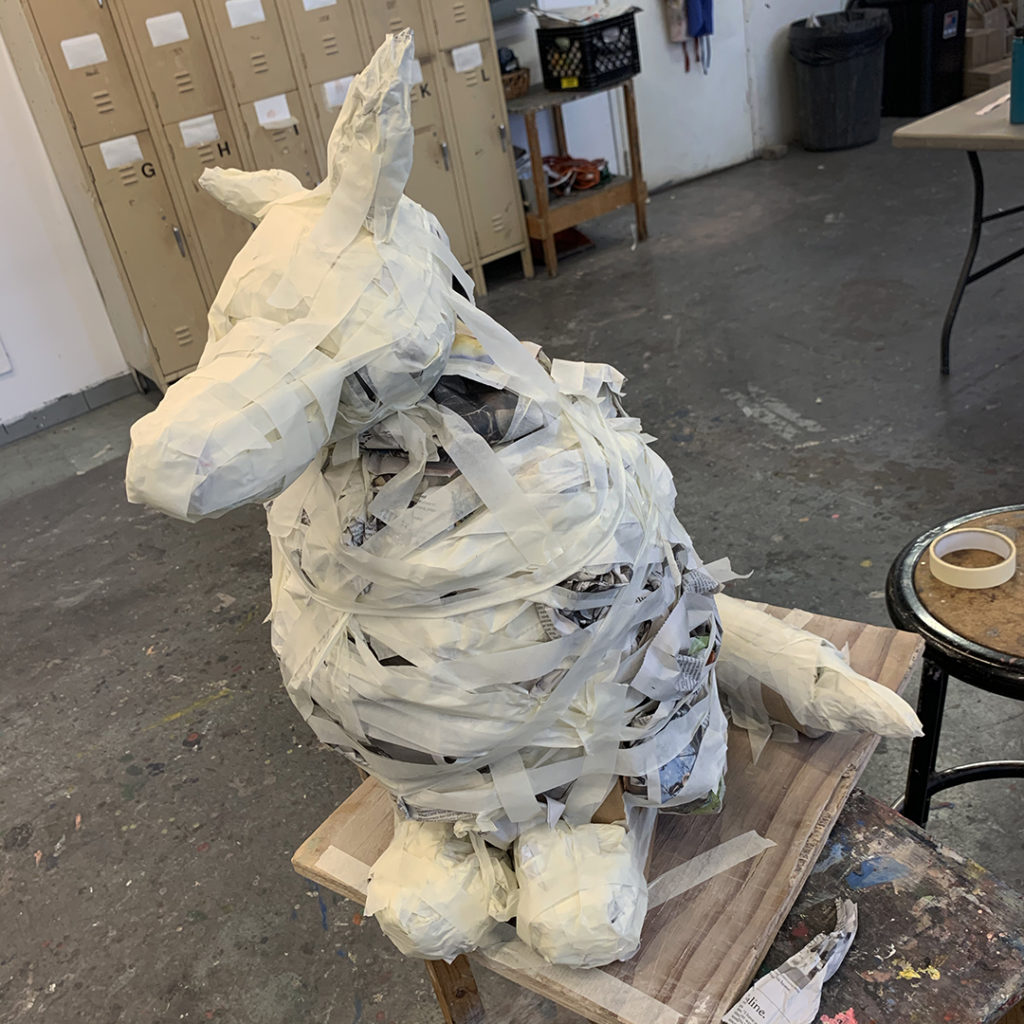
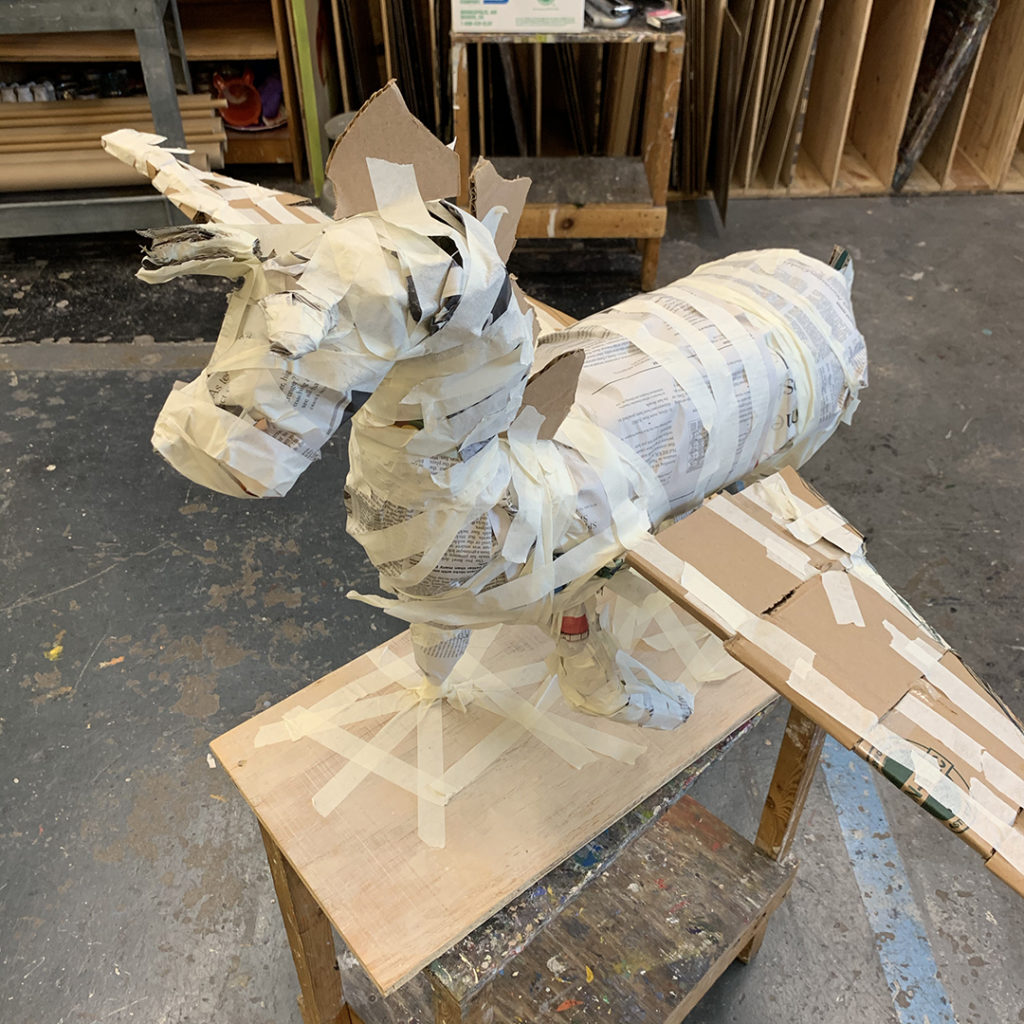
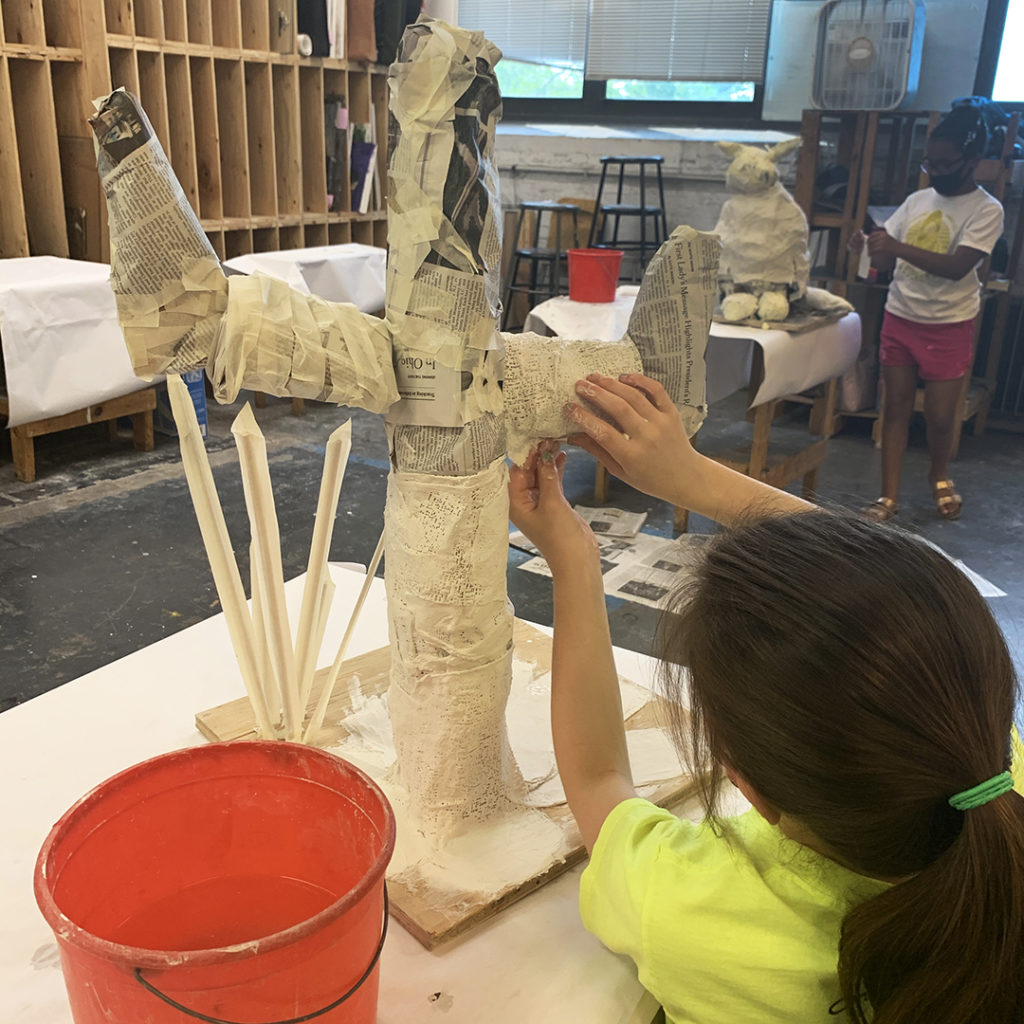
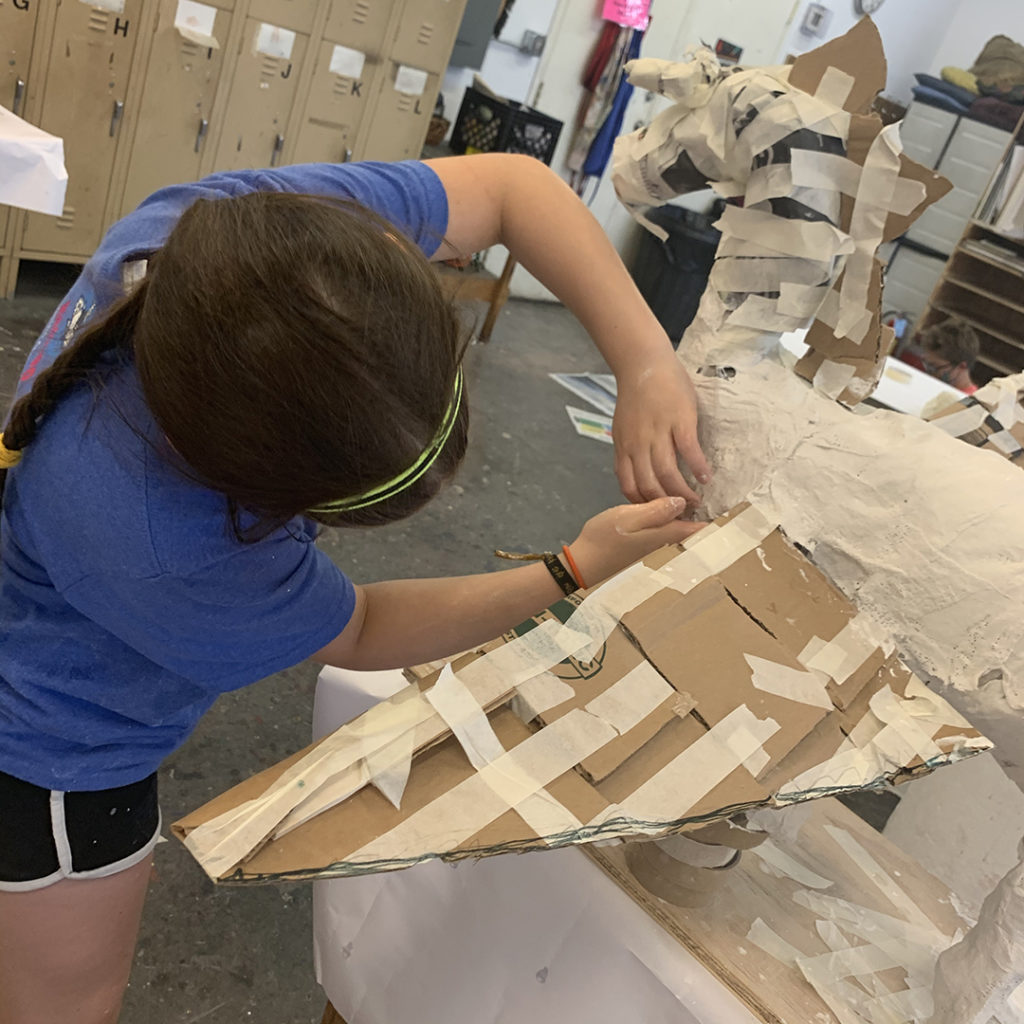
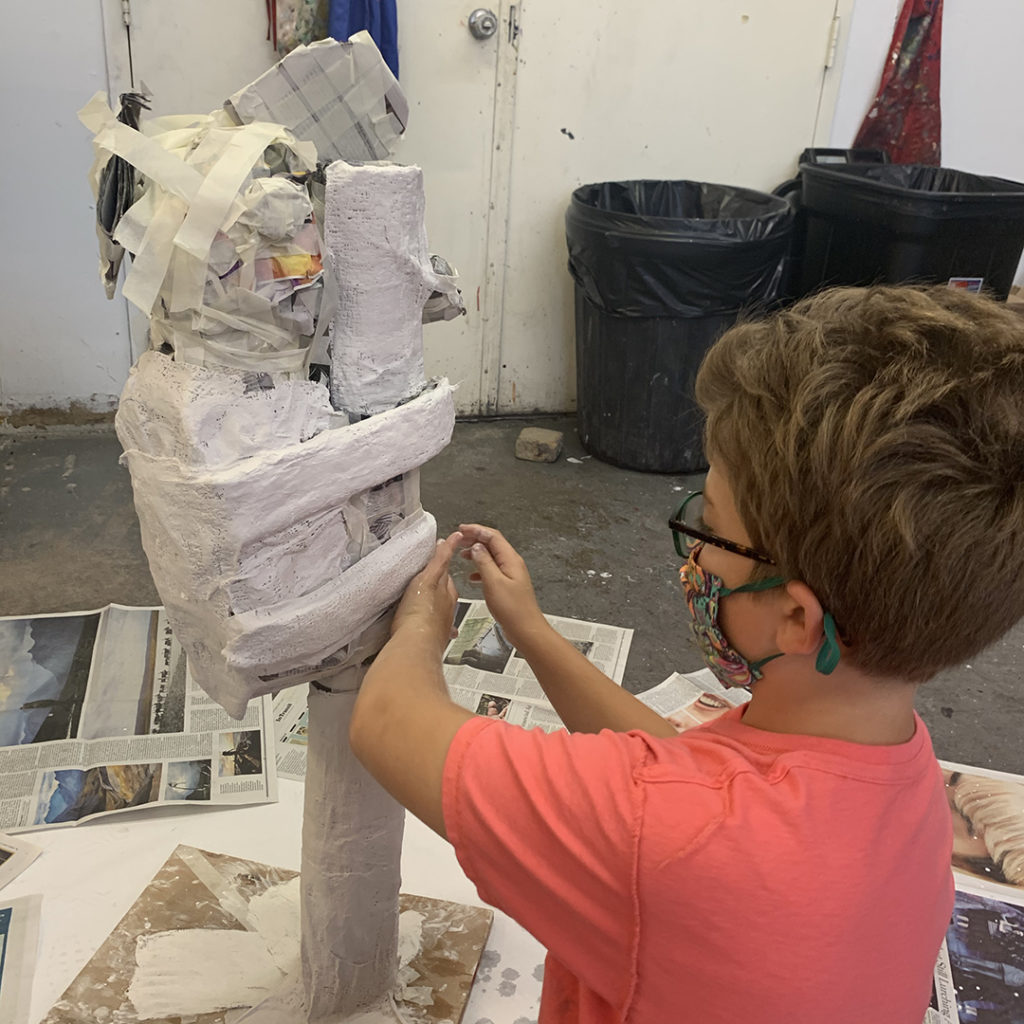
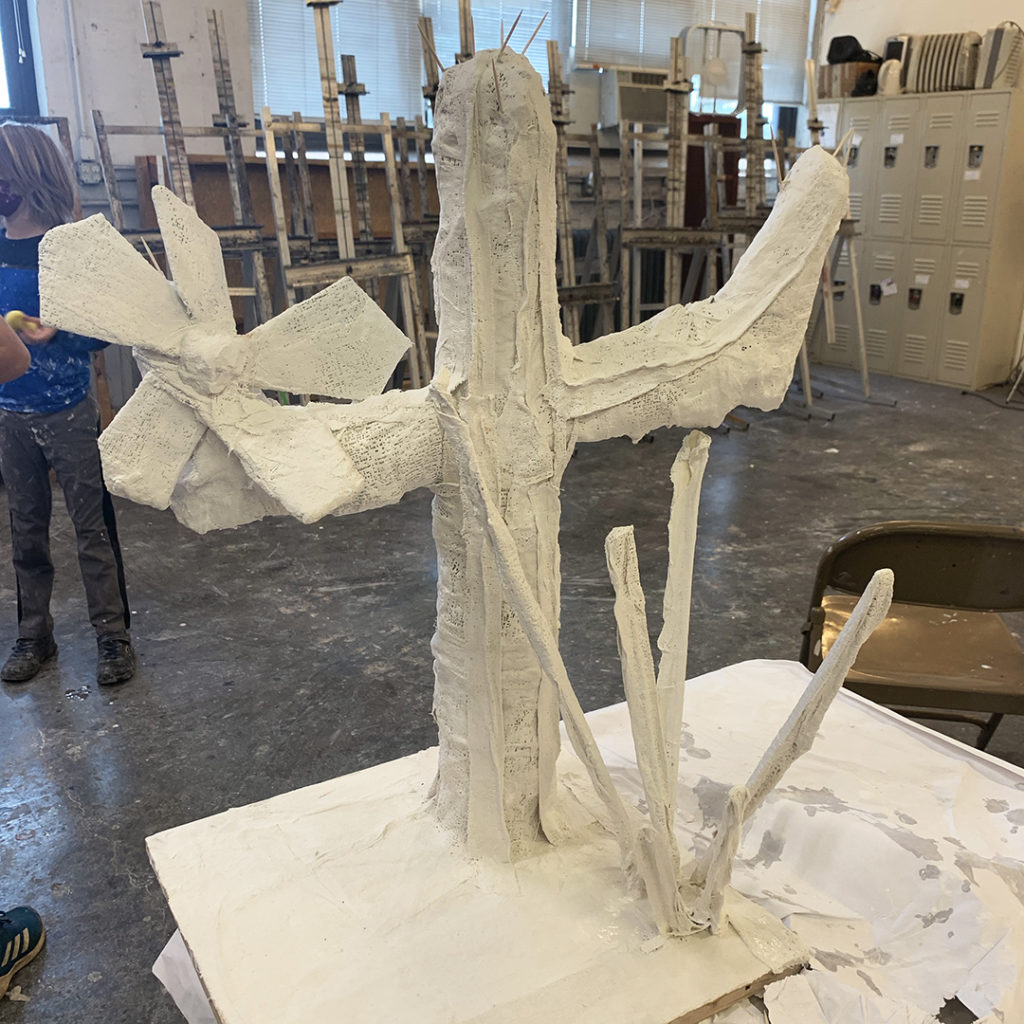
So we started with some “individual consultations” and I helped each of them build their initial armature… as it required some power tools & construction materials. After I helped them build the armature, they started “fleshing it out” with newspaper & masking tape. Trying to give their sculptures some shape & bulk. So much fun to see their vision coming together… and their blind-faith that it will all work out in the end. They each had a plan… and I’m just there to help facilitate their vision!!!

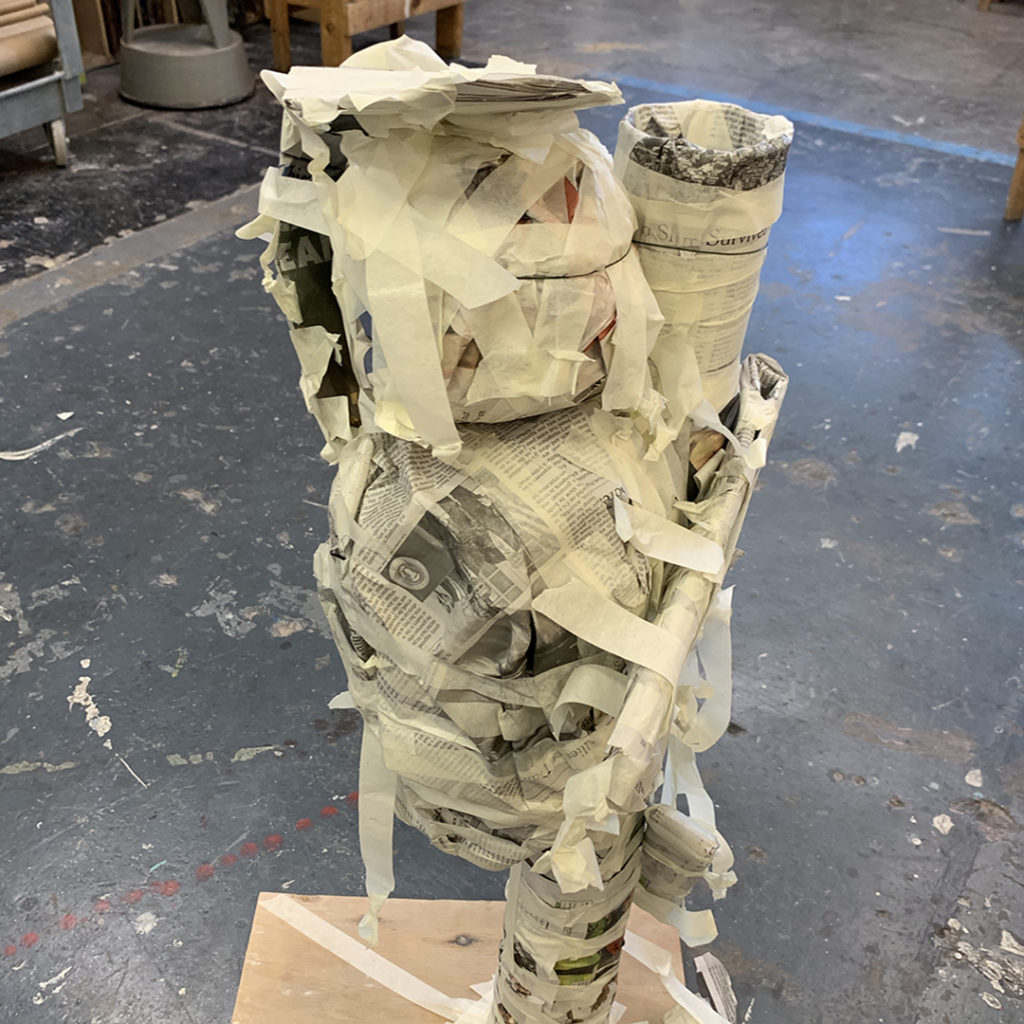
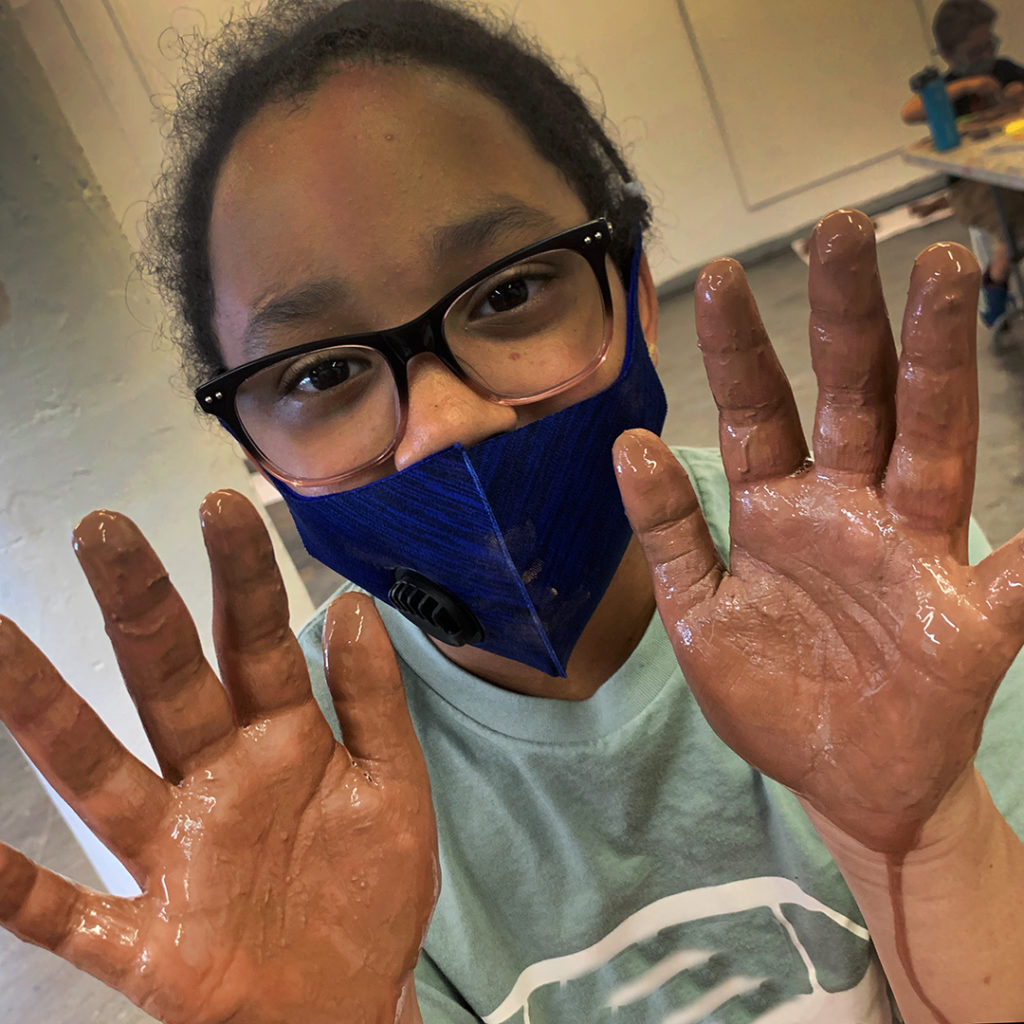
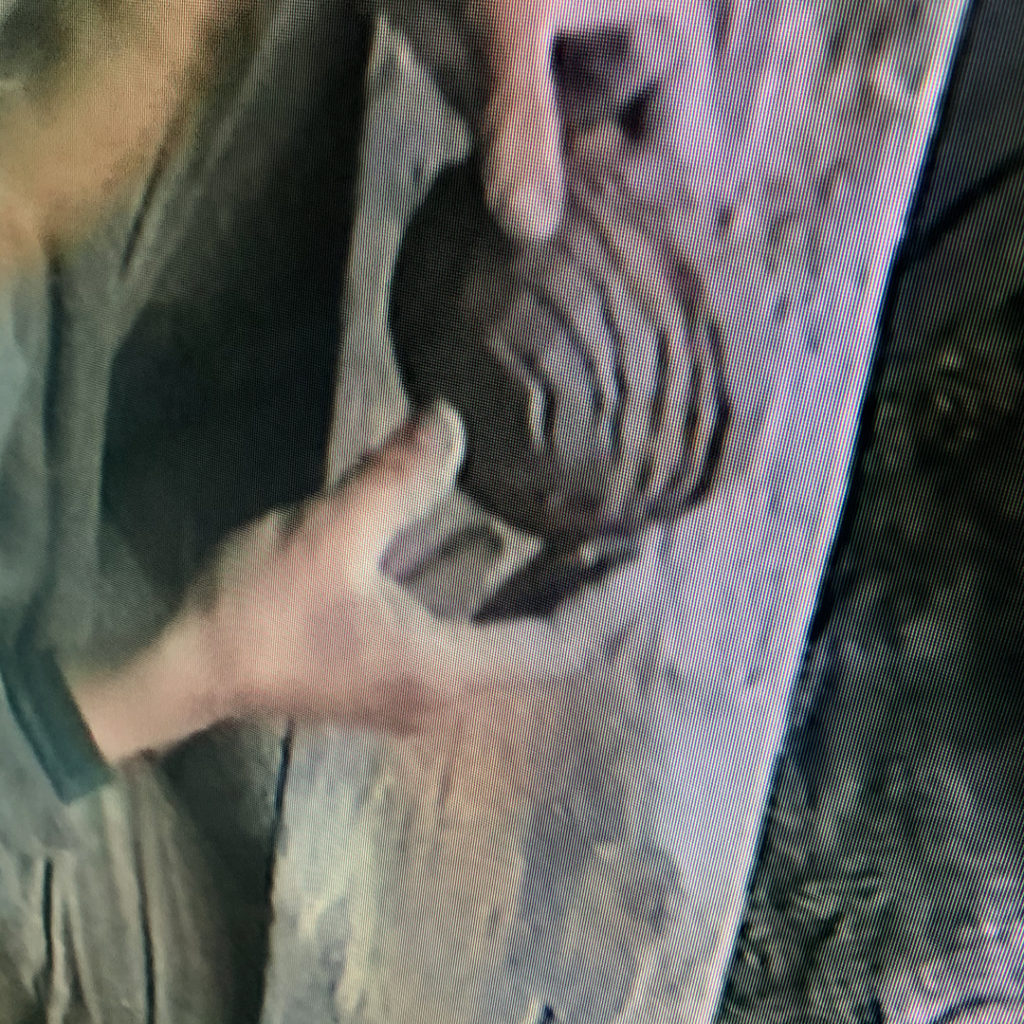
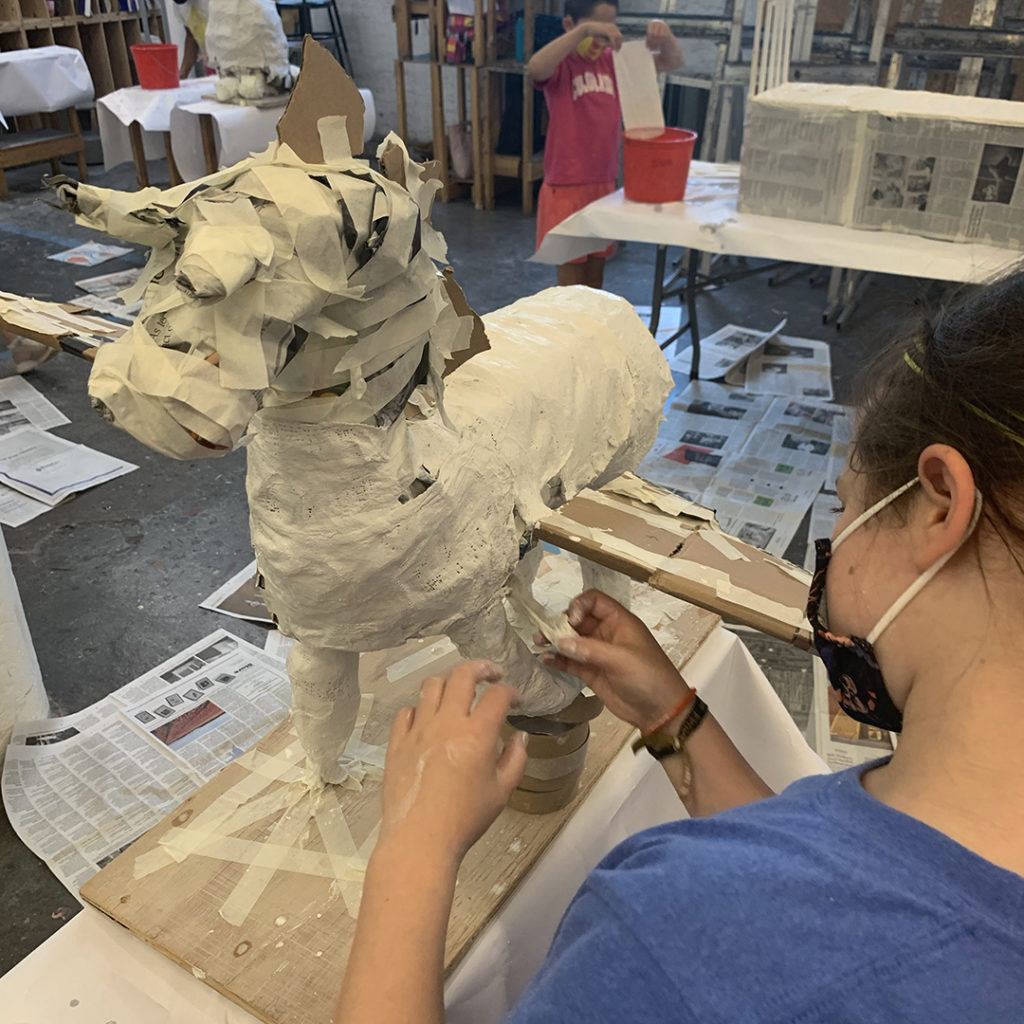
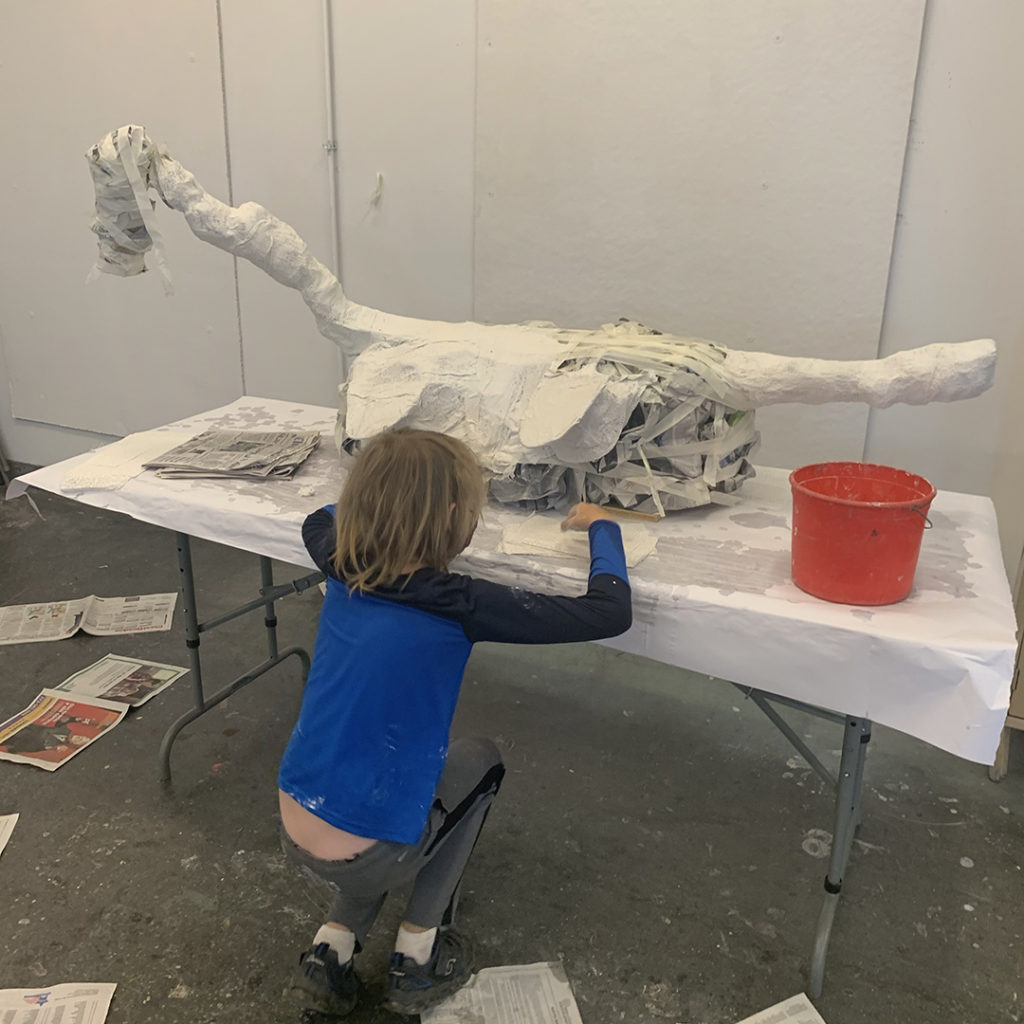
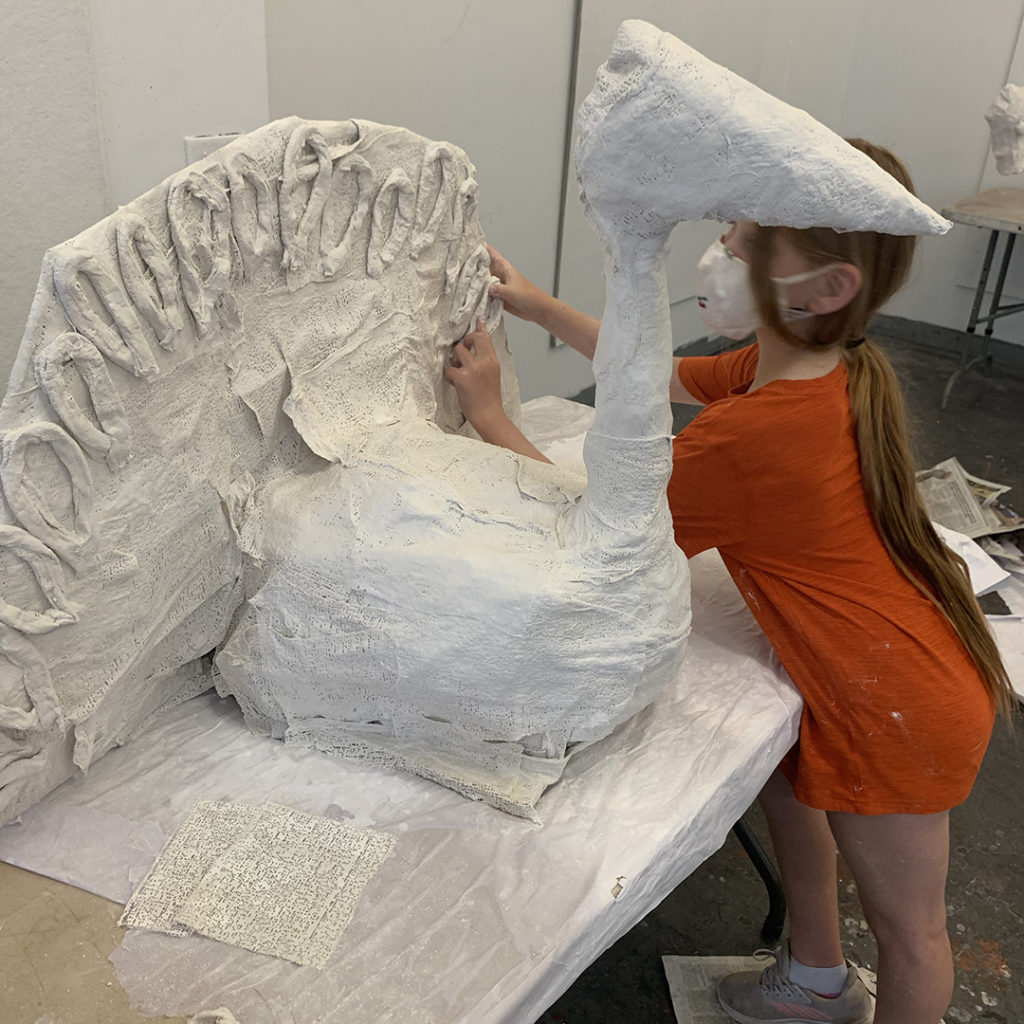
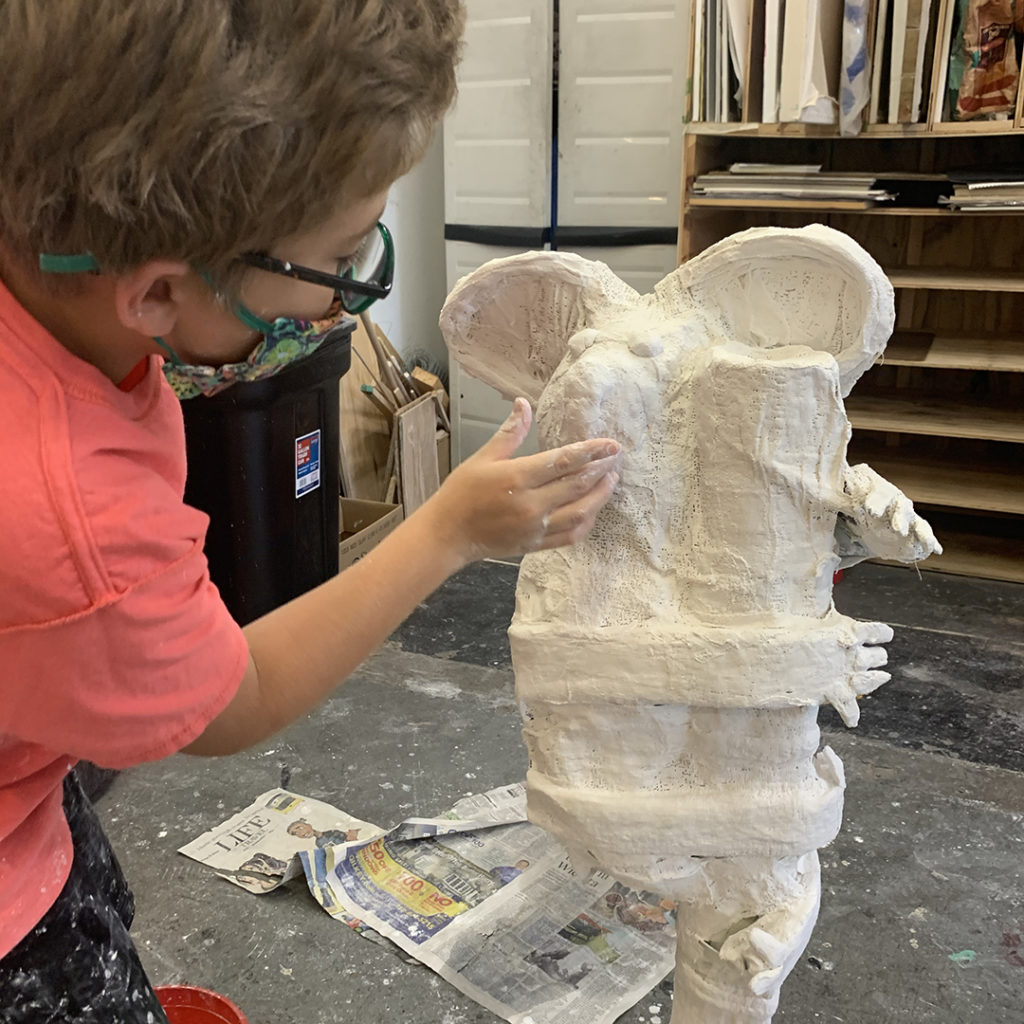
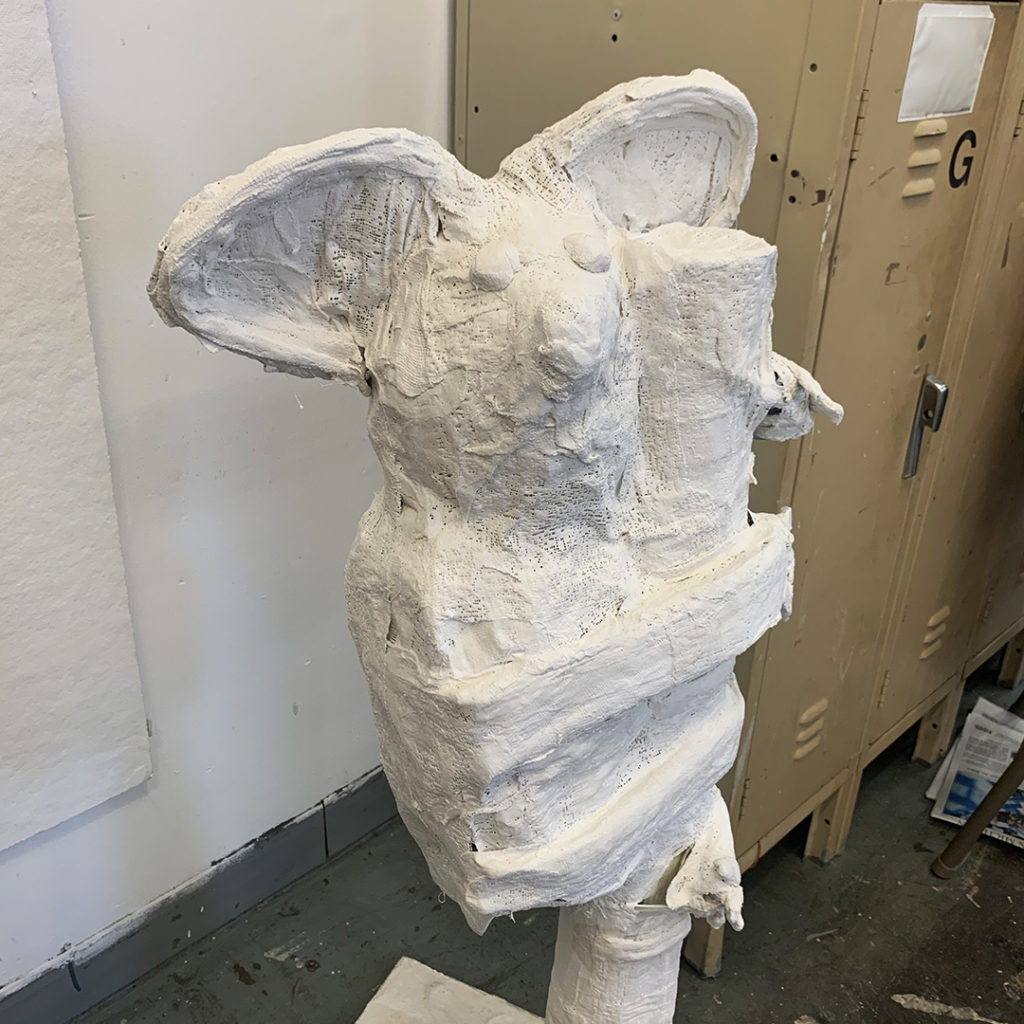
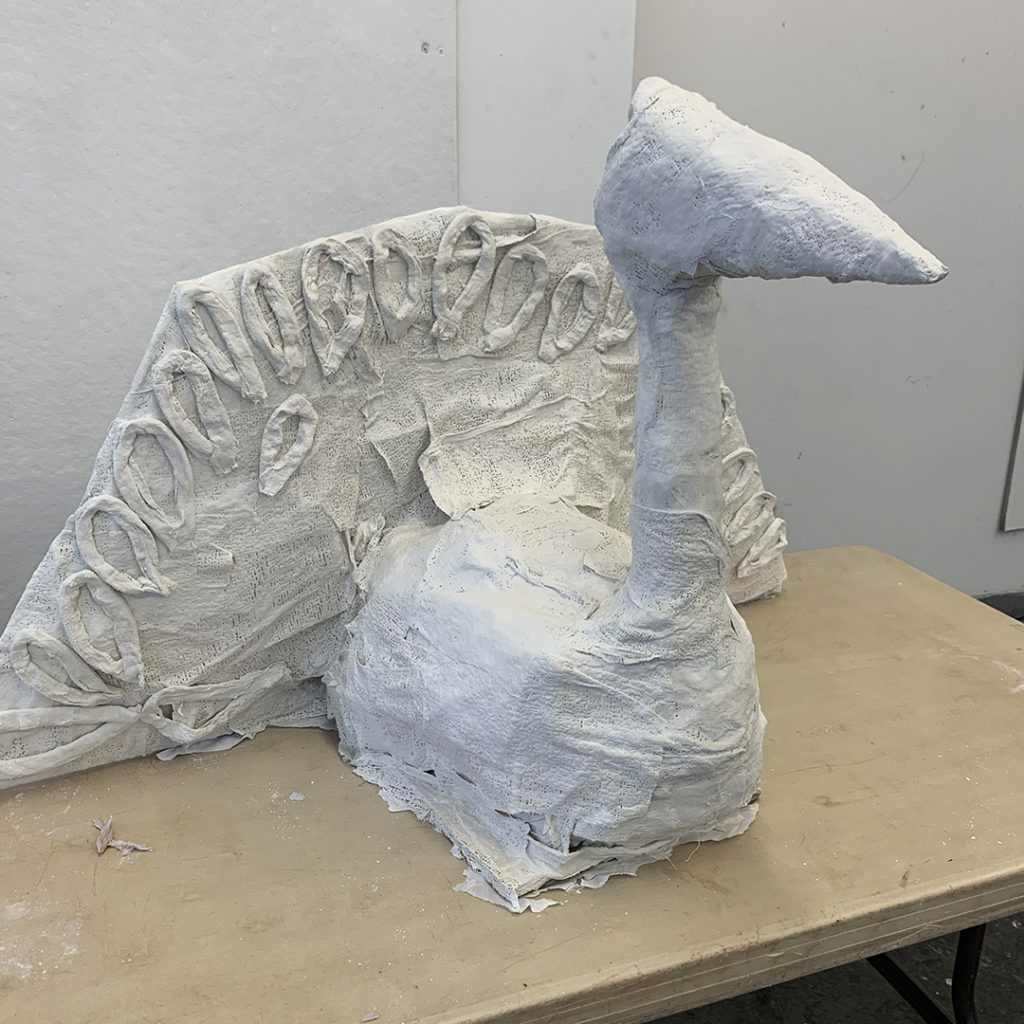
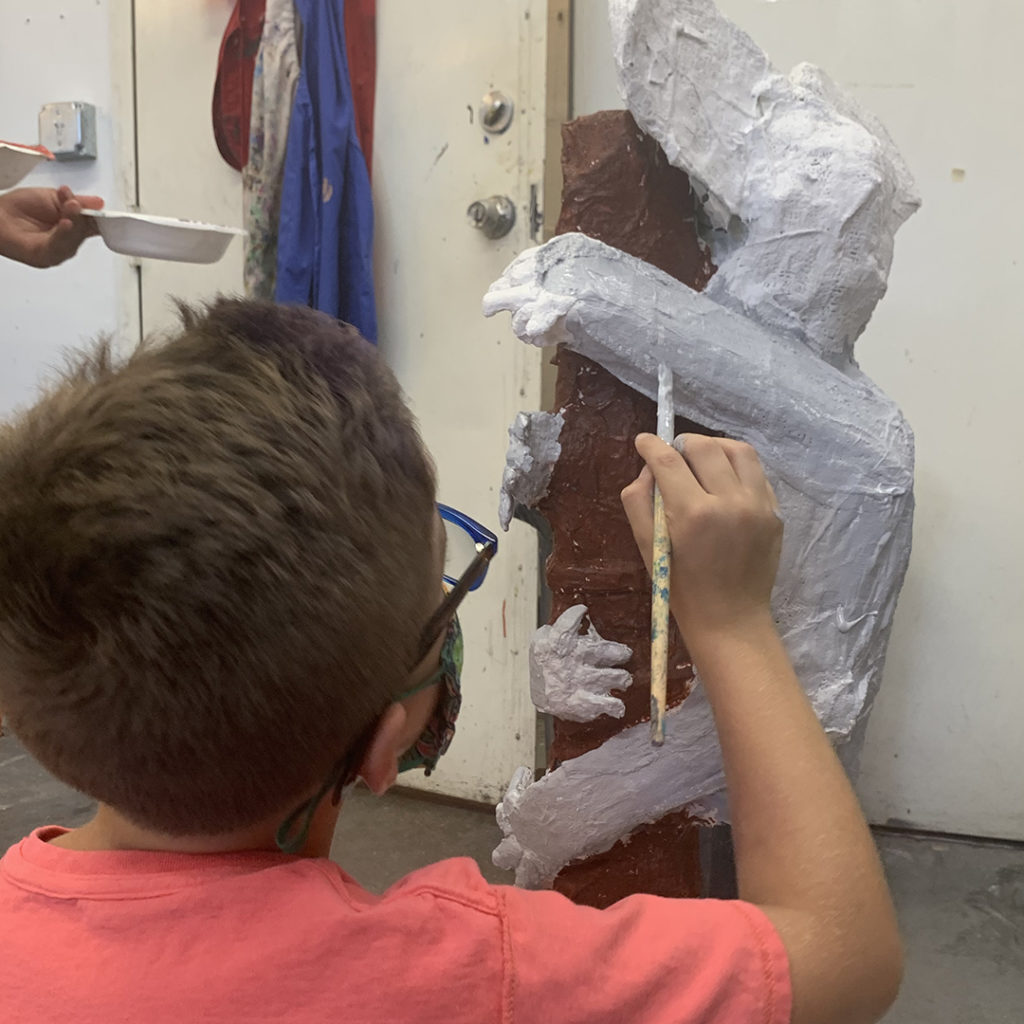
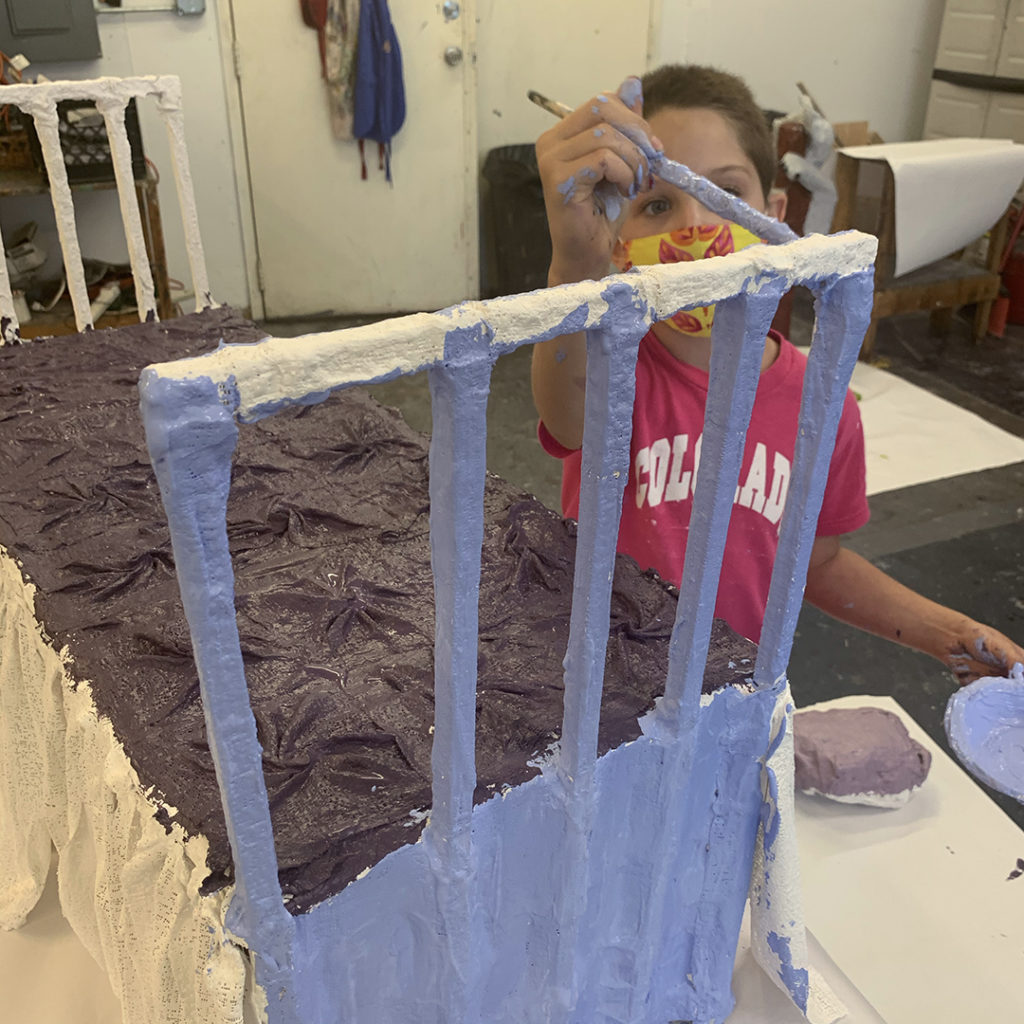
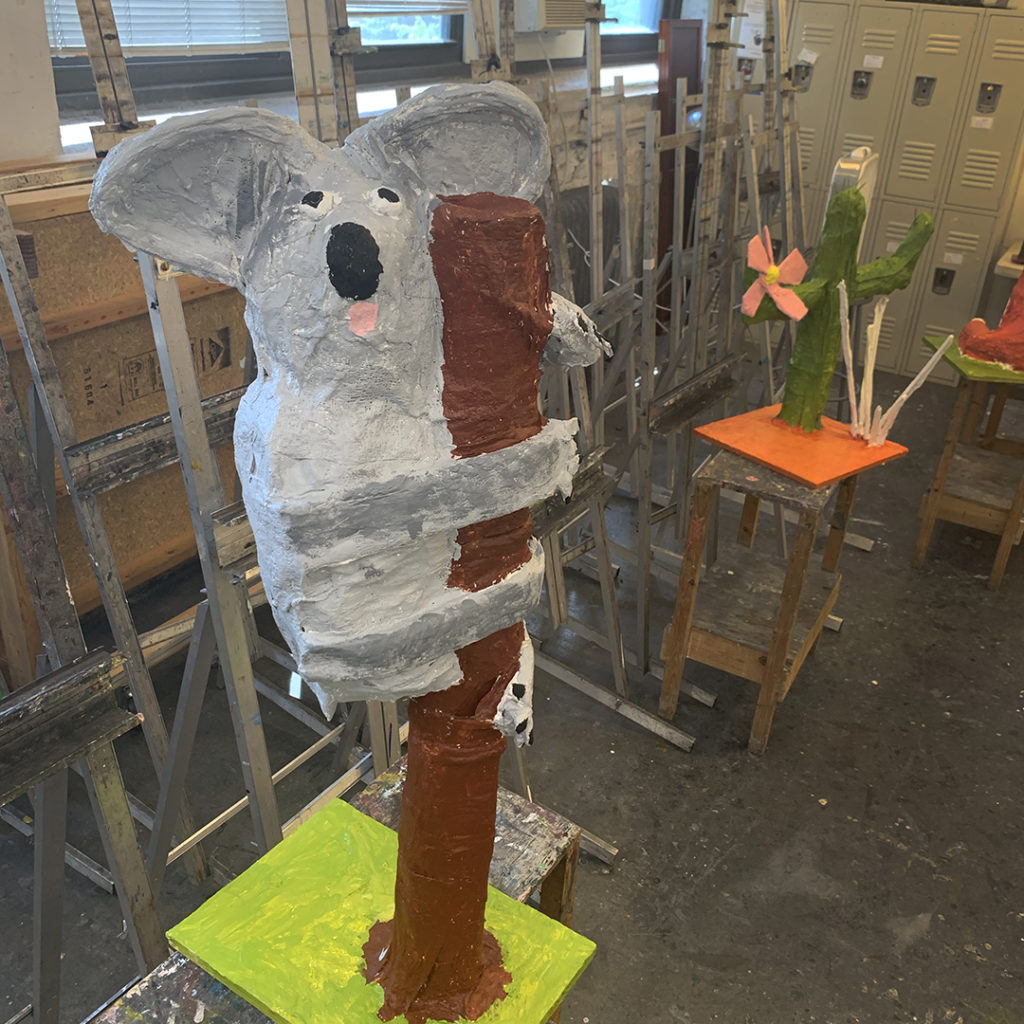
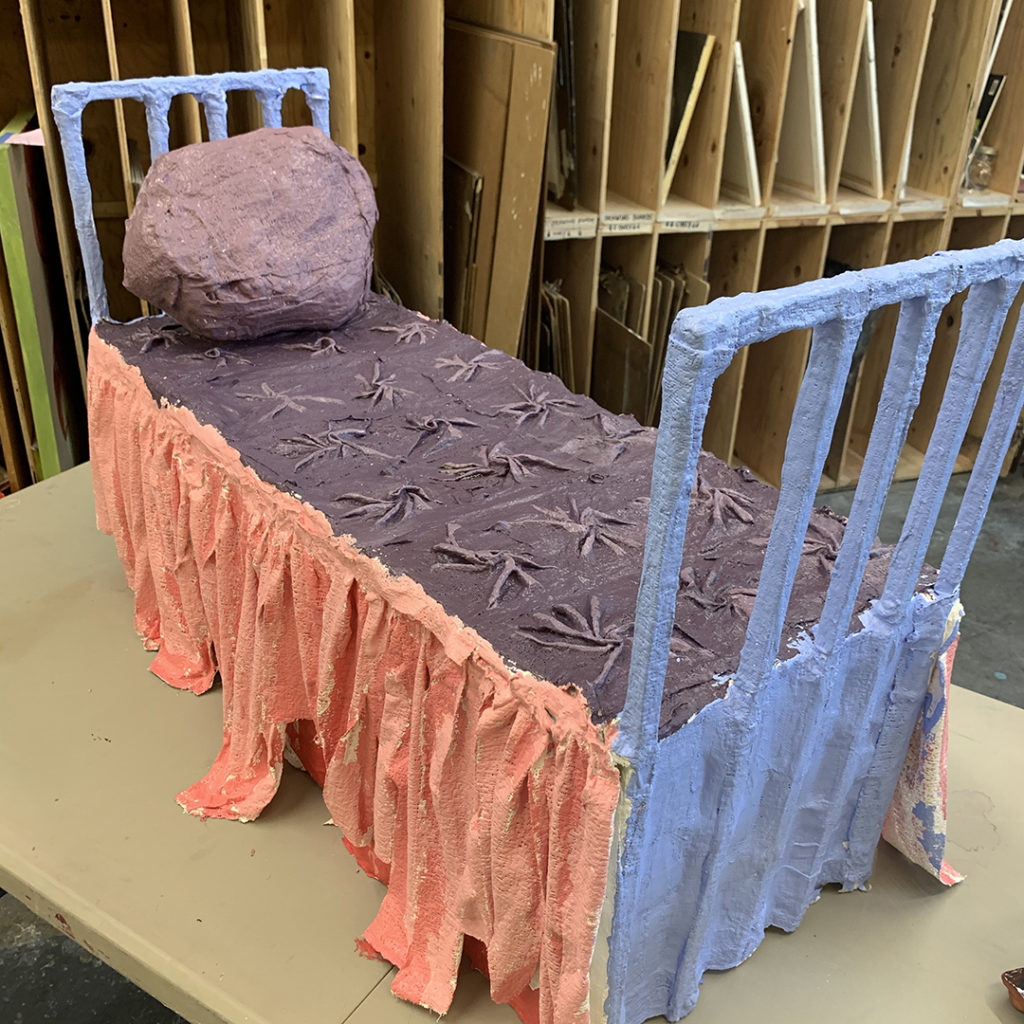
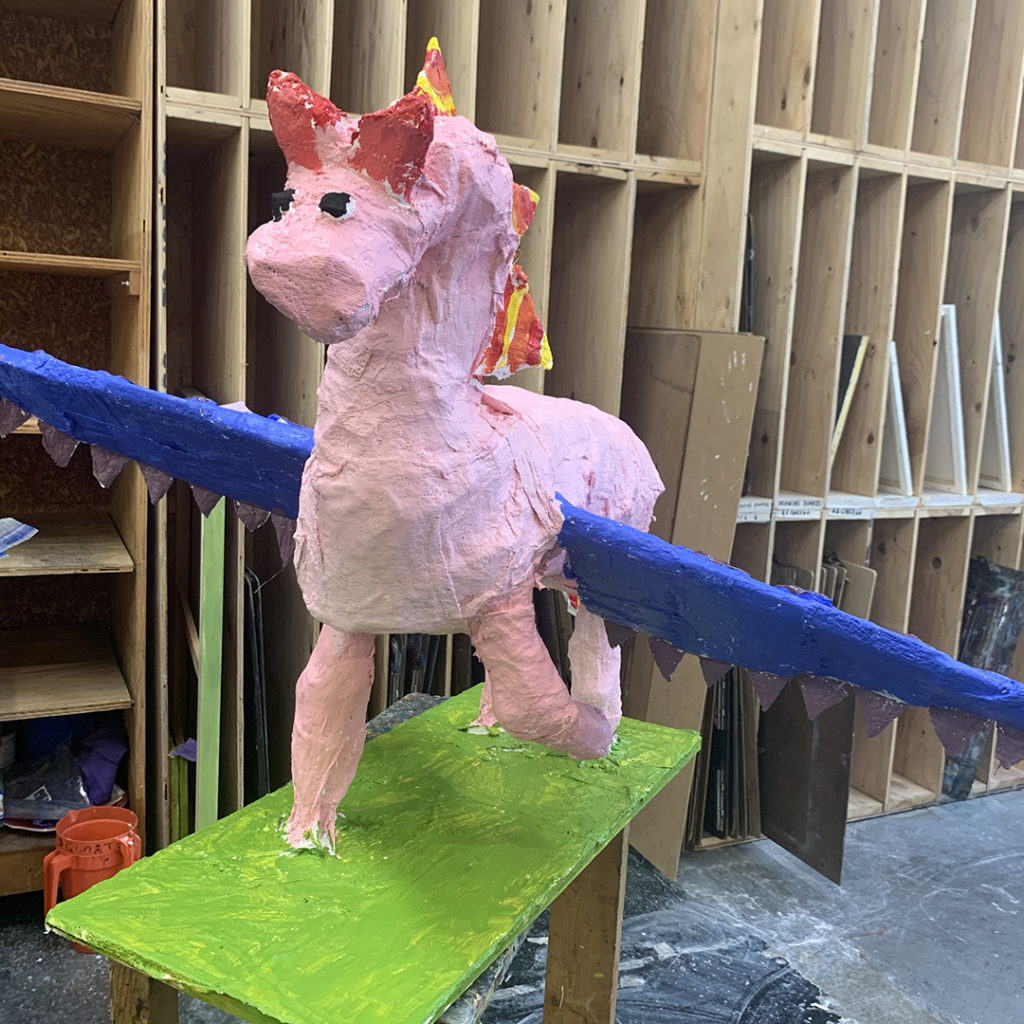
Once they had filled it out with newspaper & tape, we started adding a layer of plaster gauze over the whole sculpture. Plaster gauze is pretty much like industrial-strength paper mache’!!! It’s actually the same material they make casts out of at the hospital. You take a sheet of plaster gauze, dip it in the water and then place it on the sculpture… rubbing it together to spread the plaster. Layer after layer, sheet after sheet… eventually they covered their sculptures. And you could see it all coming together even more!

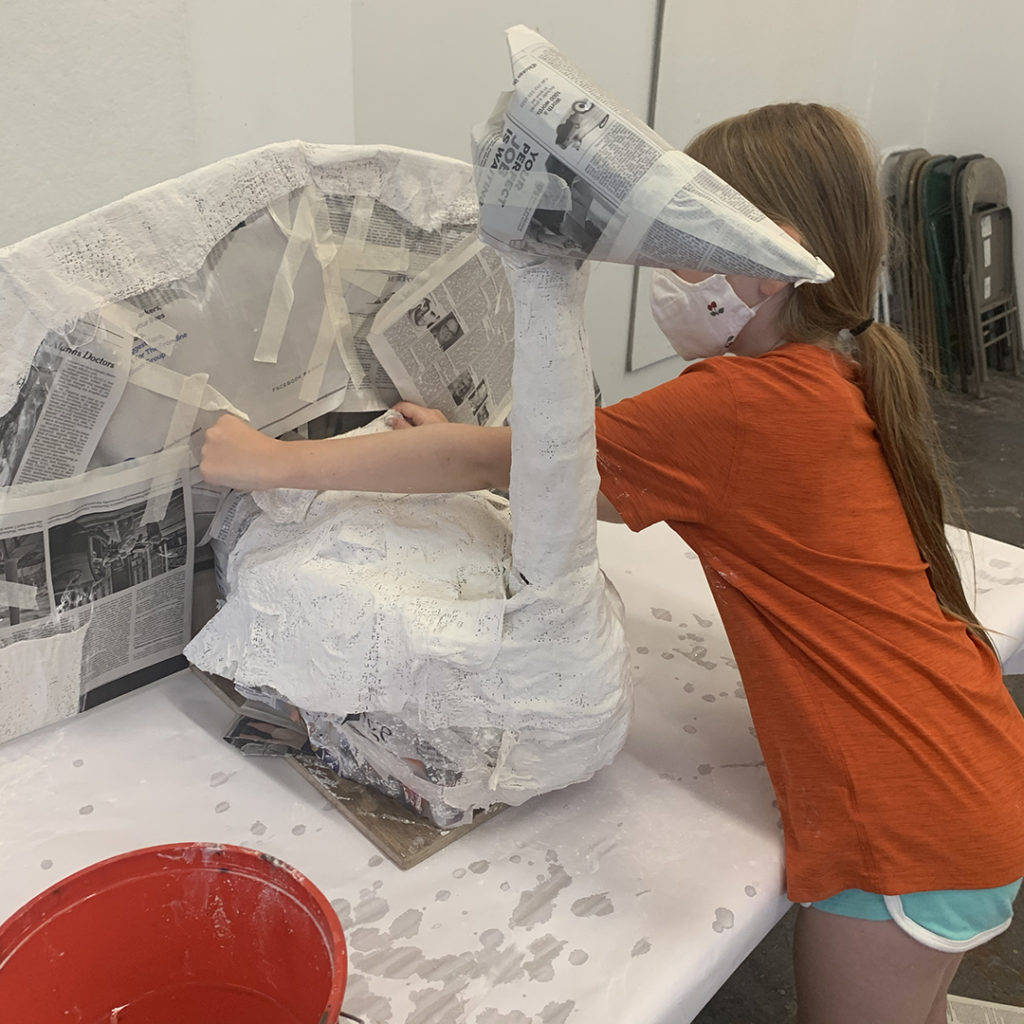
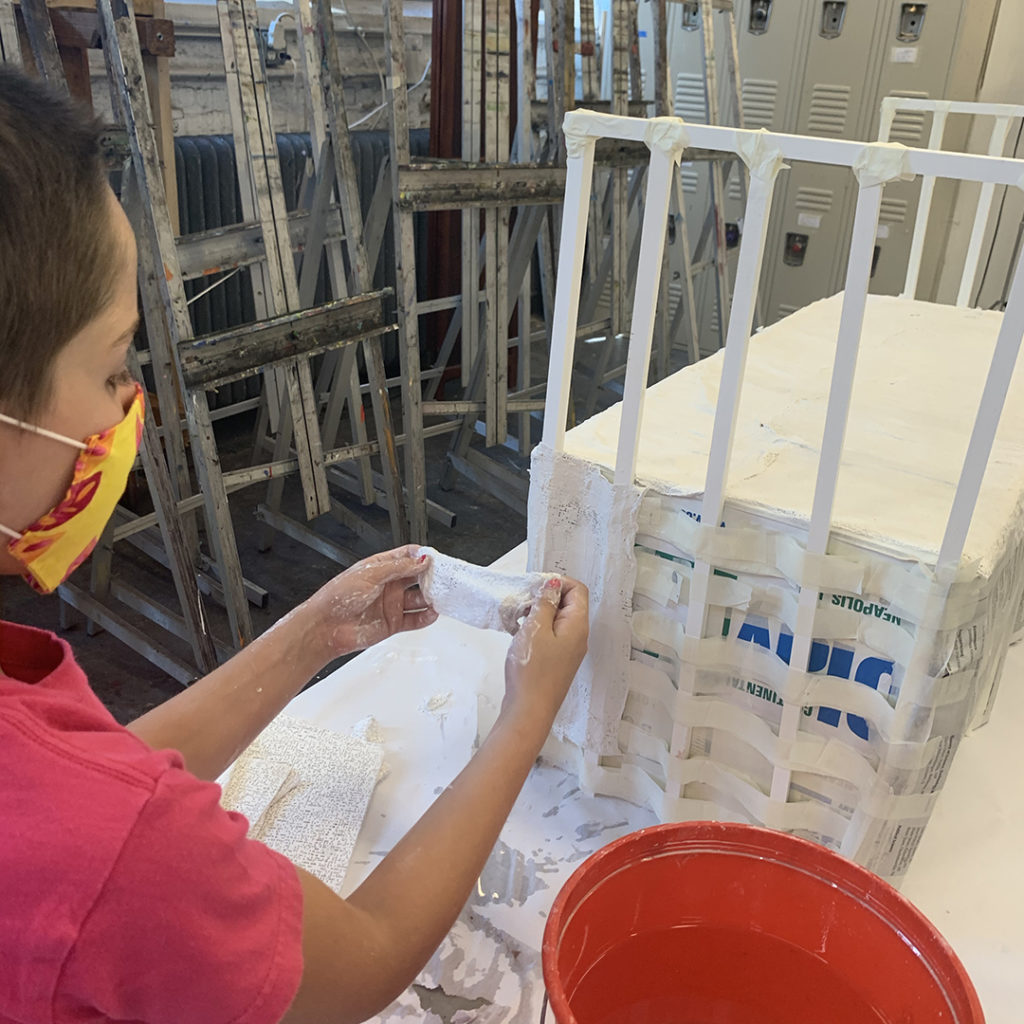
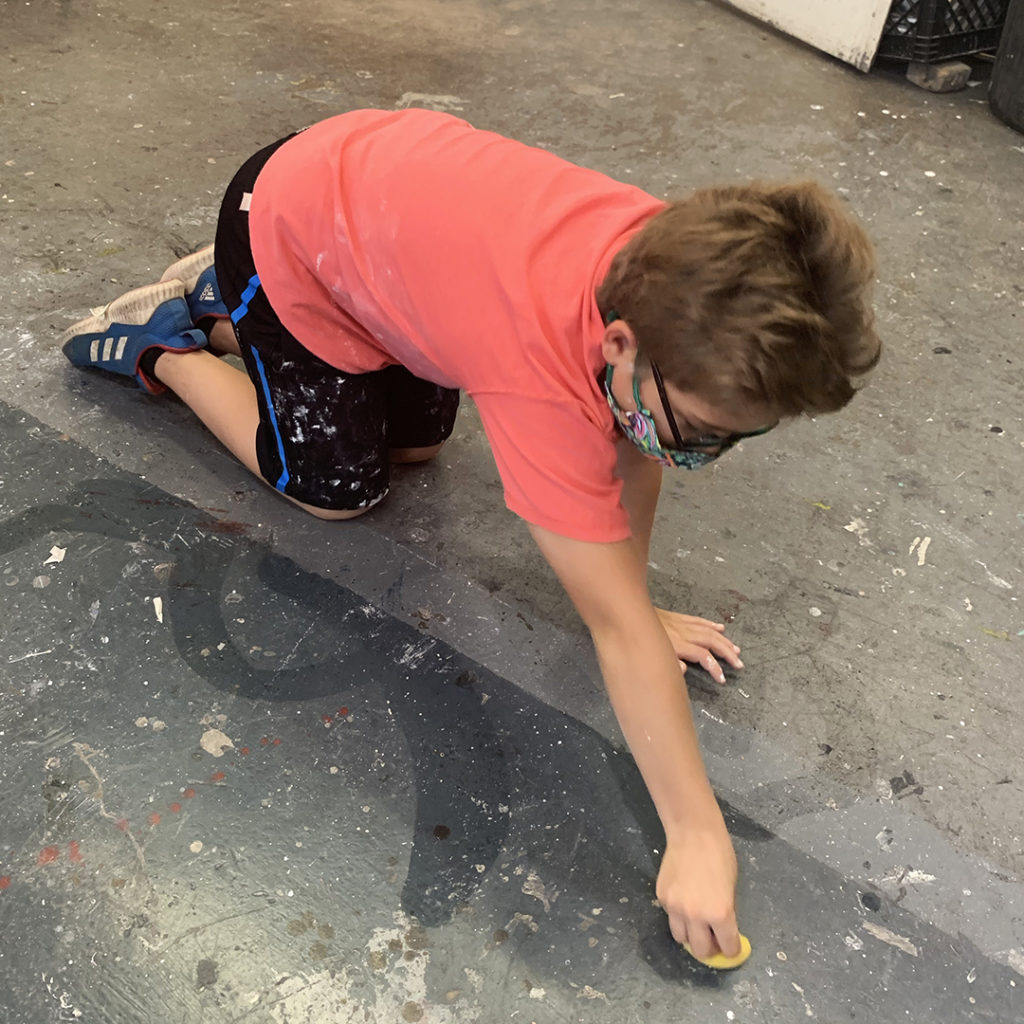
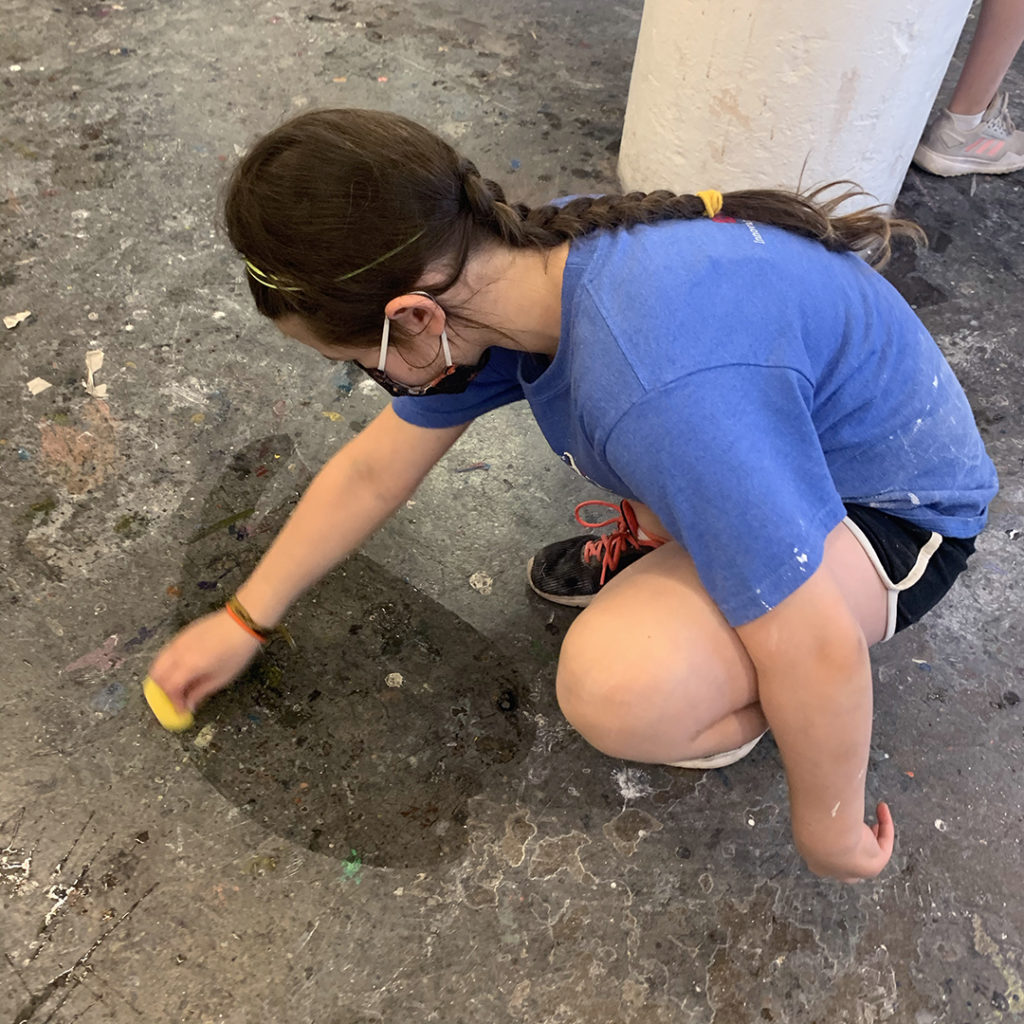
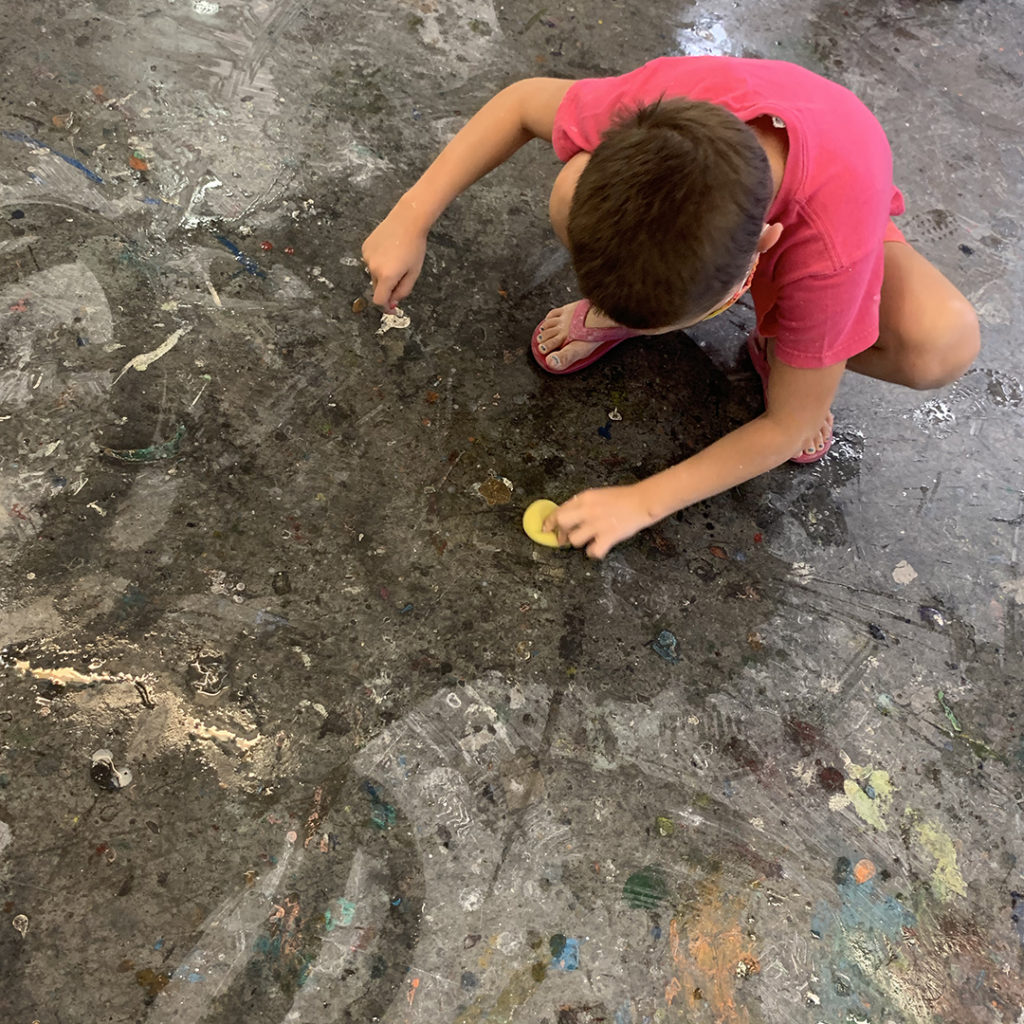
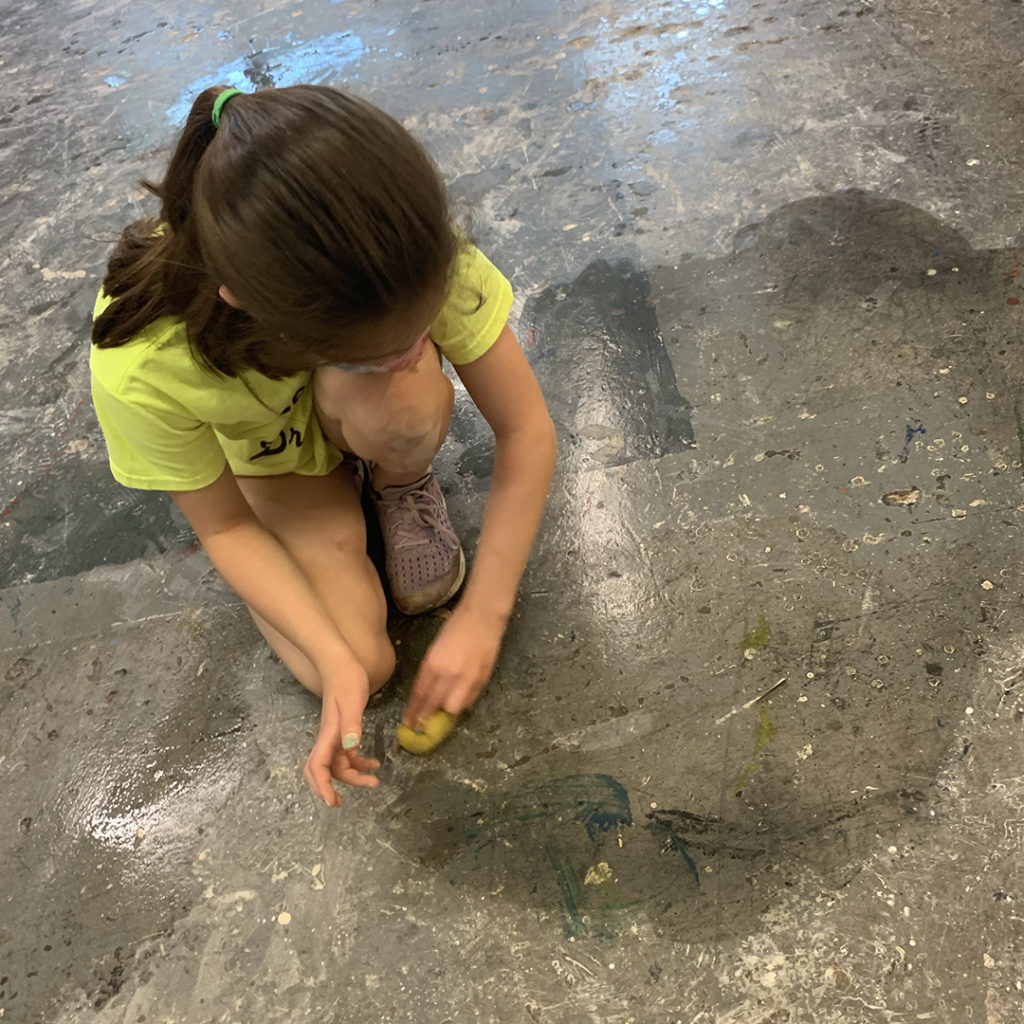
After we finished the first layer of gauze, we did a bit of clean-up… again Rule #3… “whatever mess you make, you will be cleaning up.” And they did!!! Gotta get the drips & drops of water cleaned up before someone slips on it, and before the plaster dries on the floor!

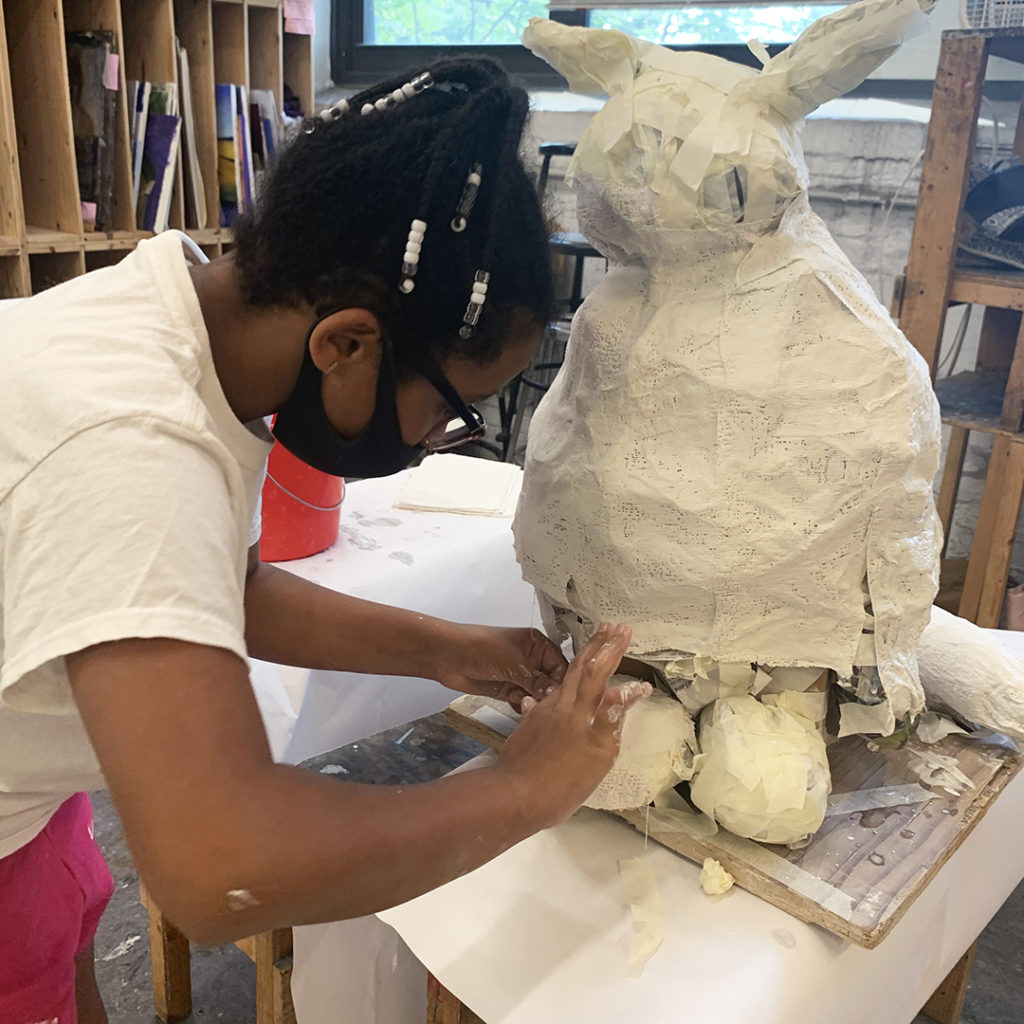
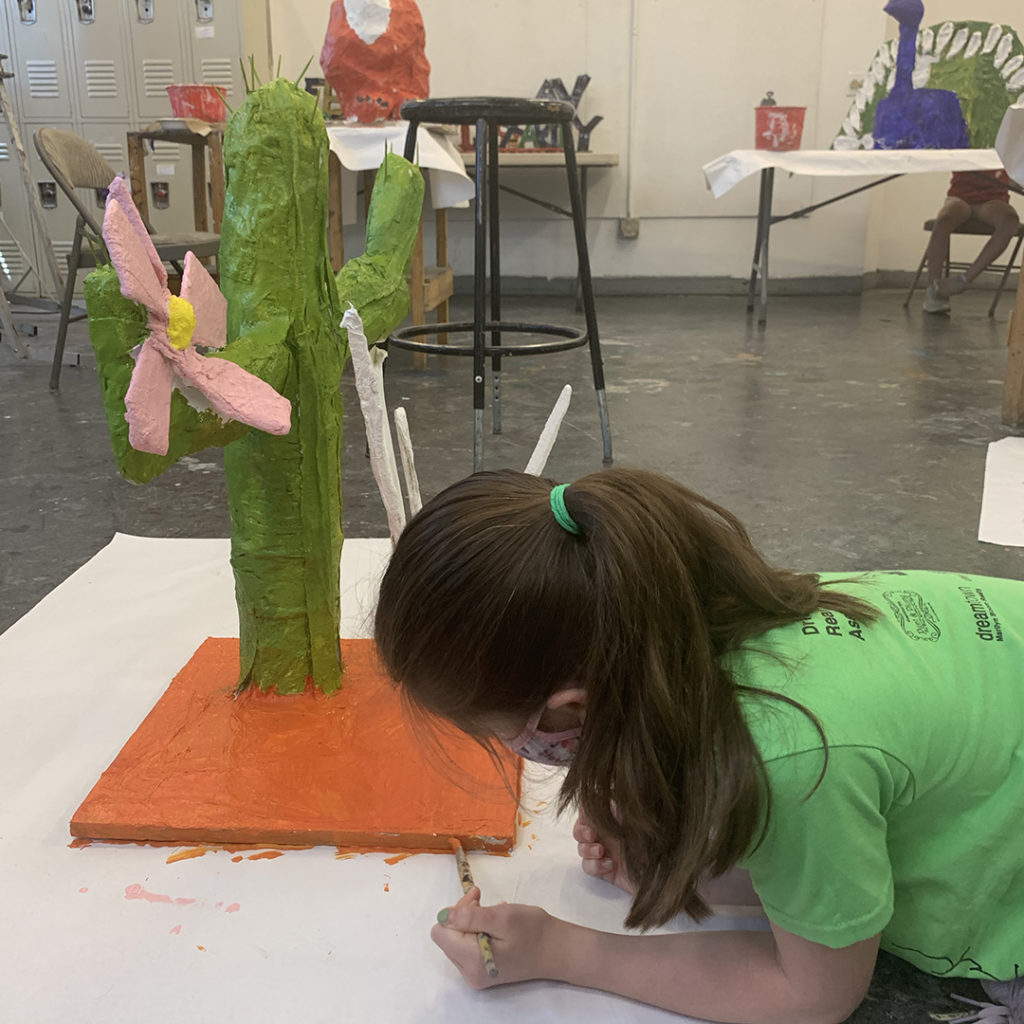
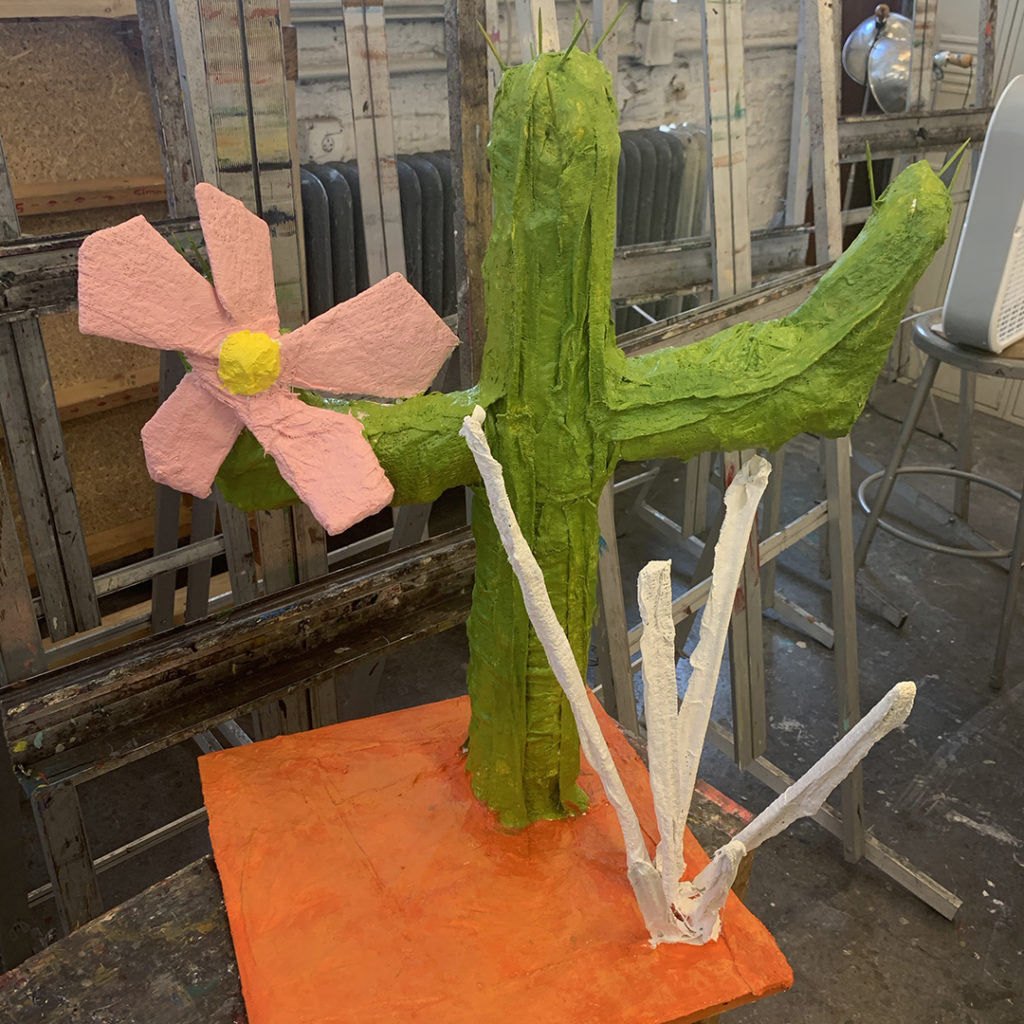
After lunch, we finished up the plastering… and added a few more details to their pieces. Textures, patterns & details to bring their pieces to life! Always fun to see the creativity & energy at Summer Camp! These kids have unbridled enthusiasm… and I’m just there to foster it and encourage them to channel that towards their artwork!!!

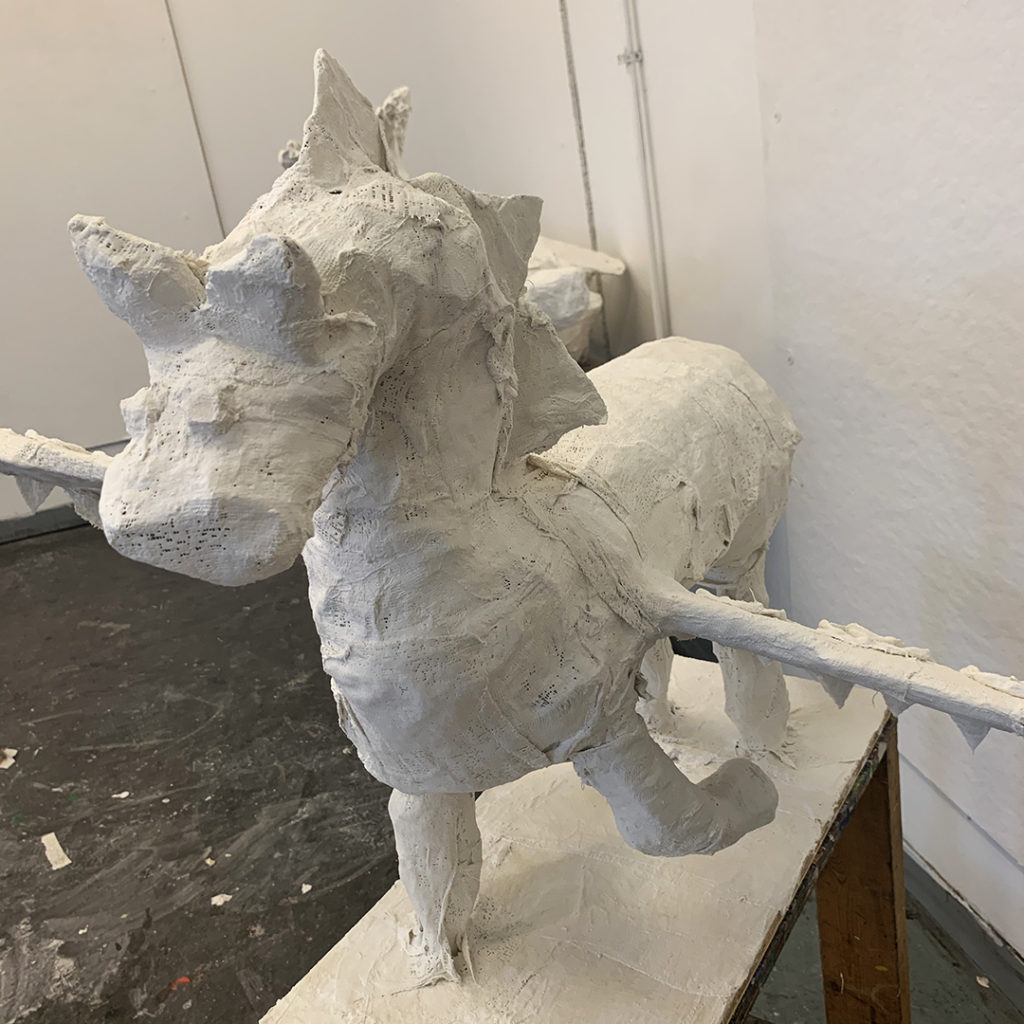
When they finished all of their plaster details on Thursday, we put them in front of the blowing fans so they could dry completely overnight.

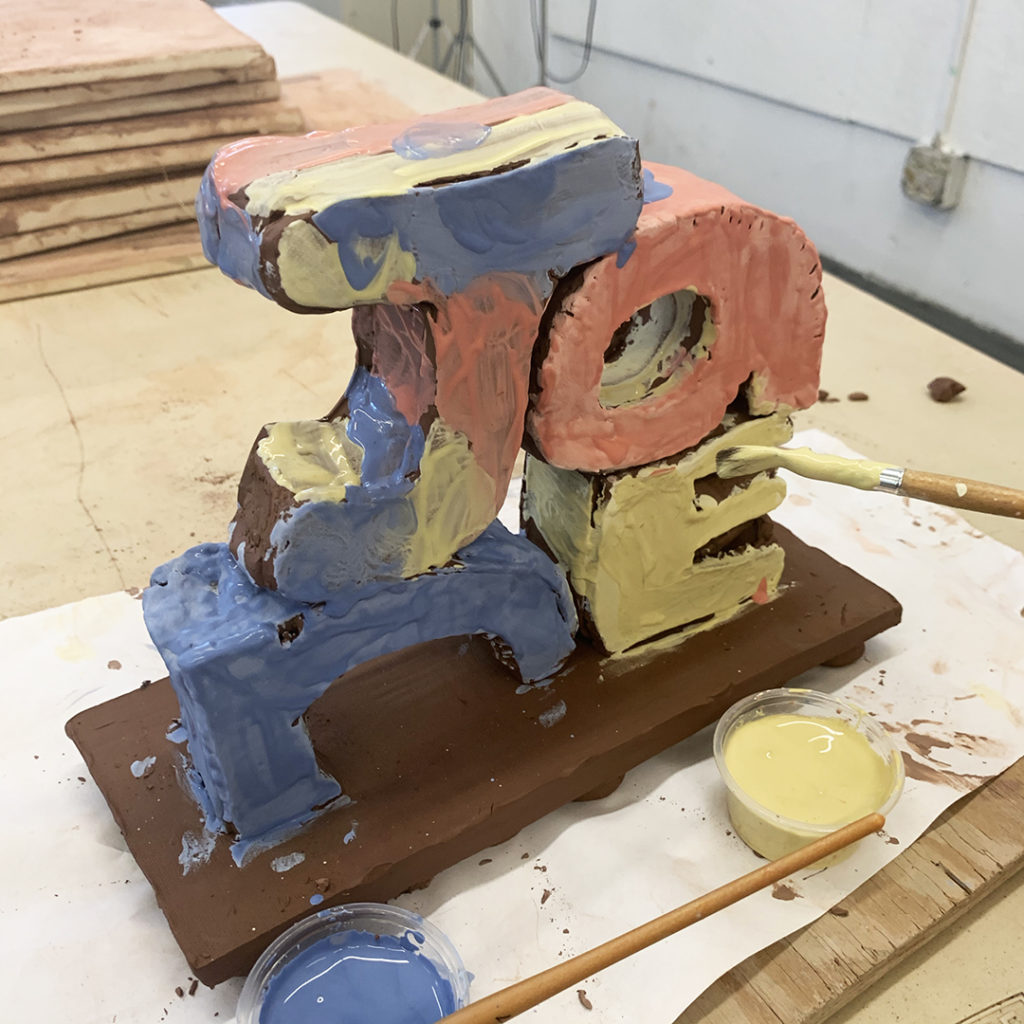
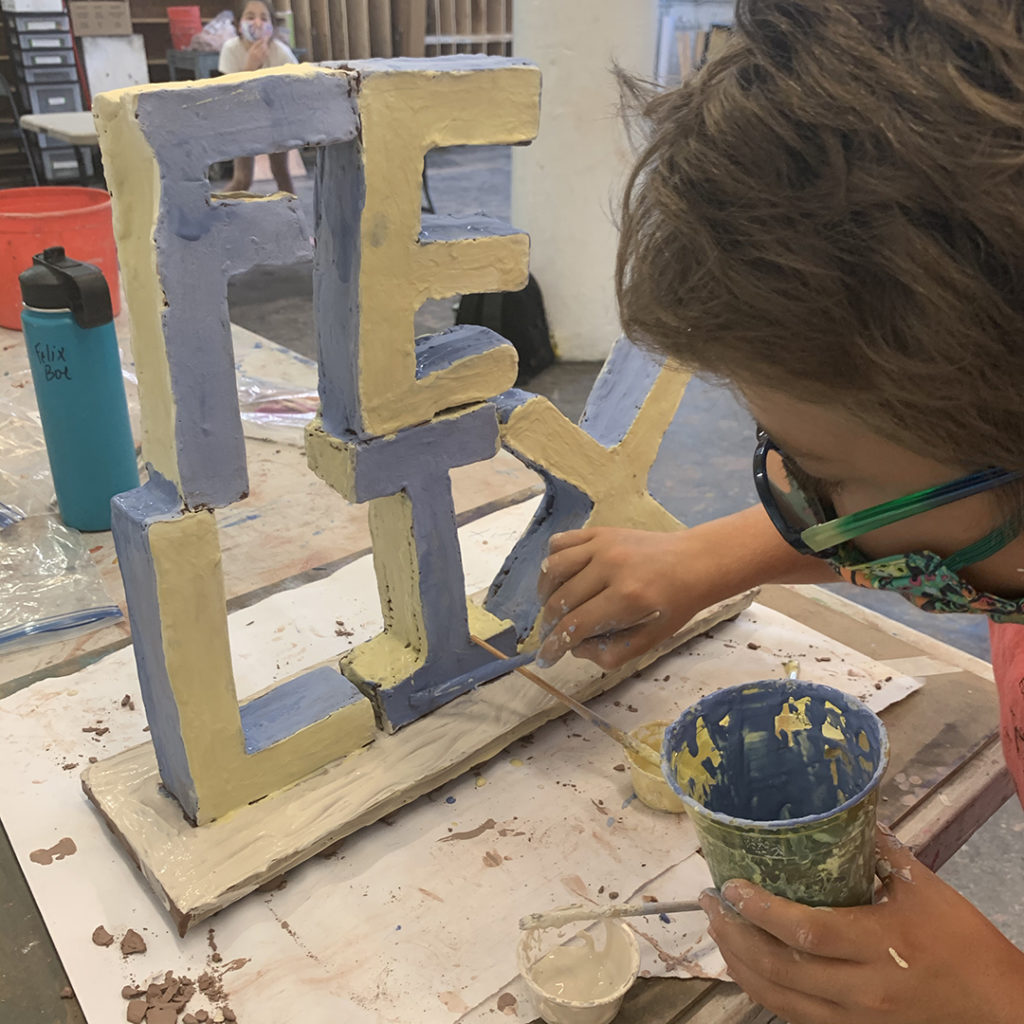
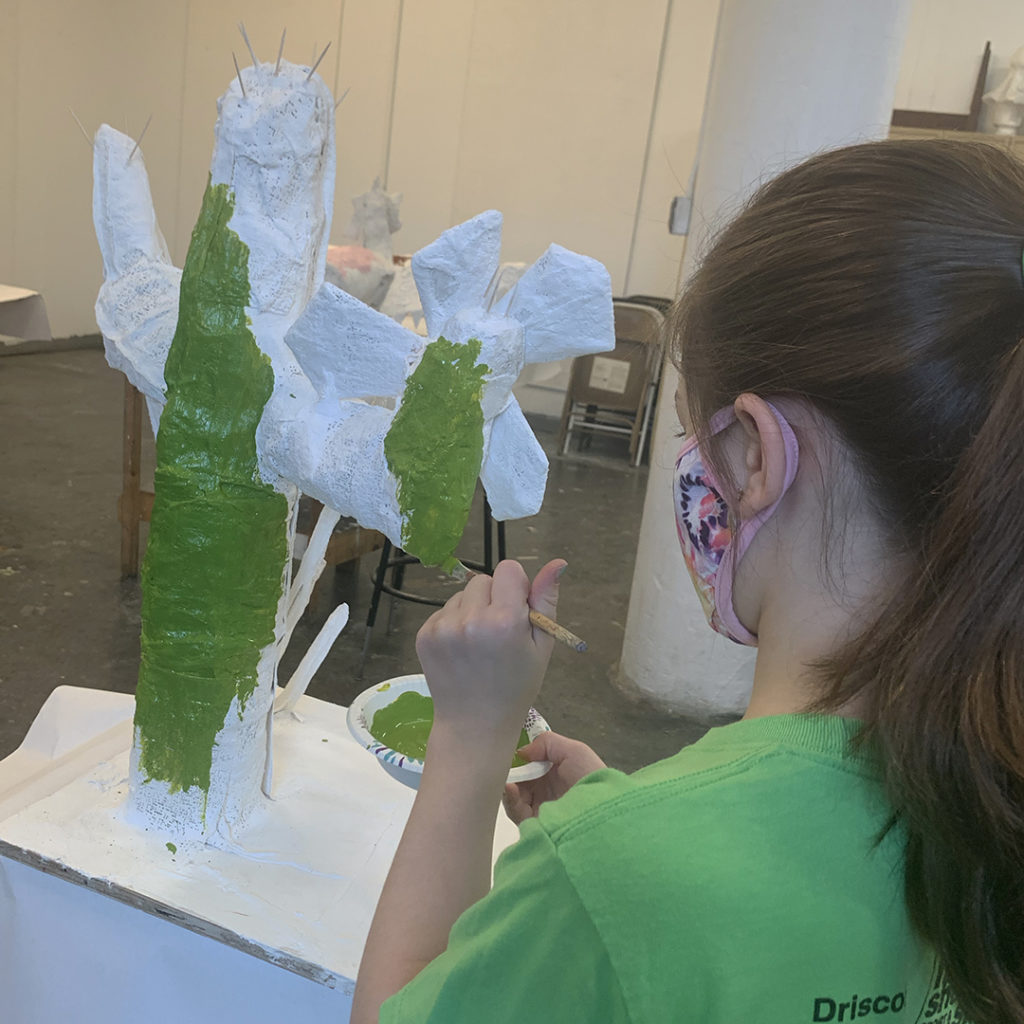
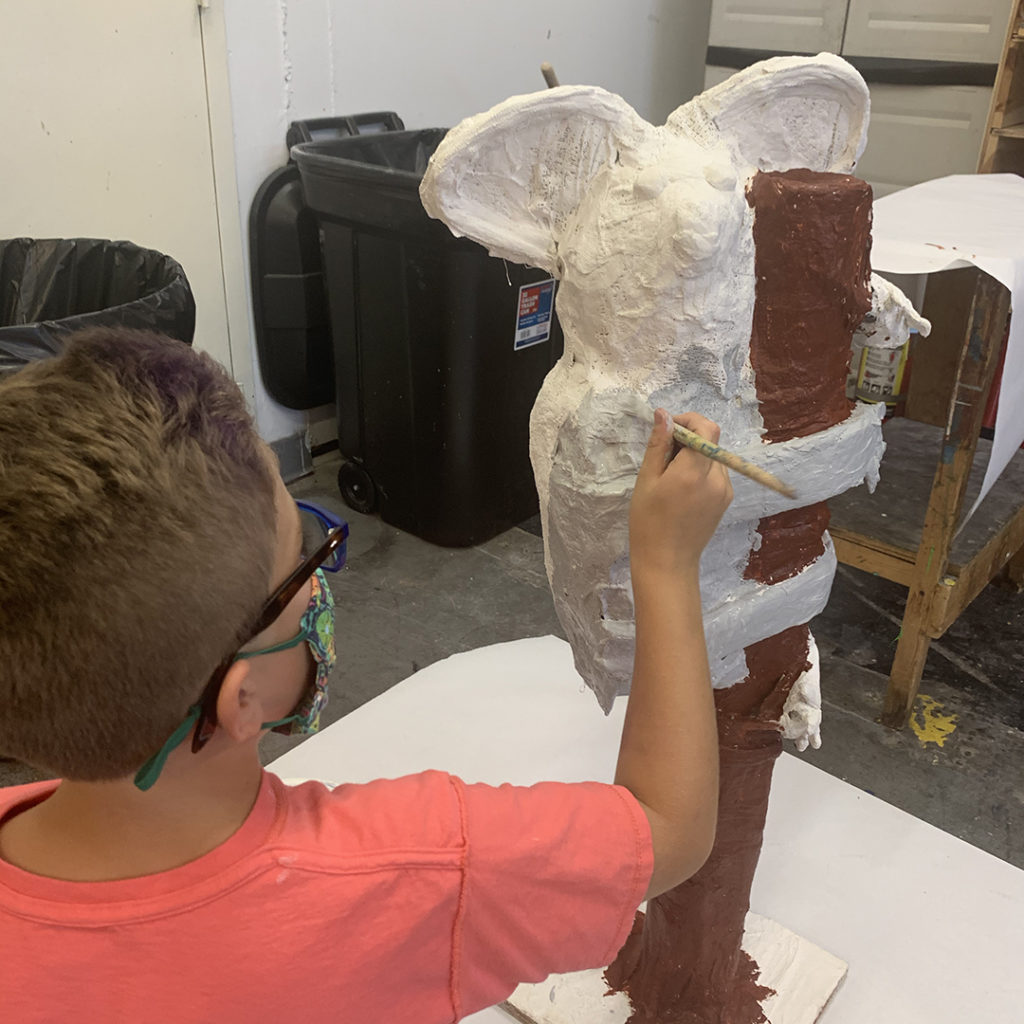
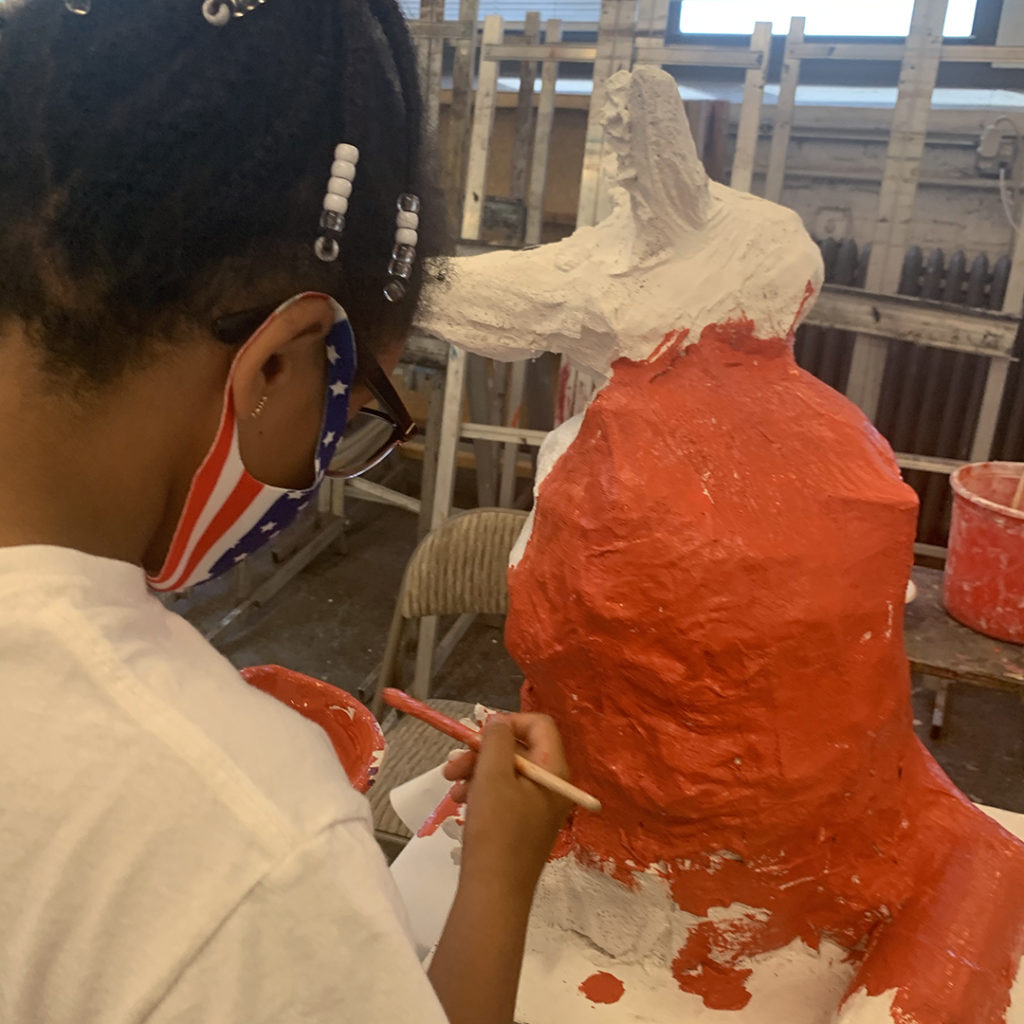
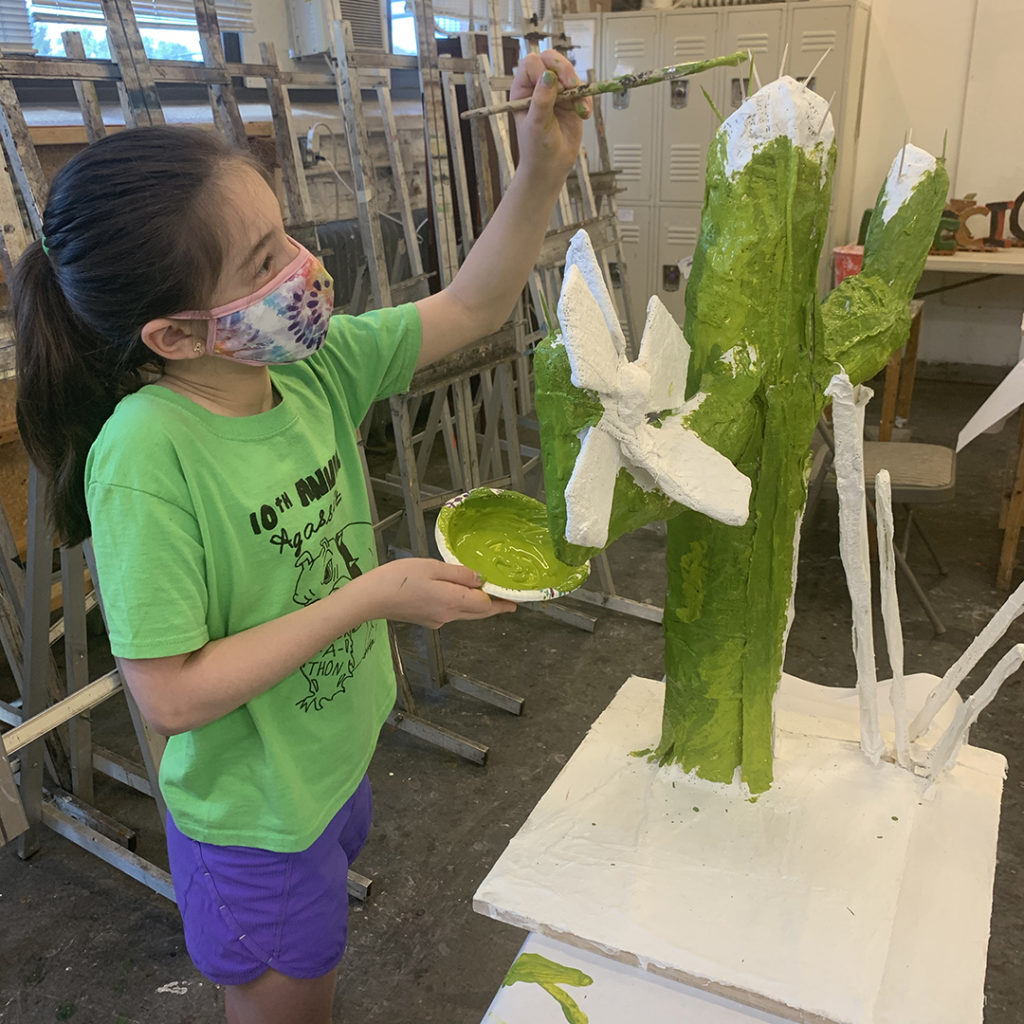
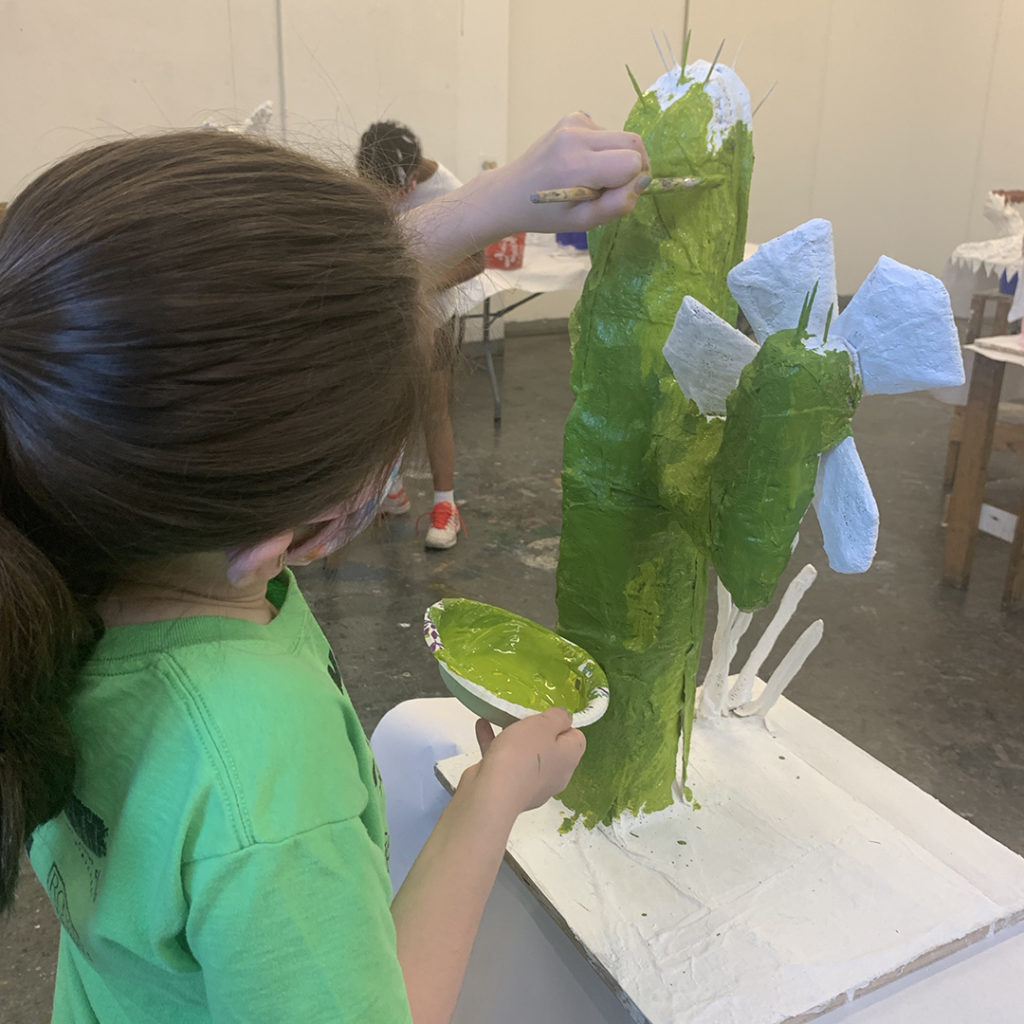
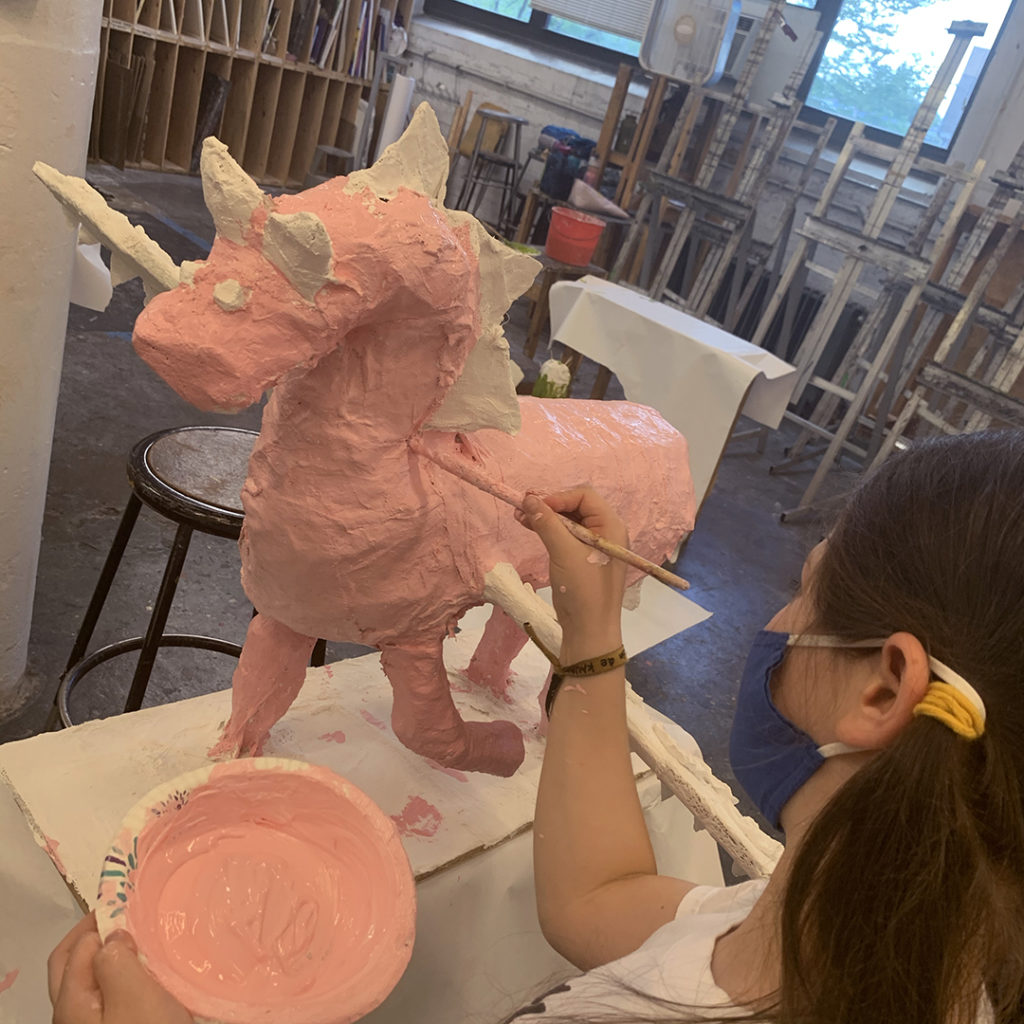
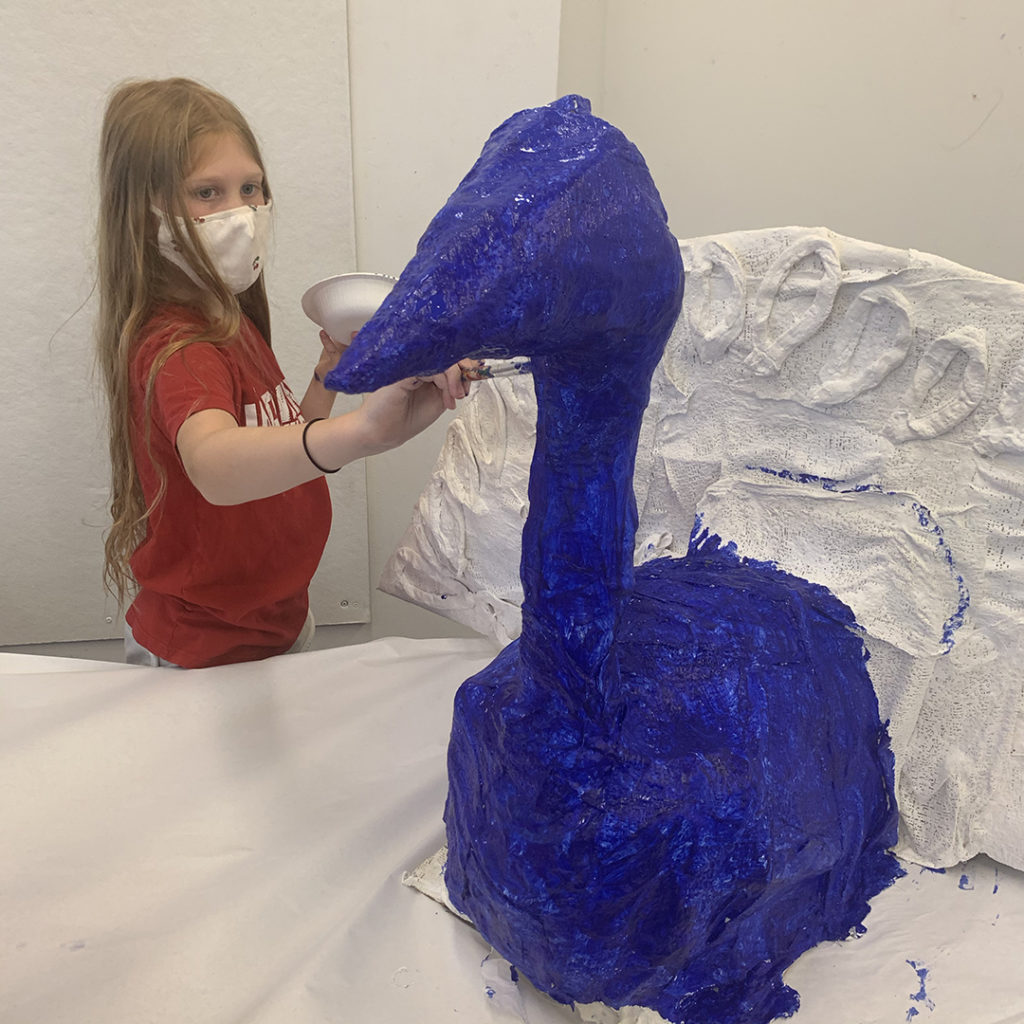
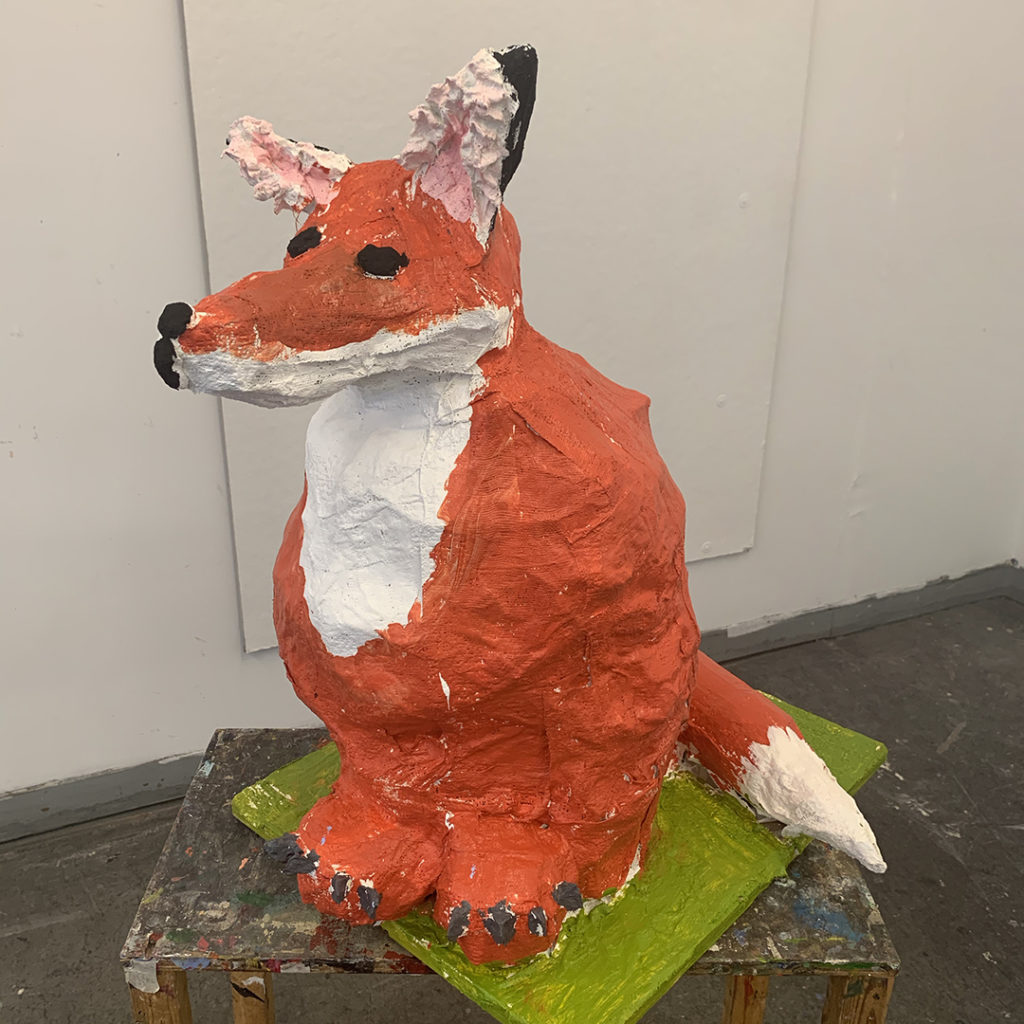
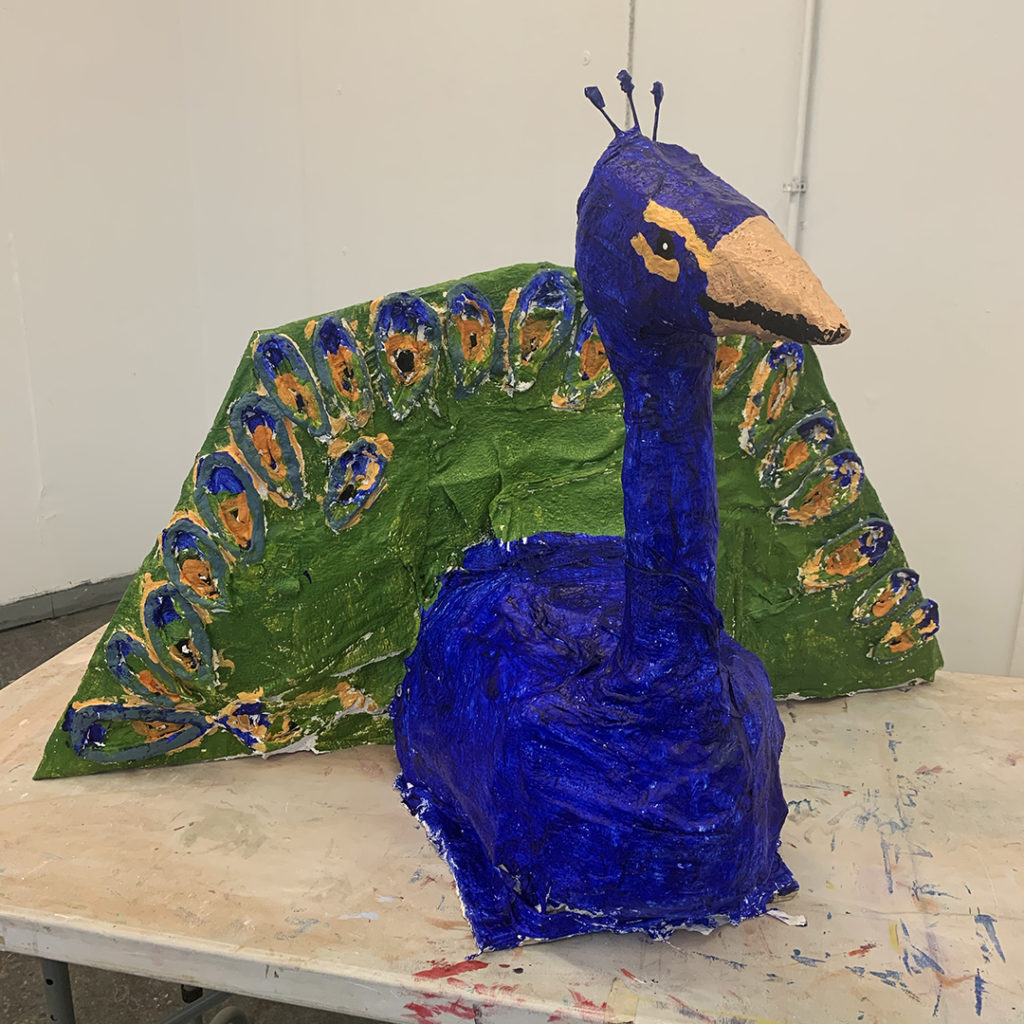
On Friday, we started the day by painting the sculptures with acrylic paint. They only get the primary color, black, white & brown. All of the other colors they need to mix to get what they want… a bit of color theory along the way!

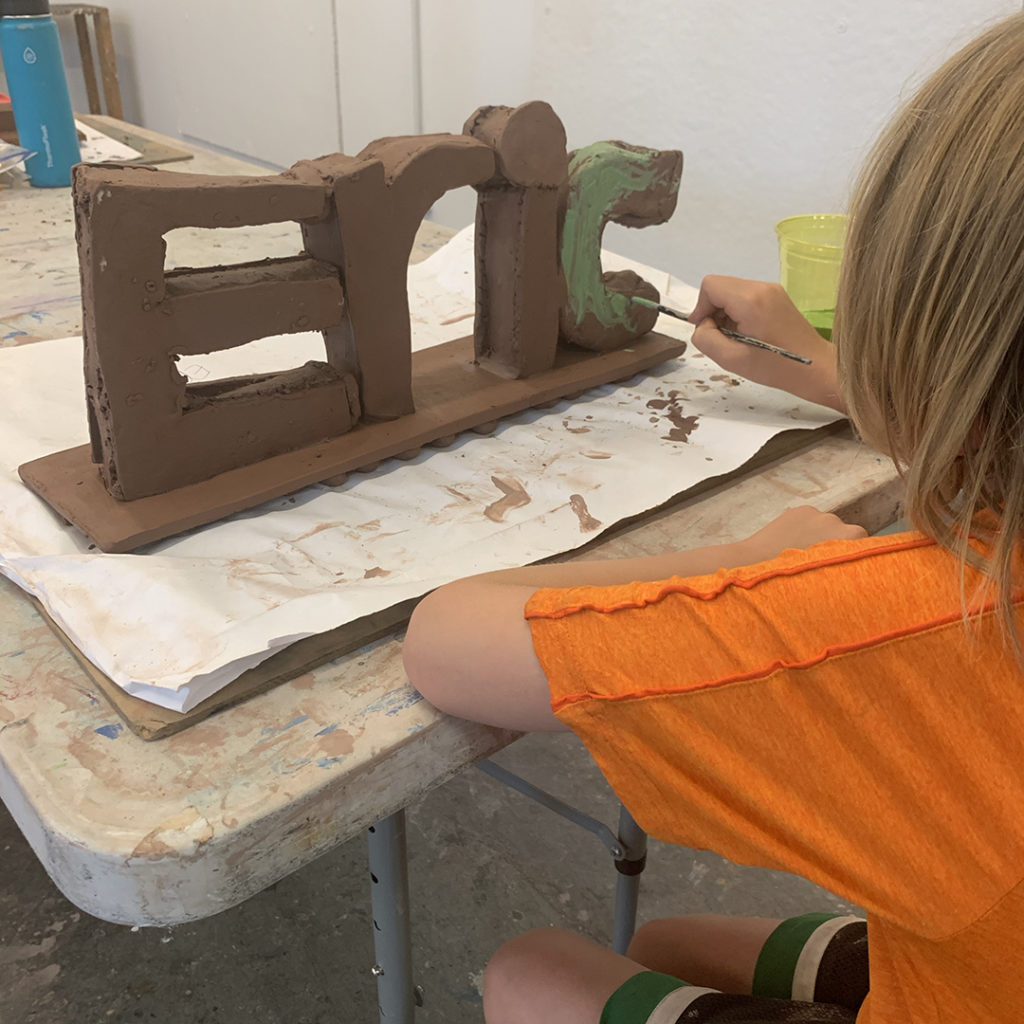
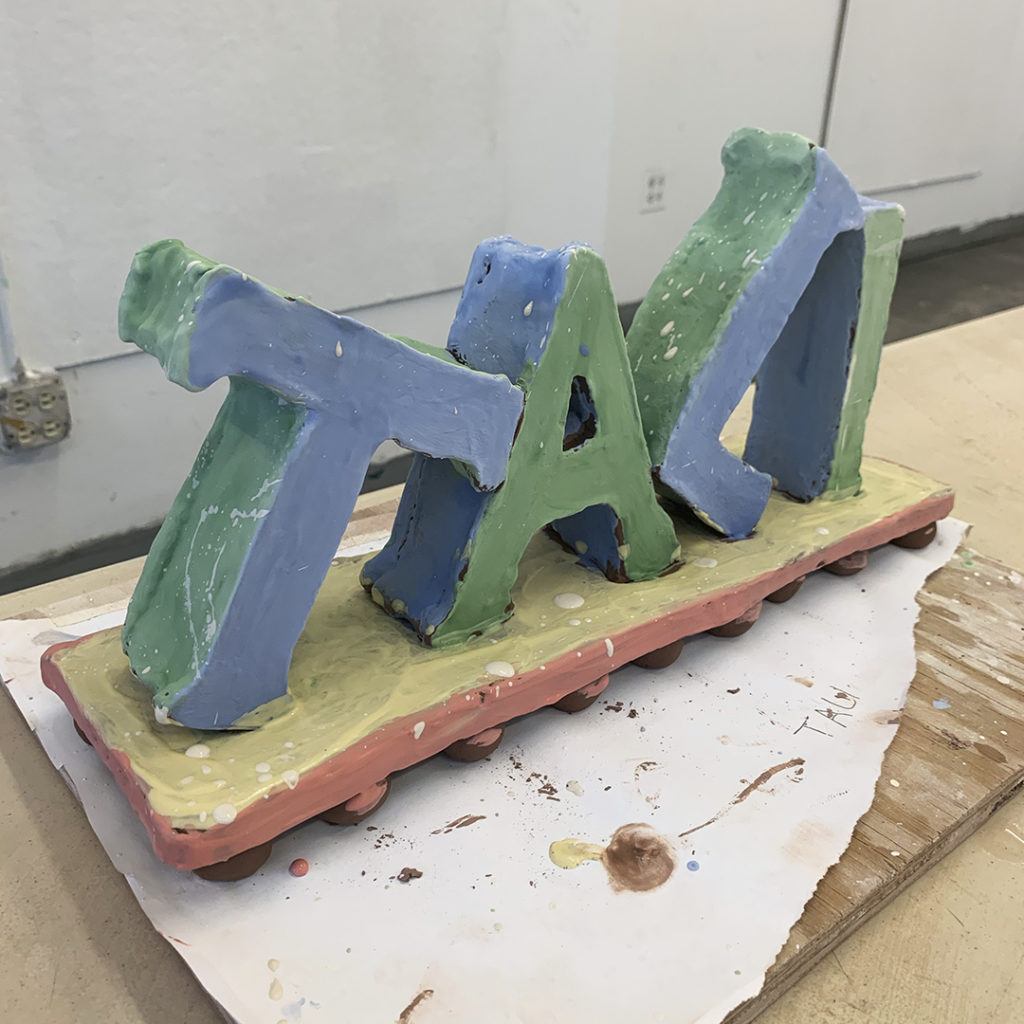
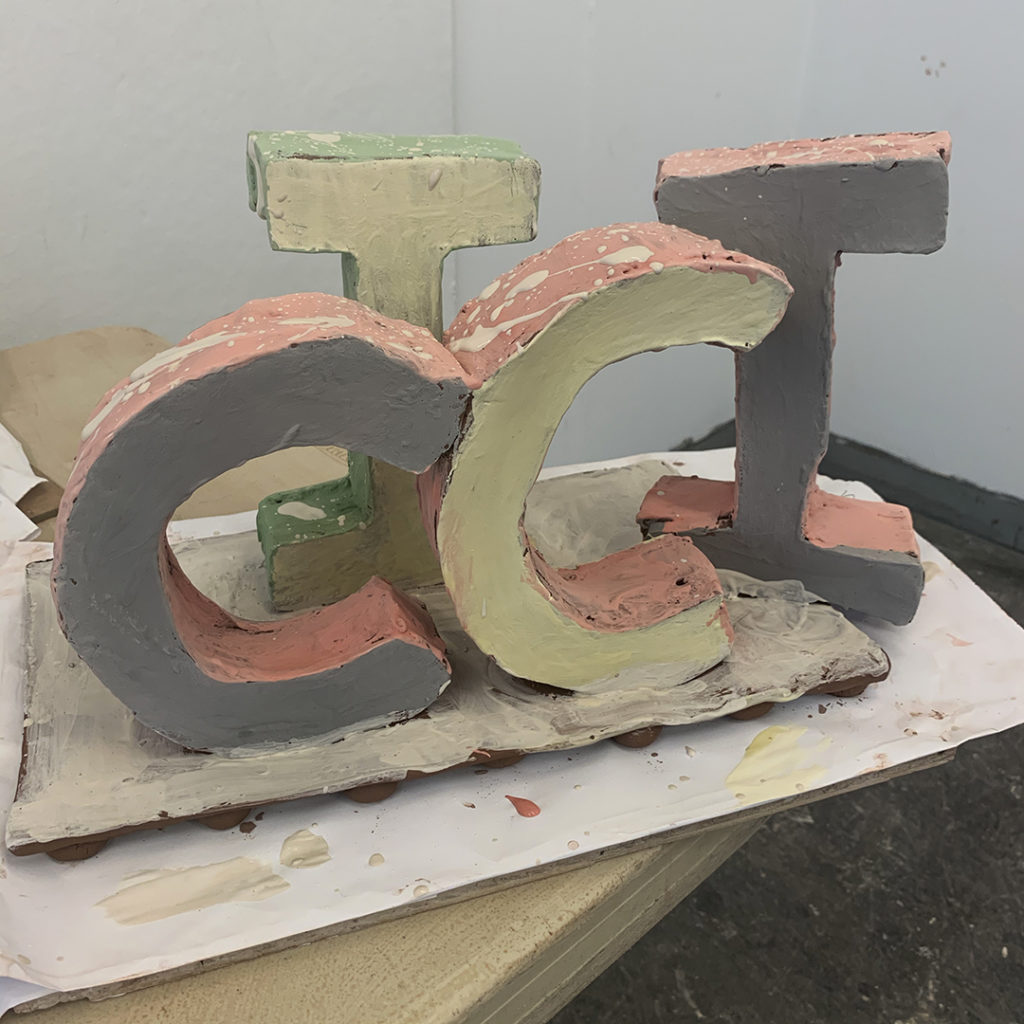
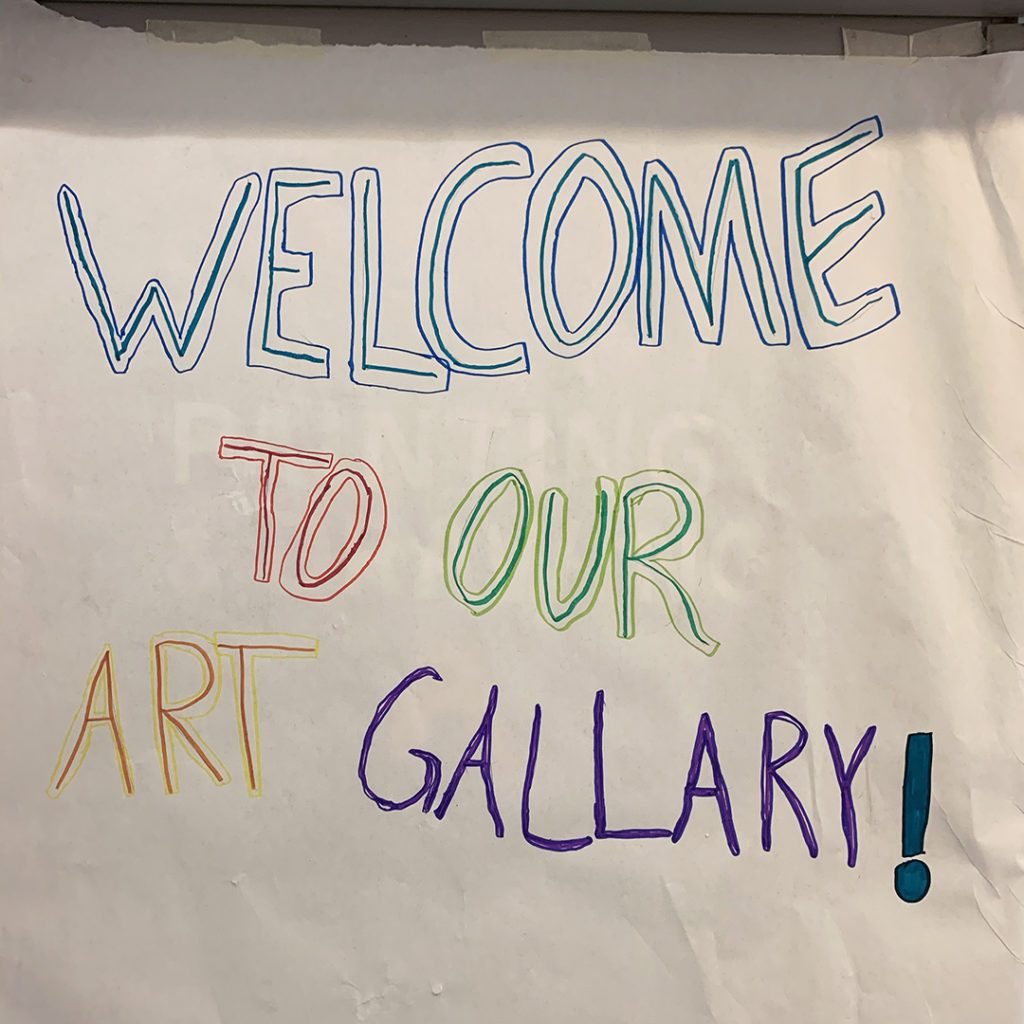
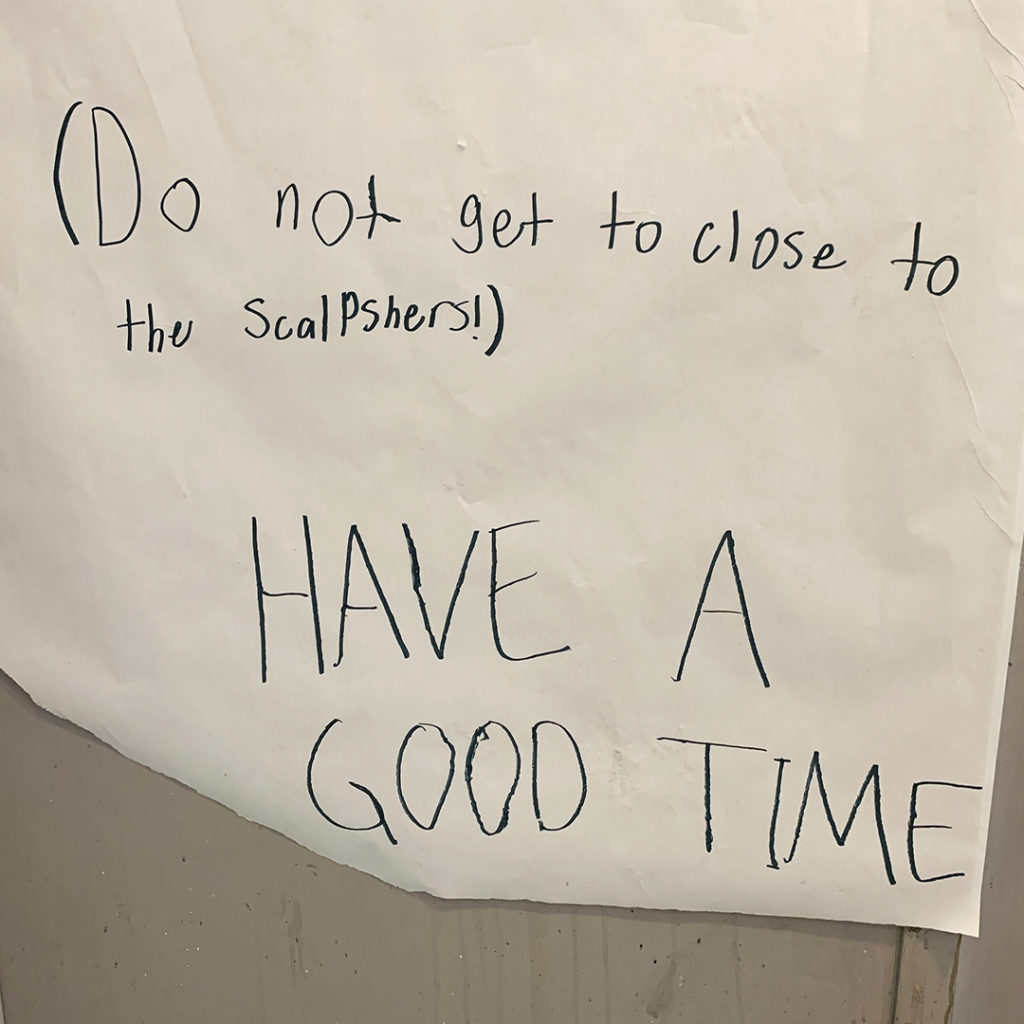
When they finished painting their sculptures, we cleaned up our workspaces and started turning our classroom into their Art Gallery… or maybe ART GALLARY??? Two of the kids made a sign for us to post on the door to welcome our guests!

After the kids had finished painting their sculptures, and making their signs, we were ready for their “Gallery Opening”… which really just meant showing off all of their work for their parents as they came to pick up their kids! The kids were so proud of their achievements… and the parents were impressed by all they had made in such a short time!

Thanks to this group of great kids for making our first week of Summer Camp at Lillstreet a success!!! It felt so great to be back at camp… I LOVE SUMMER CAMP!!! And especially for making it feel like we’ve taken one big step towards a little bit of normalcy… masks included!!!

More Summer Camp to come… I have three more weeks scheduled!!!

Categories: lillstreet, summer camp, terra cotta

So we finally started Summer Camp at Lillstreet Art Center. A lot of new rules & guidelines for all students… and for the kids coming to Summer Camp! A lot of cleaning, disinfecting & sanitizing throughout the day. And of course MASKS for everyone!!! So exciting to have the kids back… the energy, the fun, the creativity!!! But still kinda weird at the same time to not be able to see their cute little faces!!!

Since this was Sculpture Camp, I figured out two-day clay project would be inspired by Robert Indiana… stacked dimensional letters. Some of the kids had never heard of him… but they sure knew him and a LOT more famous sculptors by the end of the week!

Sculpture by Robert Indiana

The kids started their project by drawing out their letters on a piece of paper to use as a stencil on the clay. They needed to cut two of each letter… for the front & back of each piece. So we made plenty of slabs. Plenty of tracing letters & cutting them out on their little canvas-covered boards!

After cutting out all of their letters, we let them set-up for a bit on a large sheet of paper. Then they started assembling their letters. A lot of scoring & slipping as they added a slab strip around all edges of the letters to give them some depth. Once the sides were on, they needed to add the top layer to close off the box. The biggest trick was to score the correct side of the letter so it lined-up with the box… I think about half of them did it backwards the first time!!! HA!!! Easy to fix… it’s just clay!

We started Tuesday by finishing & refining their letters. After they were all cleaned up, we started stacking them and designing their final layouts. Keeping Robert Indiana as their inspiration, they each figured out different configurations… and then decided on their final stack. I helped them assemble their sculptures with some “strong” scoring & slipping!

Once they were all stacked, they start to paint their sculptures with color glazes. One of the benefits of working with terra cotta in Summer Camp is that we can do a single firing and get their projects back by Friday!

Always part of the process… and “Gary’s Summer Camp Rule #3”… Whatever mess you make, YOU will be cleaning up!!! And they do without complaint. It’s just an “understood” part of the process. You tell them to do it. They do it. Giddy-up!

On Friday, their sculptures came out of the kiln. They finally got to see their sculpture masterpieces!!! So adorable!!! Sure, there were a few minor issues where something didn’t stick together… “did I tell you to score & slip?”… but no huge errors! No explosions! No major breakage! I consider that a success… especially because THEY LOVED THEM!!!

Categories: classes, clay, lillstreet, summer camp, terra cotta

Last week was our first week back at Summer Camp!!! Lillstreet Art Center is finally re-opened for classes & camps… and it was so fun & exciting to have “people” back in the building. The energy. The creativity. The smiling faces… or well, at least I assume they were smiling behind their masks?! Anyway… summer camp was AMAZING as always. I had a wonderful time with a wonderful group of kids!!!!

Categories: clay, handbuilding, television

Okay, so YES… I do watch far too much Reality TV!!!

But, is anyone else watching “ALONE” on the History Channel? It’s kind of like a real-life “Survivor” where ten contestants need to survive the arctic wilderness for a hundred days… hunting, gathering, building a shelter & self-filming the whole time. On last week’s episode, one of them dug up some clay and was making her own pinch pot dinnerware!!! Very cool… very resourceful. I would have of course pressed twig & leaf impressions into them too!!! Cuz’ more is more!!!

Categories: classes, friends, glaze, process, production

One of the best parts of “kiln firing day” is I can also get a lot of “busy-work” done around the studio. Like spraying these baby building blocks with a layer of clear glaze. If you remember, these were leftover from the end of our Winter session and my Lillstreet Throwdown class. We made them as a surprise gift for Molly & Jacob who are expecting their first child. We finished building them at the end of class, and they were bisqued soon after that. And there they sat on the shelf as the pandemic took hold.

Sure, I was working in the studio. Sure, I could have glazed these any time over the past three and a half months… but of course I kept putting it off. Well, they’re FINALLY glazed… and ready to be fired again! The “Team Lavender Baby” is due in six weeks… so I had plenty of time. Could have easily procrastinated a few more weeks!!!

Categories: classes, lillstreet, wheelthrowing

So I taught my new Intermediate Wheelthrowing class yesterday in the new wheelthrowing room at Lillstreet Art Center. I was stupified by the amount of natural light coming in through the windows!!! My studio has no window access so it was all new to me. It was kind of amazing… huge windows along the wall above the wheels… then I realized that I typically teach night classes… and that might be part of it too?!

Categories: kiln firing

After a full day of firing, it’s always a little nerve-wracking to me to turn the kiln off. It’s been going all day, flames shooting out everywhere with the fan & gas valves making a good amount of noise. So it’s a big change when you turn it off and it’s suddenly silent!!! Just hope you’ve actually done all you can.

Also great to look at the digital pyrometer kiln at the end to see the difference top-to-bottom… for this firing it was just 15-degrees! Sweet!!! Can’t wait for it to cool now… so I can unload to see the new “treasures” Monday night!

Categories: kiln firing, process, production

Pretty exciting when you’re adding the soda mixture into the kiln… it’s already in reduction… and somehow the flames find their way of to shoot out of every nook & cranny!

Categories: bike, sunrise

What a difference a day makes…
barely a cloud in the sky after yesterday’s cloud-cover.

Categories: kiln firing, process, production

Three stacks of pottery, shelves & bricks from tonight’s loading. A lot of work “crammed in there”… hoping that the soda atmosphere can still make its way around inside to move the soda around!

If you look close, you can also see where my flock of birds have landed!!!

And then the front stack…
which is actually a “square” made of two shelves side-by-side”