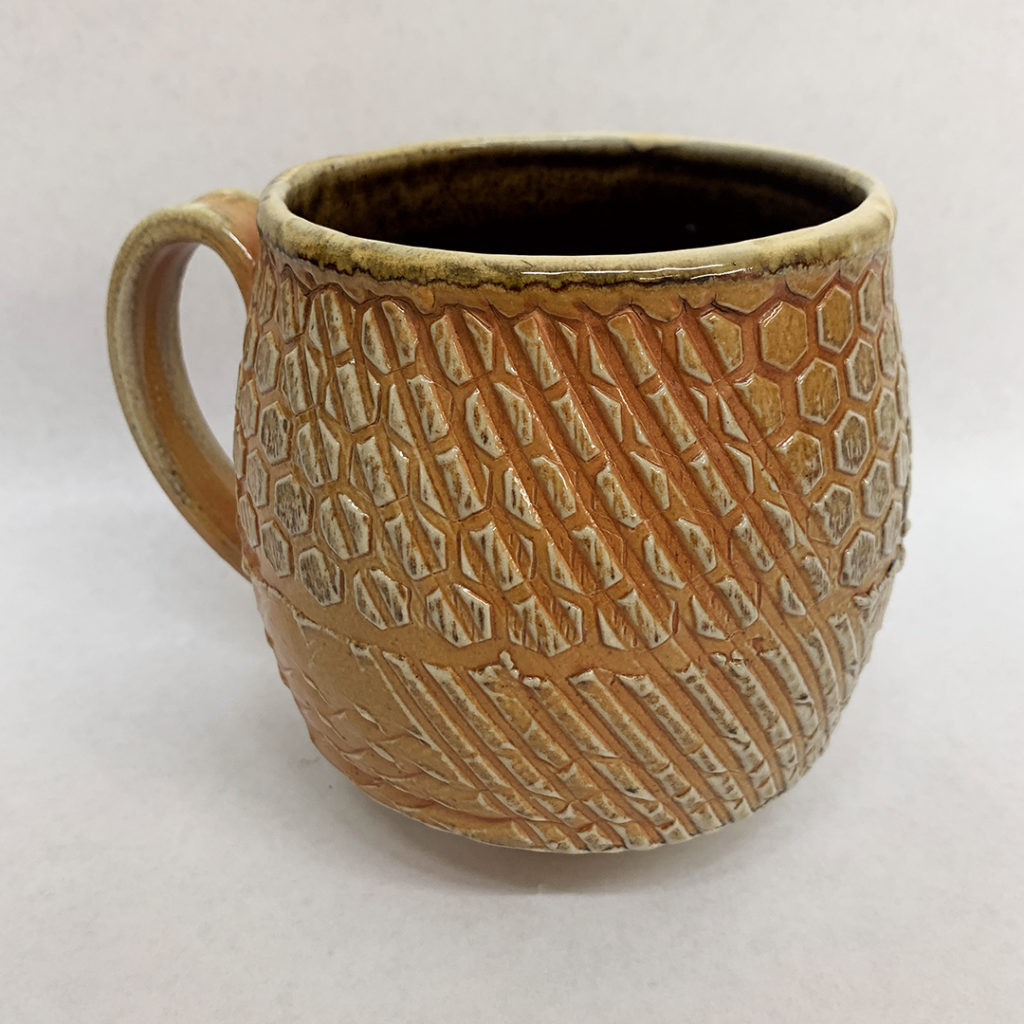
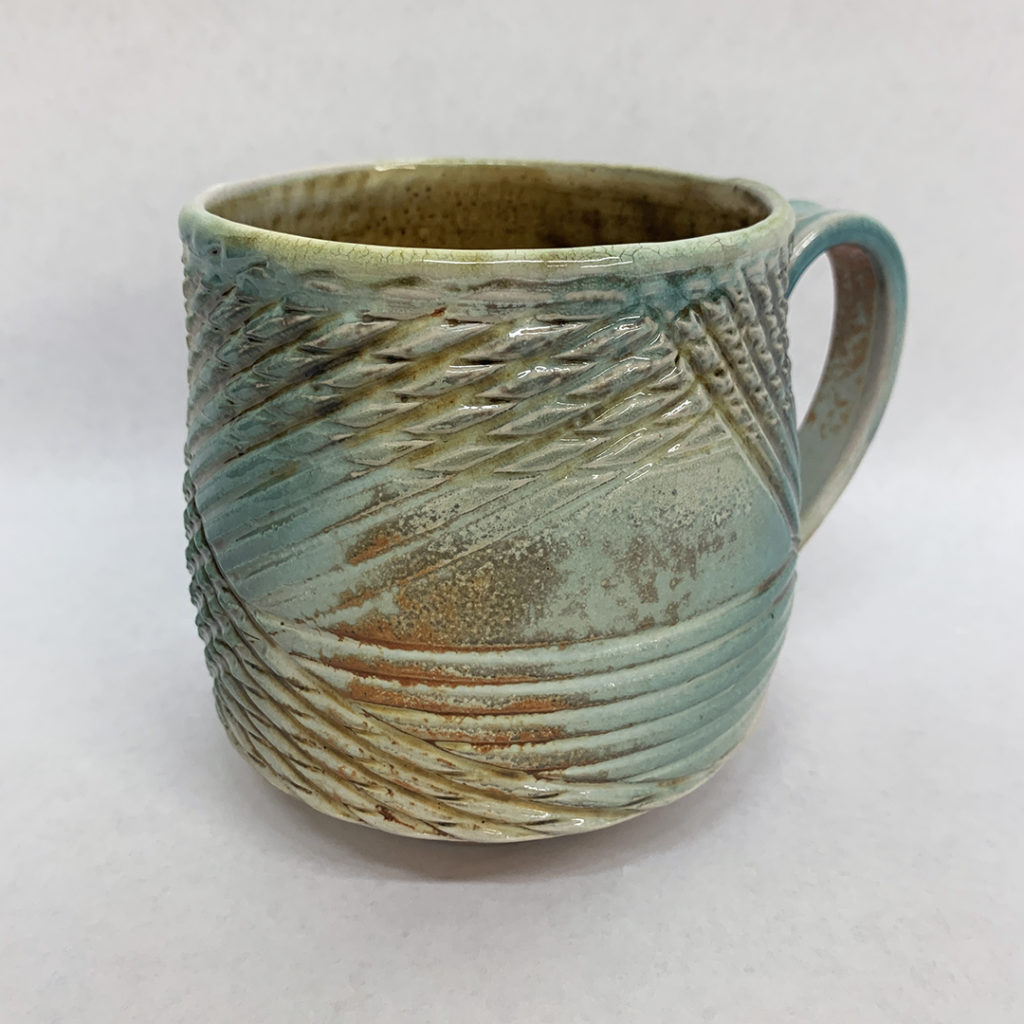
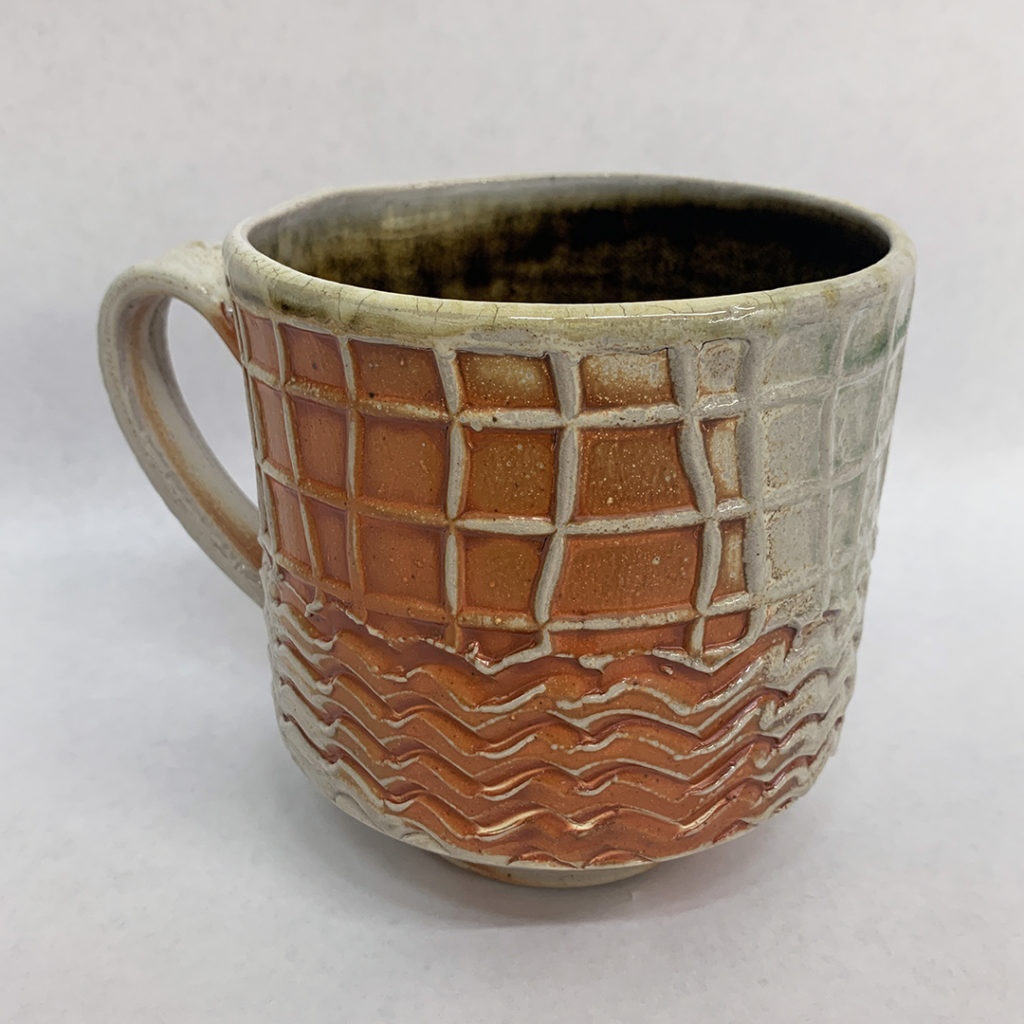
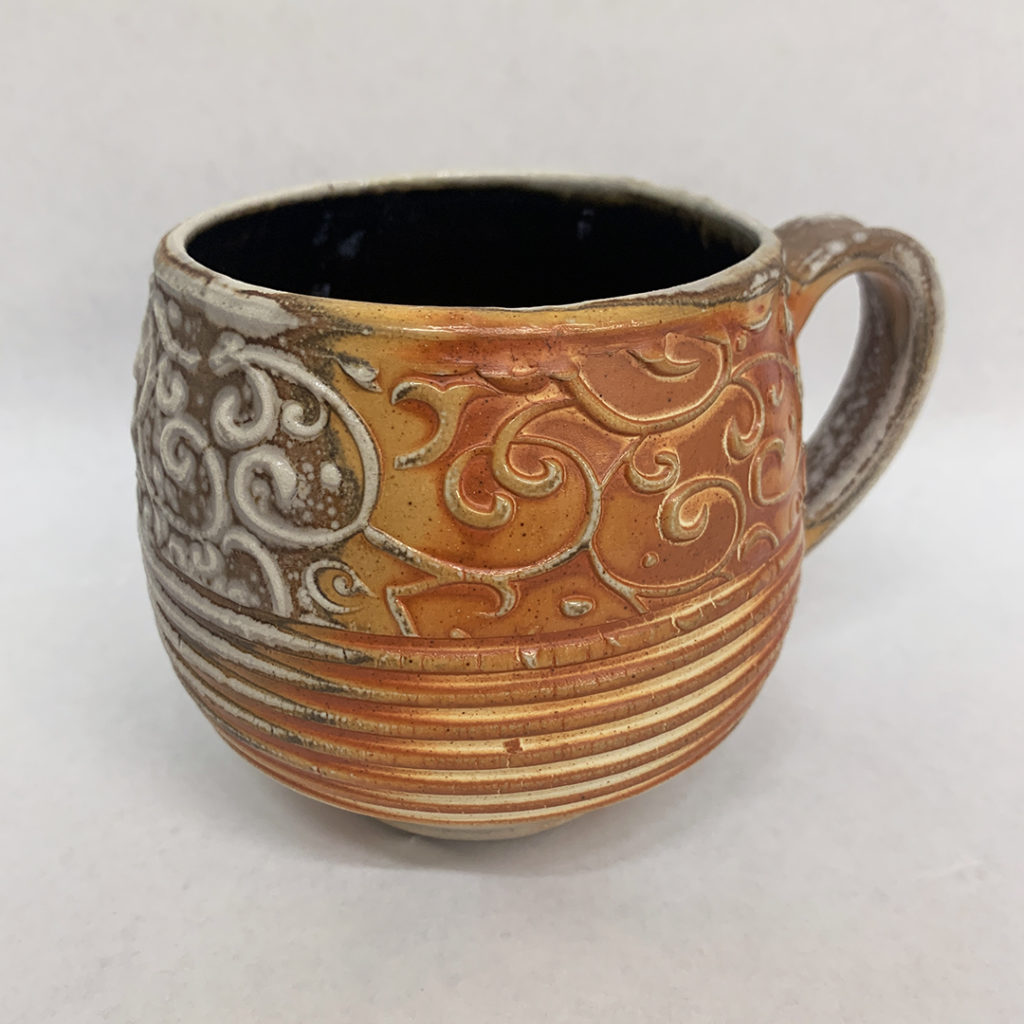
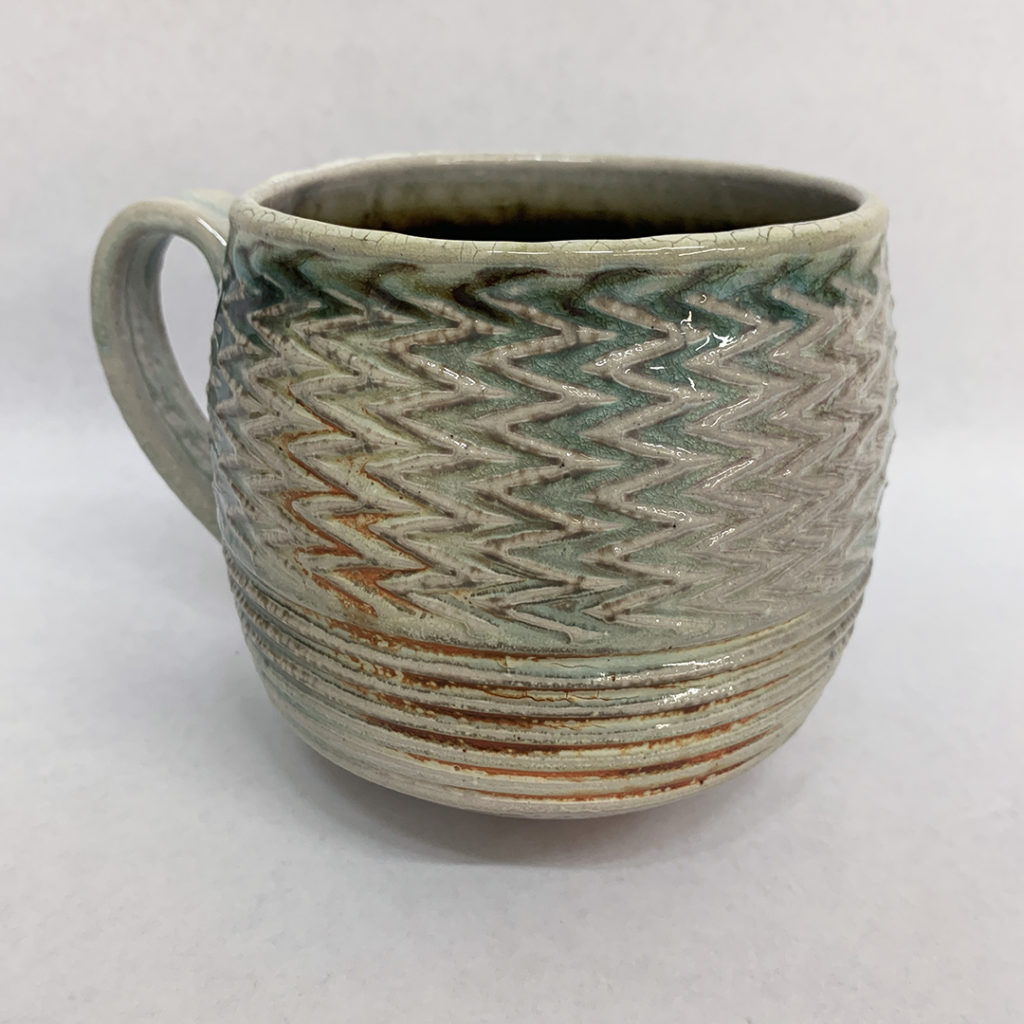
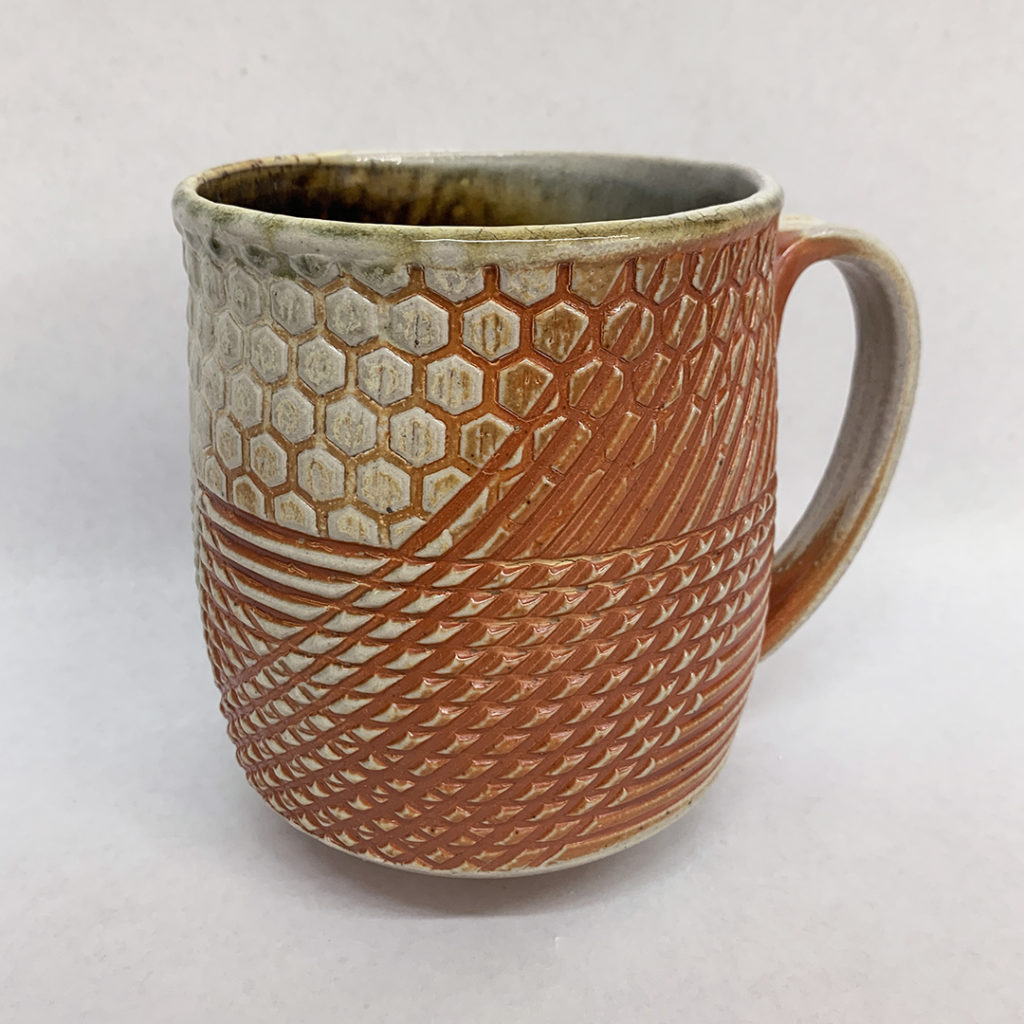
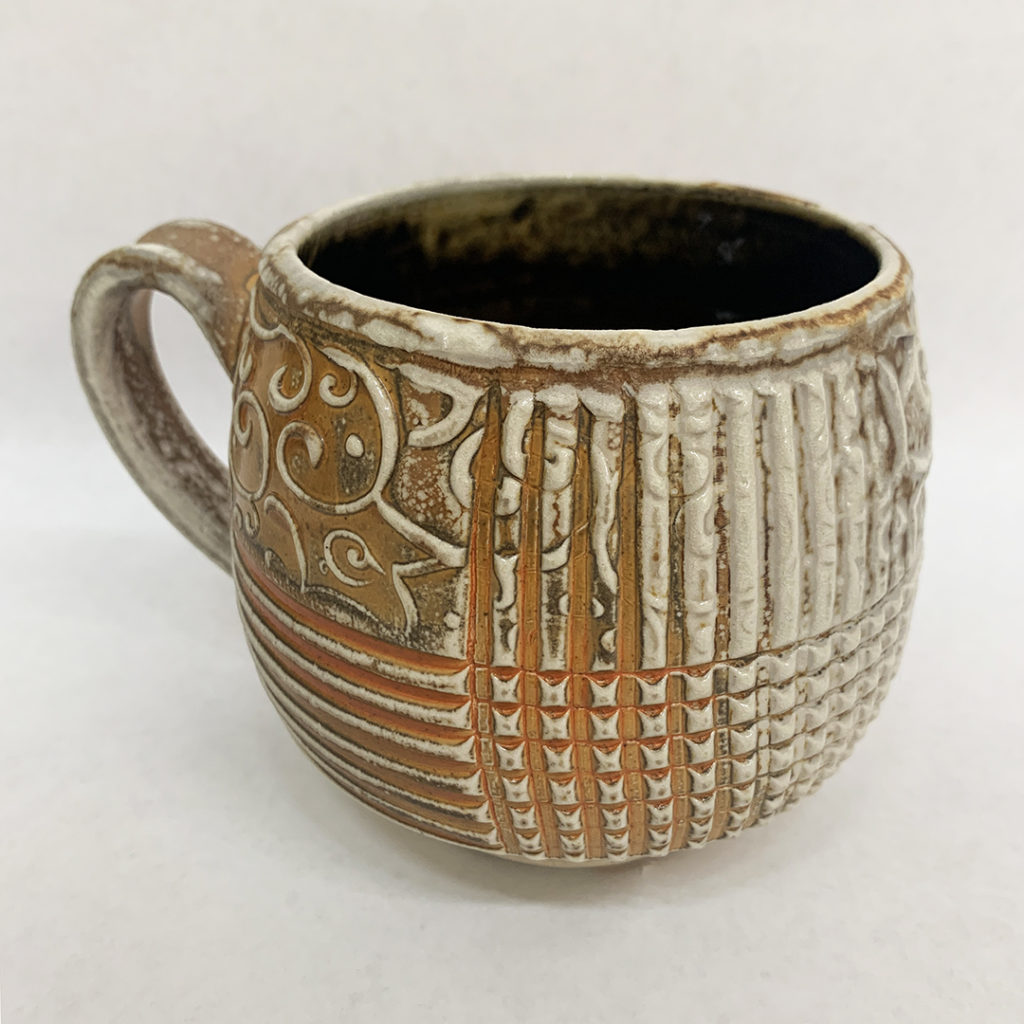
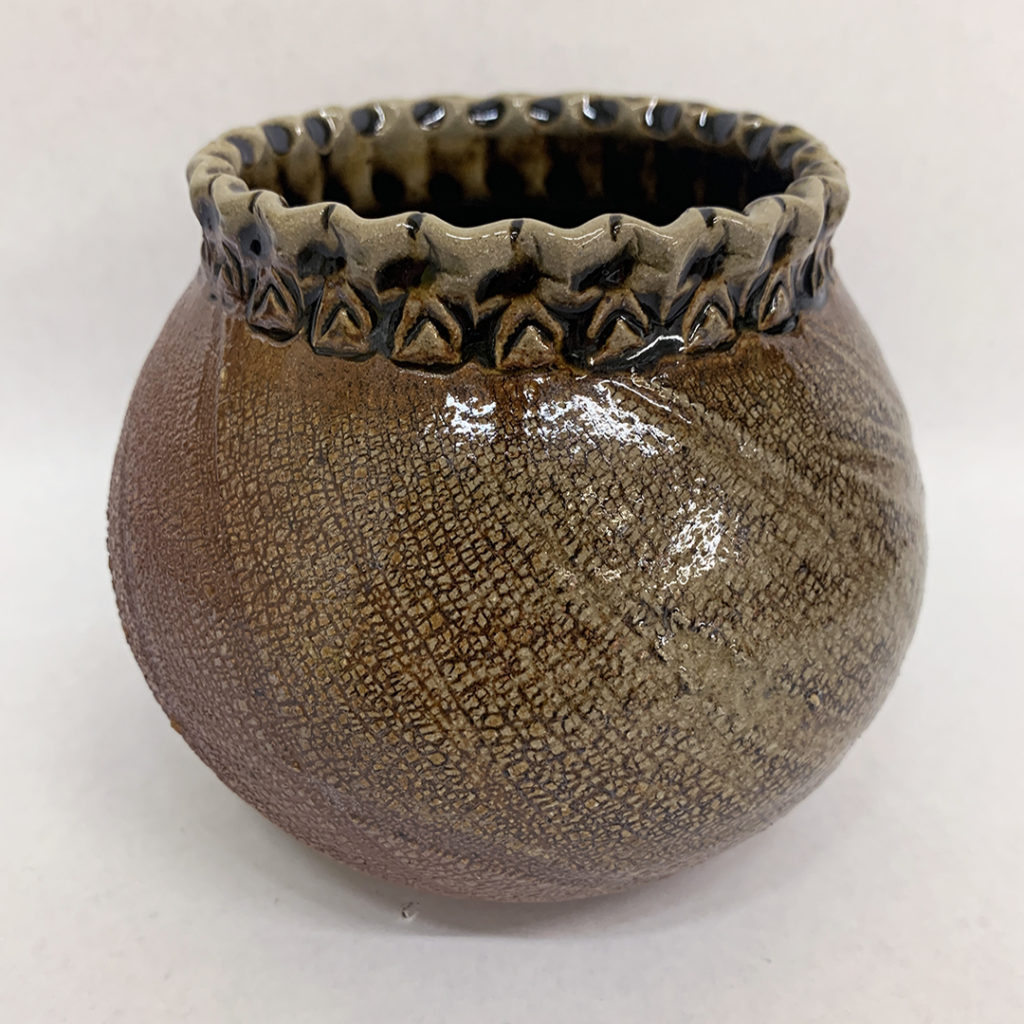
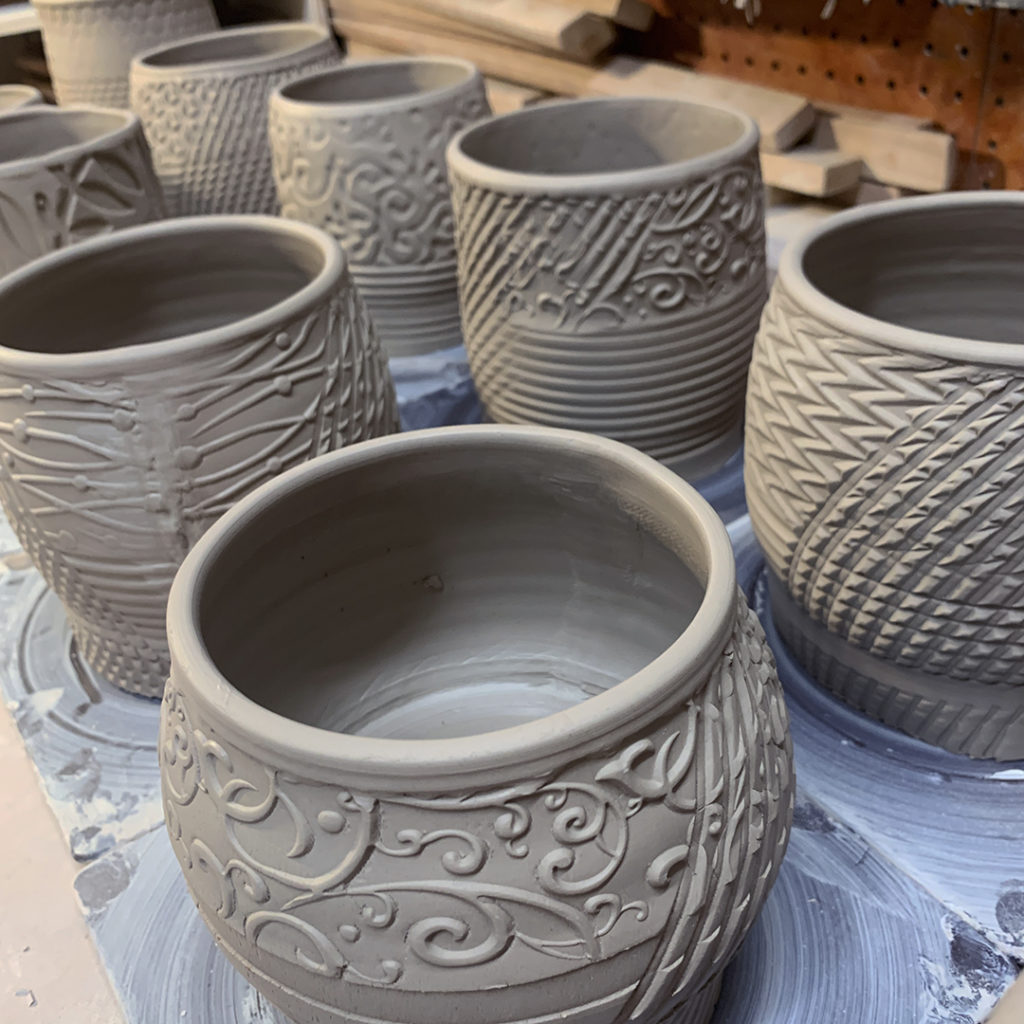
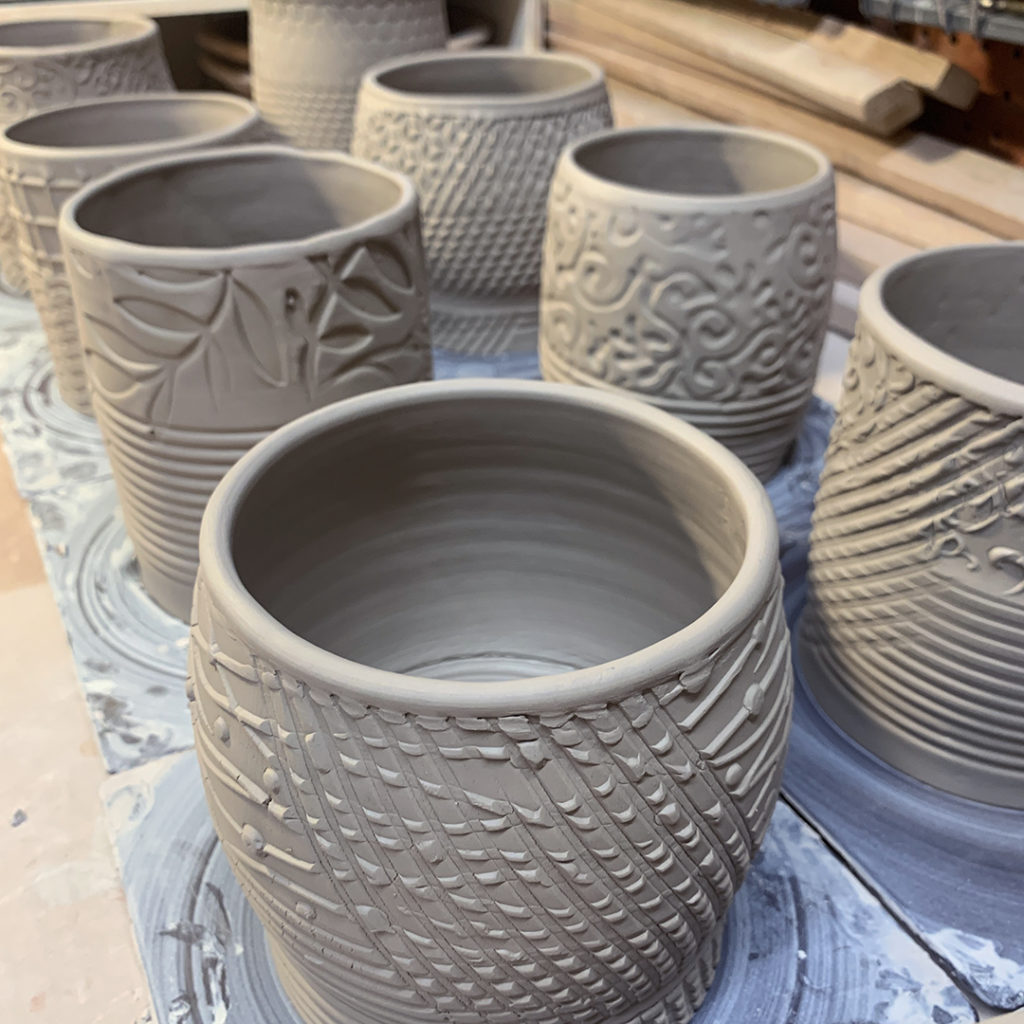
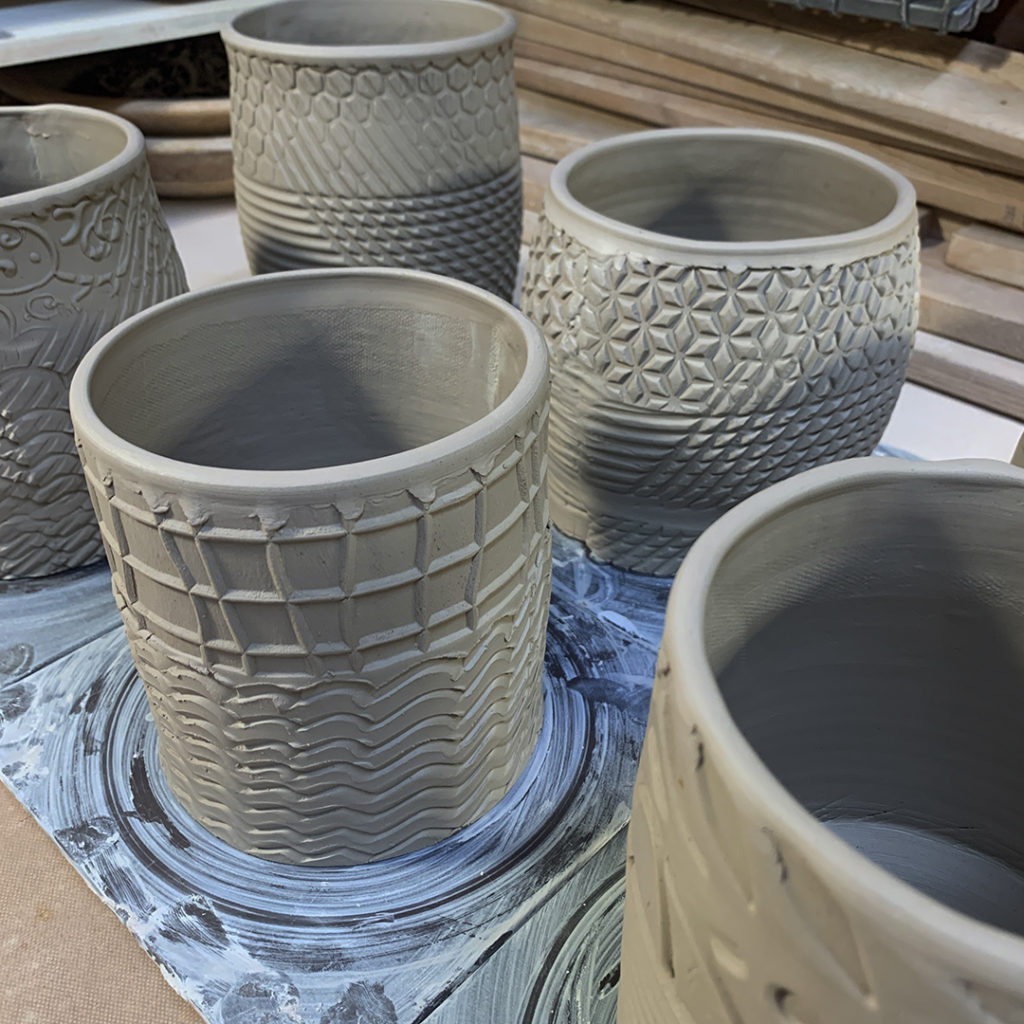
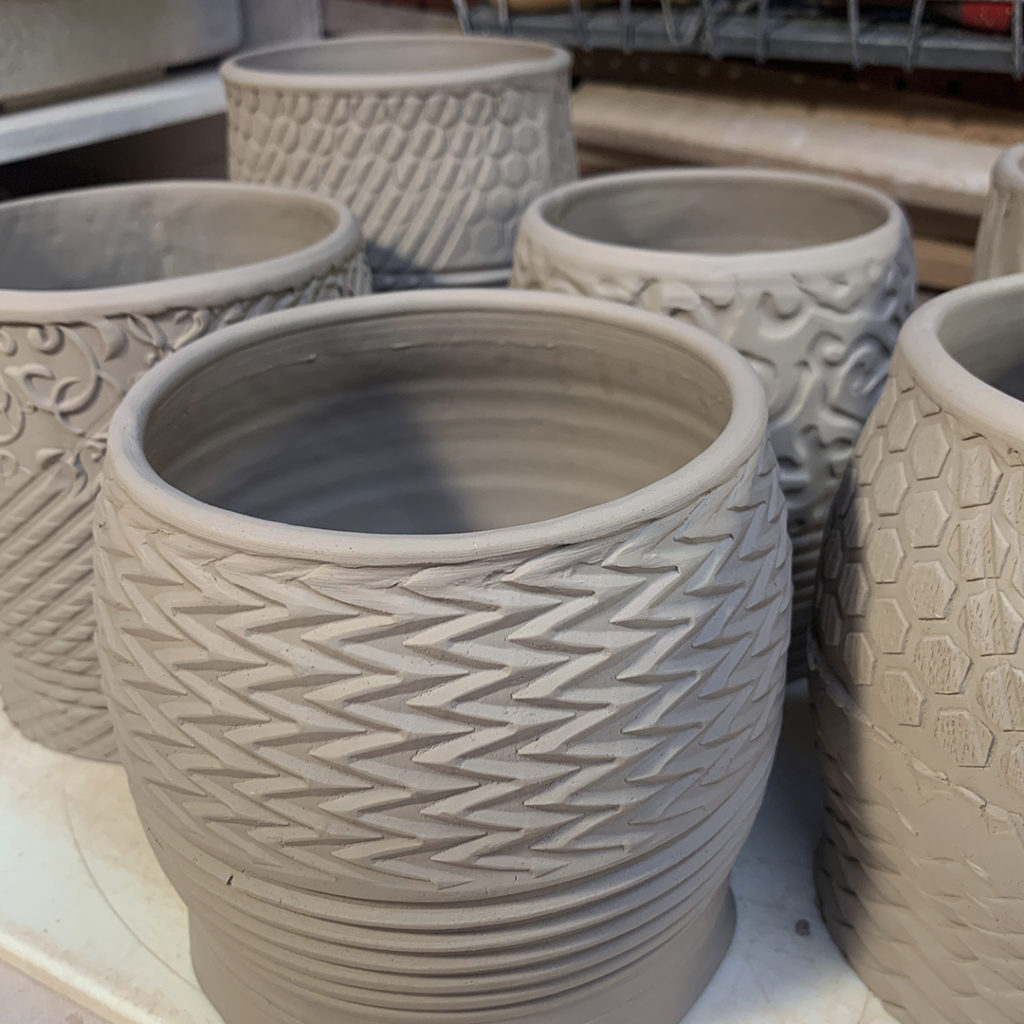
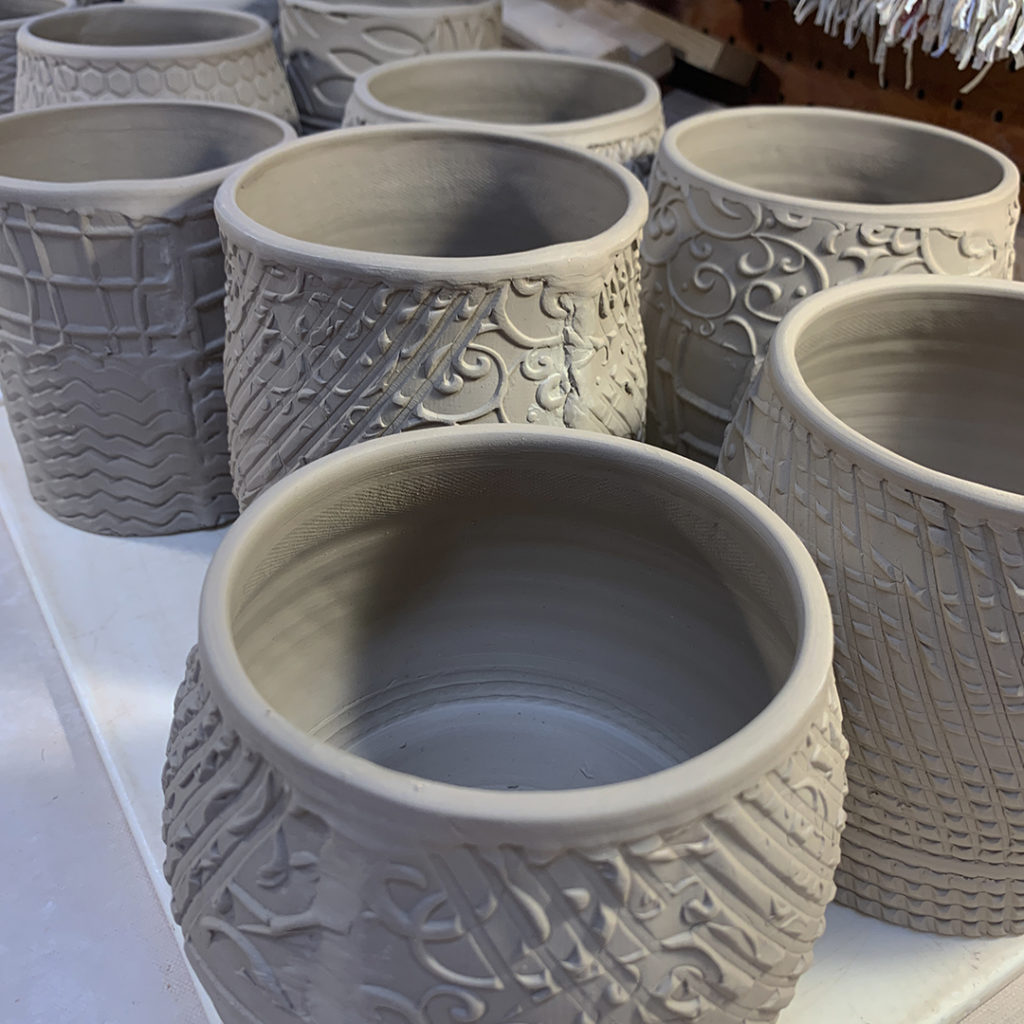
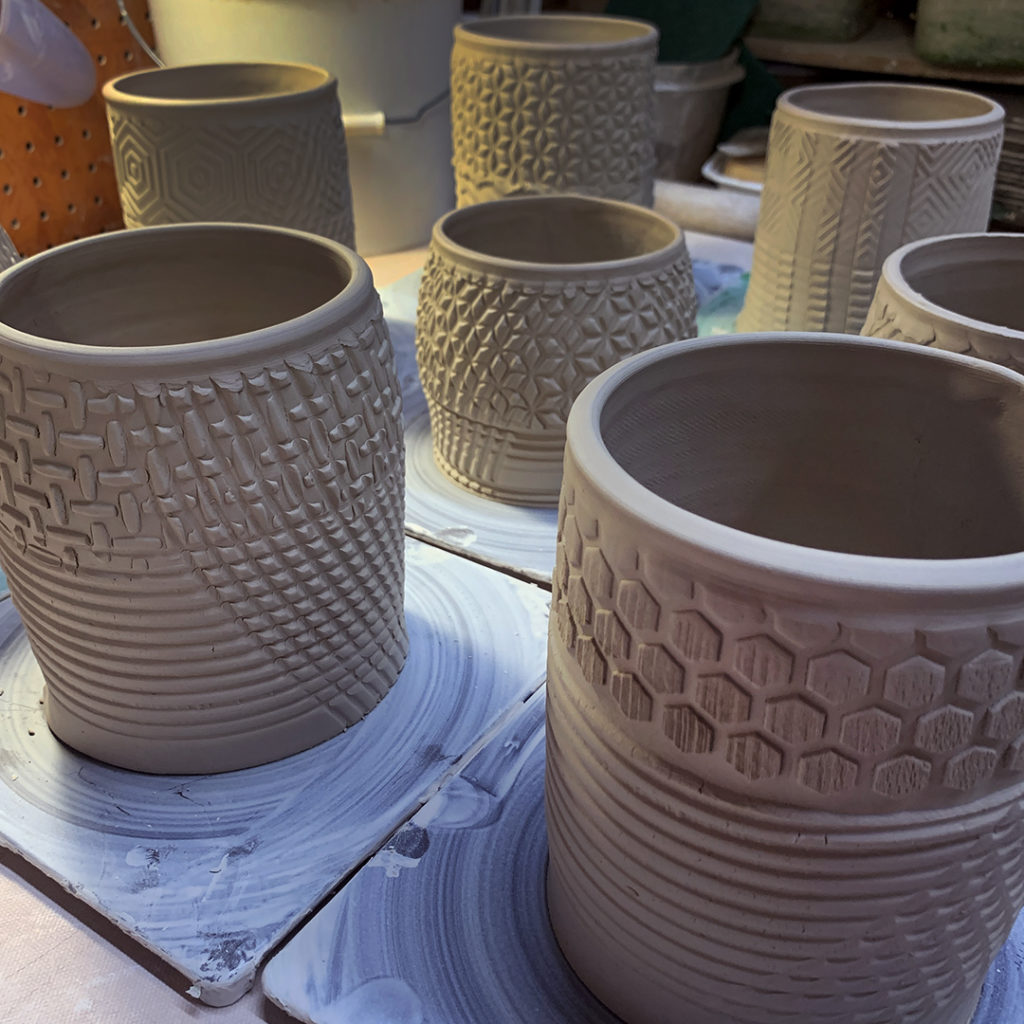
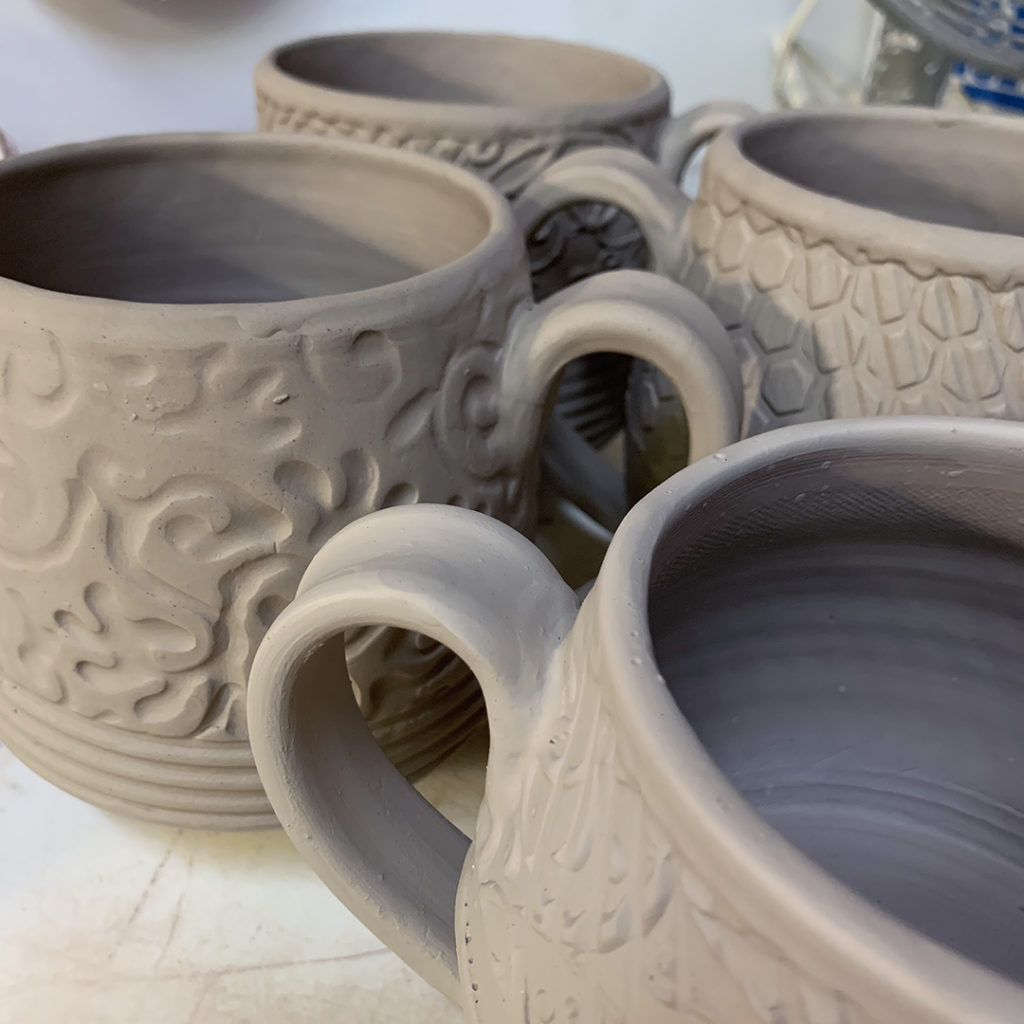
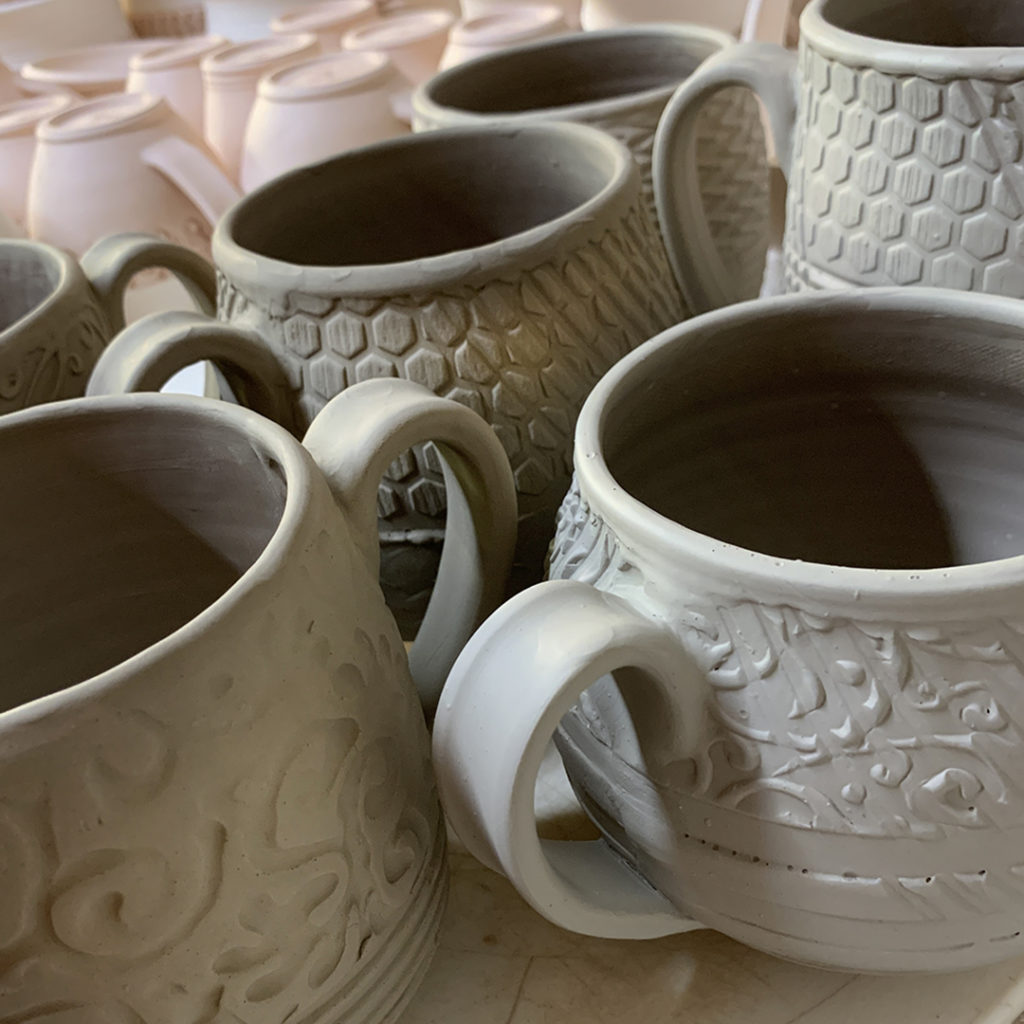
So Ive been working on some more of my “handbuilt-wheeltrown-combo” mugs. The bottoms are wheelthrown, the sides handbuilt, and then trimmed & refined on the wheel again! One of my favorite “tricks” for making fun textured mugs!
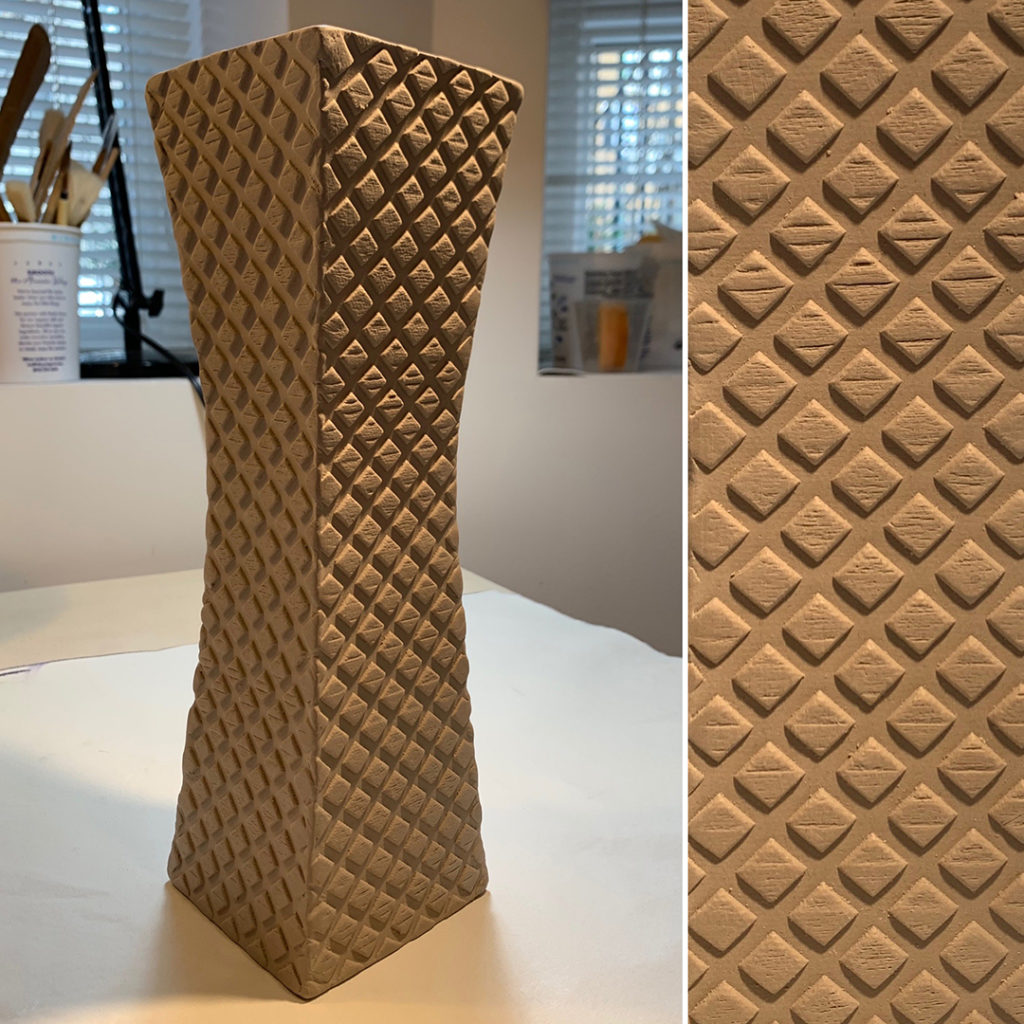
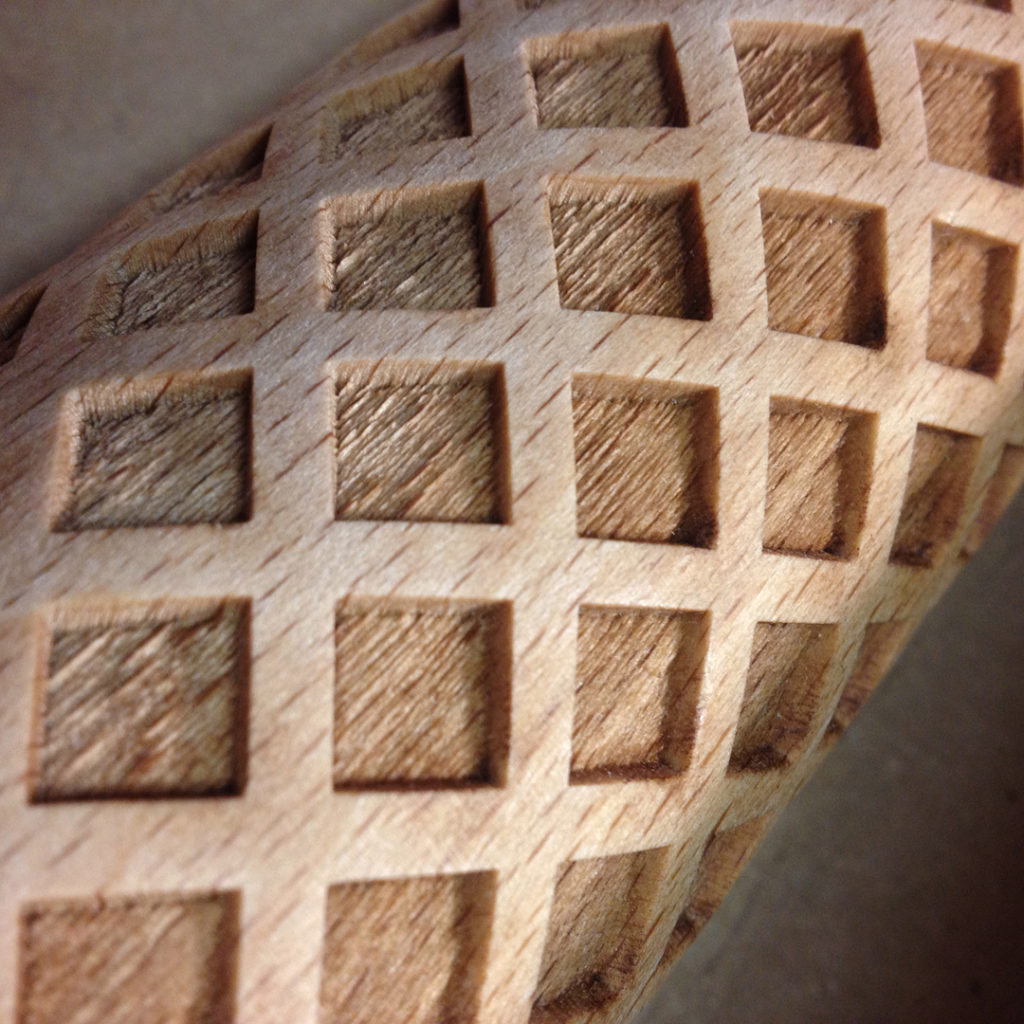
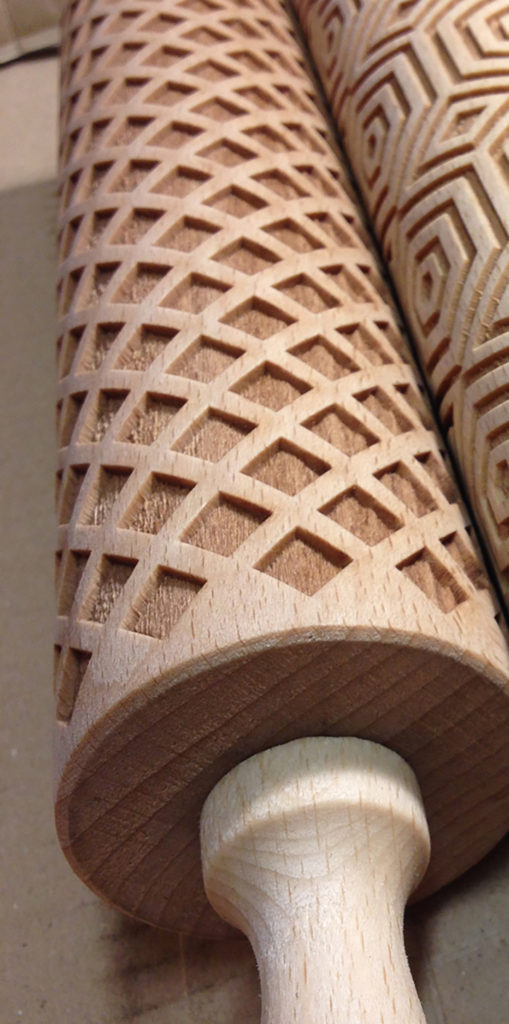
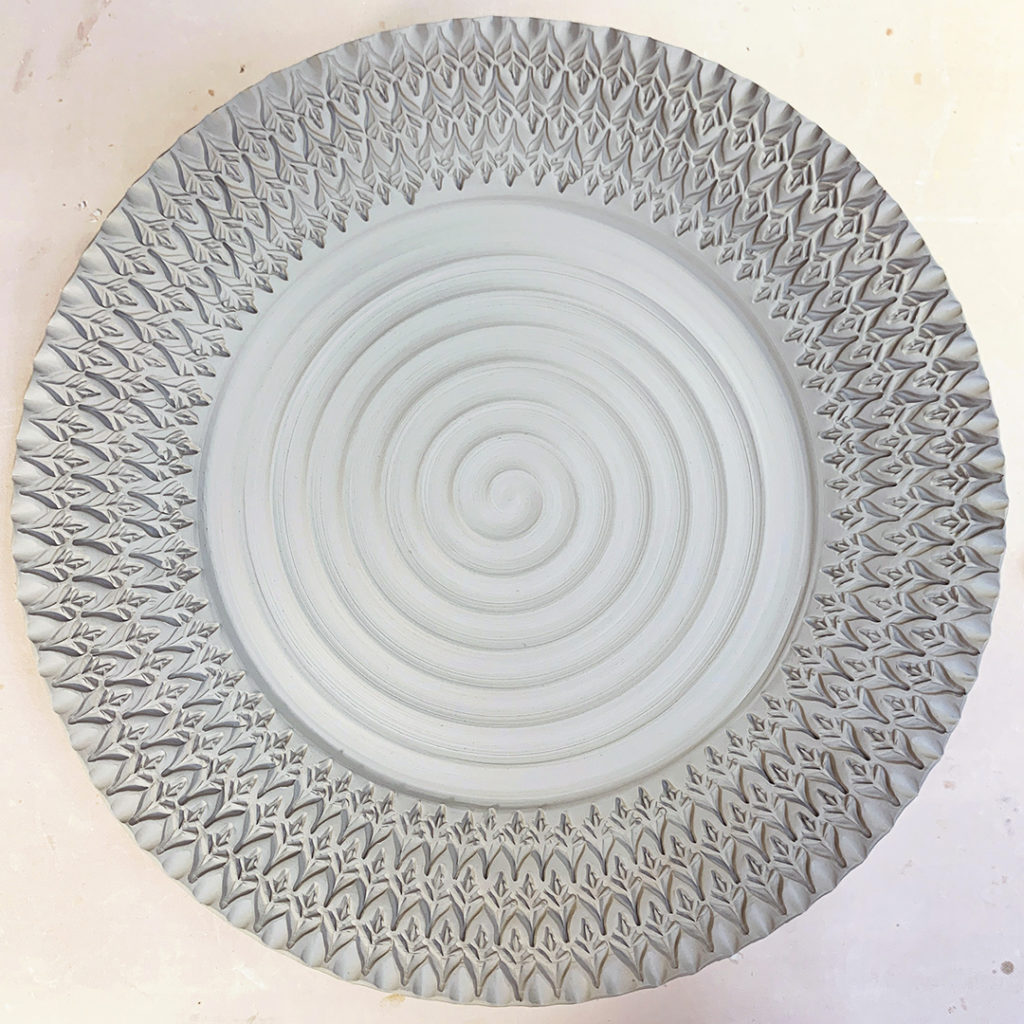
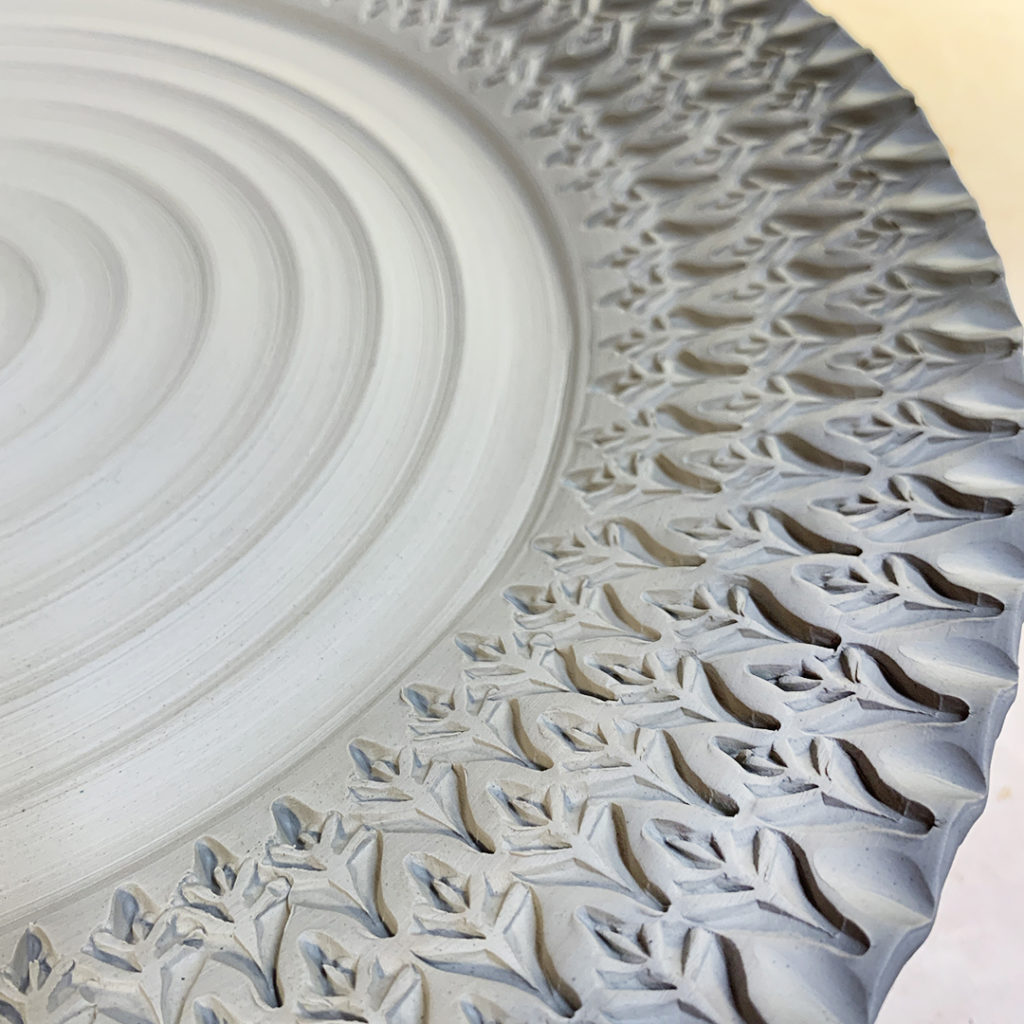
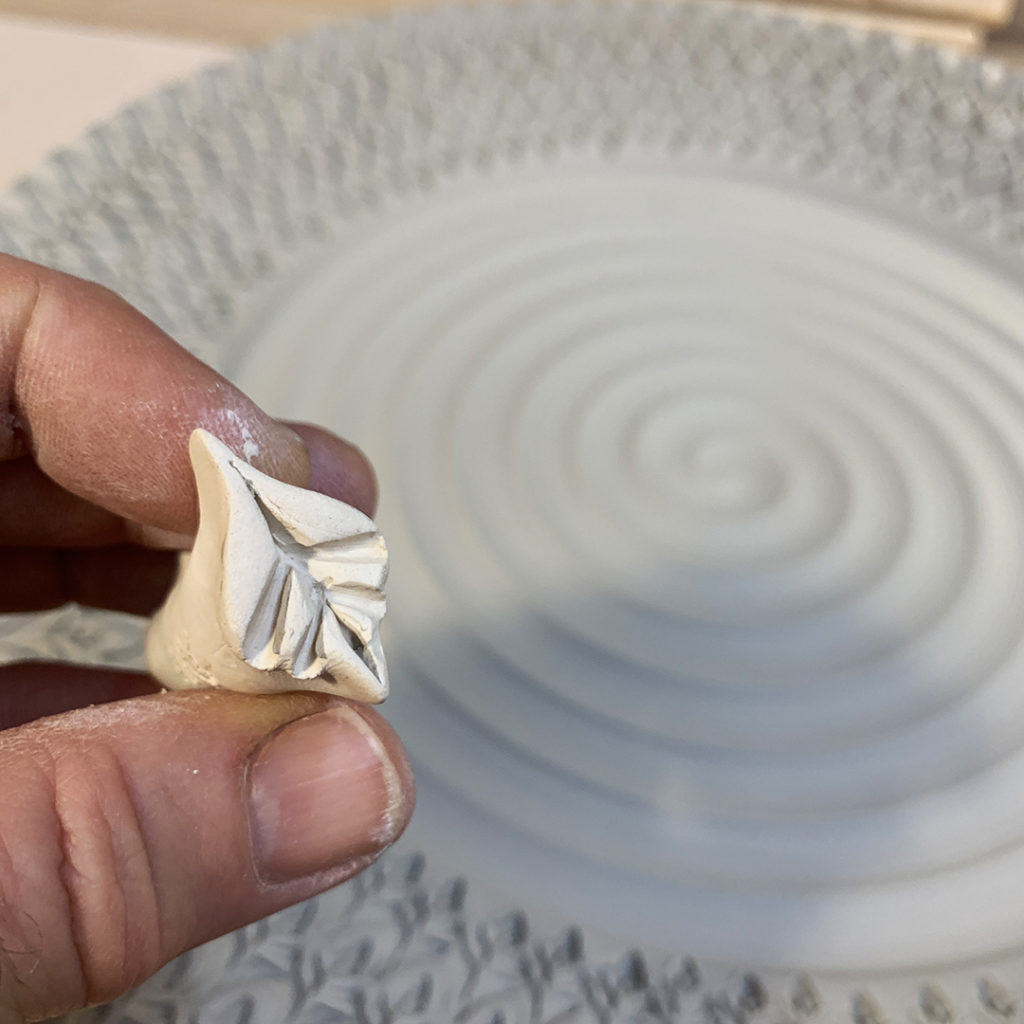
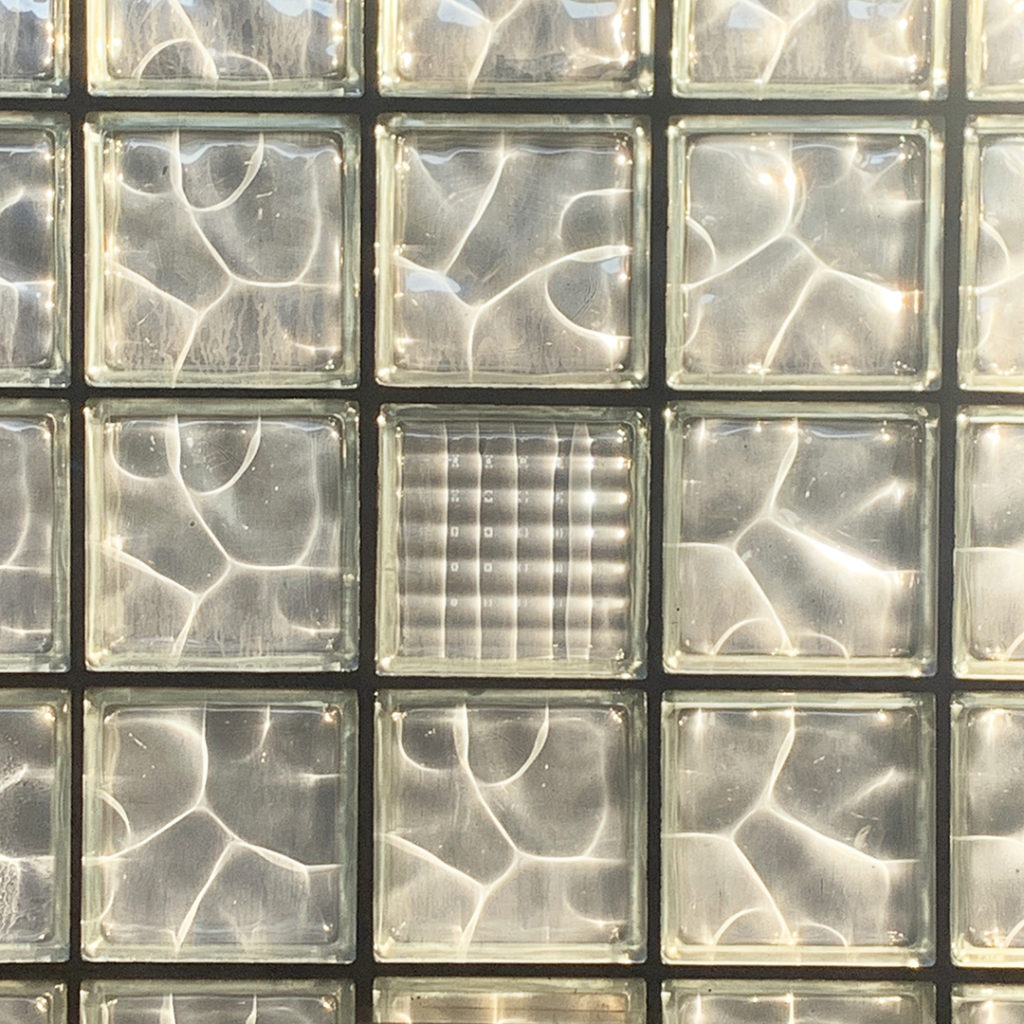
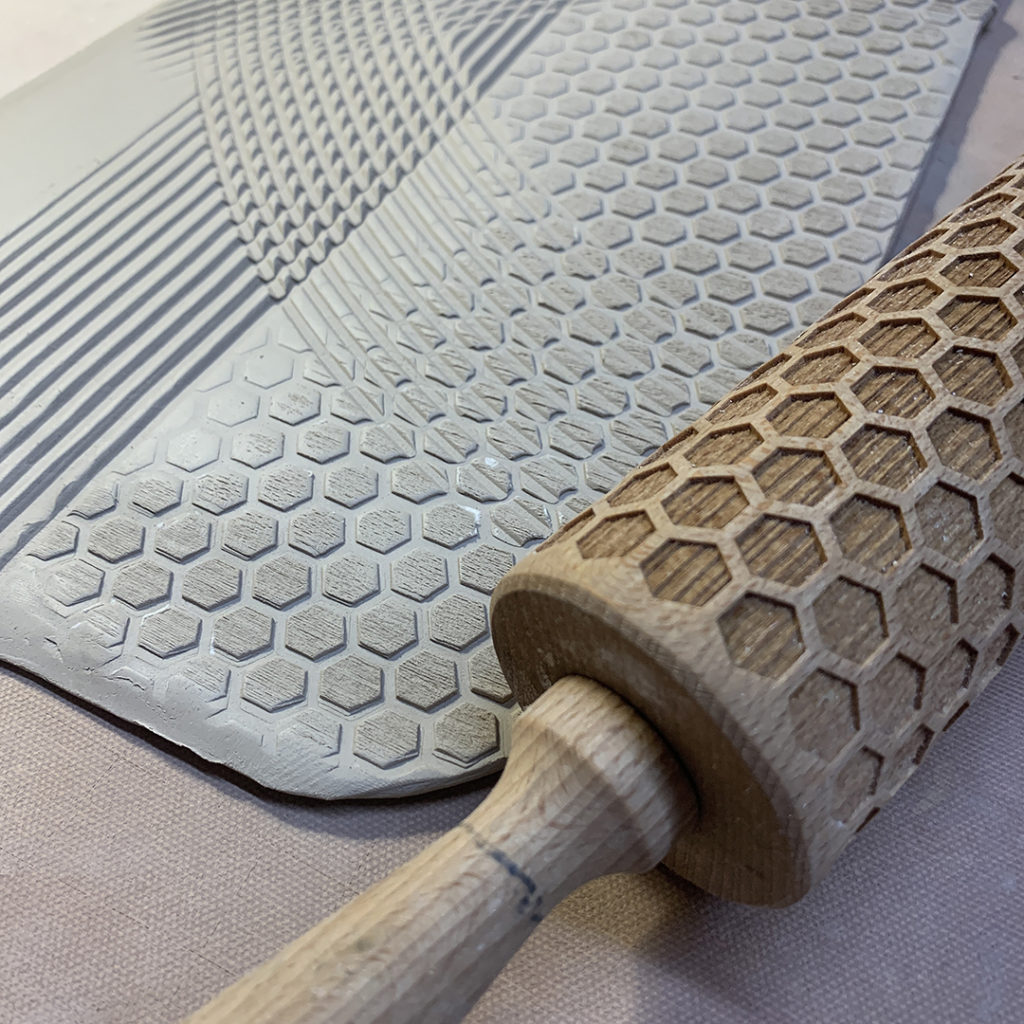
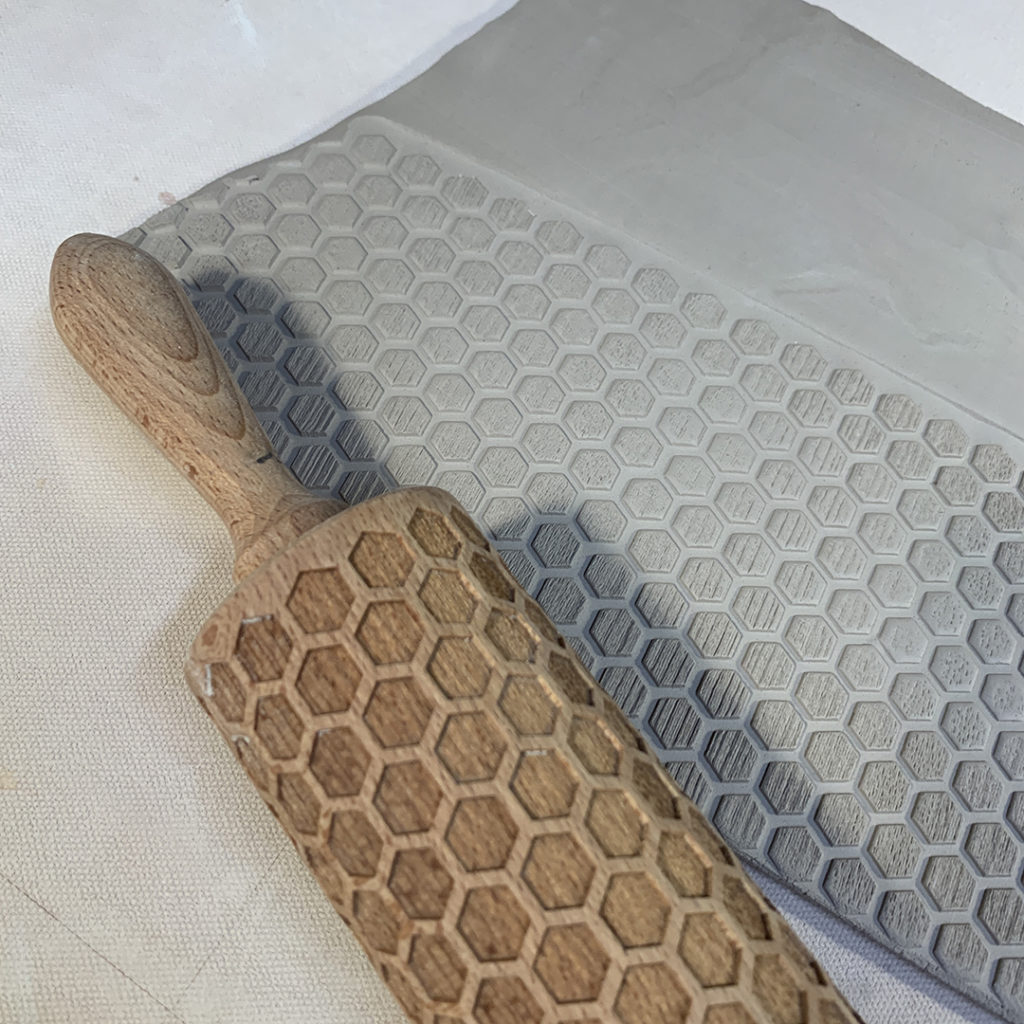
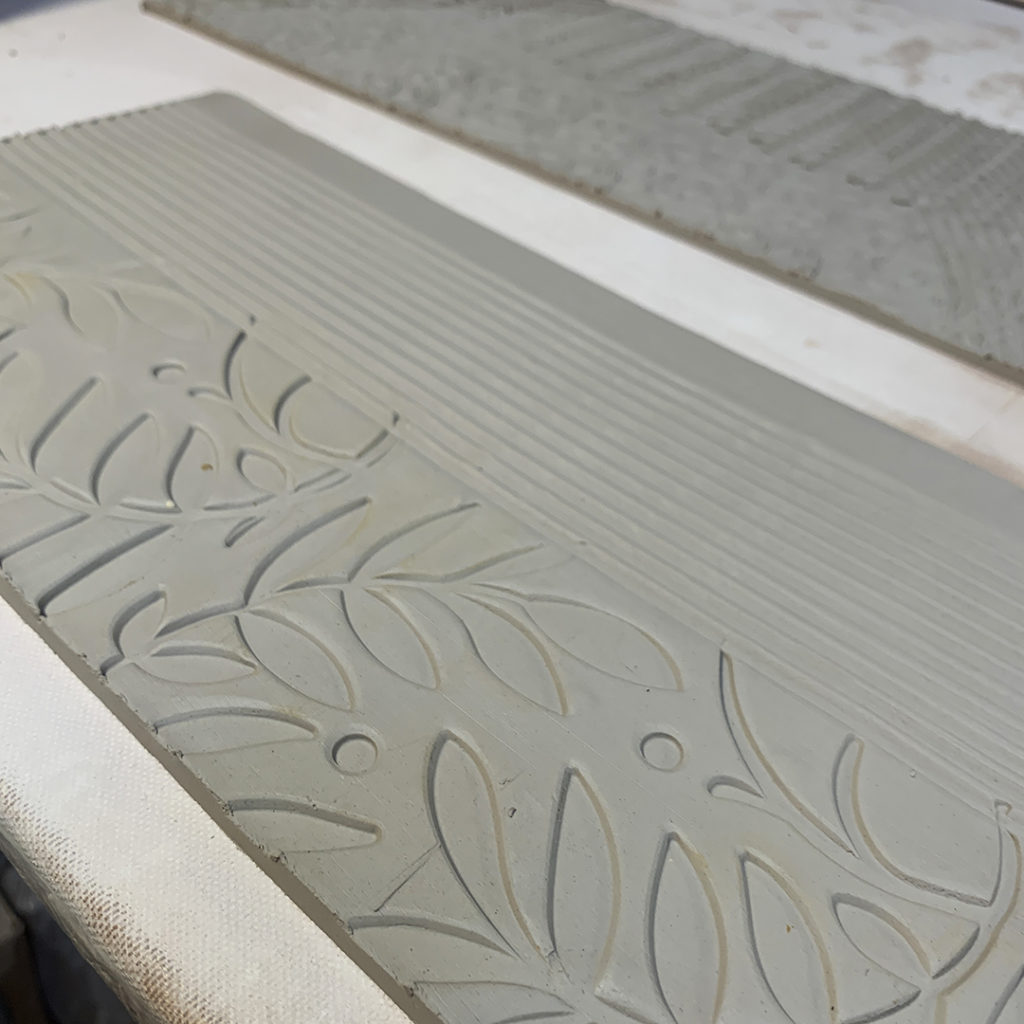
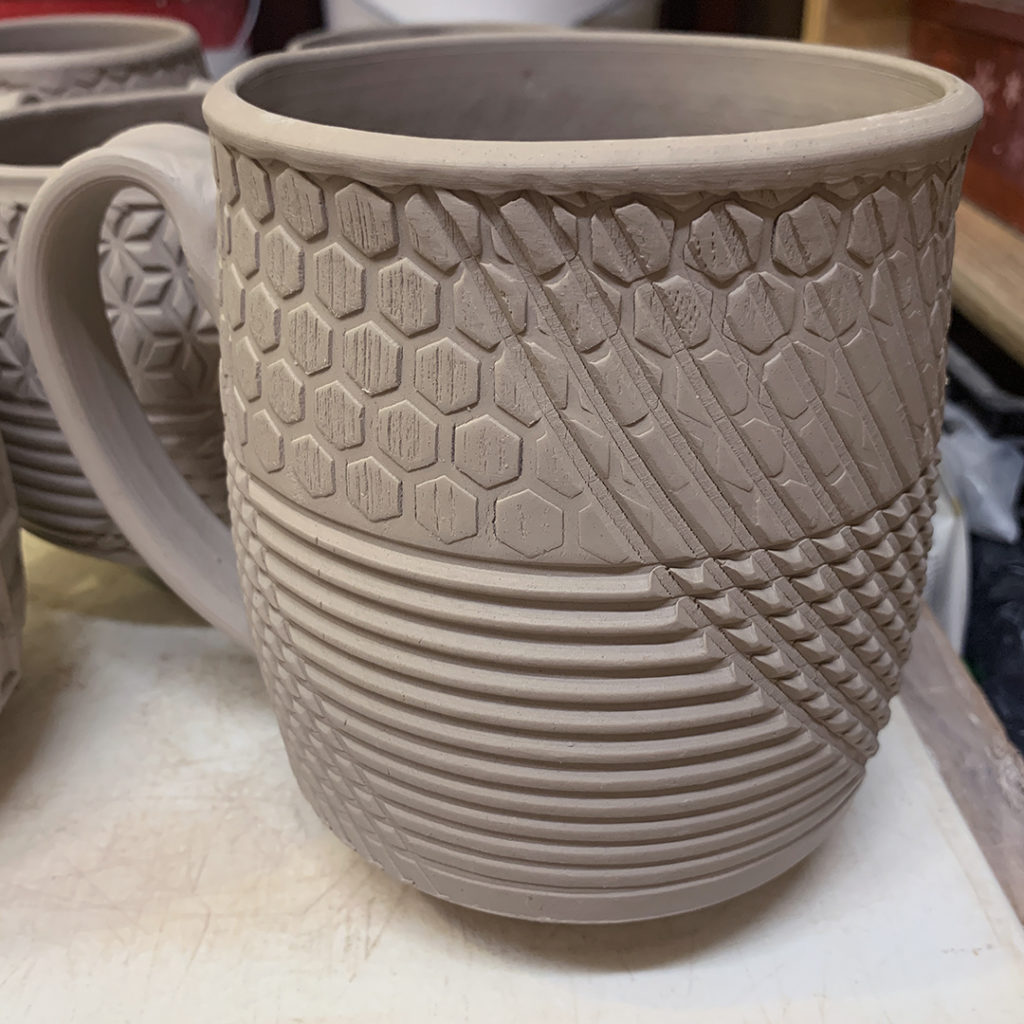
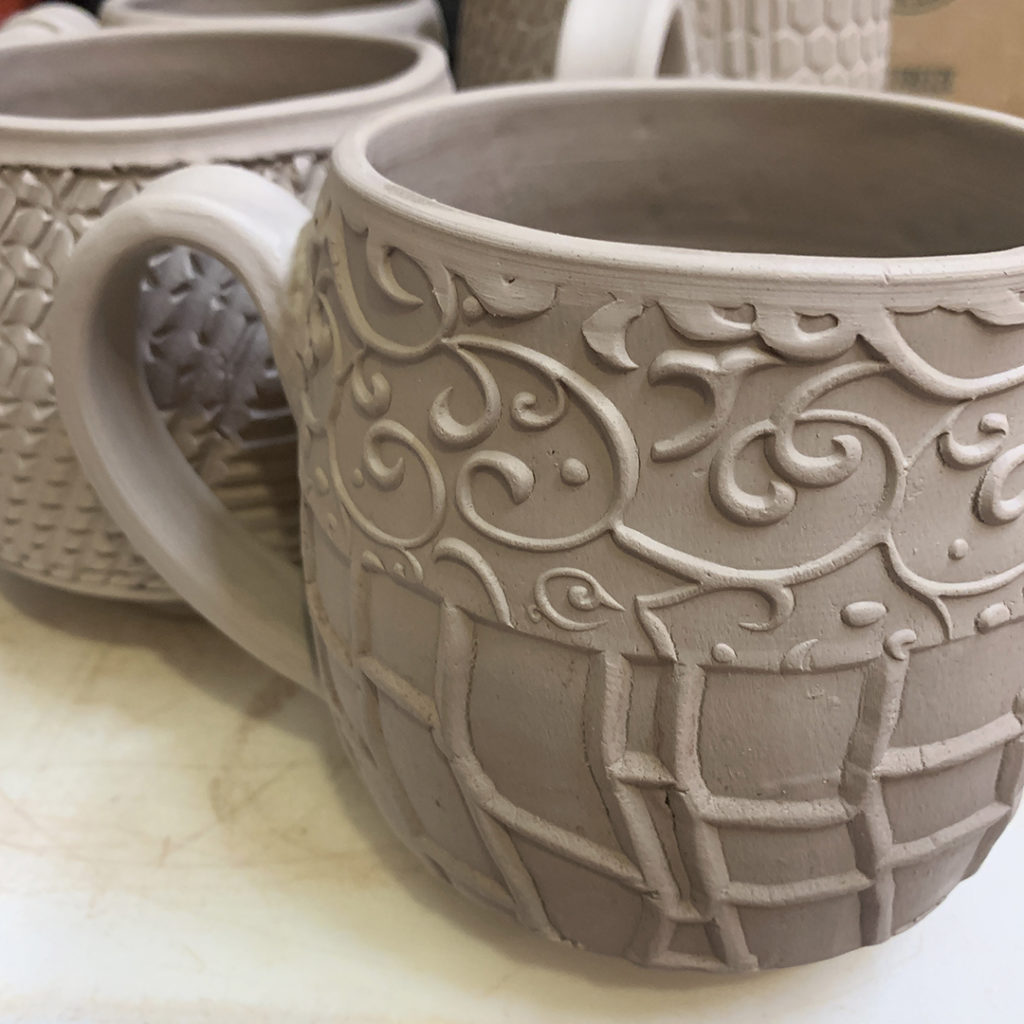
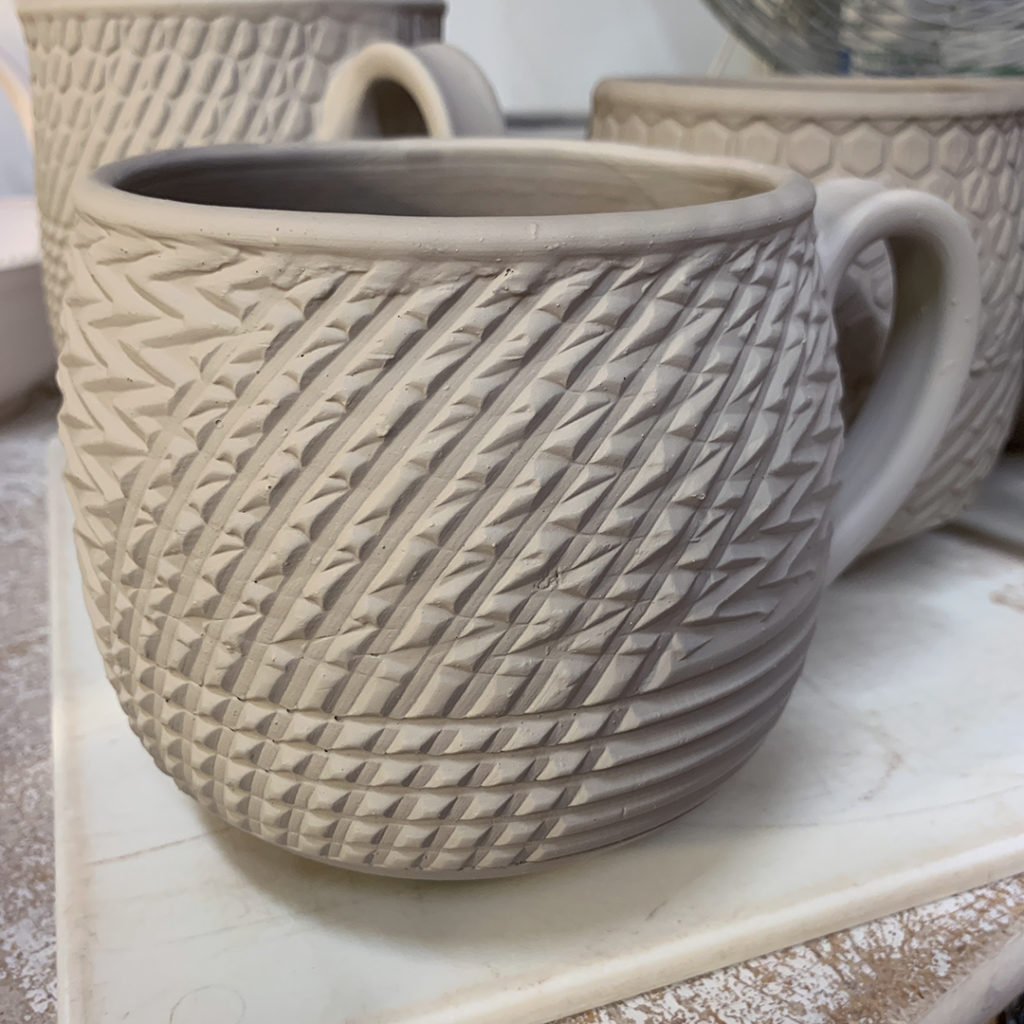
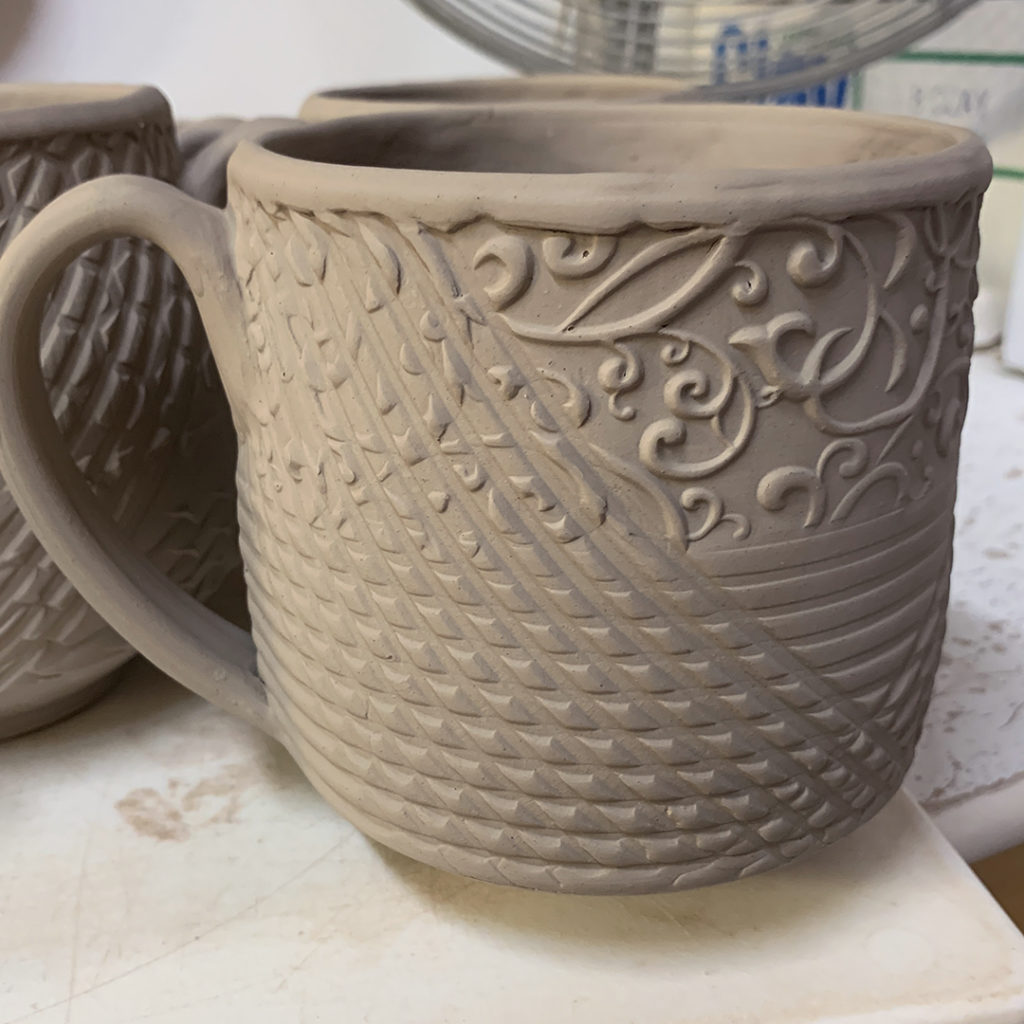
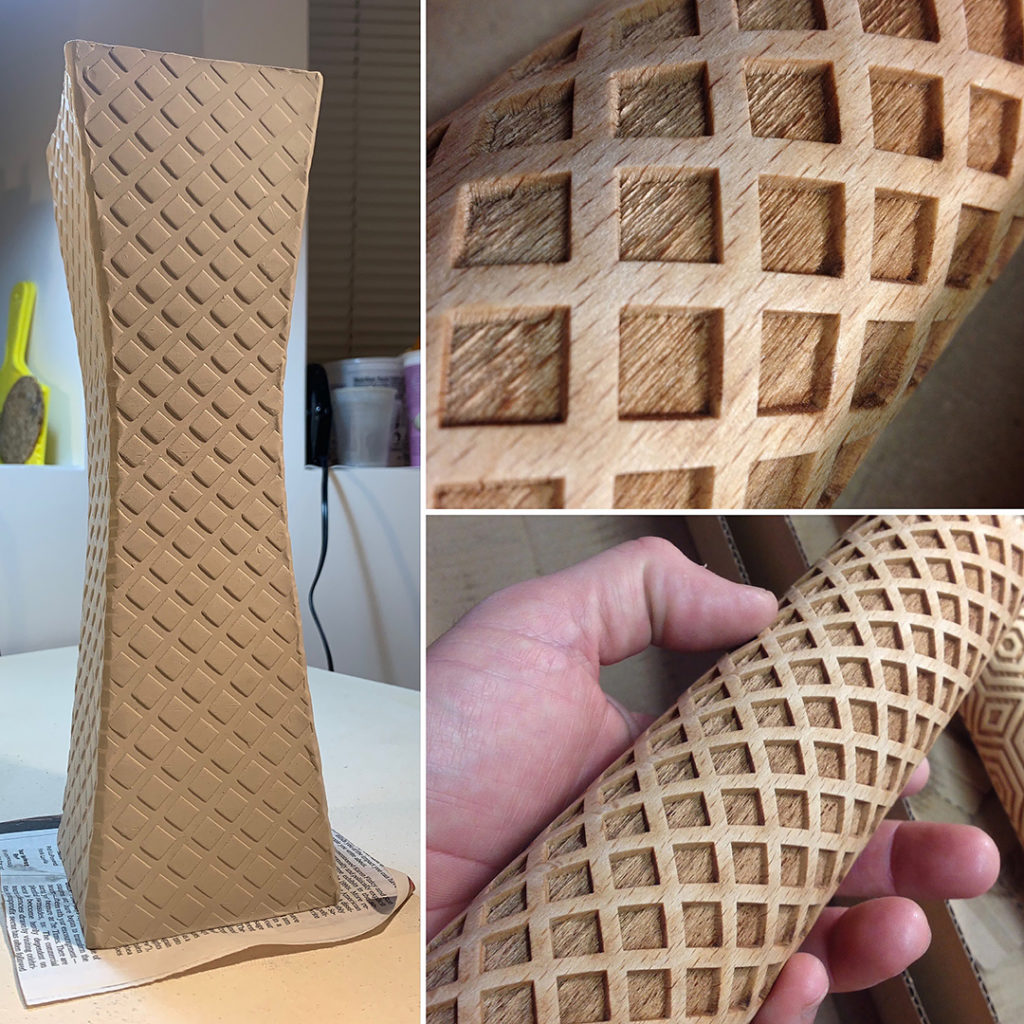
I start by making some textured slabs of clay. Sometimes with my own stamps, texture mats, or carved rolling pins… like this great one from STODOLA!!! They make tons of different rolling pin textures… including custom designs if you need that. Check ’em out at www.stodola.org.
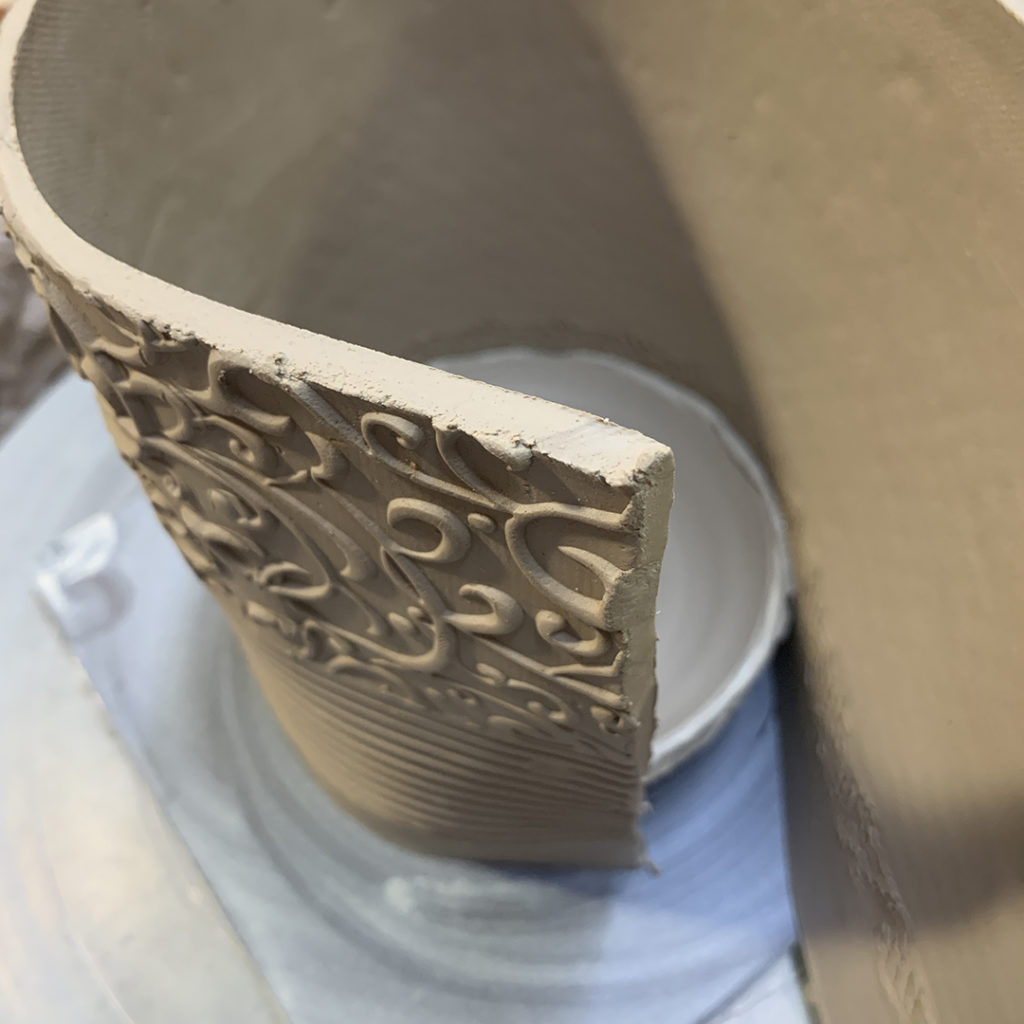
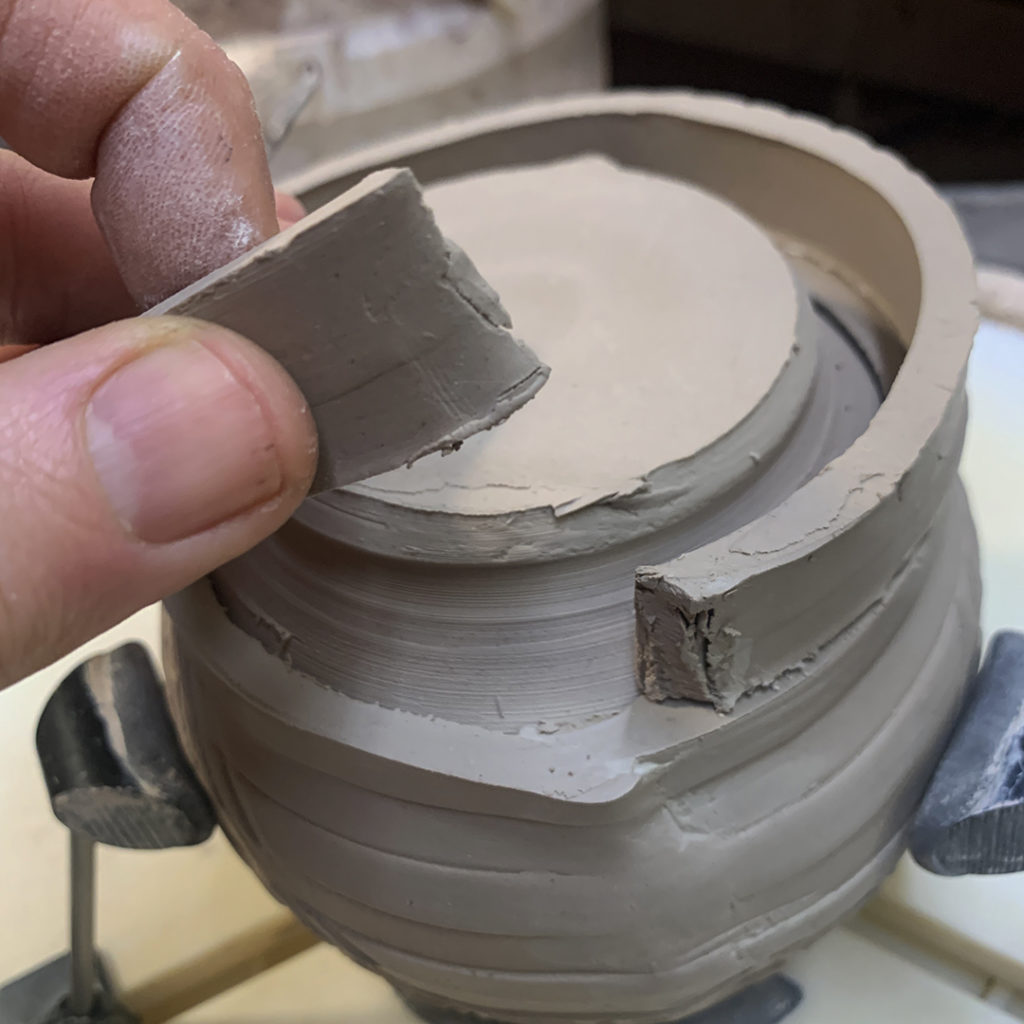
After pressing in a texture, I cut them into straight-sided rectangles… long enough to be the circumference around the base of the cup.
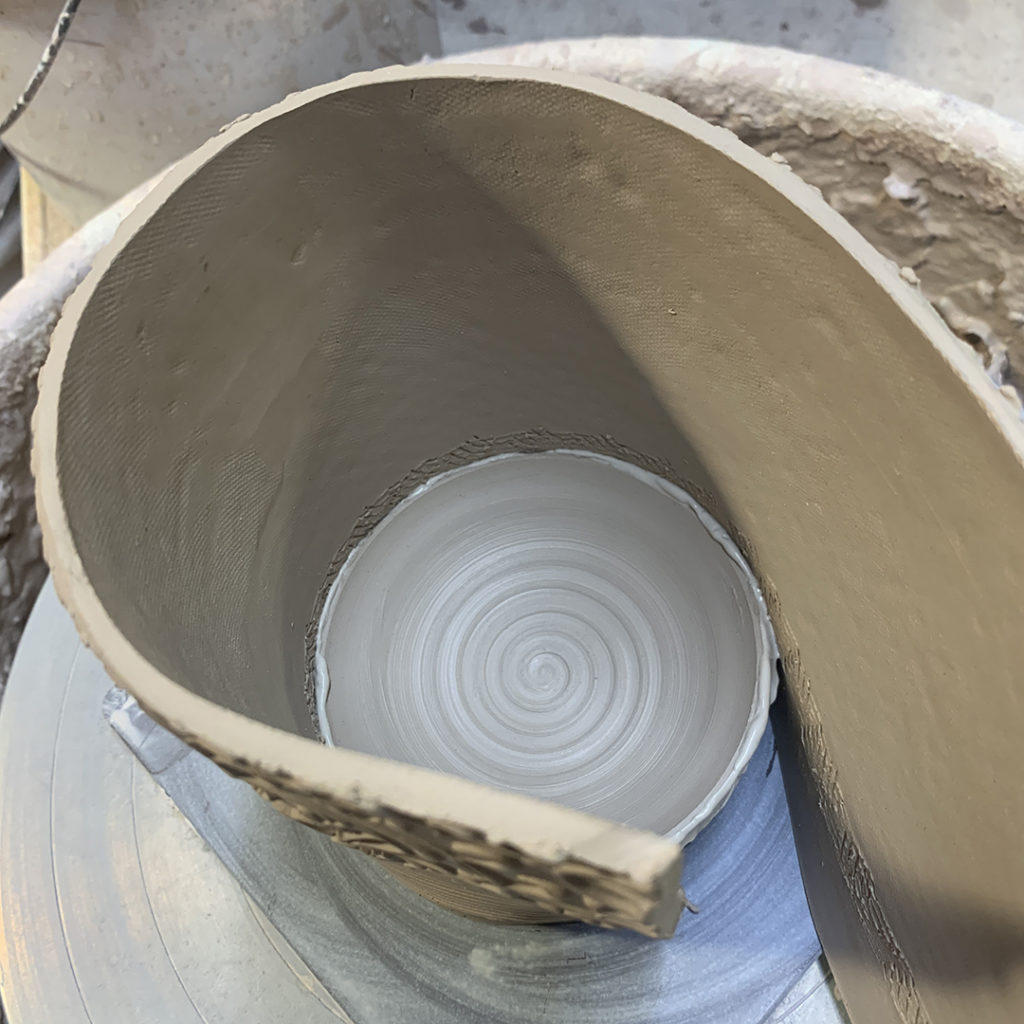
I throw little “bases” on the wheel… just a small little disc wheelthrown on a plastic bat. I do NOT wire them off as I will be putting them back on the wheel to continue to the process and I want them to stay centered.
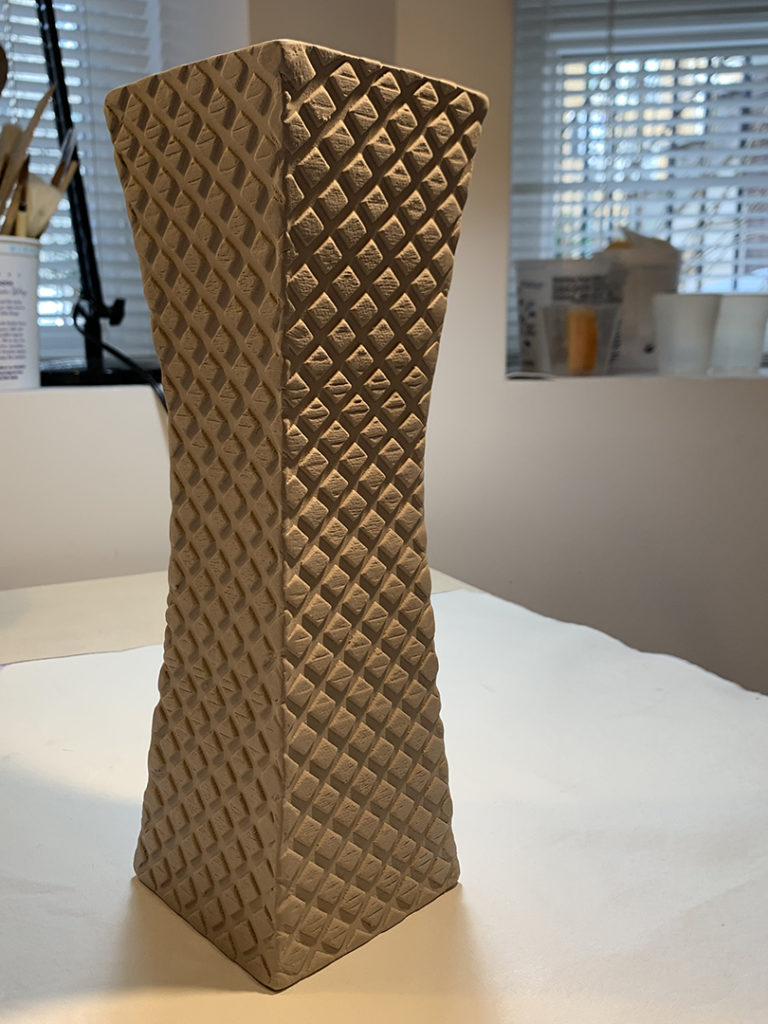
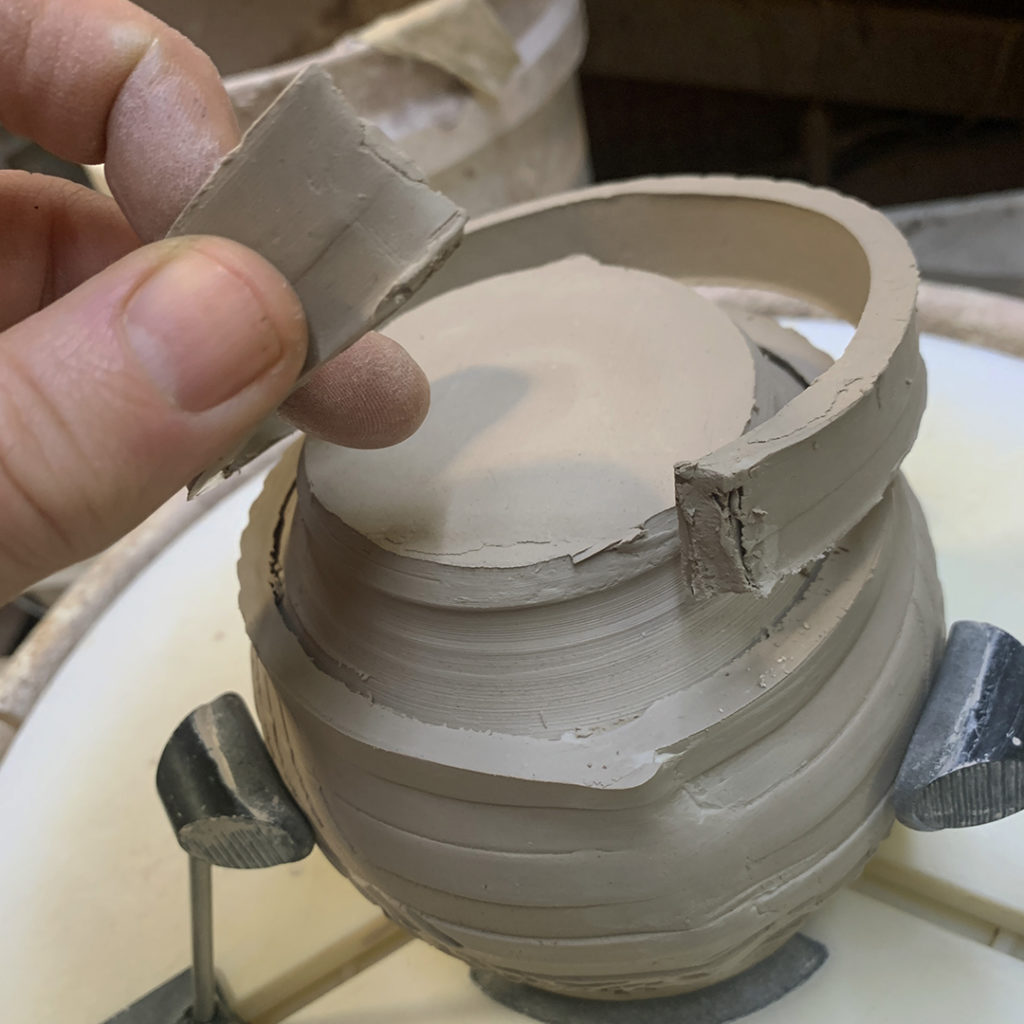
I start assembling them by wrapping the slab around the base – scoring & slipping along the way. One of the benefits of this technique is that the weight of the slab is supported by resting on the plastic bat. The extra part below the wheelthrown bottom will be trimmed off later. But it makes a great support system at this point.
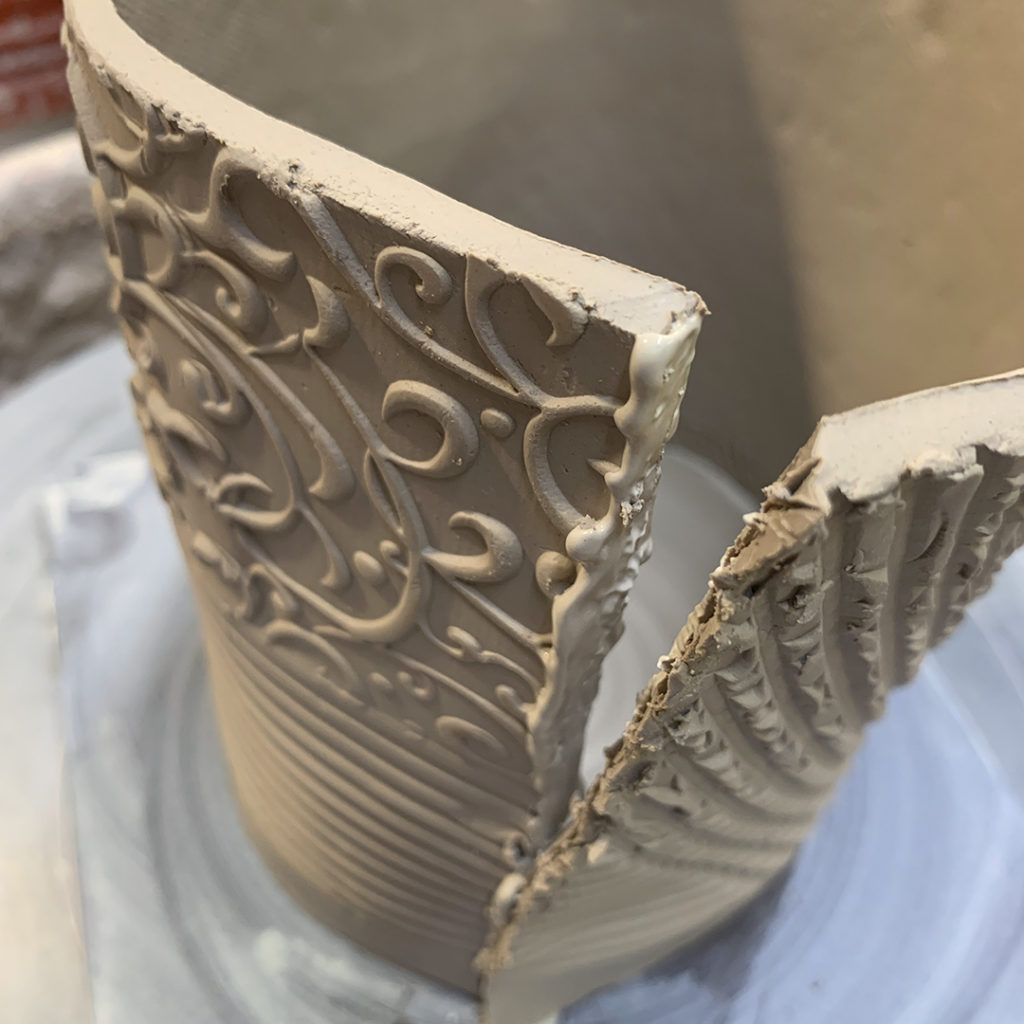
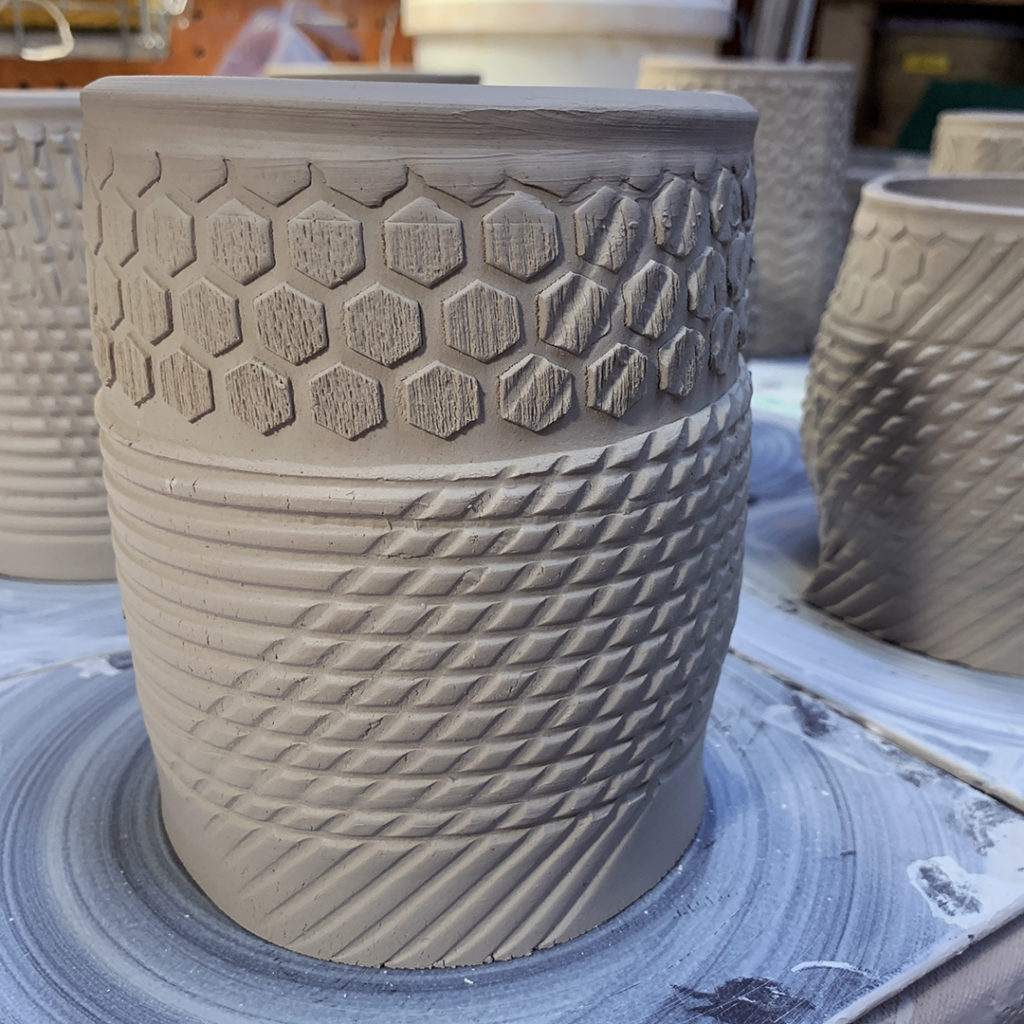
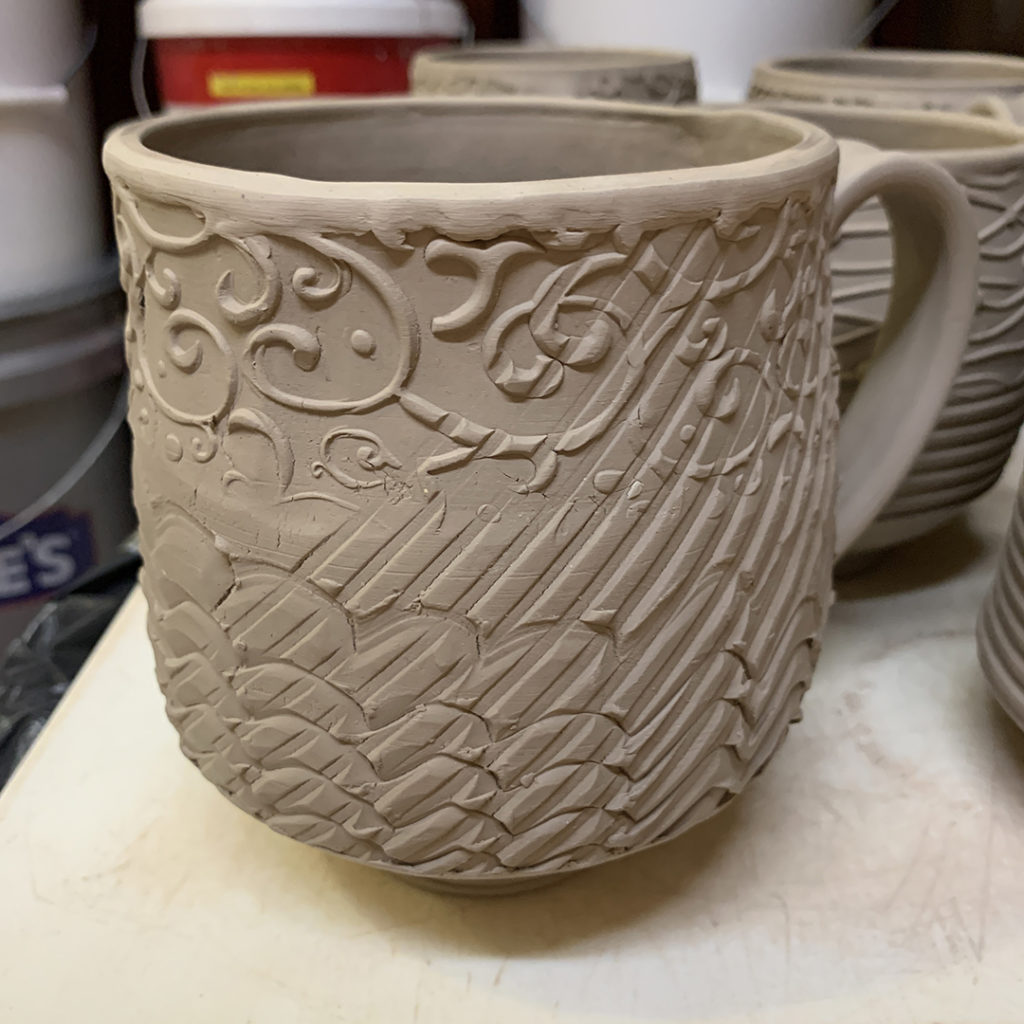
Where the slab overlaps, I cut it on an angle and then connect that seam… trying to blend it together as best I can without ruining the pattern. A good “secure” seam is pretty important here.
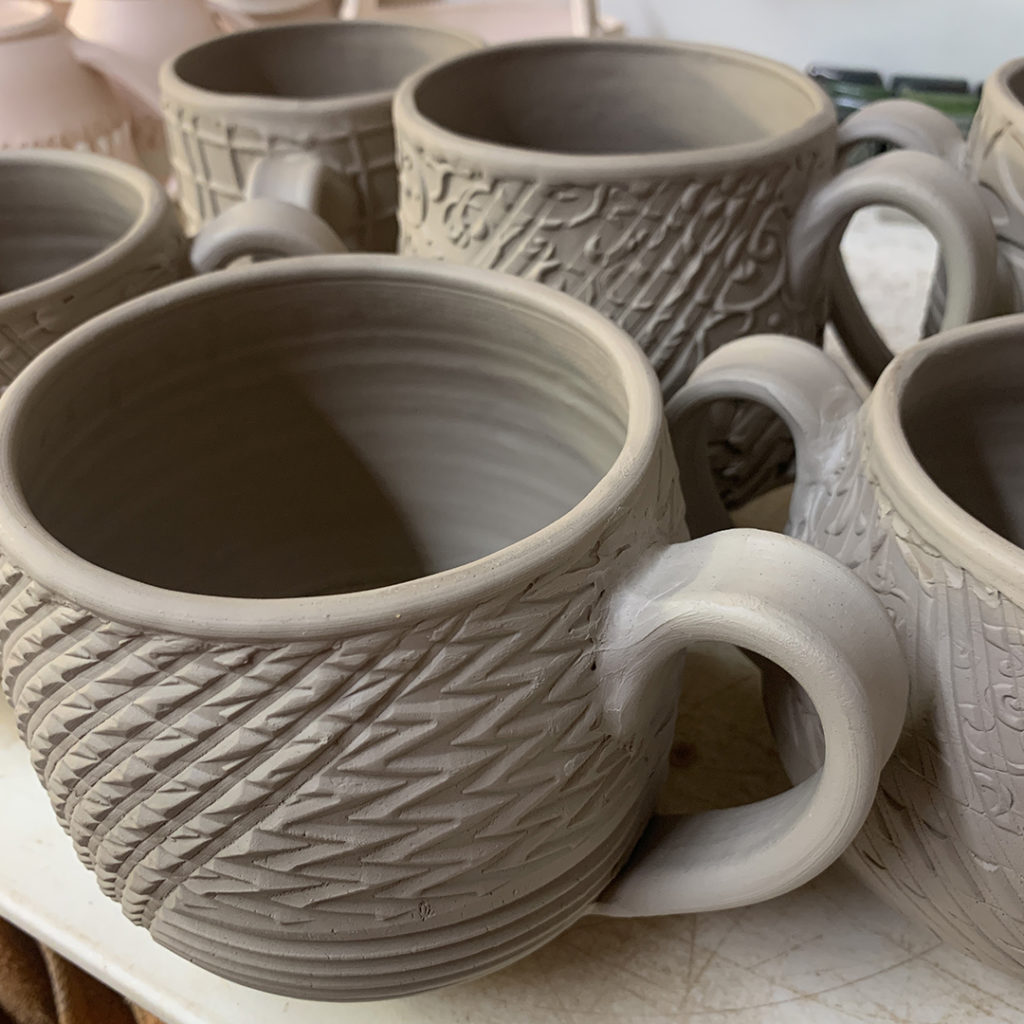
After attaching the sides, you can spin them on the wheel and press outwards from the inside to give the cup a little curve & volume. I also give the rim a little extra attention to keep it round & smooth… like a wheelthrown cup.
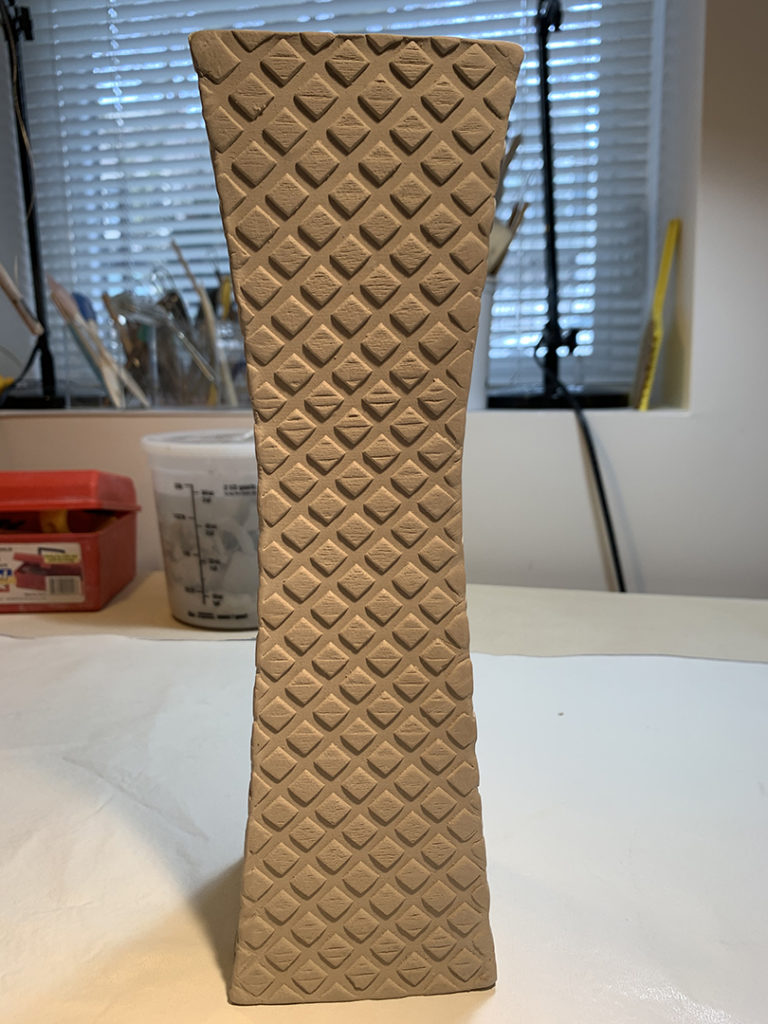
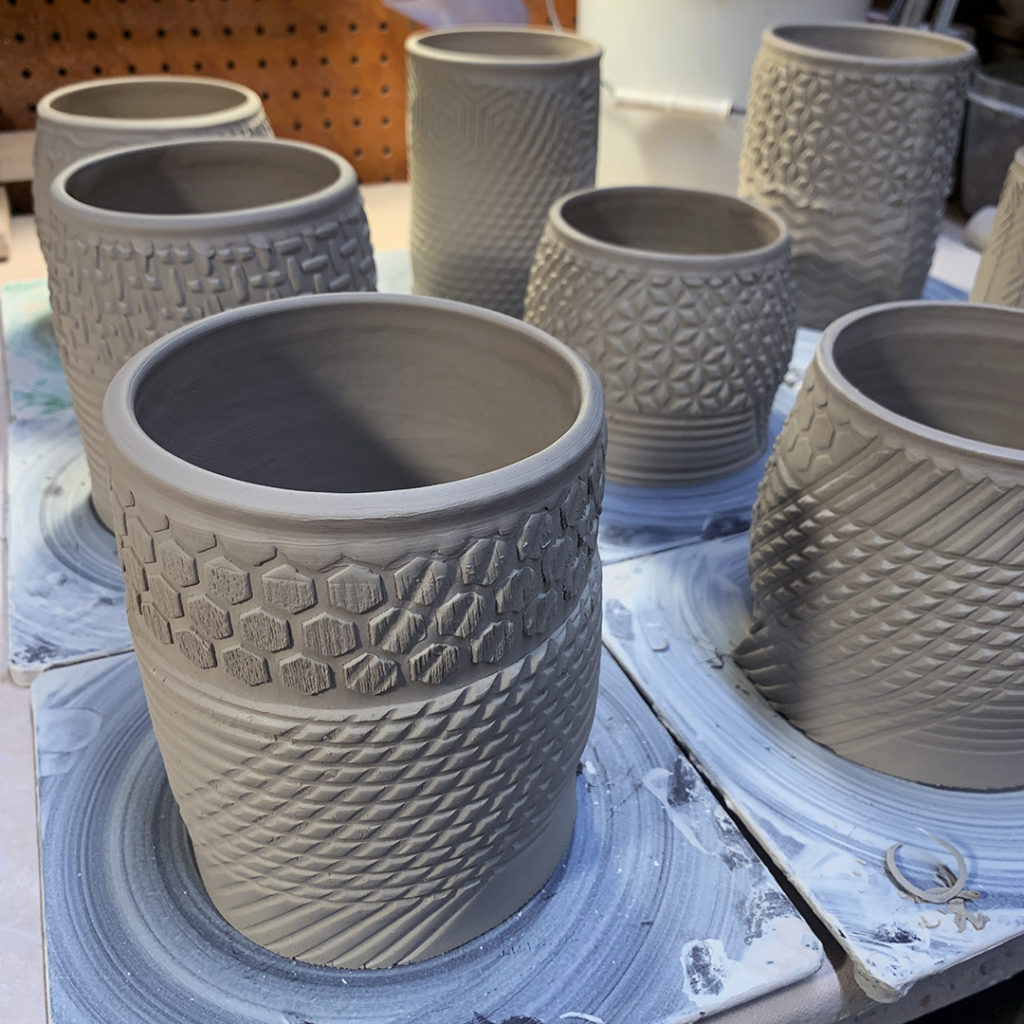
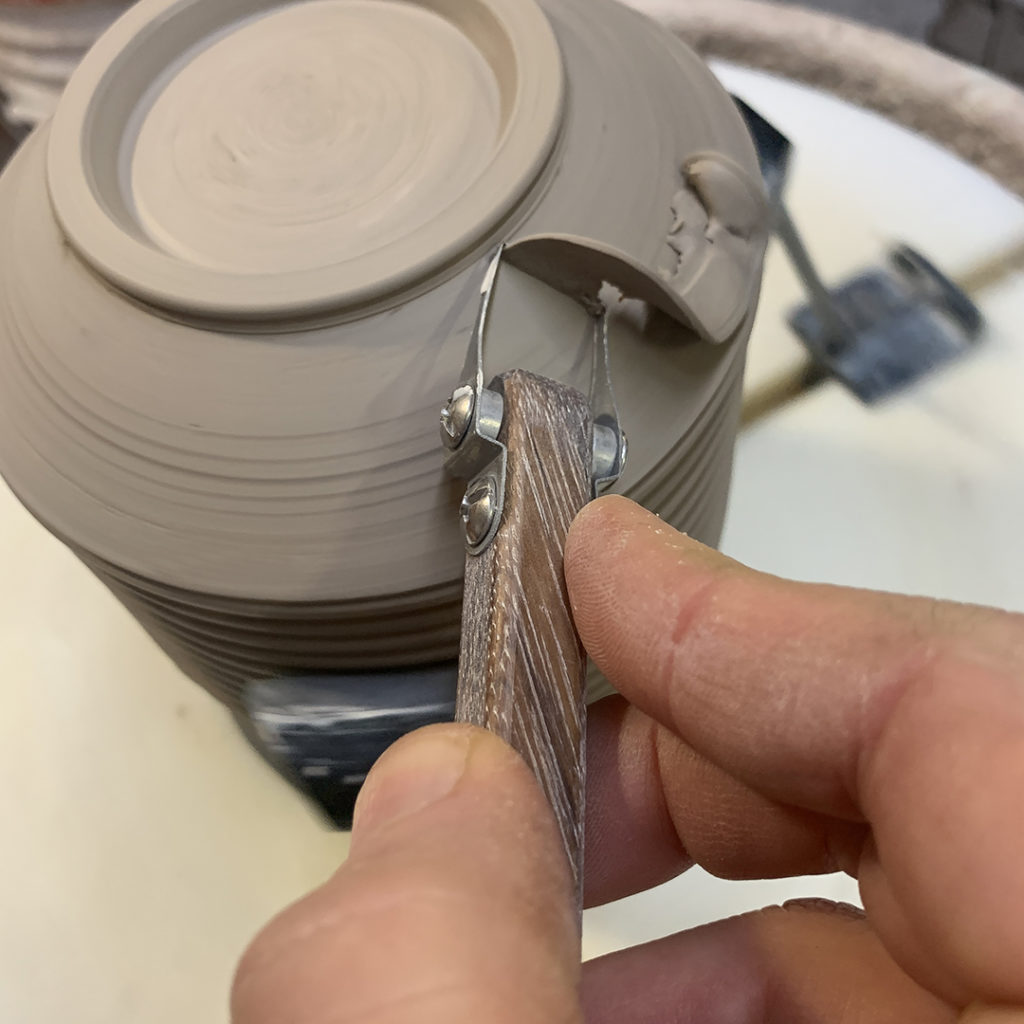
I let the cylinders set-up overnight before trimming… under plastic so they dry slowly to leatherhard. At this point, they can be wired off the plastic bat.
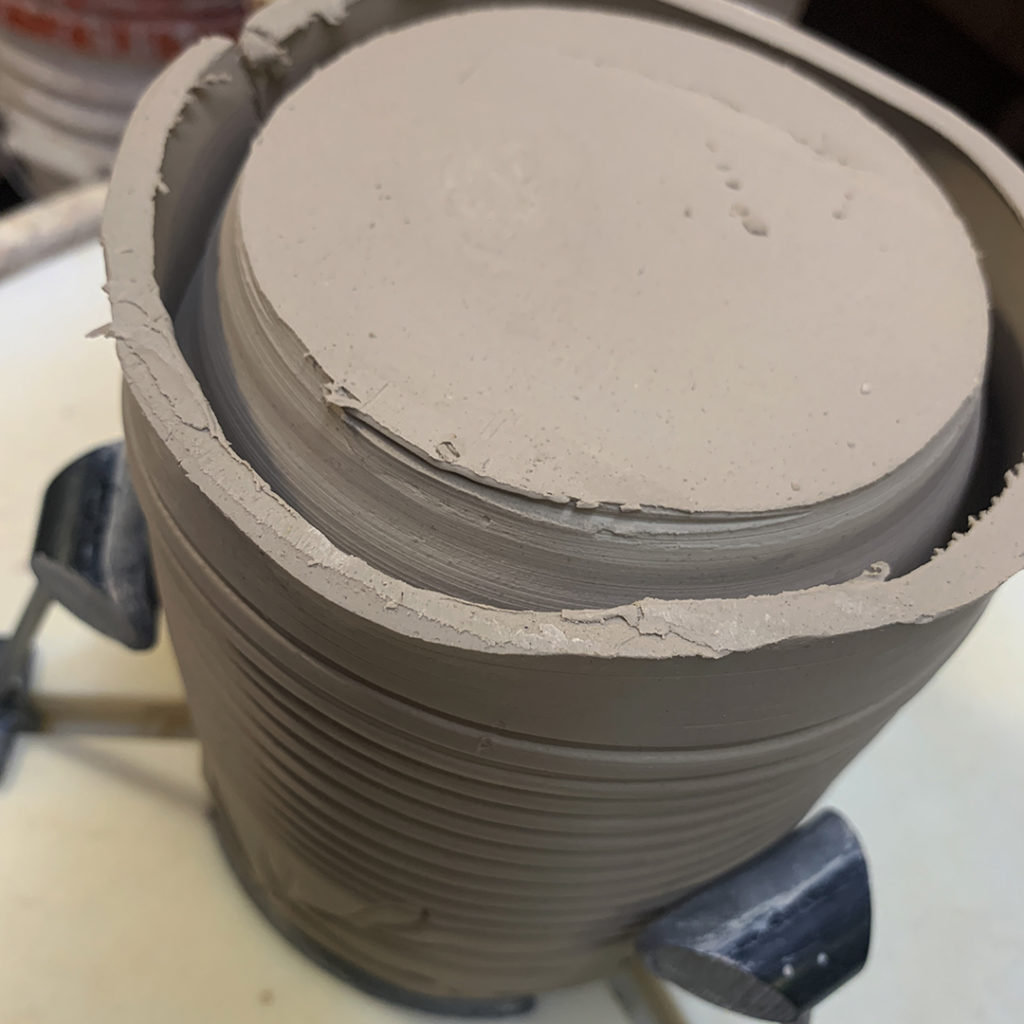
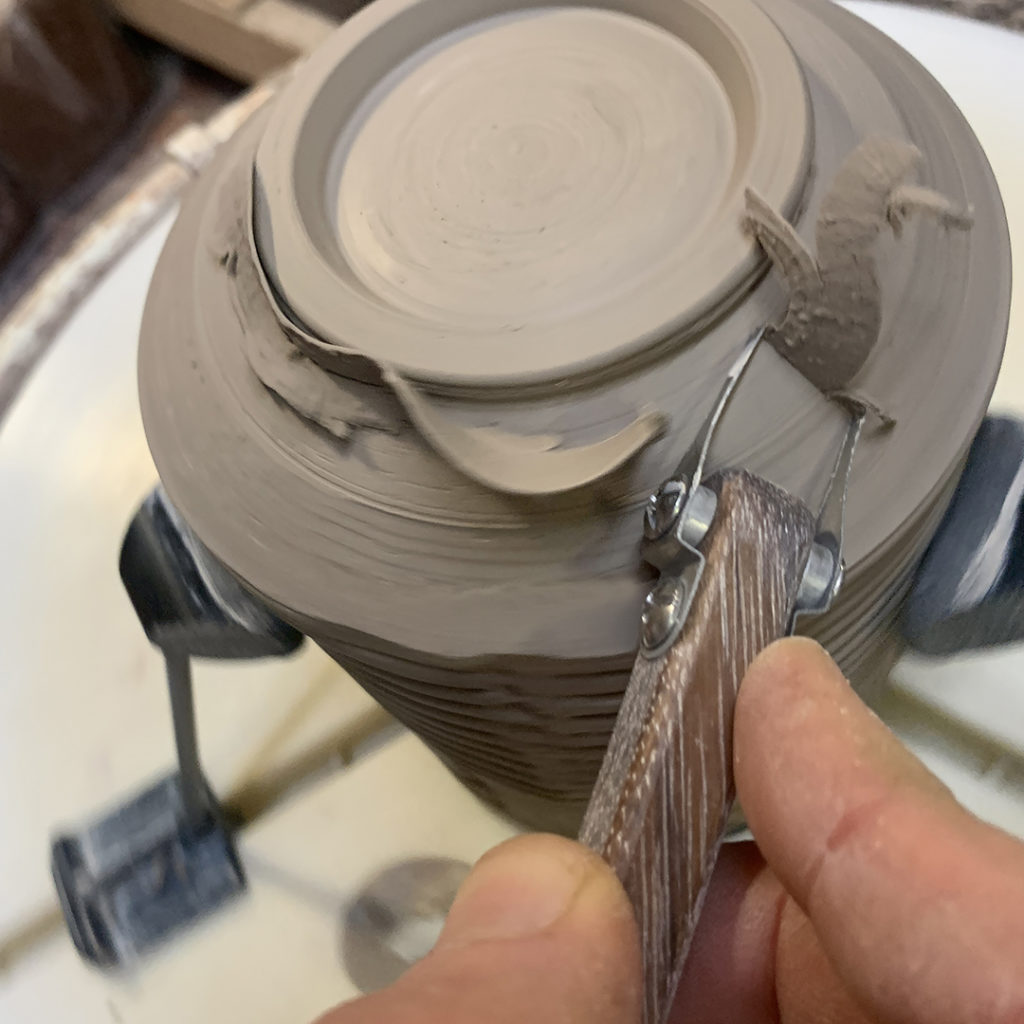
I start by cutting off the excess slab that is “under” where the slab attaches to the wheelthrown disc with a sharp blade. Confusing a bit… as it is now “above” the connection point as the cup has been flipped for trimming.
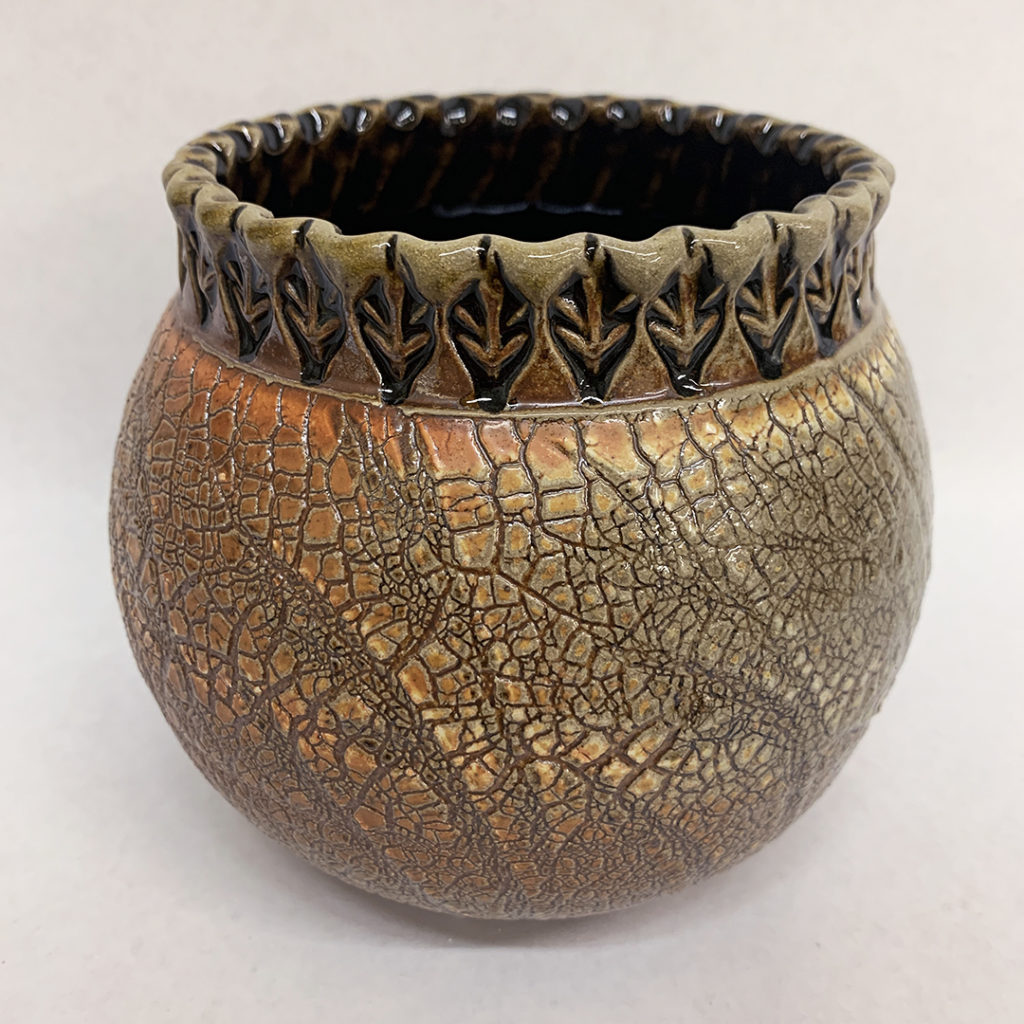
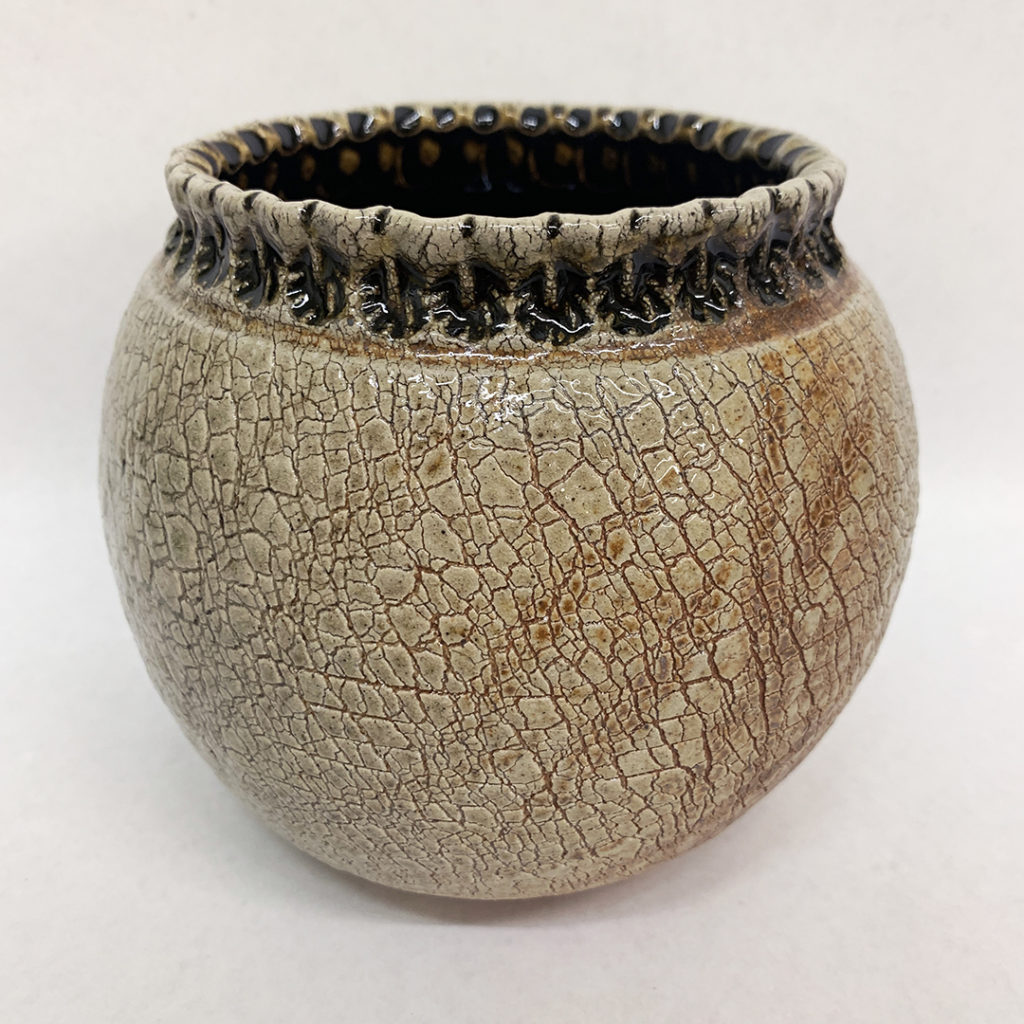
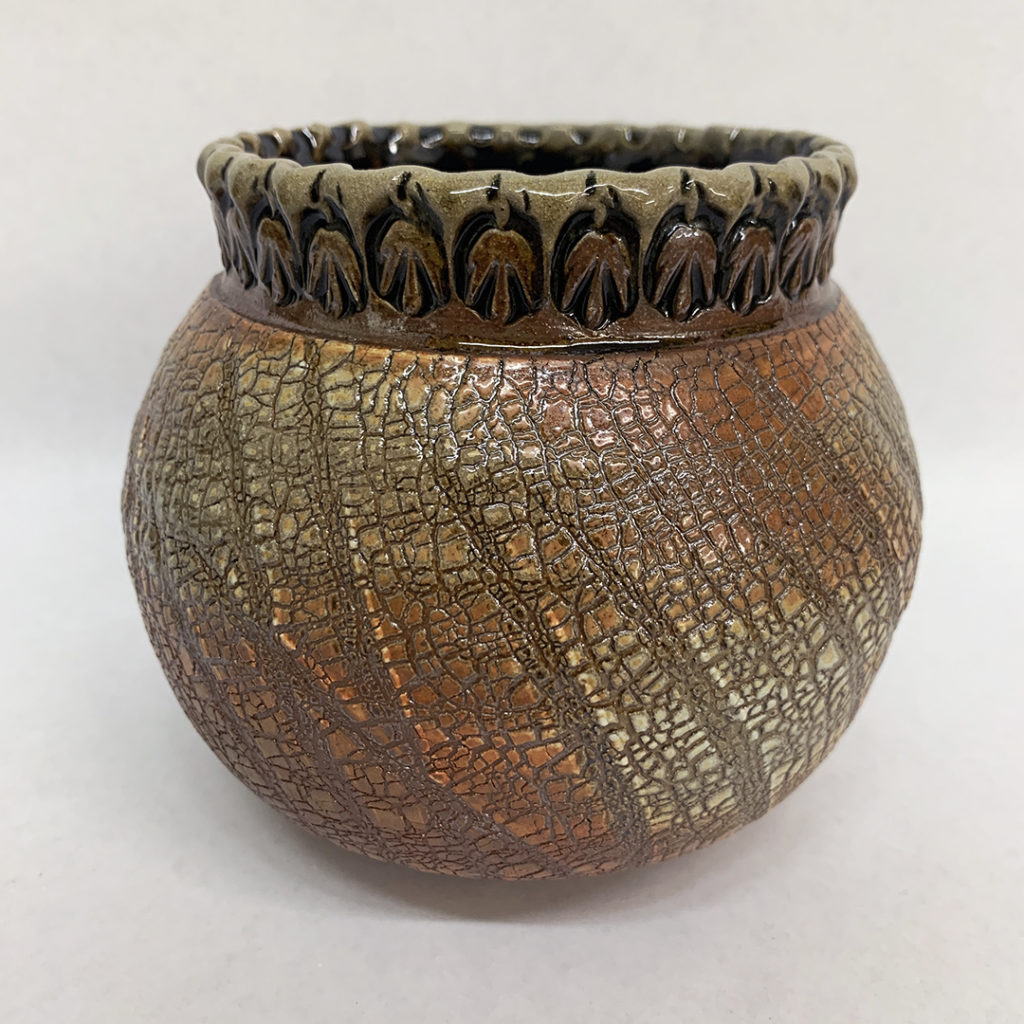
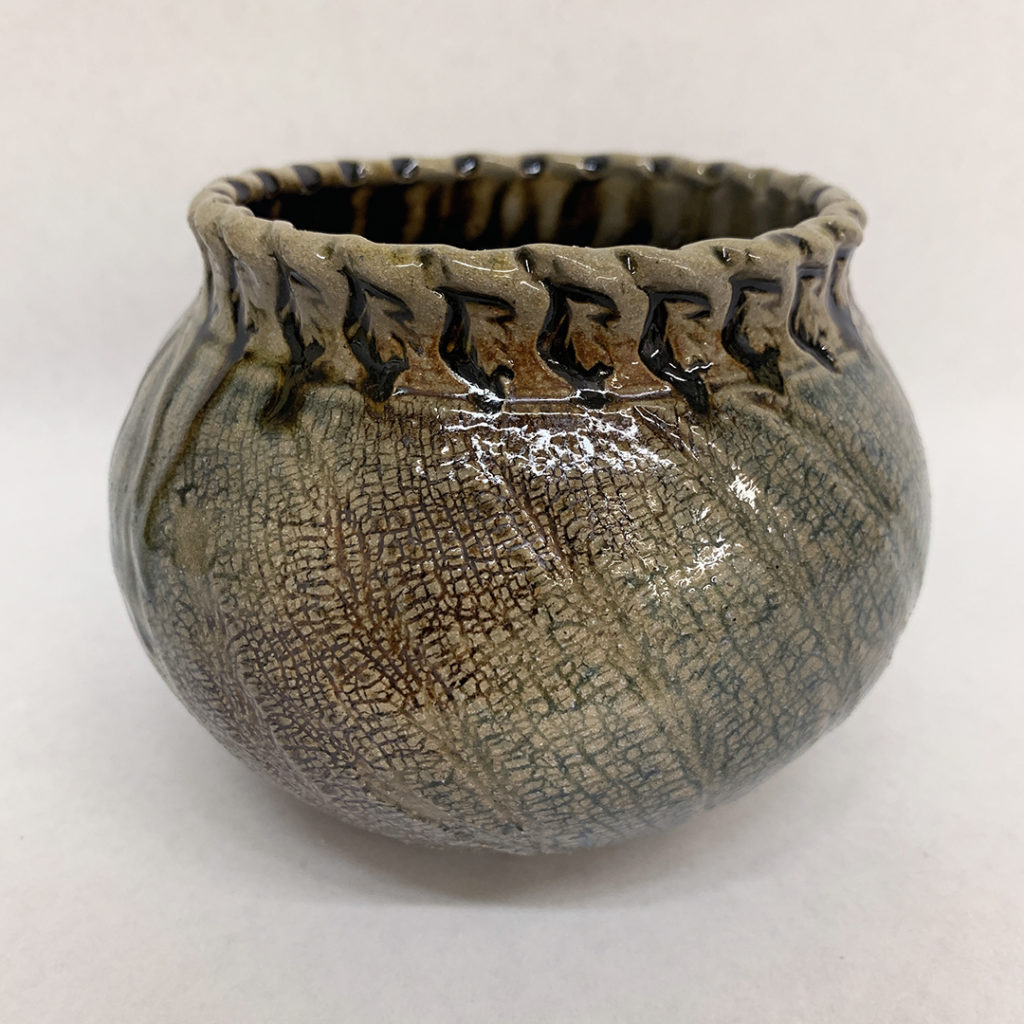
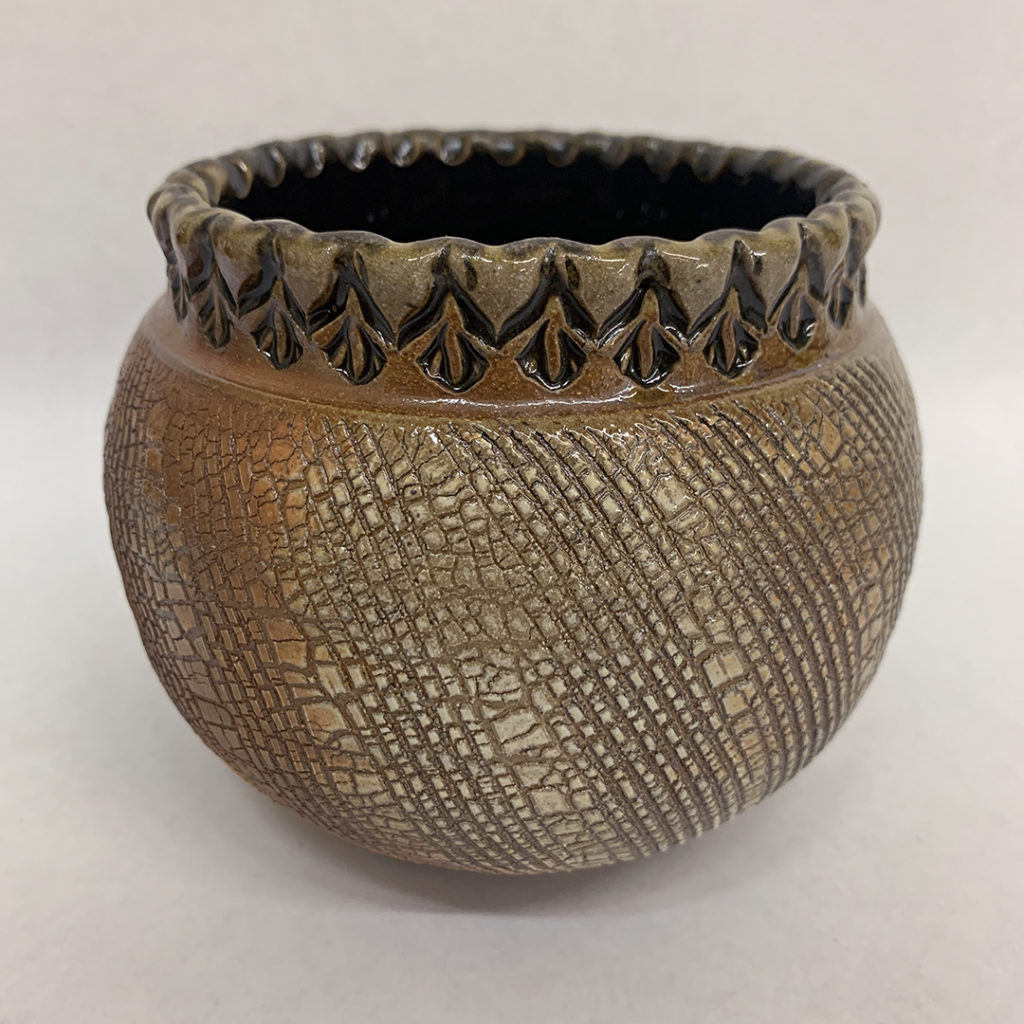
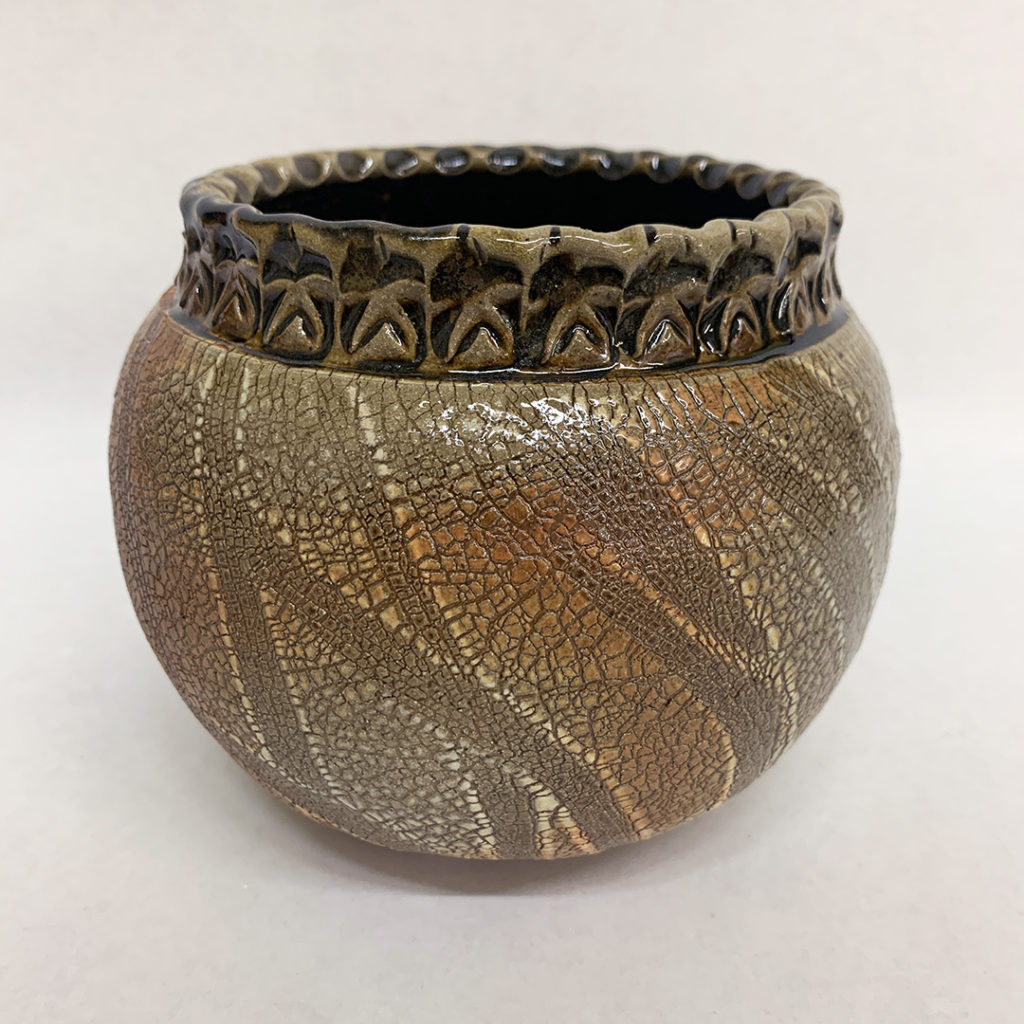
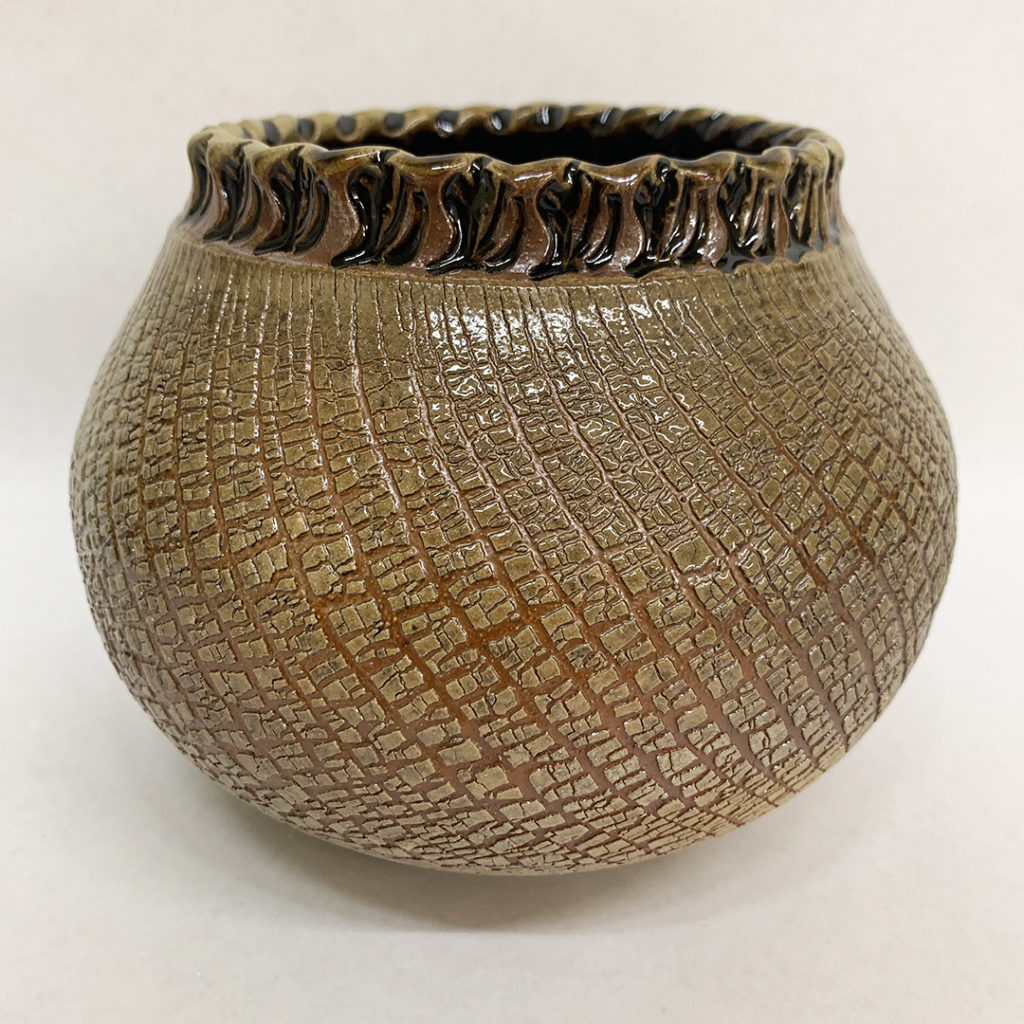
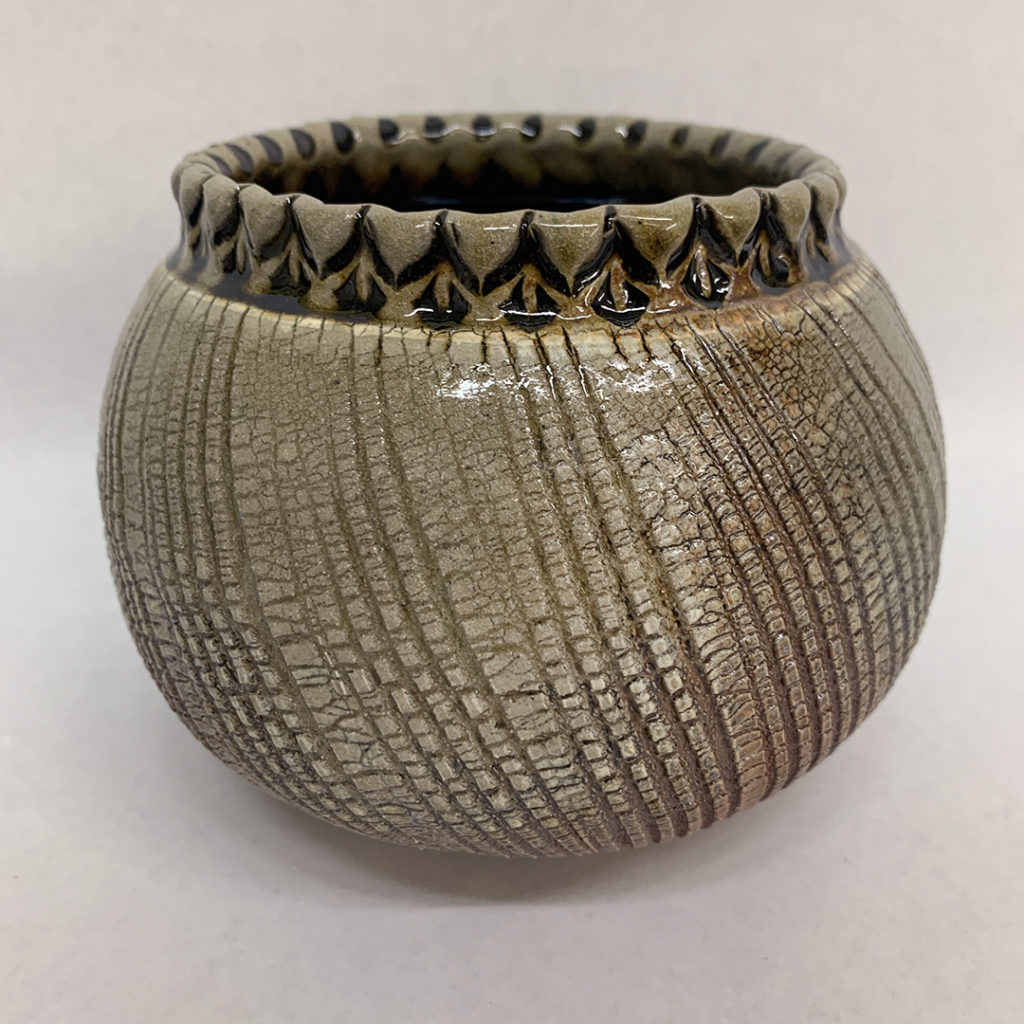
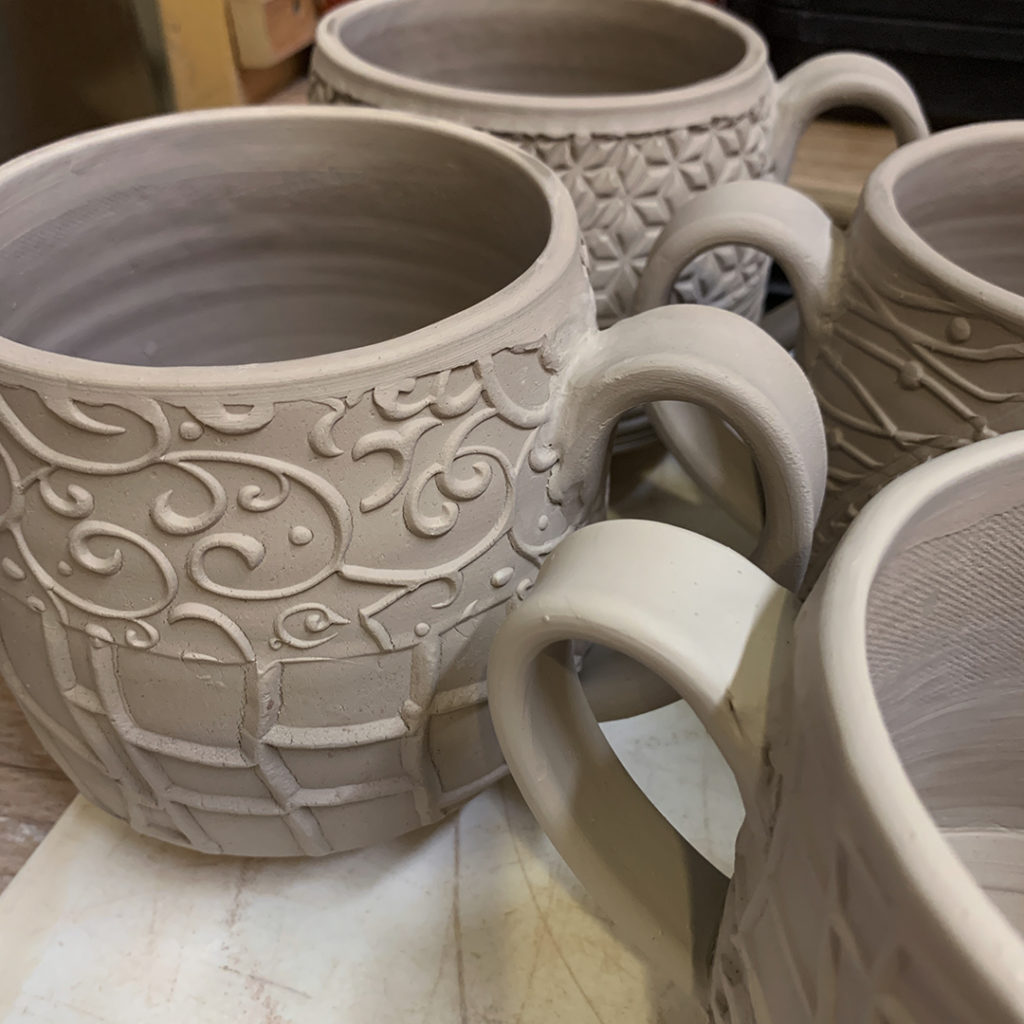
Then I start trimming the bottom as though it were a “normal” wheelthrown cup. The Giffin Grip helps hold everything in place and centers things quickly! And my DiamondCore Trimming Tools work great for trimming a clan, crisp footring. I make sure to trim all the way into the textured slab so that it blends together and looks seamless.
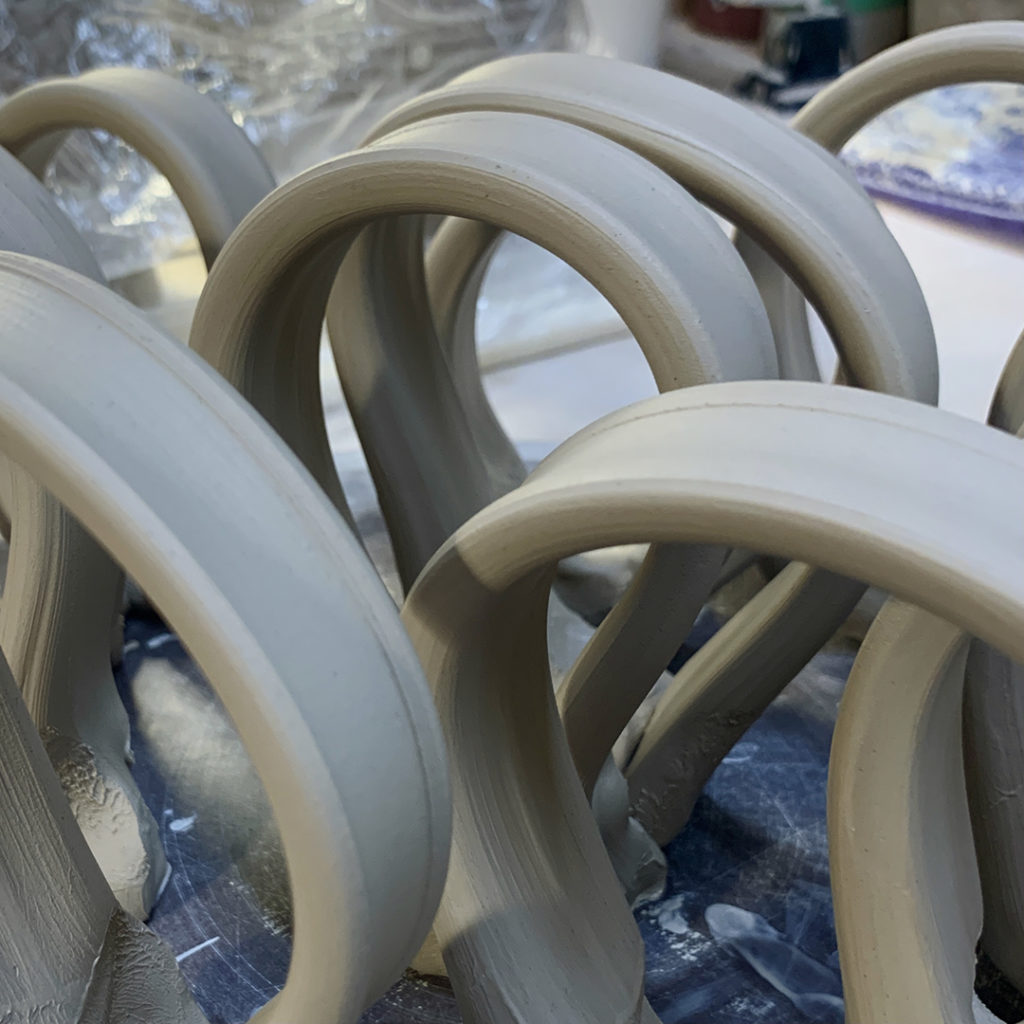
Once trimmed, I let them sit under plastic while I pull some handles for them. Cups are cups… but a mug needs a handle!!!
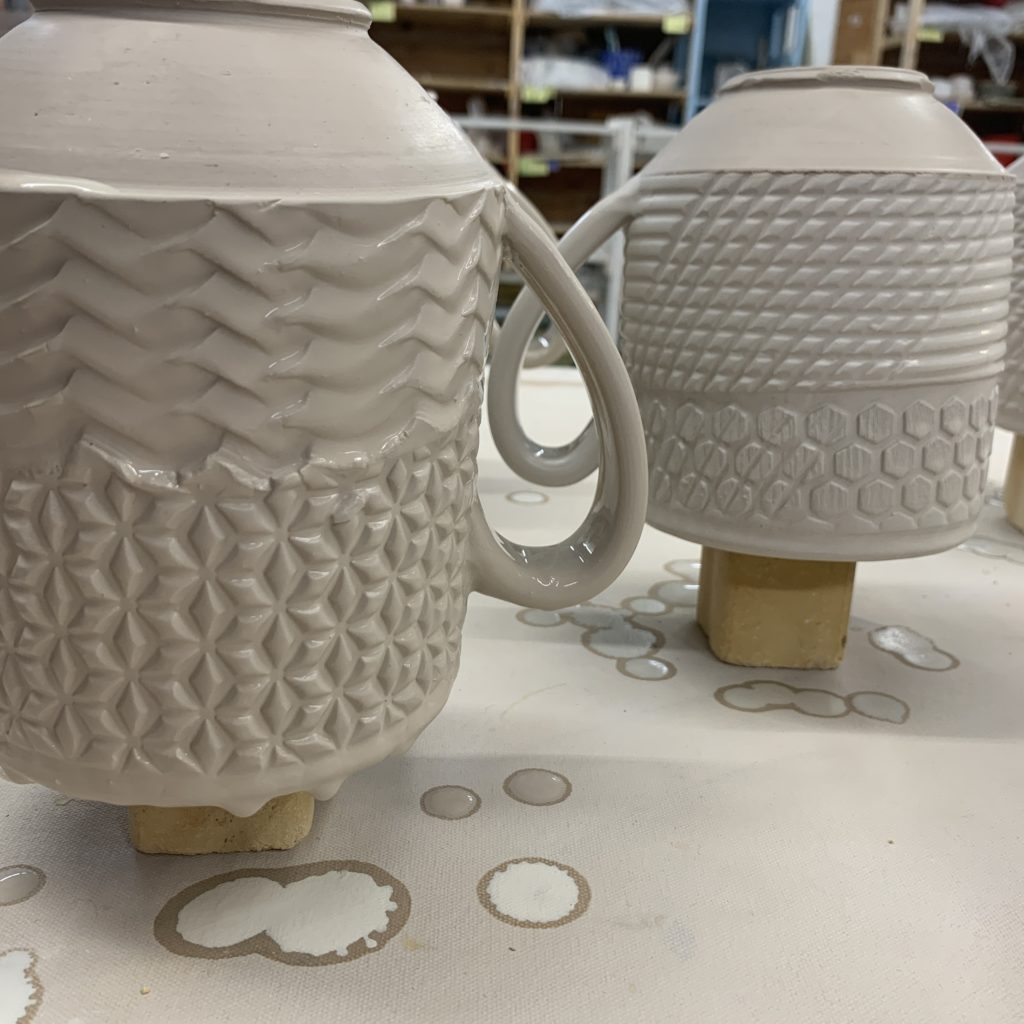
So when the handles stiffen-up a bit, I start attaching them to the sides… usually where the seam is as a little “creative camouflage.”
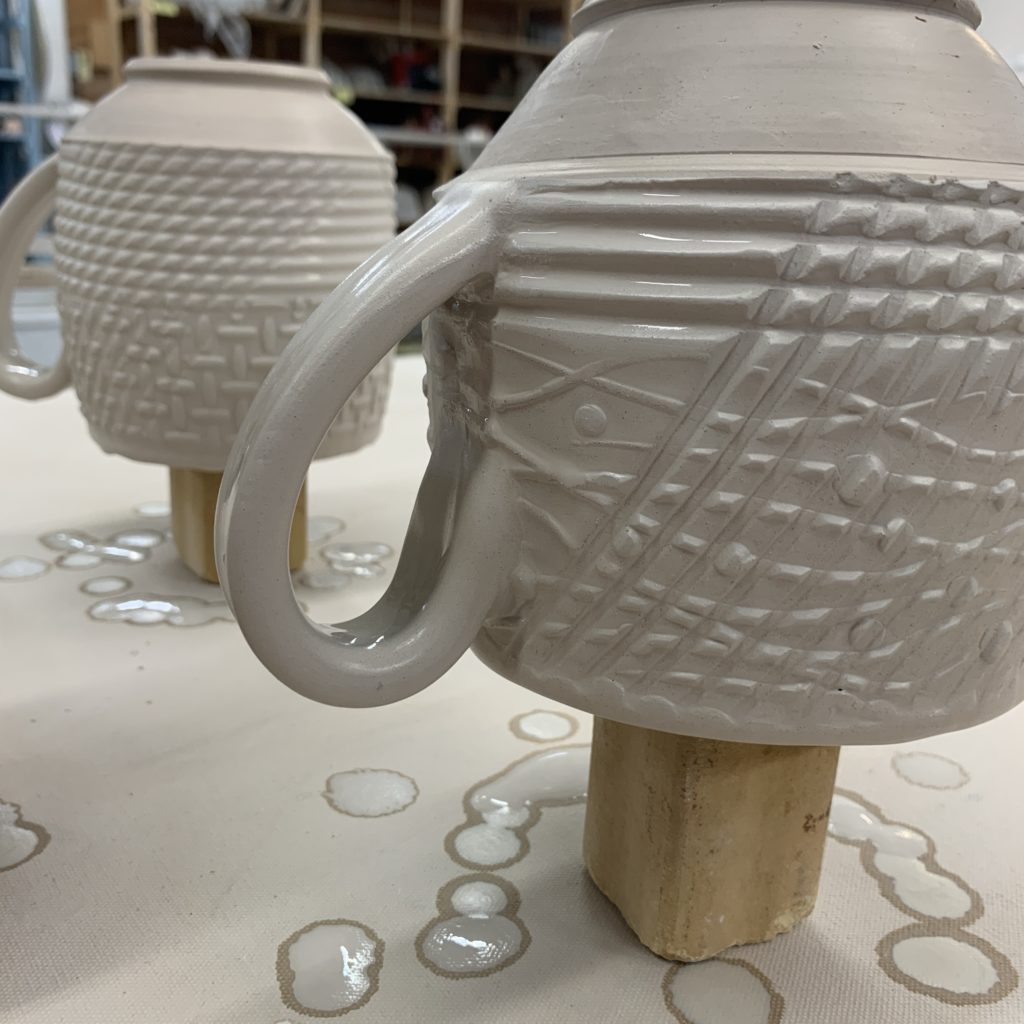
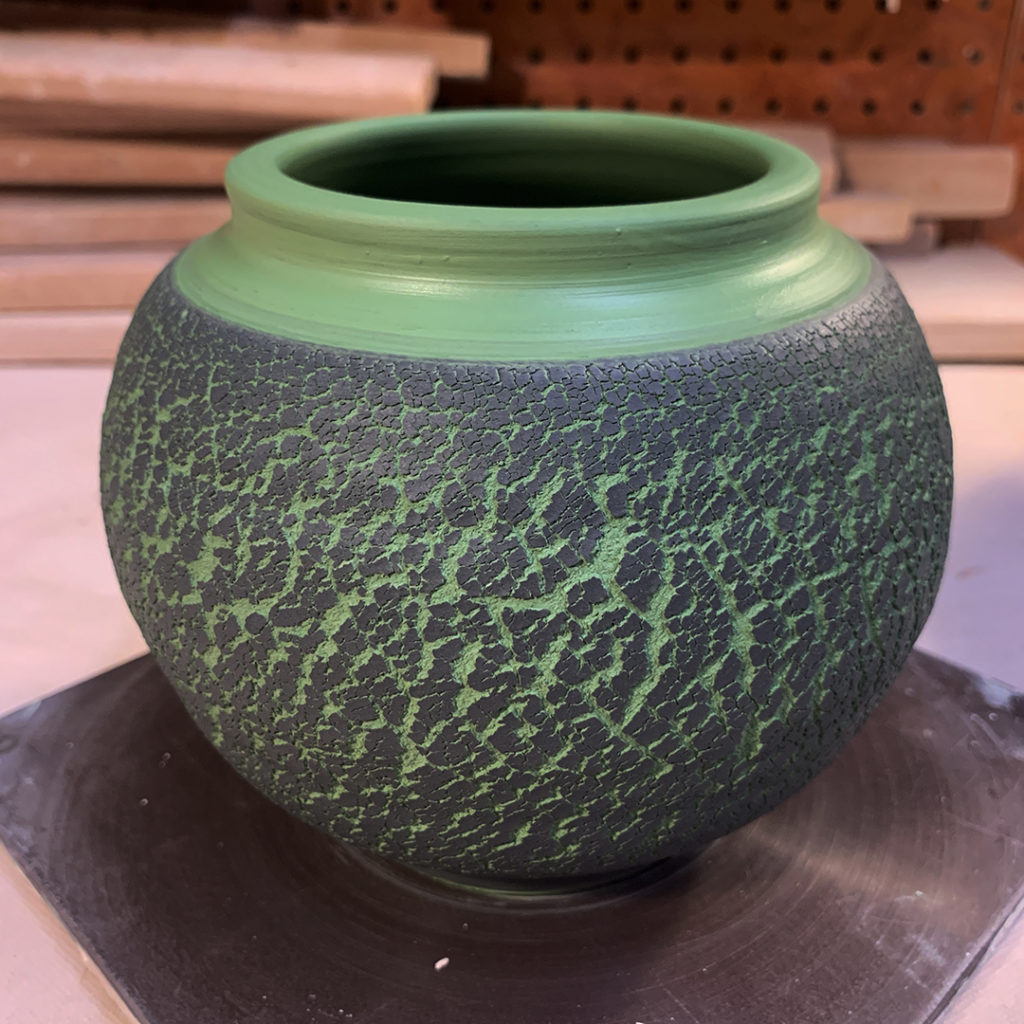
I let the mugs sit under plastic overnight again so that they stiffen-up to leatherhard and the moisture levels balance out. Since these are going to be soda-fired, I decided to dip them in thin colored flashing slips. I held them by the footring and carefully submerged them into the slip to only cover the textured slab sides. I left the curved wheelthrown bottoms as raw clay. I think that the difference will look cool after soda-firing! As the slip was dripping wet after dipping, I propped them up on kiln posts so the dripping would stop before flipping them back over. I didn’t want big drippy runs going down the sides.
So now they’re drying and getting ready for a bisque firing. Once fired, I will add a liner glaze and maybe some other colored glaze accents. After soda-firing, the textures should pop nicely and the flashing slips will help accentuate the pattern.
Finger crossed.