Gary Jackson: Fire When Ready Pottery
A Chicago potter’s somewhat slanted view of clay & play
Categories: pottery, process, surface decoration

During the St. Croix Pottery Tour, it was great to see some beautiful “sangam” pottery by Minsoo Yuh. We tried this technique last year in my Surface Decorations class… and great to see how it’s really done by a master! Much better detail & smoothness than when we tried it in class. Ha!!!

Basically, you stamp patterns all over your clay. Then add a layer of thick slip over everything and let it dry to leatherhard. Then you carefully “shave off” the top layer of slip to reveal the clay body surface and the “now-slip-filled” stamped impressions.

Categories: classes, color, surface decoration

My students LOVED last week’s “tie-dyed” demo night with my SURFACE DECORATIONS class. After the shaving cream demo, they all decided to give it a try… splashing colors, smelly shaving cream & water melting away the “evidence” to leave behind some great colored results!!!

Categories: bowls, classes, color, surface decoration, tie-dye

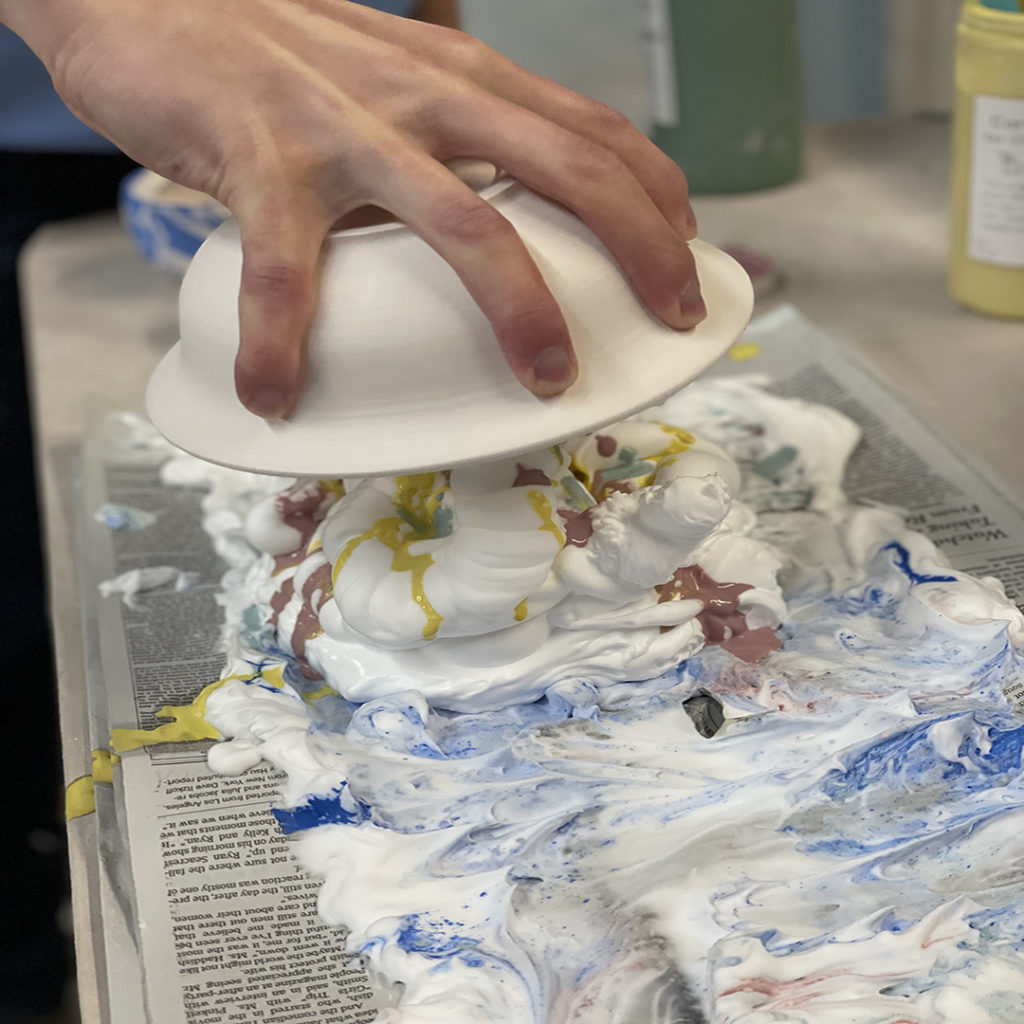
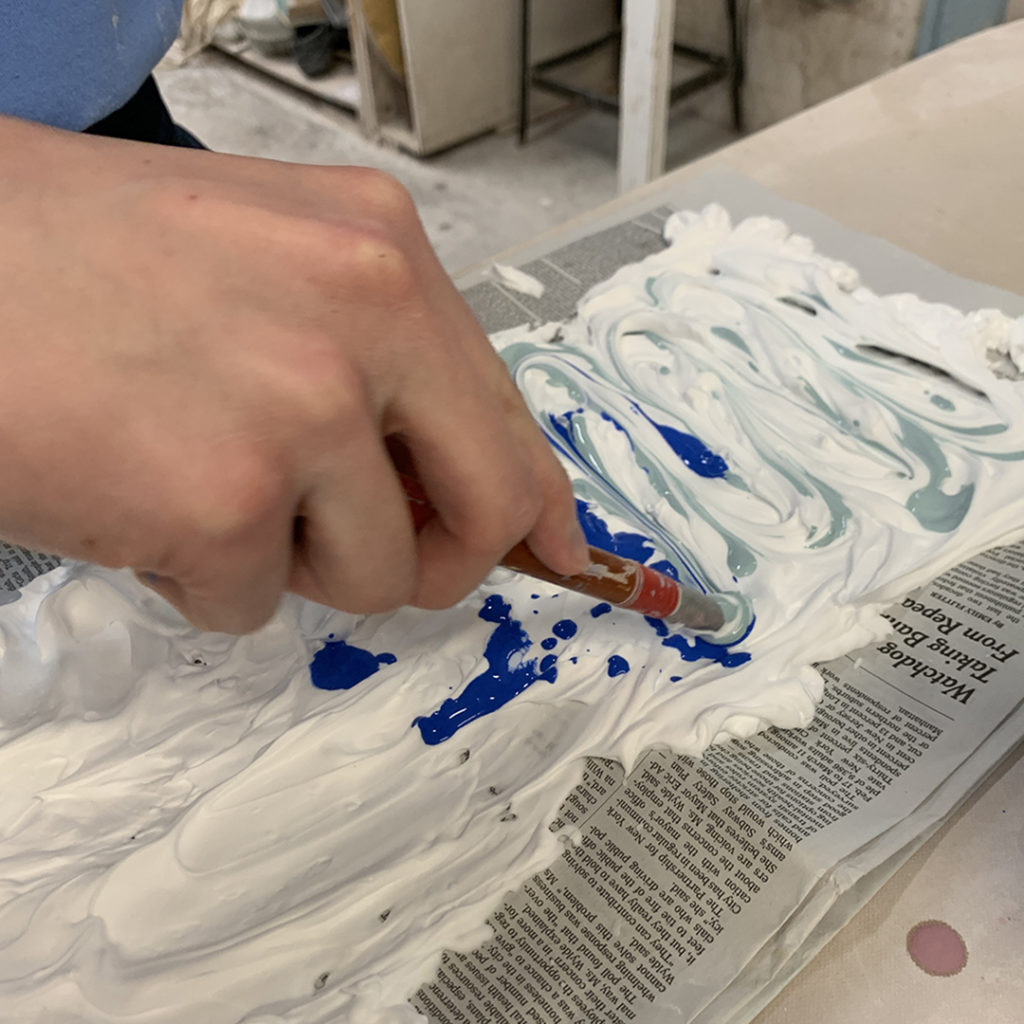
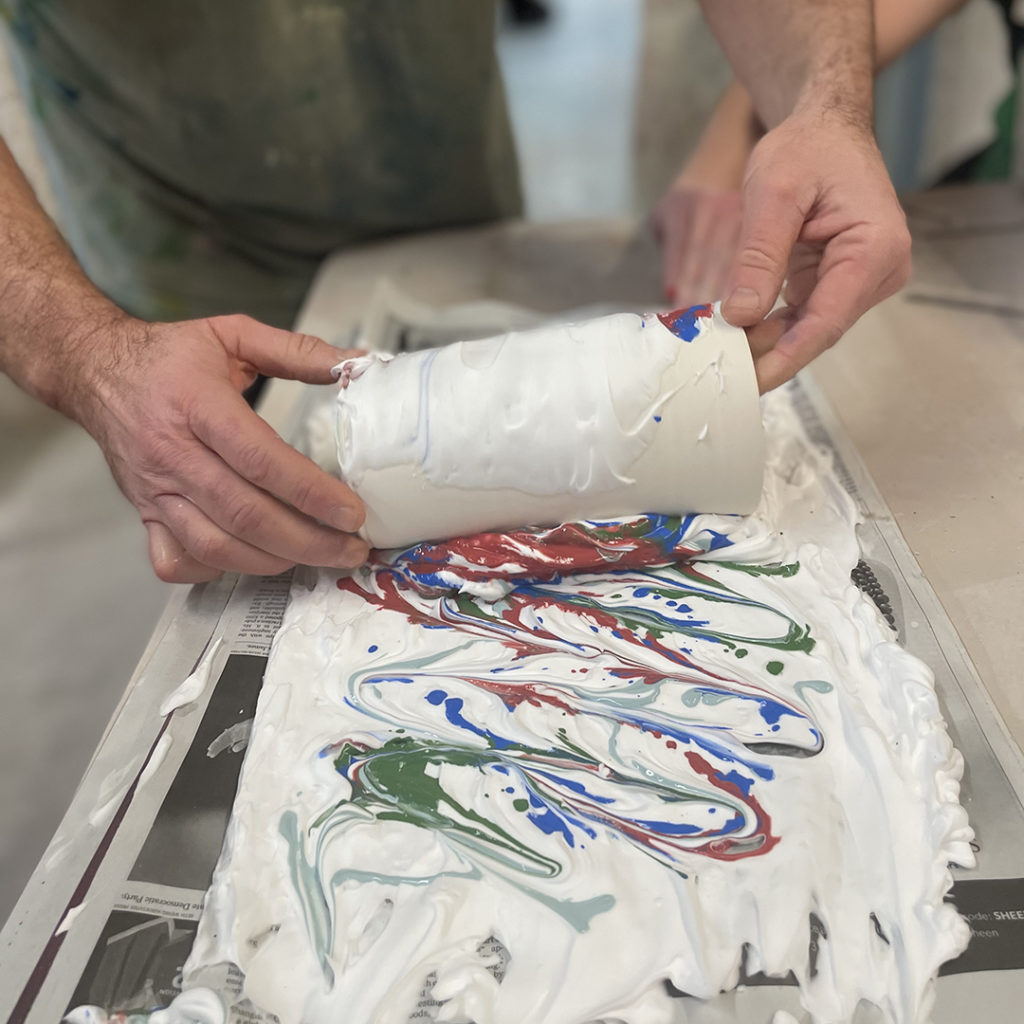
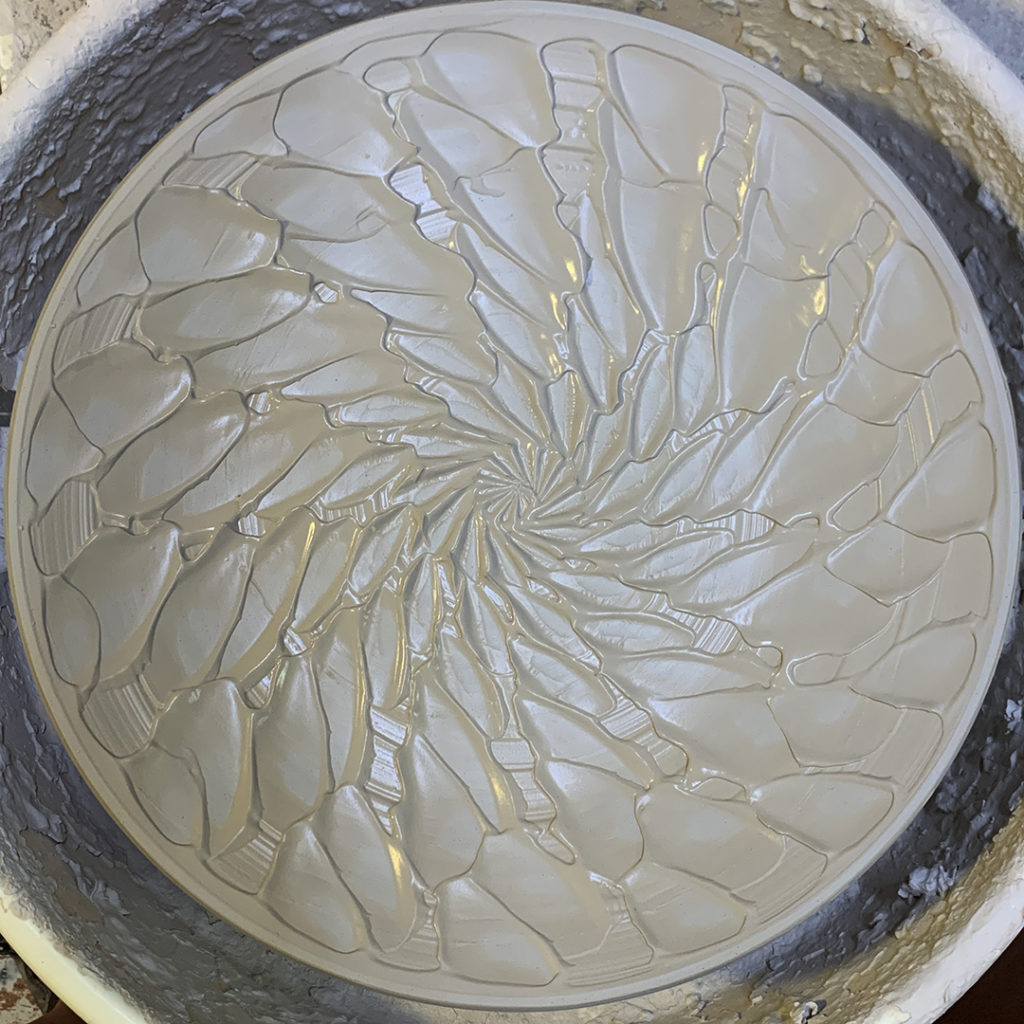
After marbling & spinning, we started our final “tie-dye” demo of the night… shockingly with a thin layer of shaving cream on newspaper. I know my students were pretty darn confused at this point.

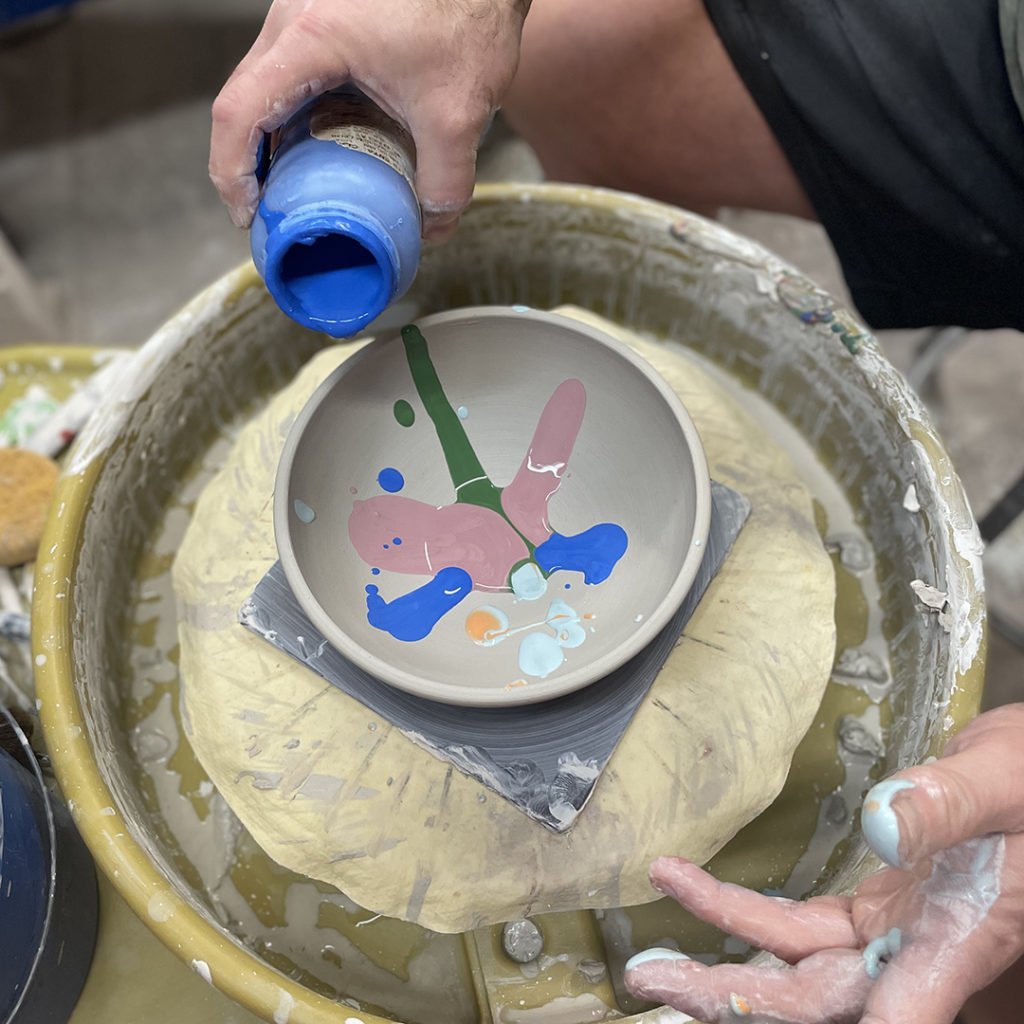
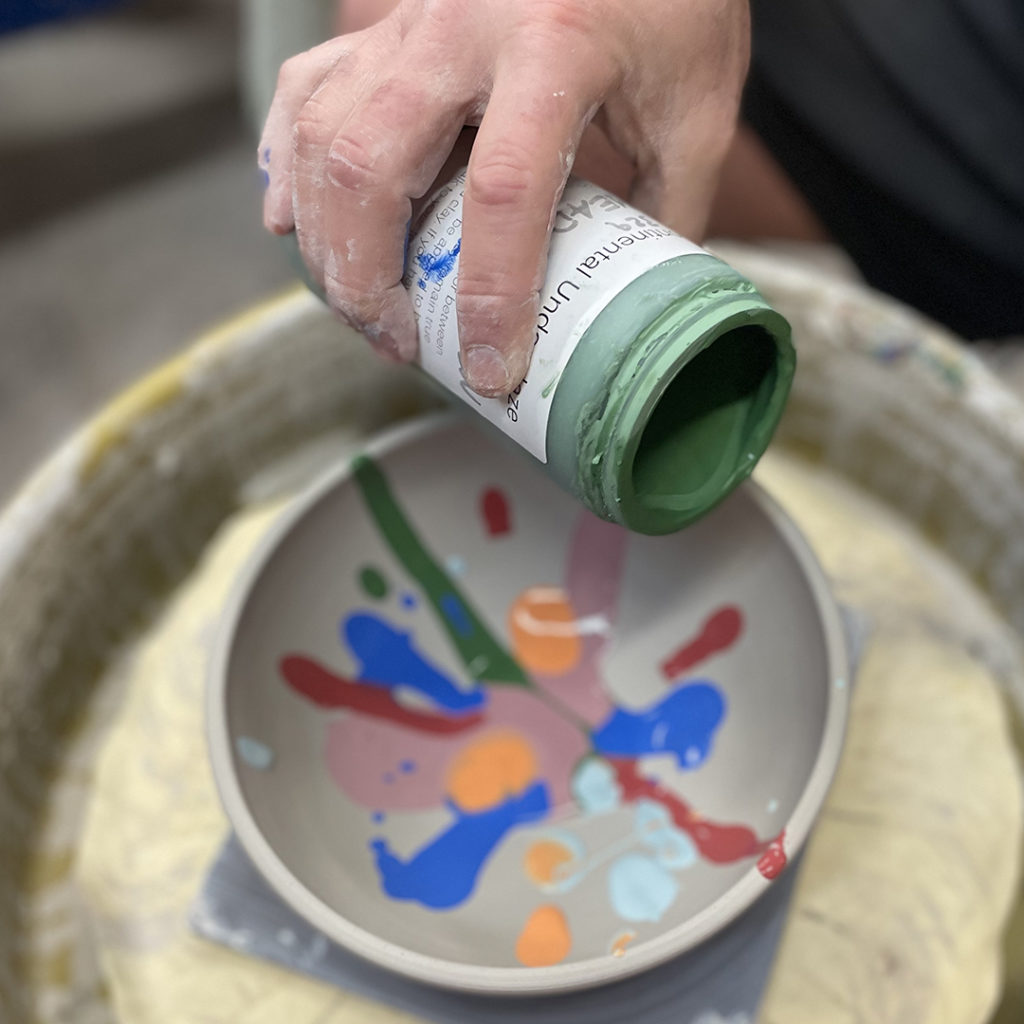
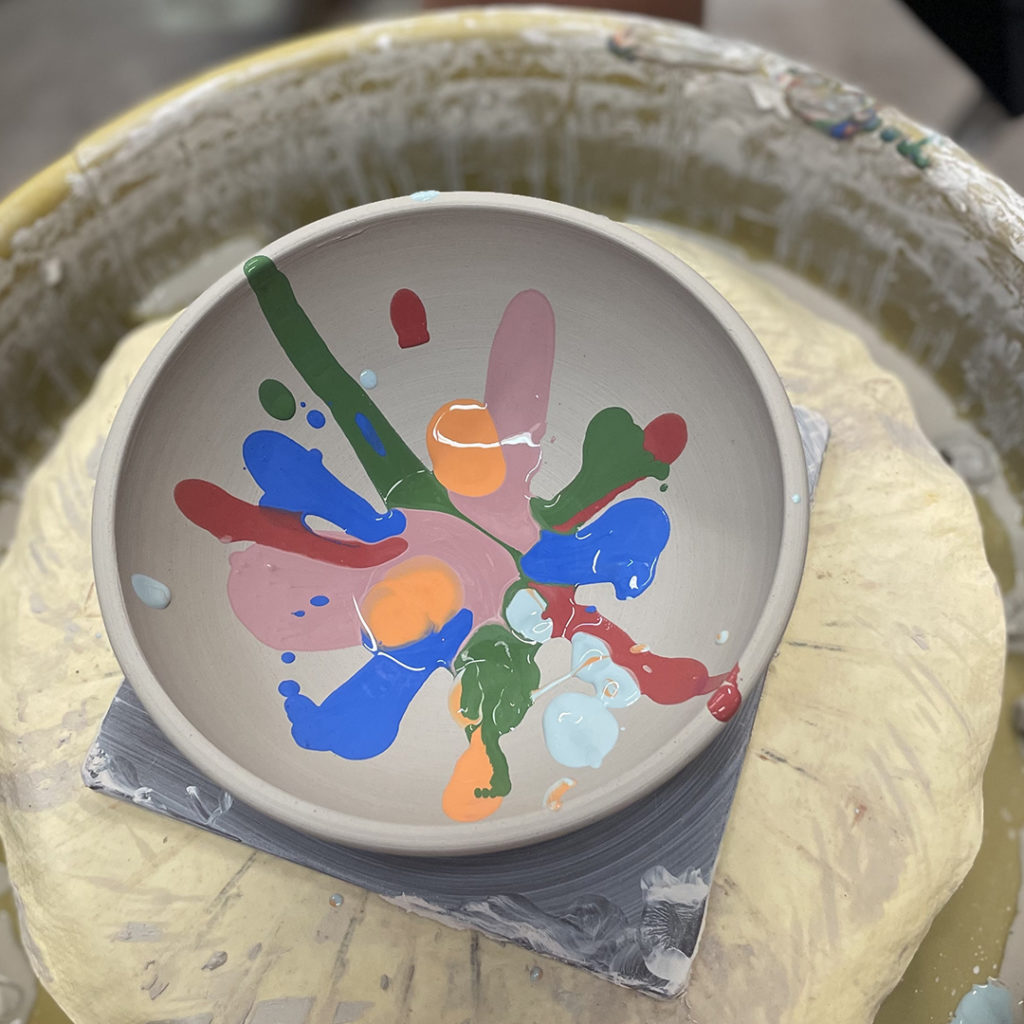
Then I took some colored underglazes and dribbled drops & squiggles all over it. I thought I could use a large straw to move the underglazes… kinda like a big pipette… using my thumb or pinching off the other end to keep it stuck in the straw. FYI… didn’t work so well.

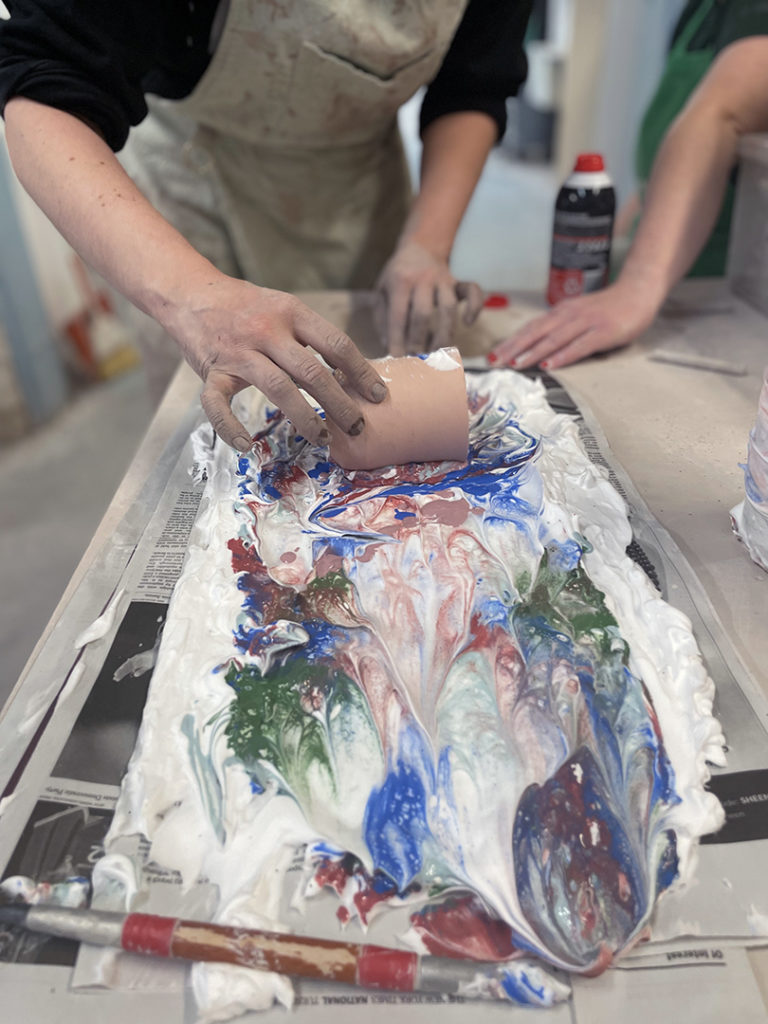
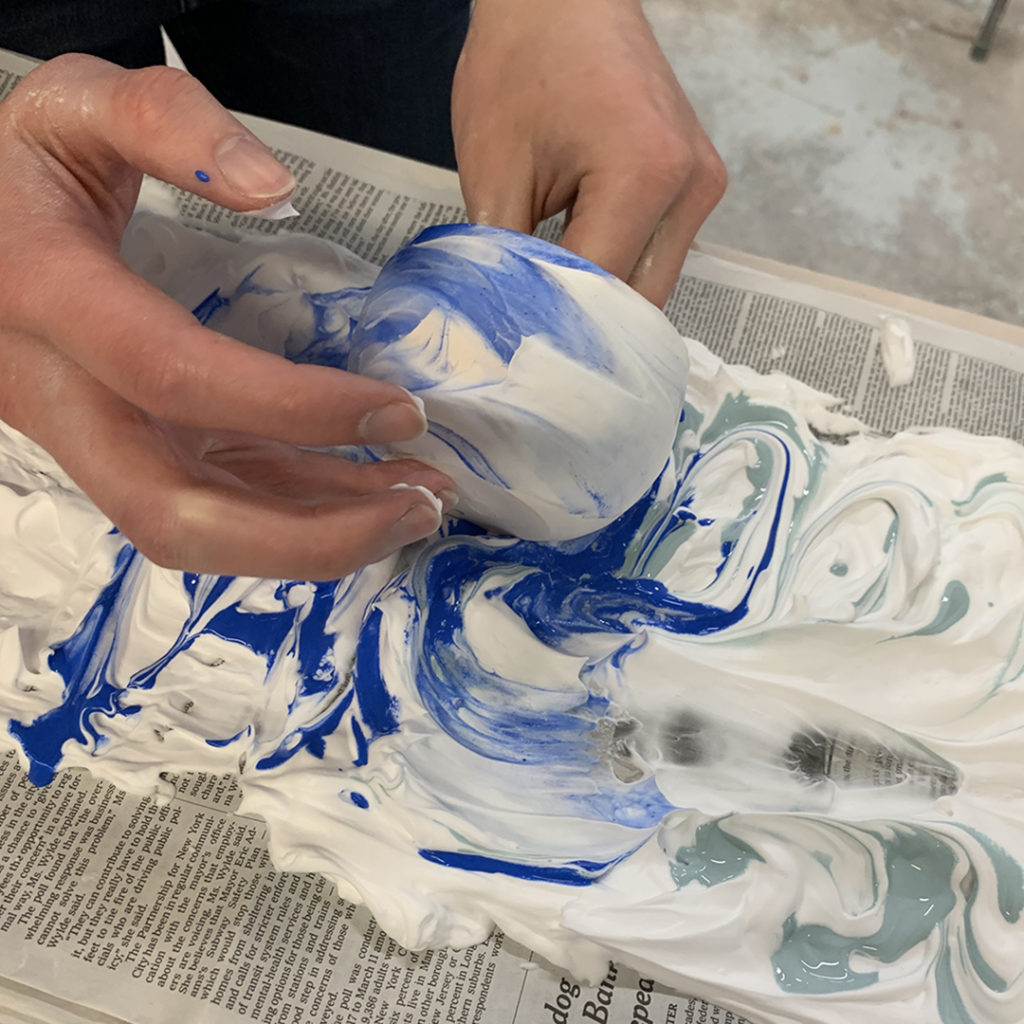
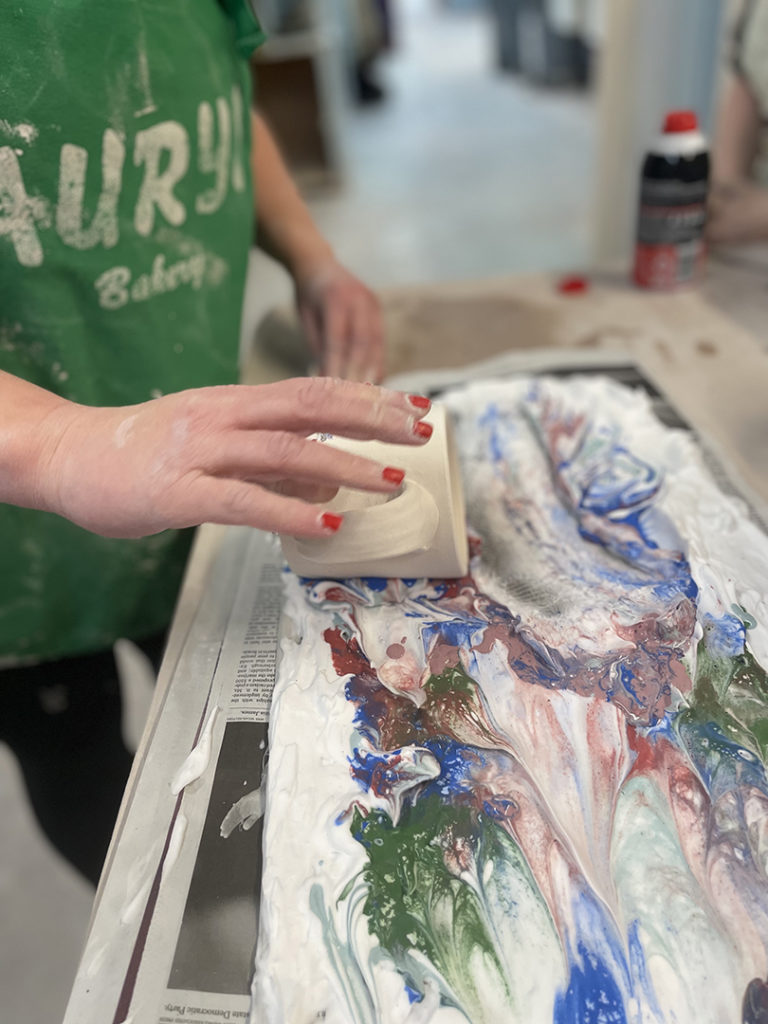
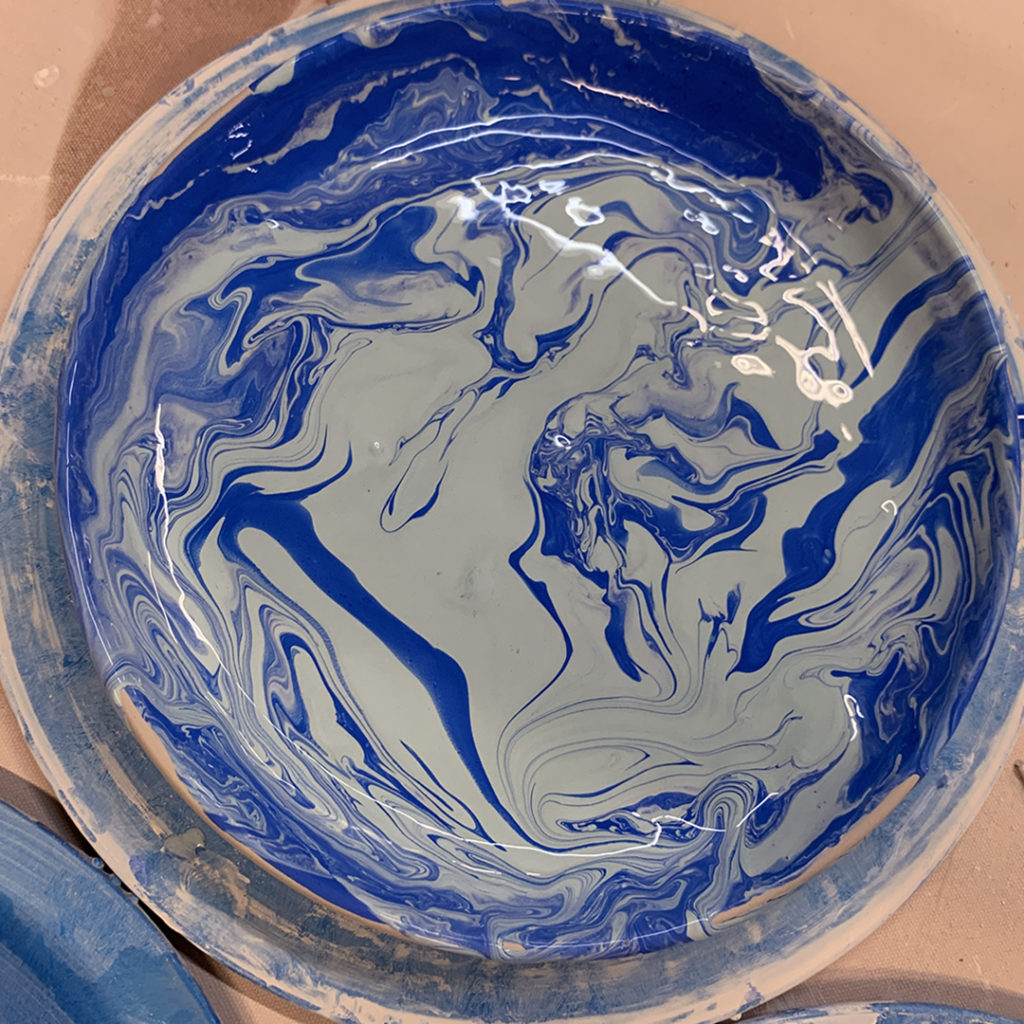
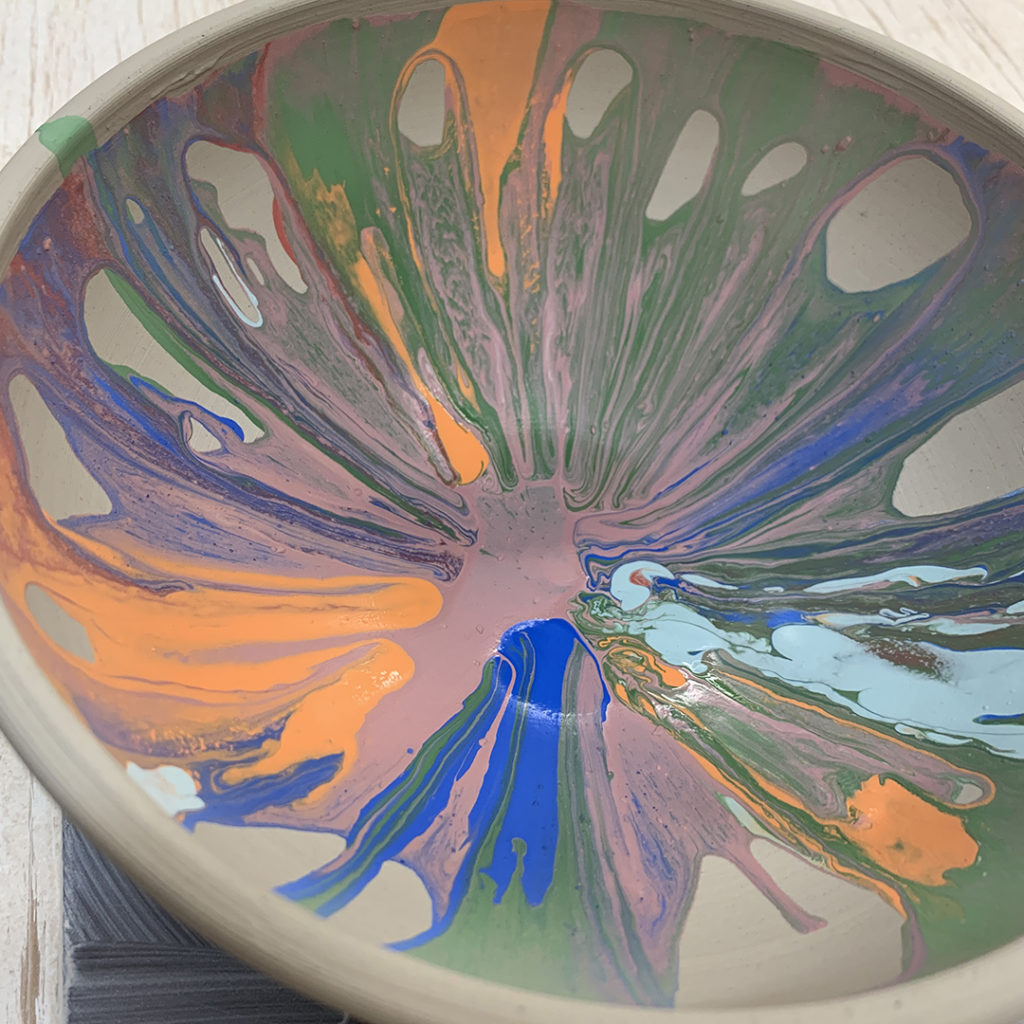
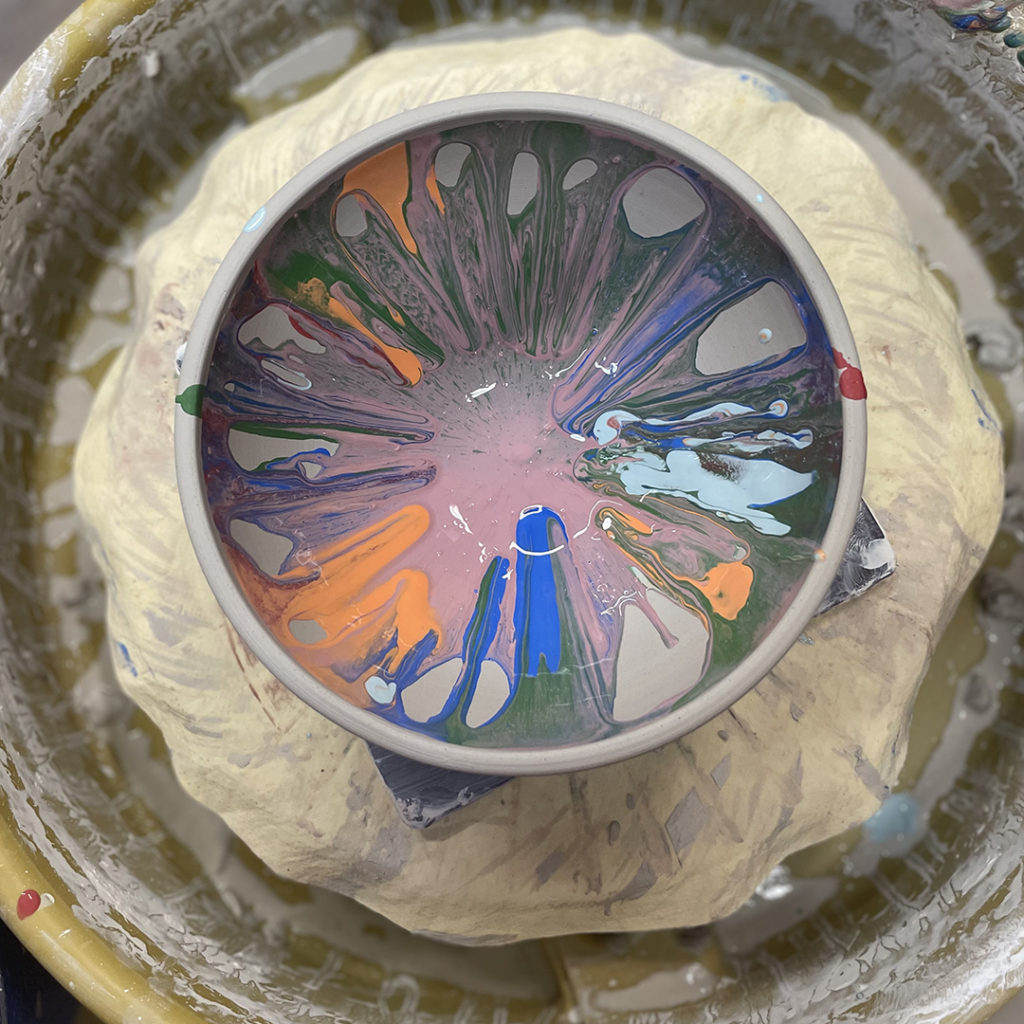
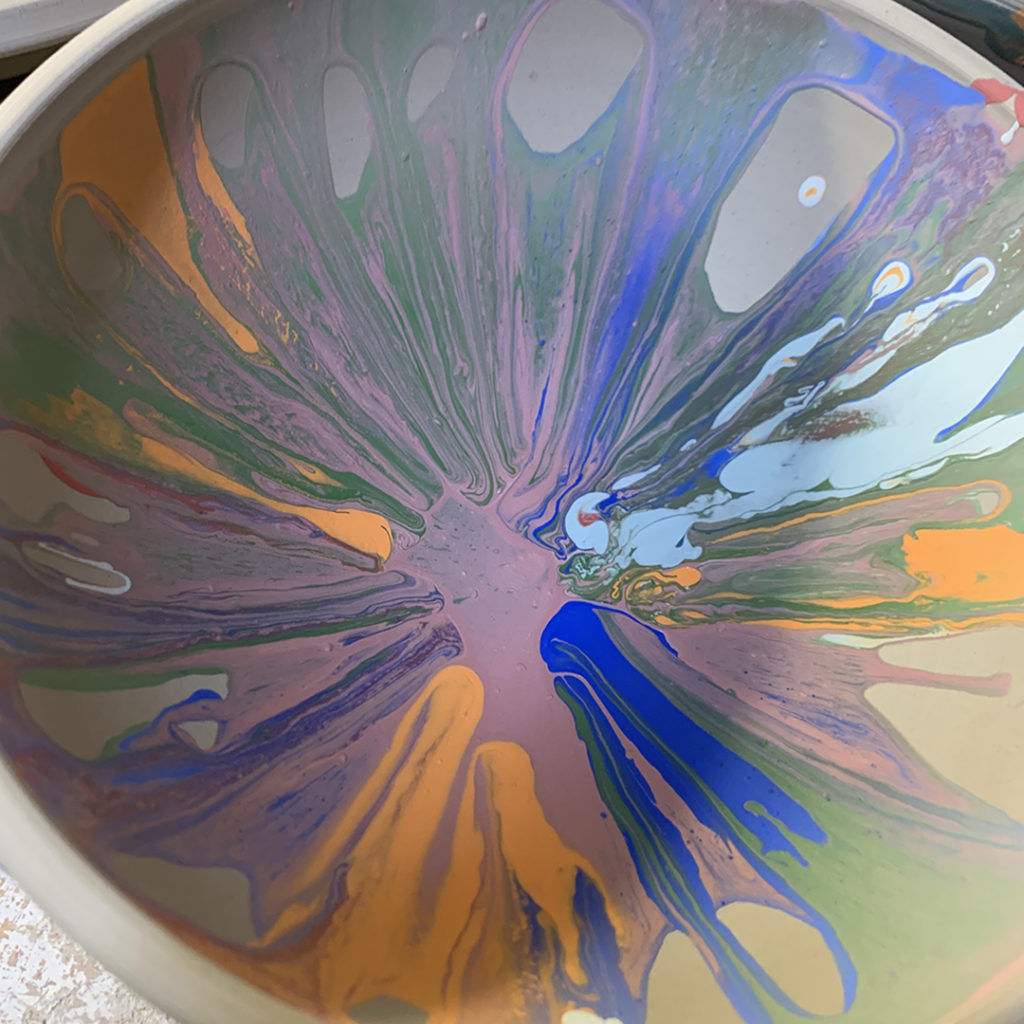
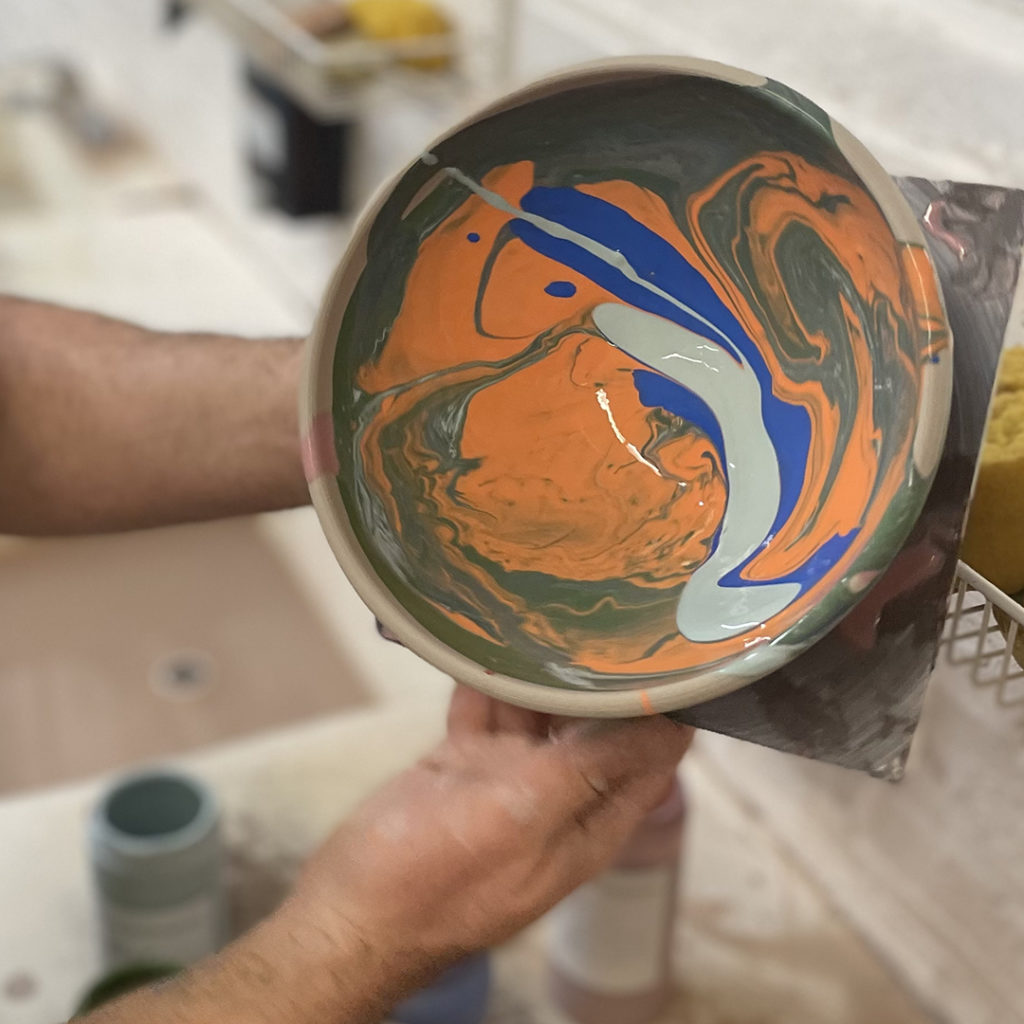
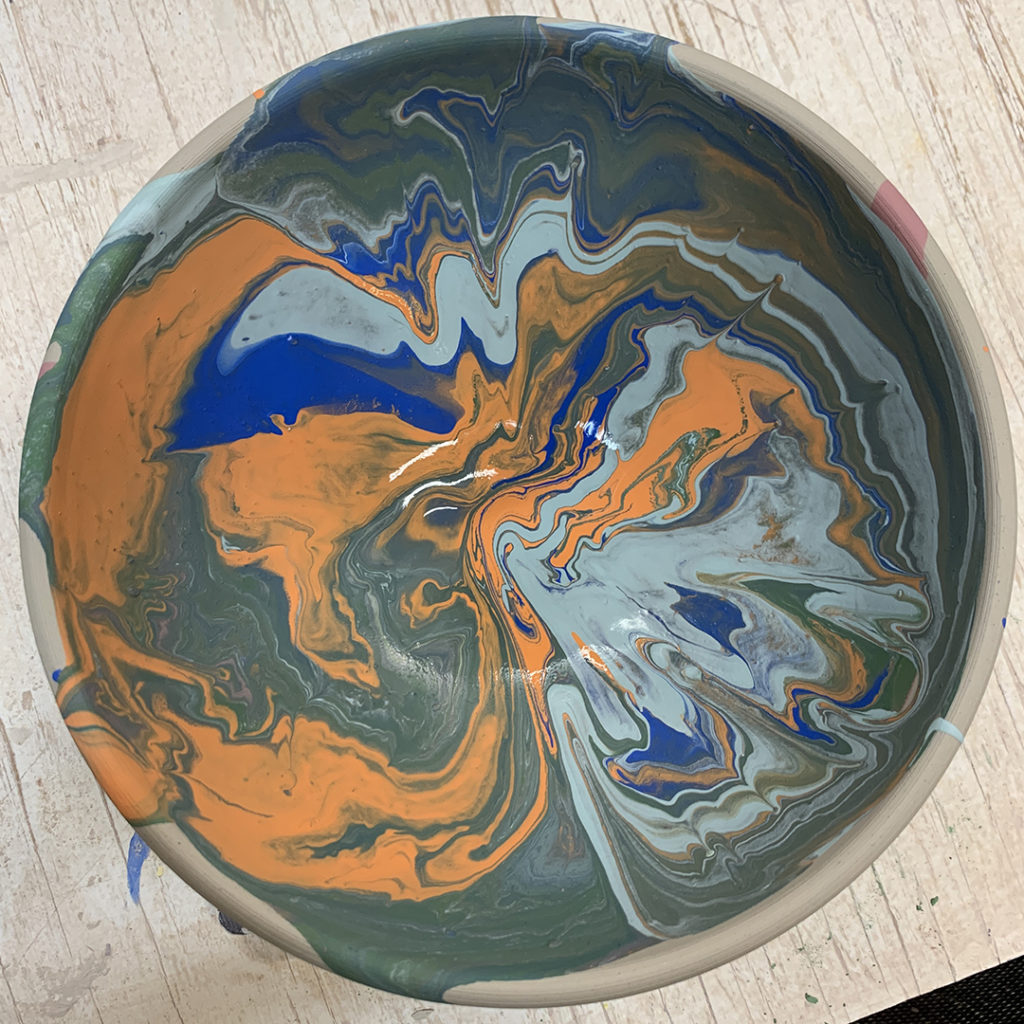
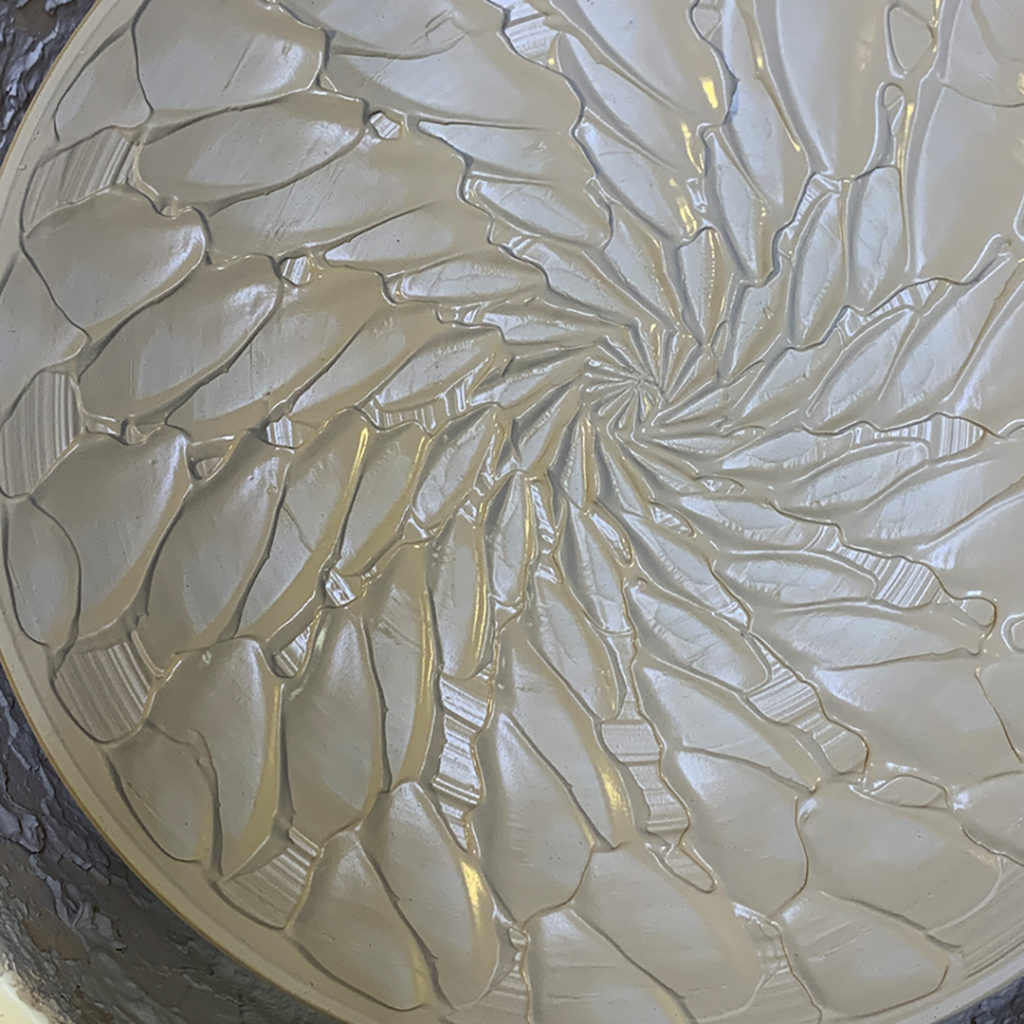
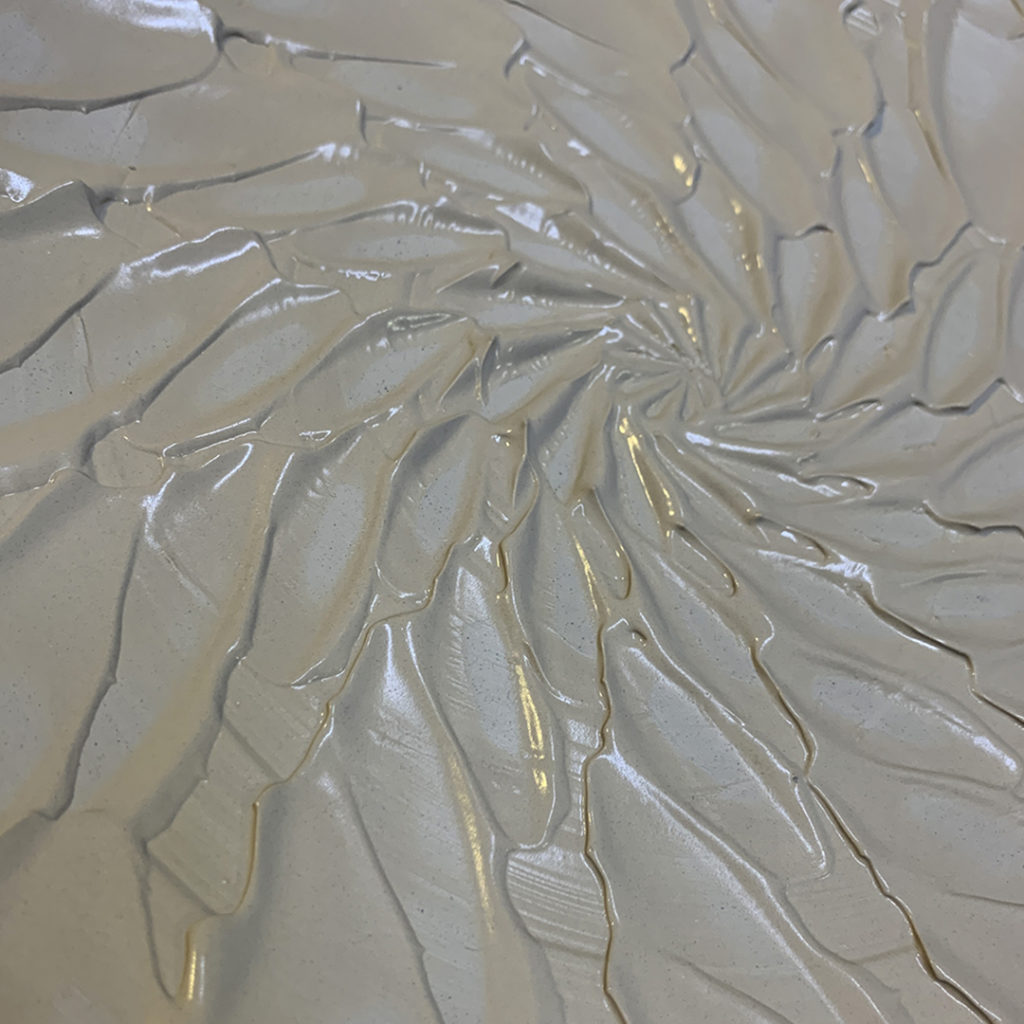
Once I had the underglaze colors spread out over the shaving cream, I dragged a tool through it to swirl the colors a bit. And yes, my students were still confused & intrigued…

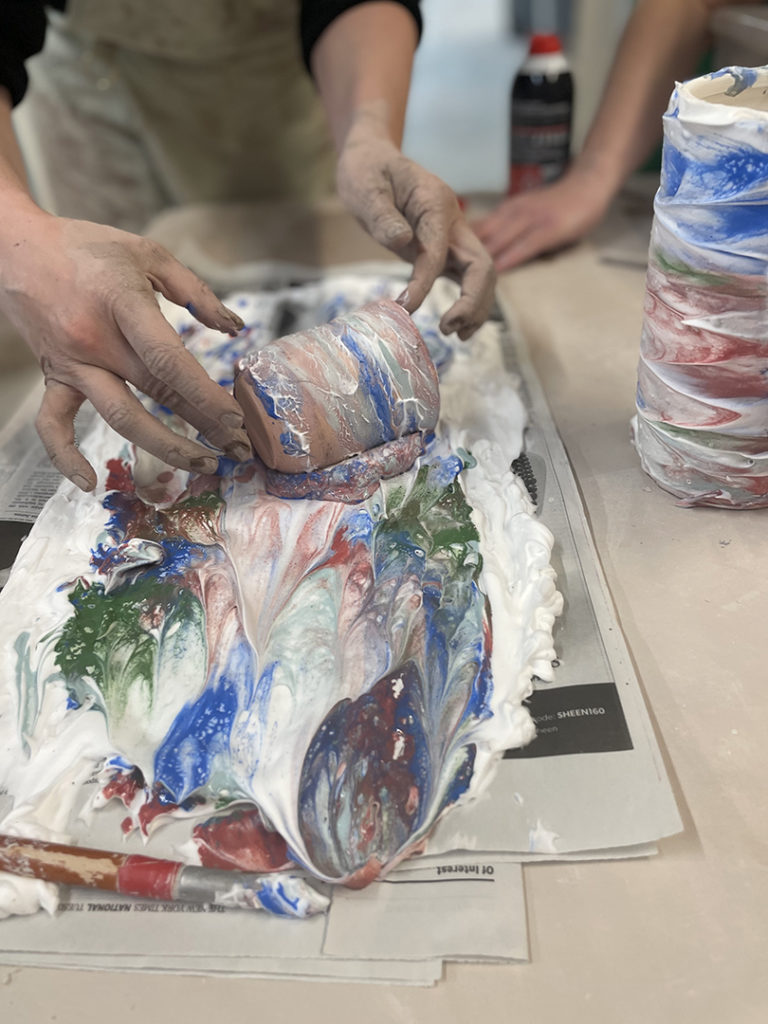
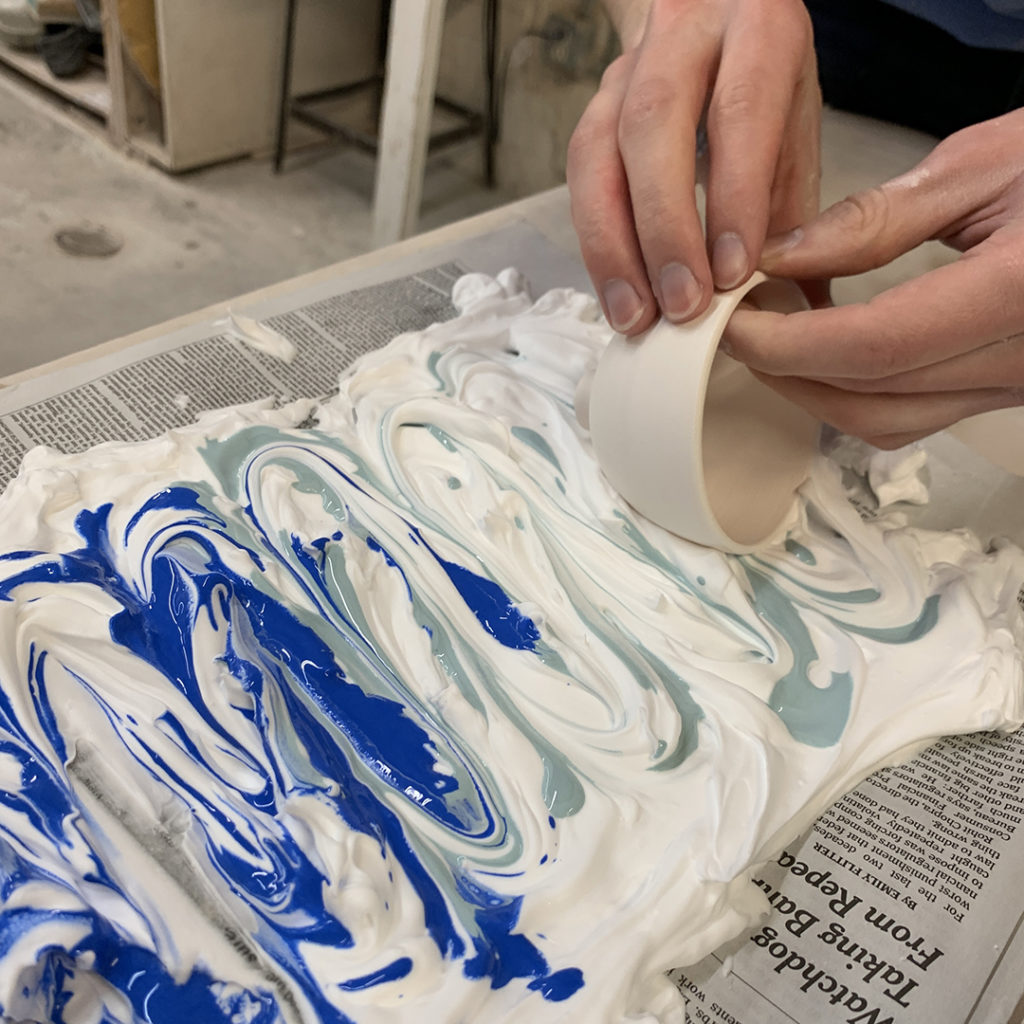
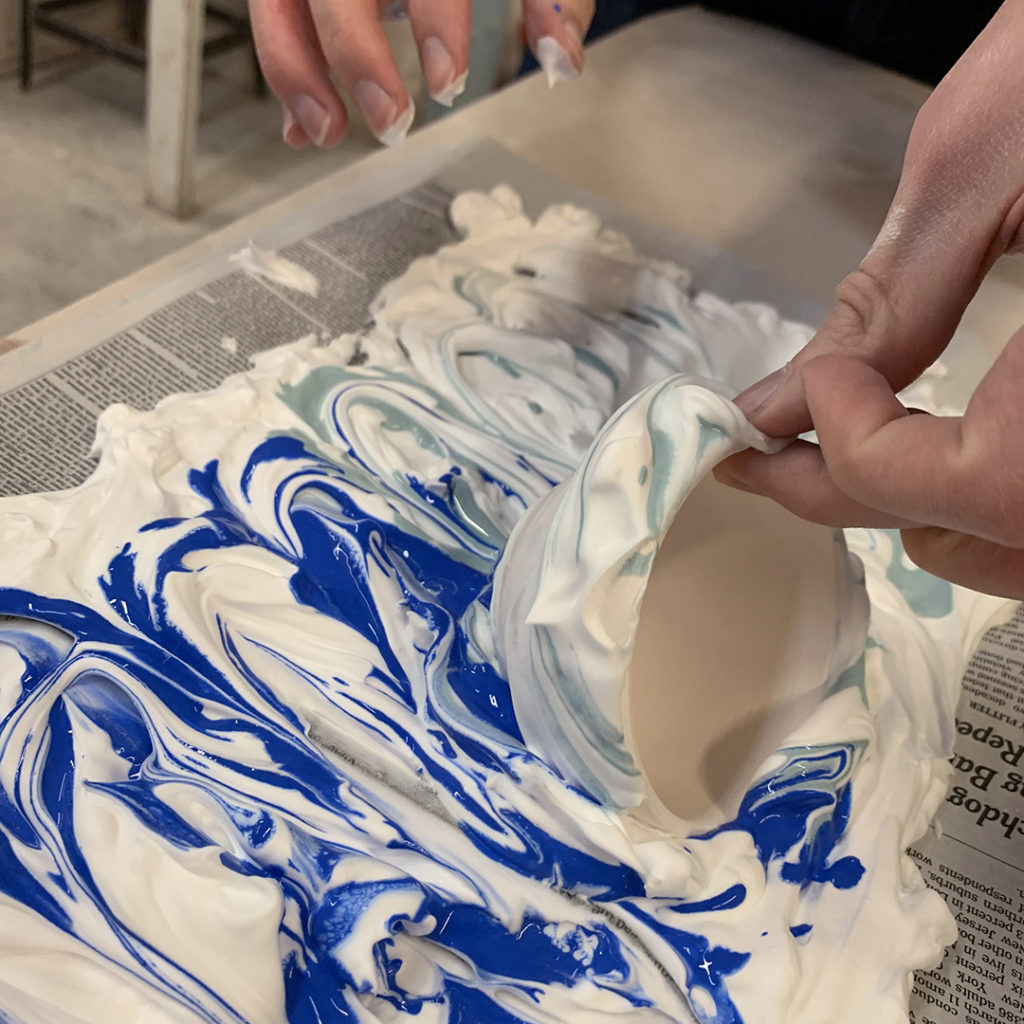
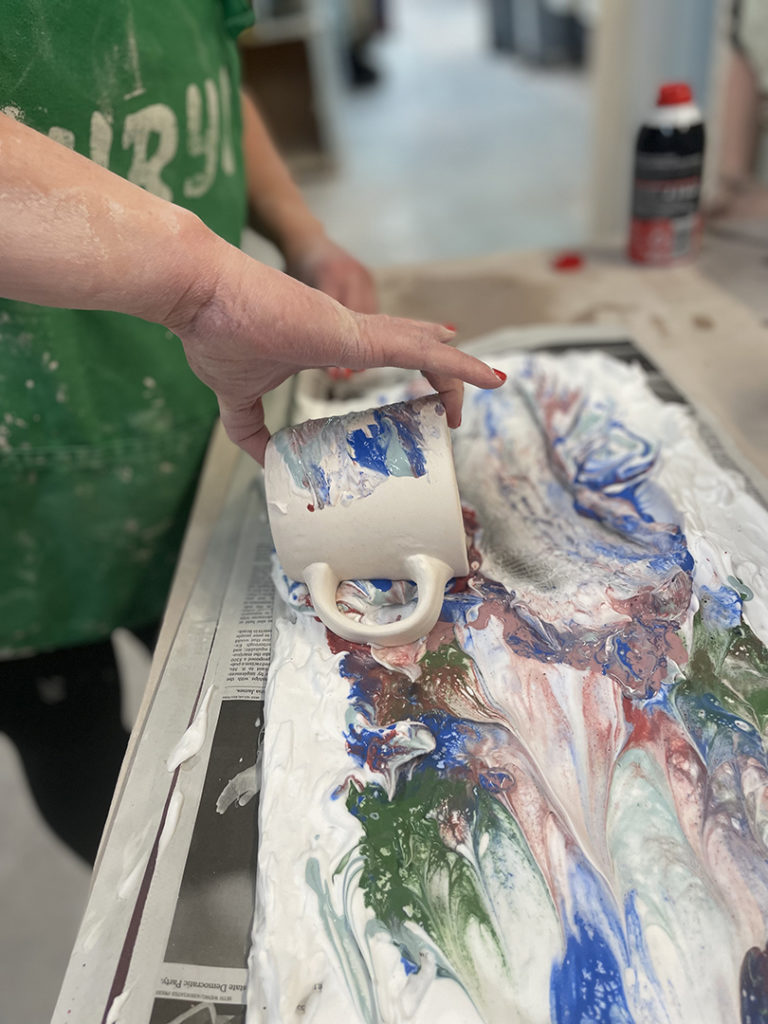
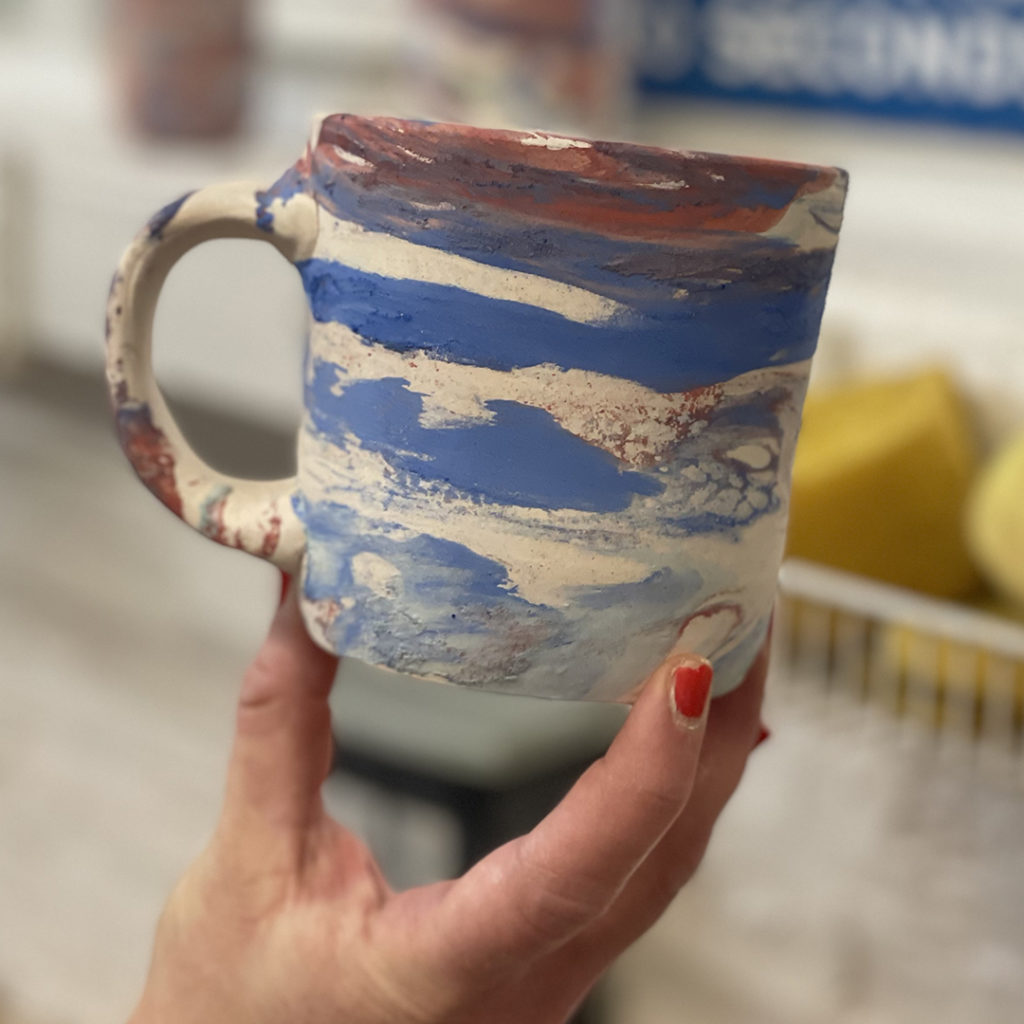
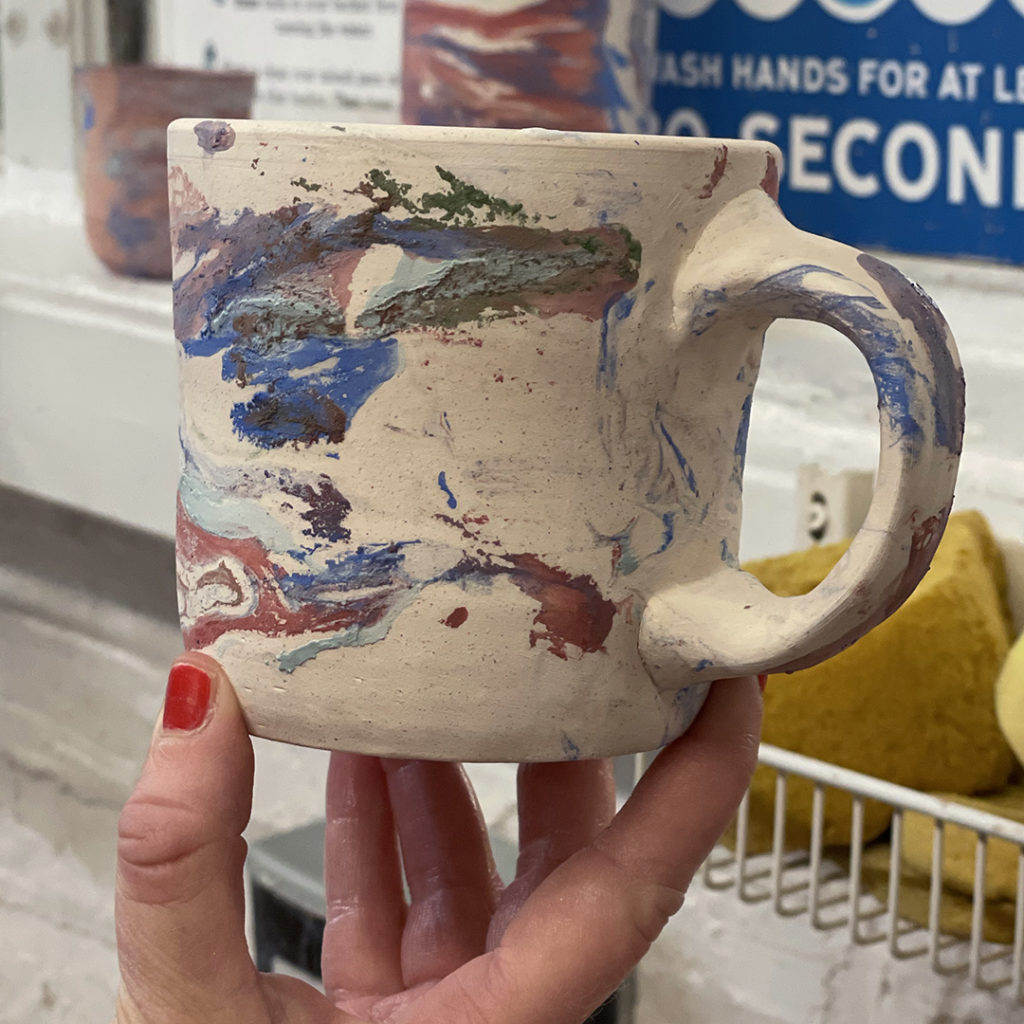
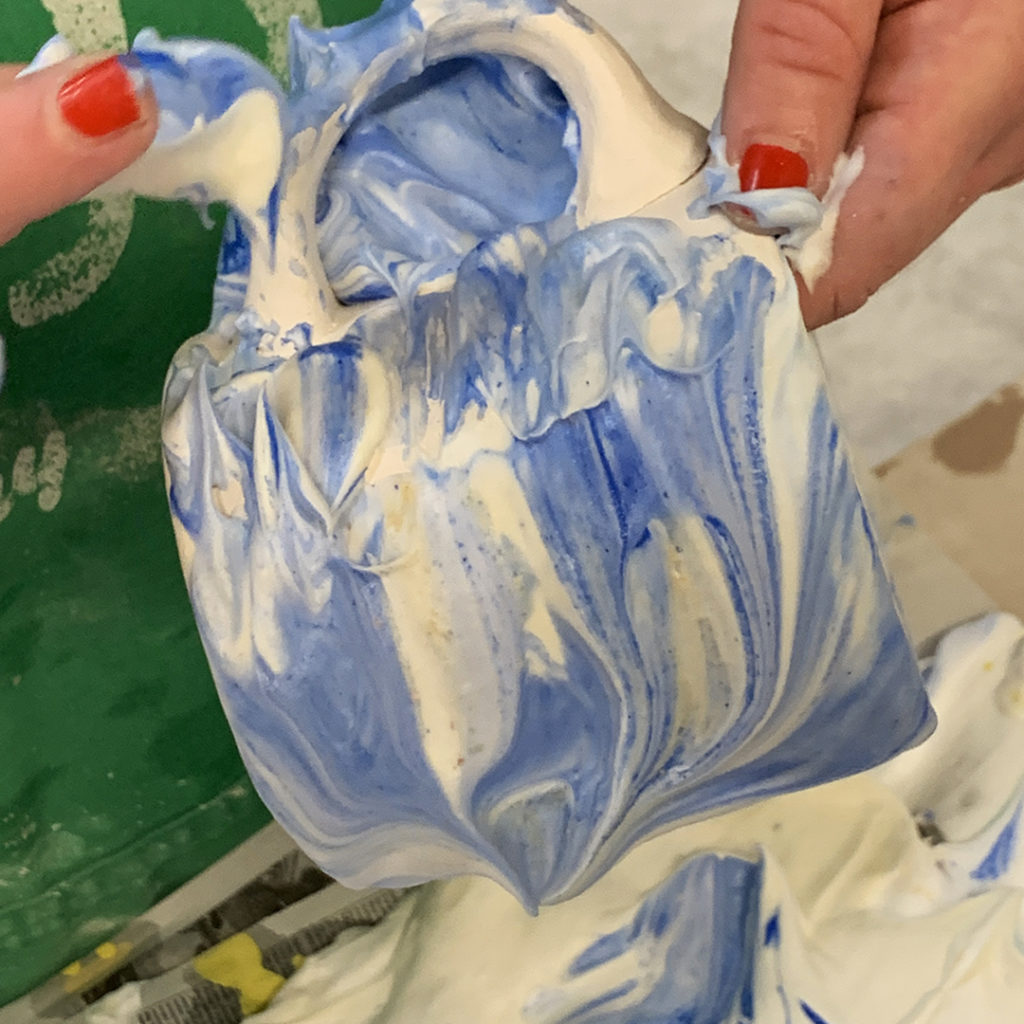
Then I took a straight-sided & smooth vase… pre-bisqued… and literally rolled it over the top of the colorful swirls. The porous bisque piece grabs the underglaze & shaving cream You want the underglaze to touch the pot… more than the shaving cream. You want the color, NOT the aromatic white fluffy stuff!!!

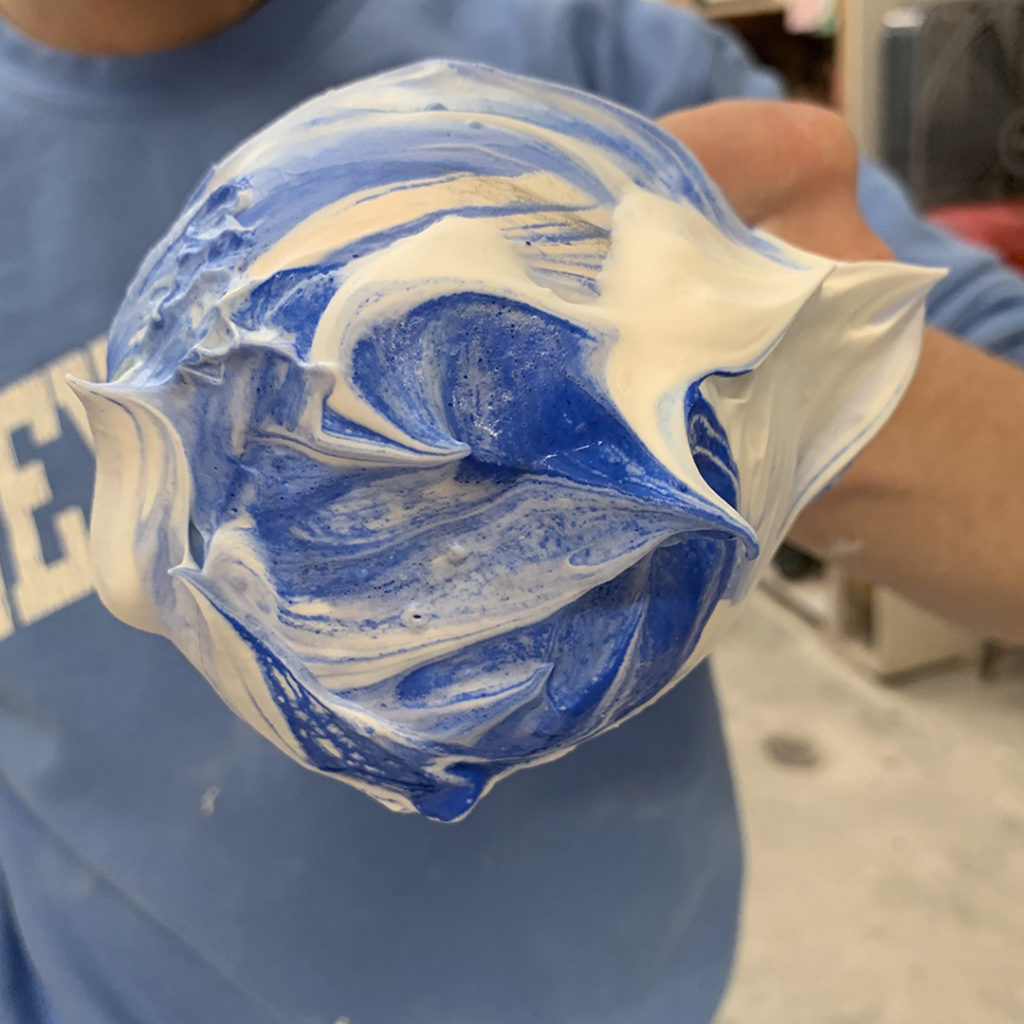
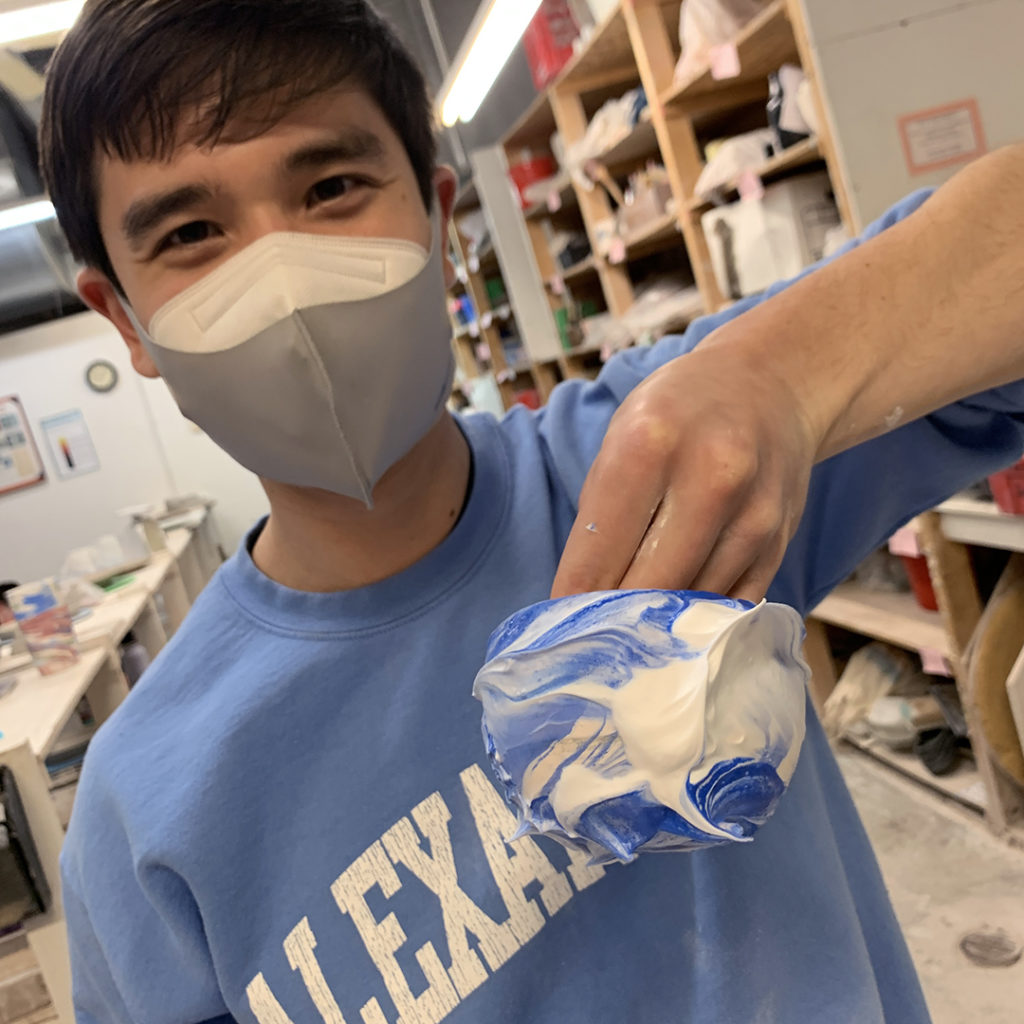
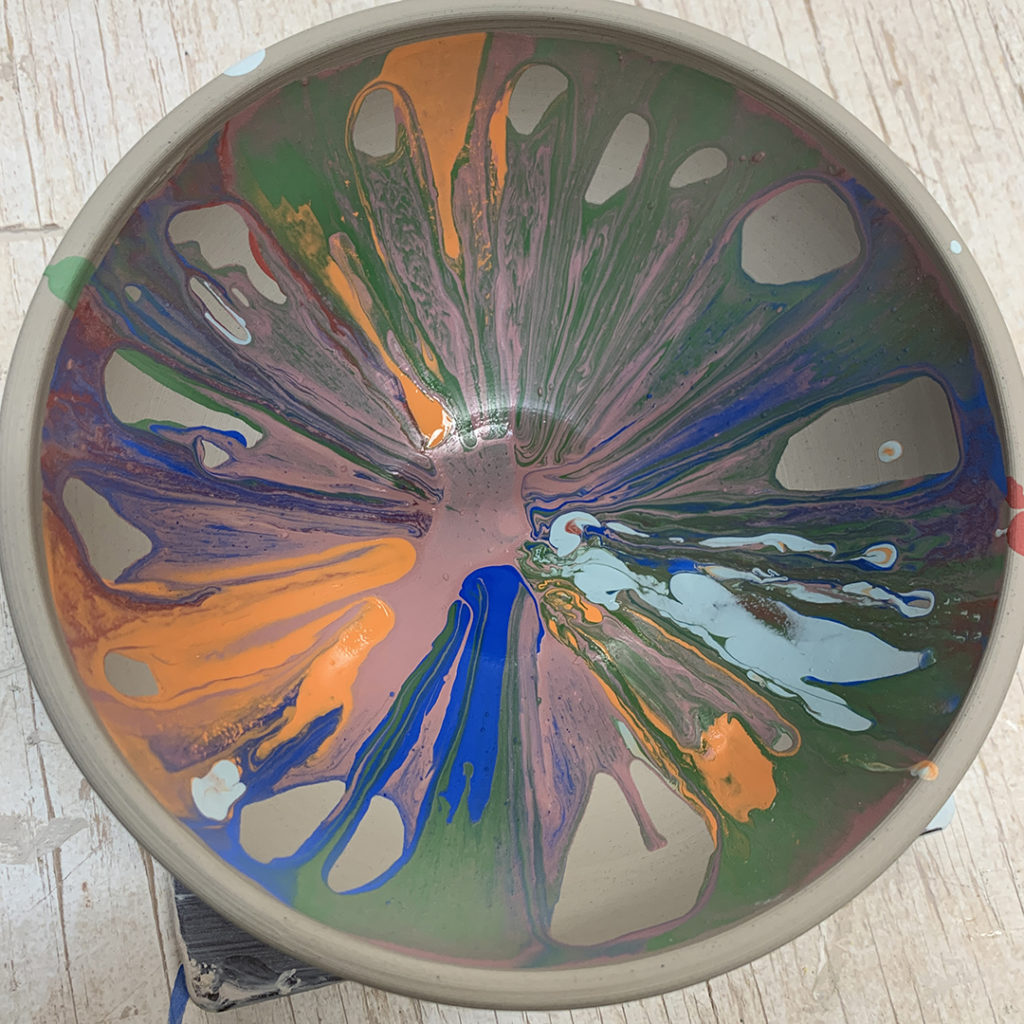
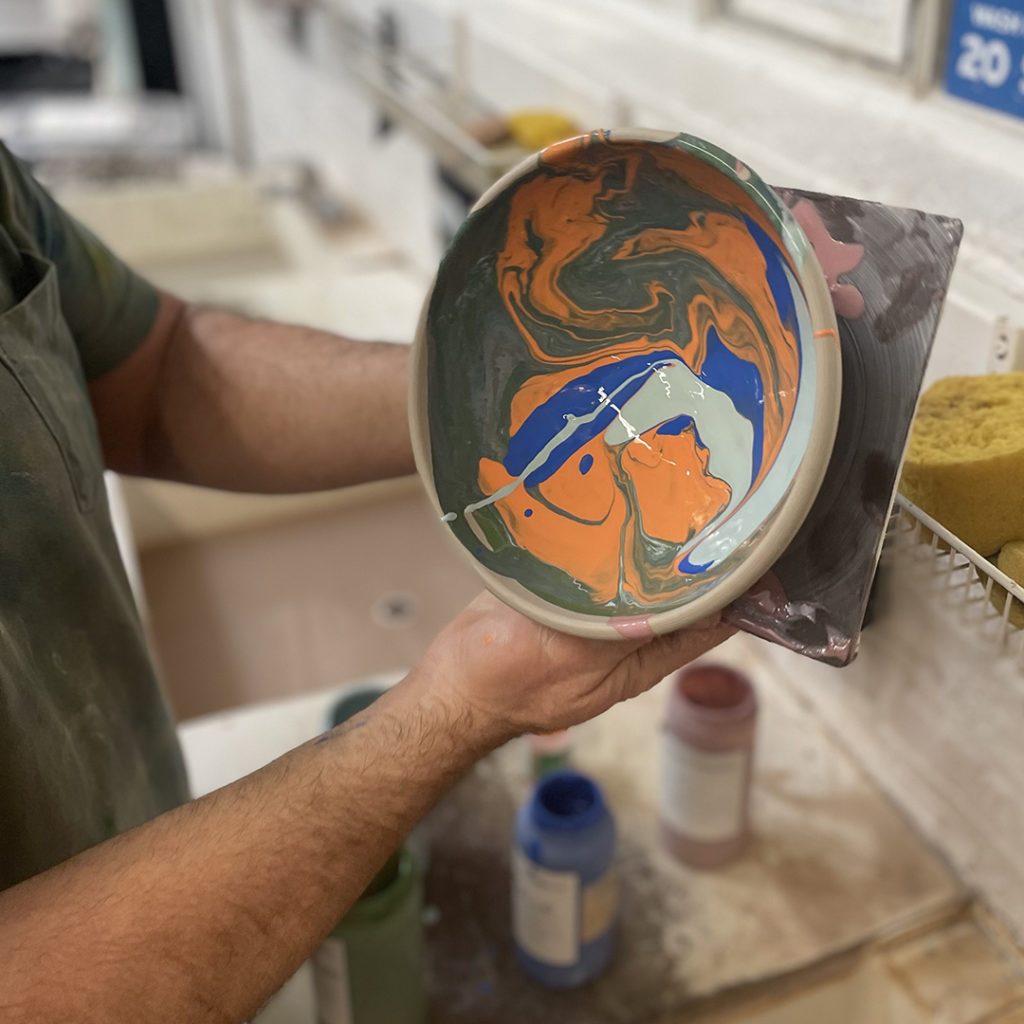
Once I had rolled the whole surface, I let it sit for a few minutes… and everyone was STILL intrigued…

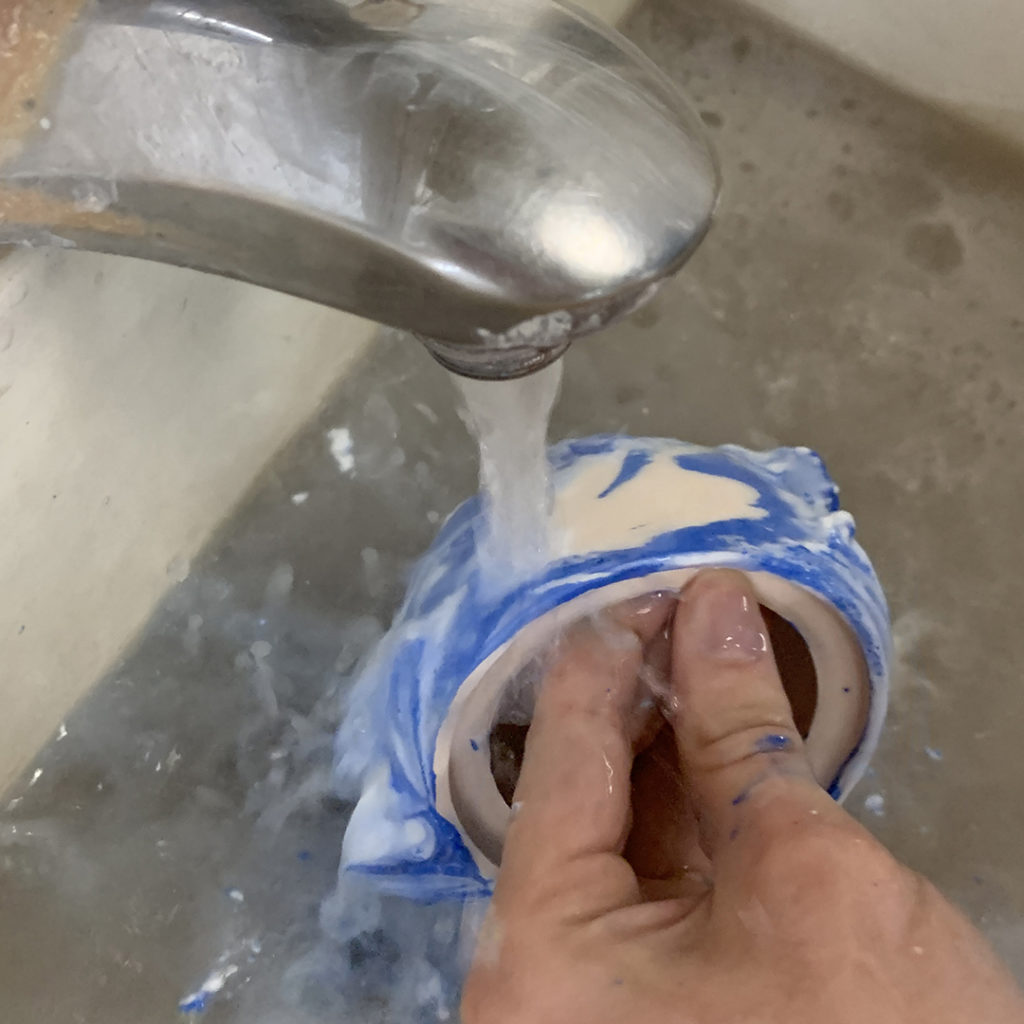
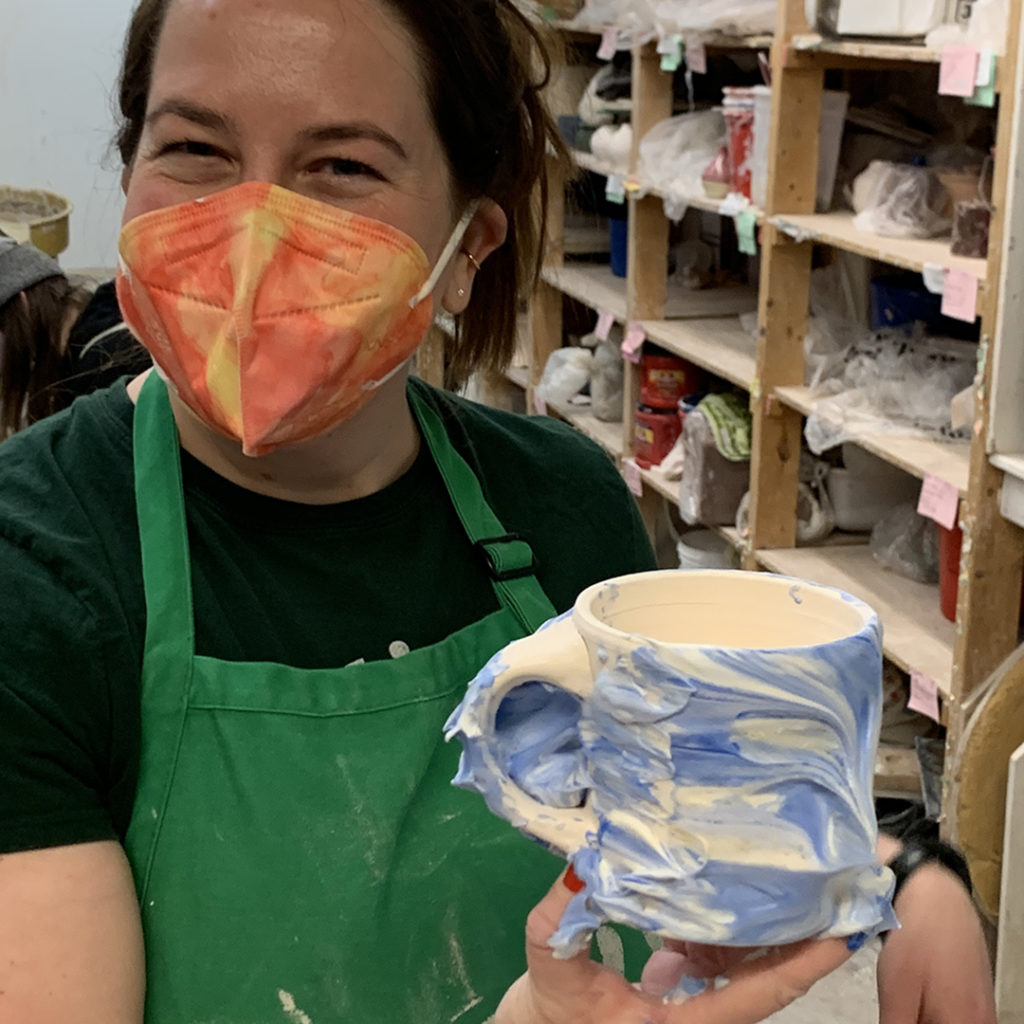
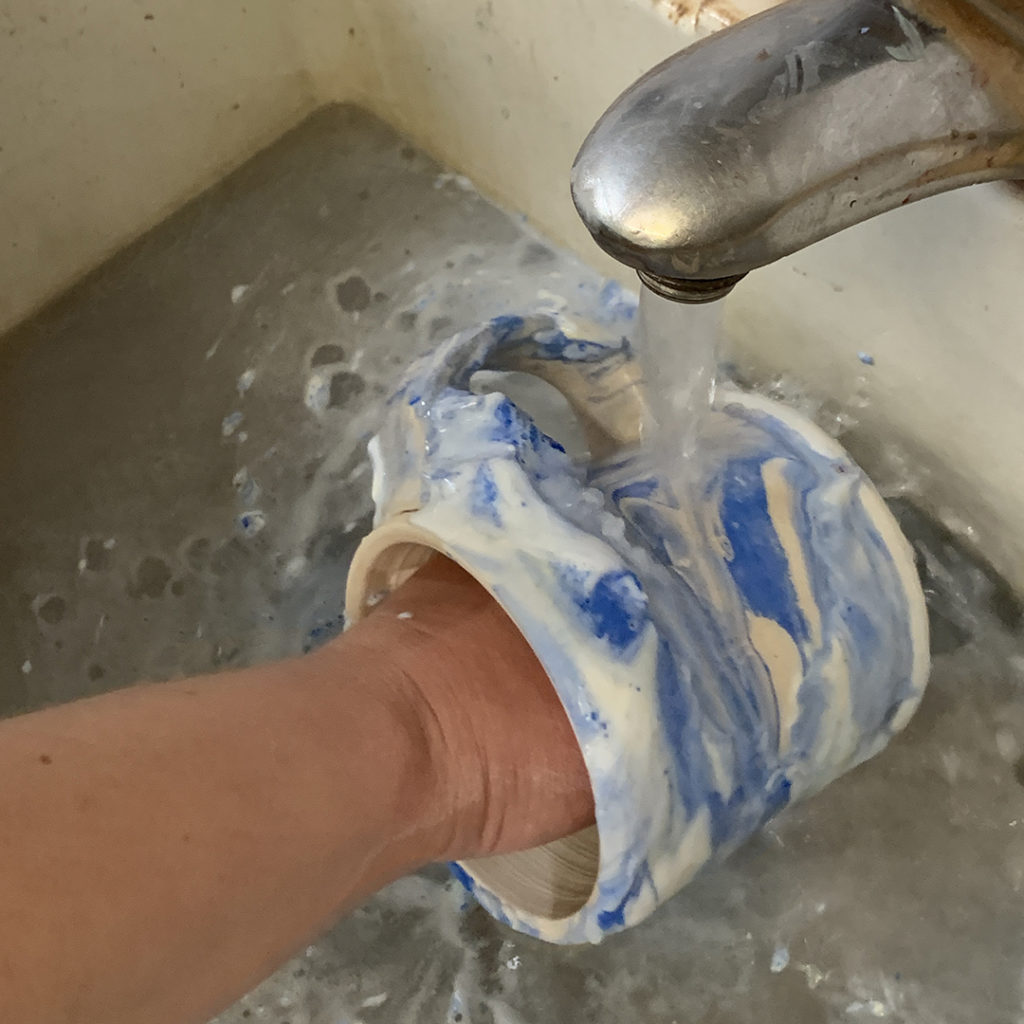
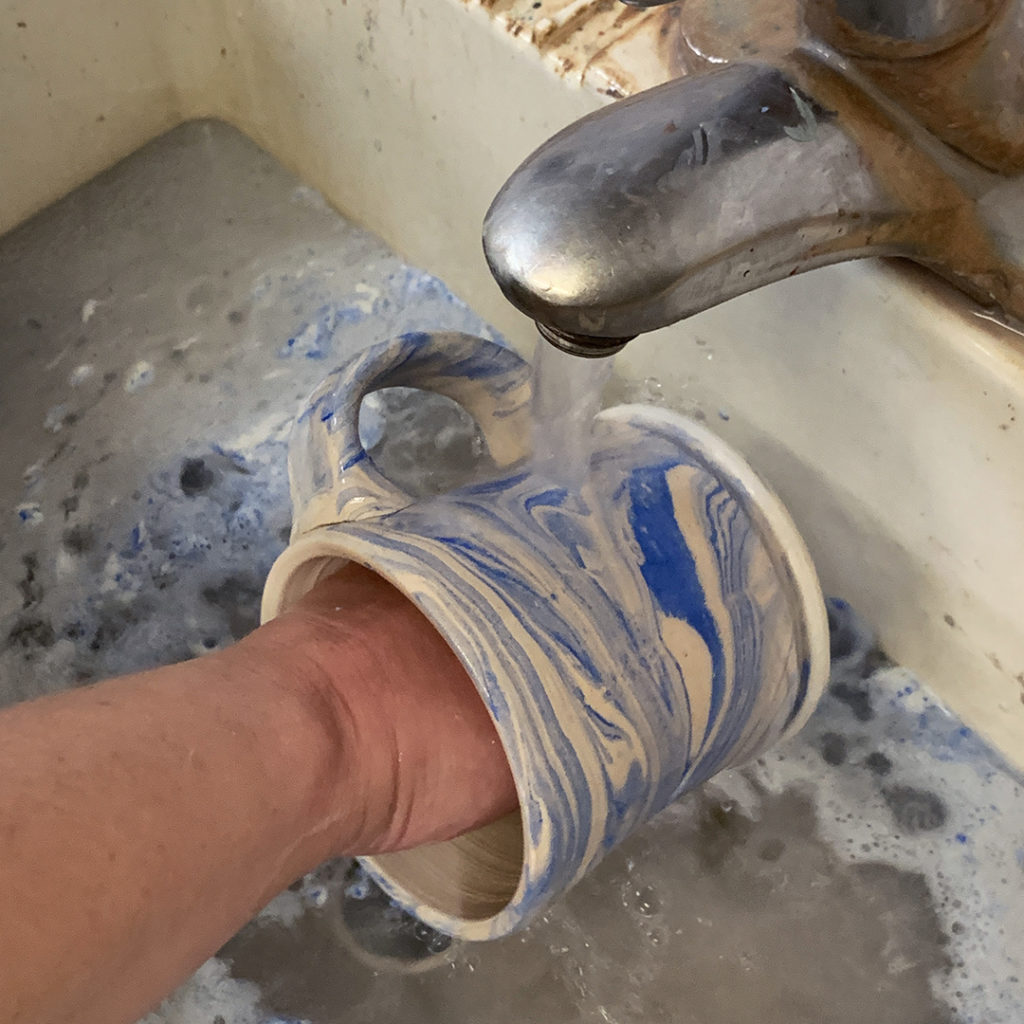
After letting it sit for a bit, we moved to the classroom sinks…

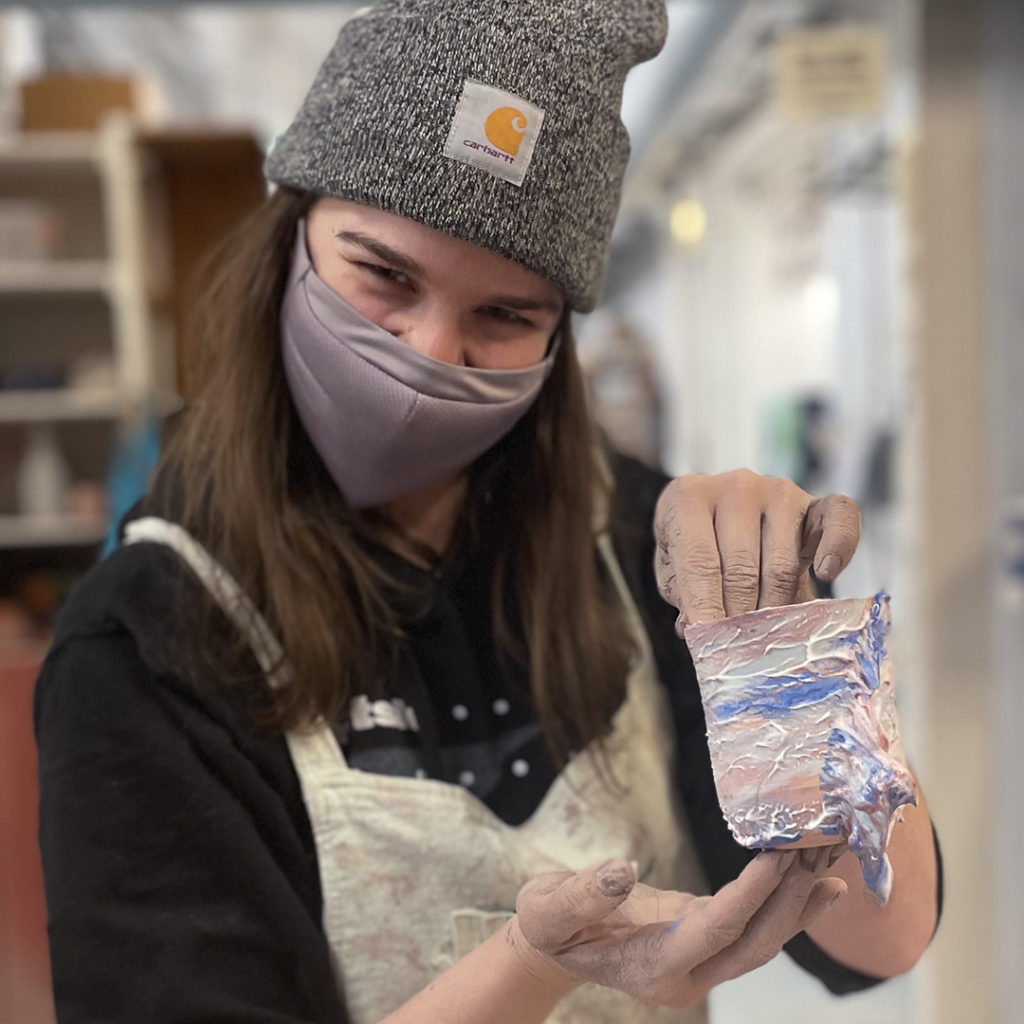
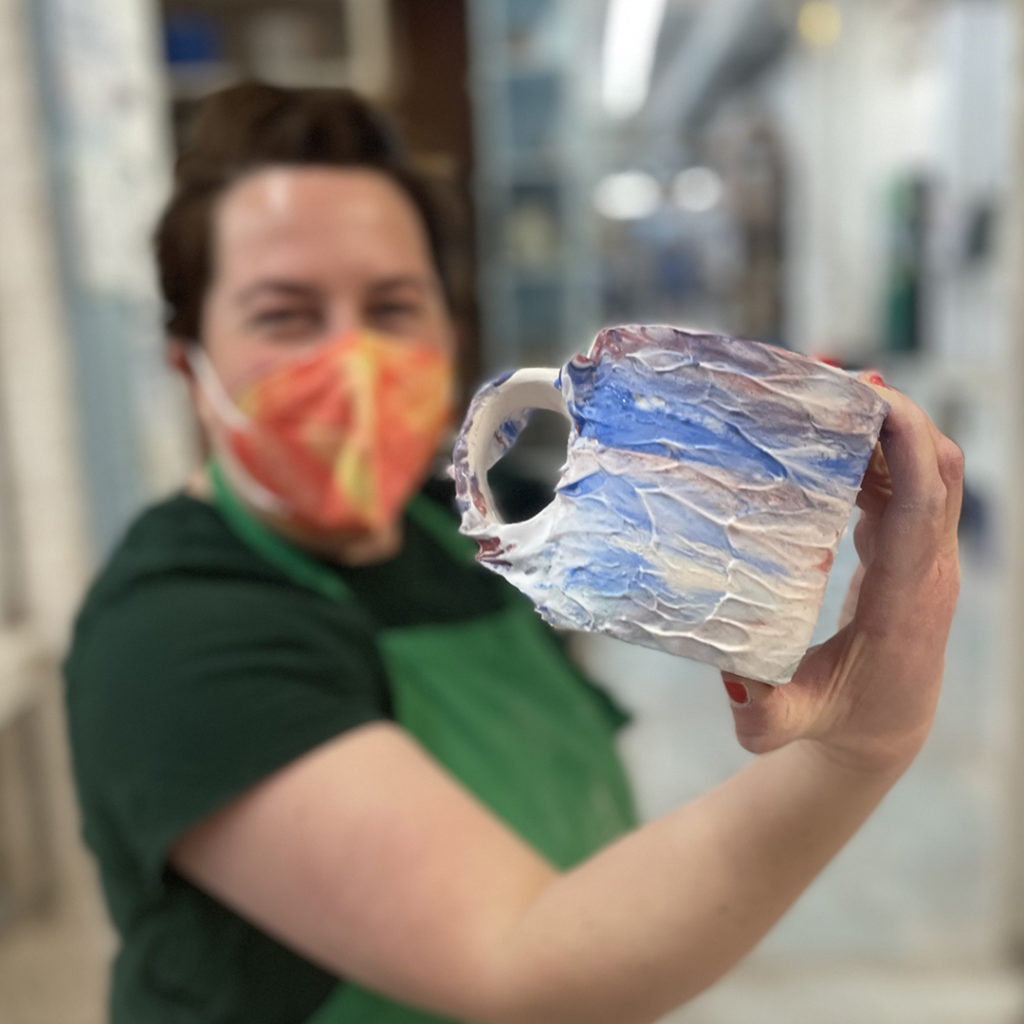
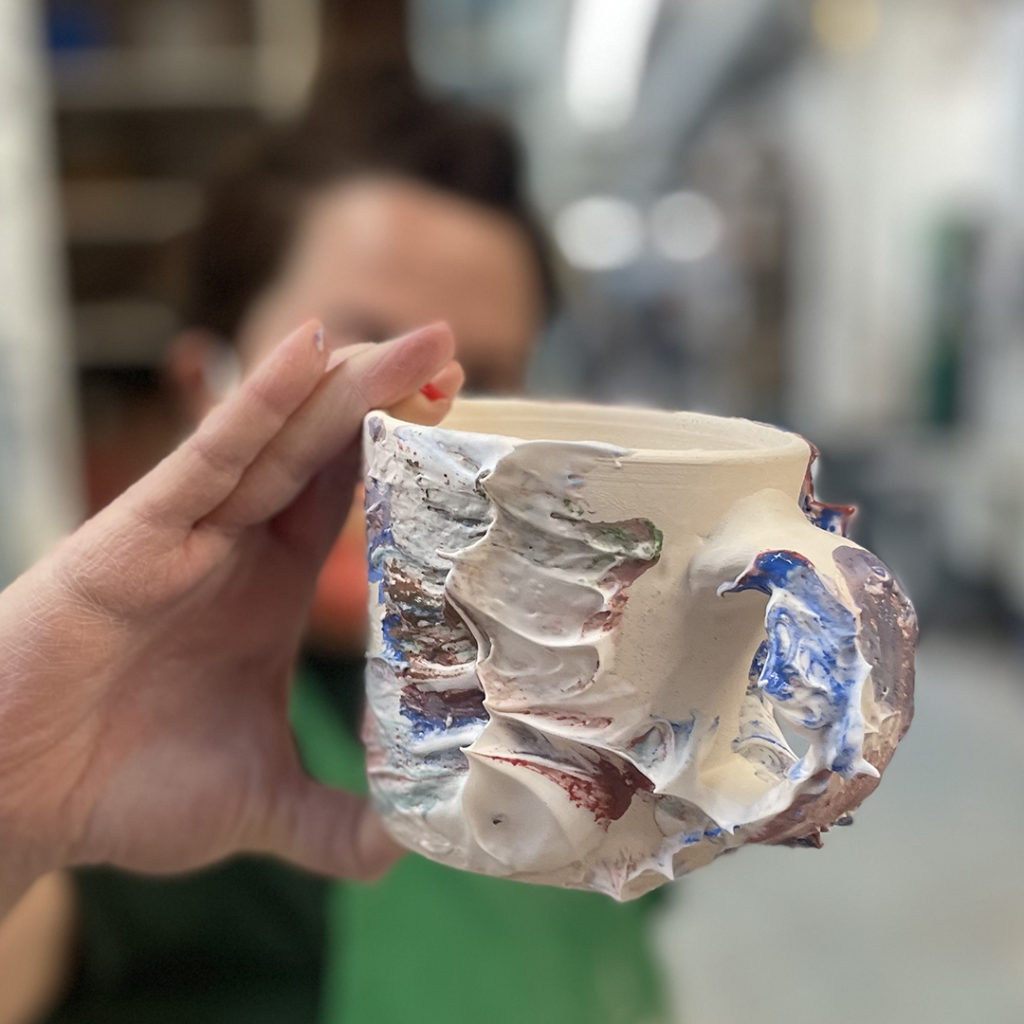
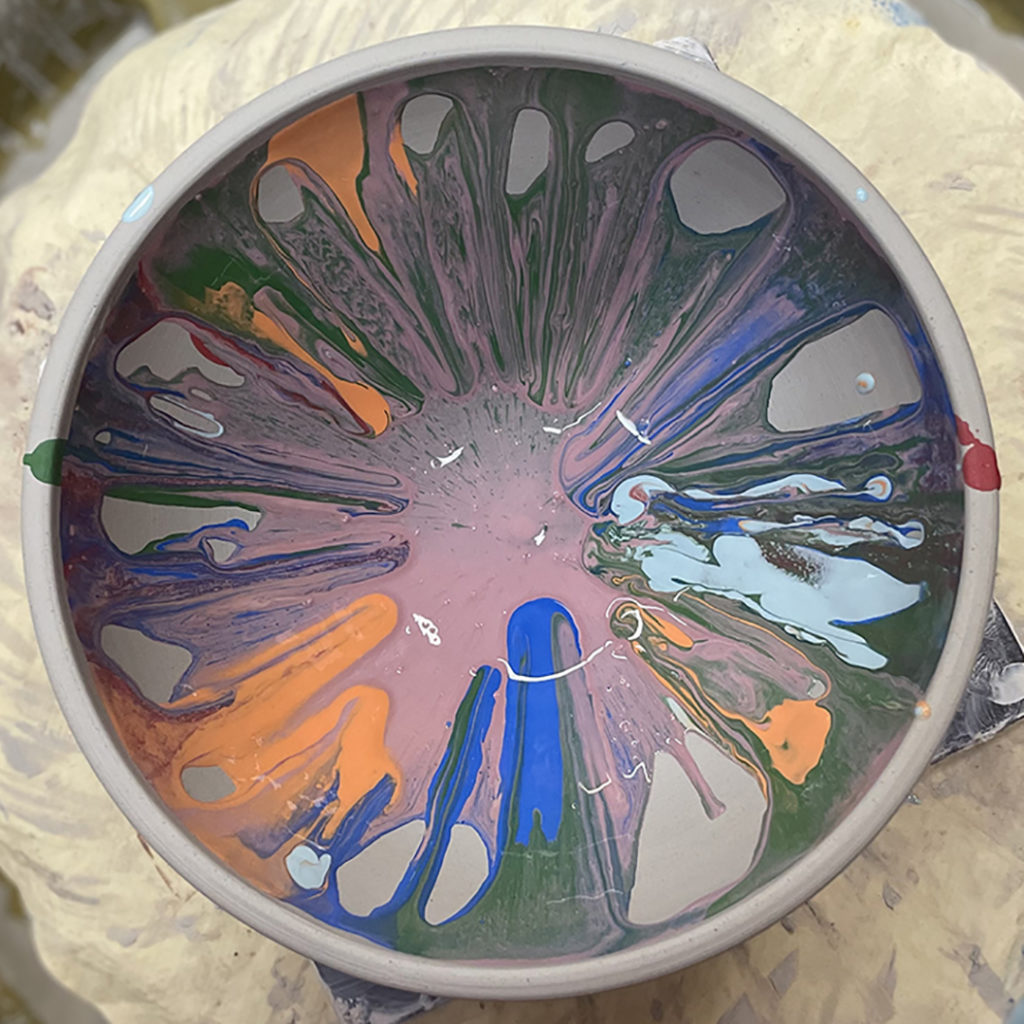
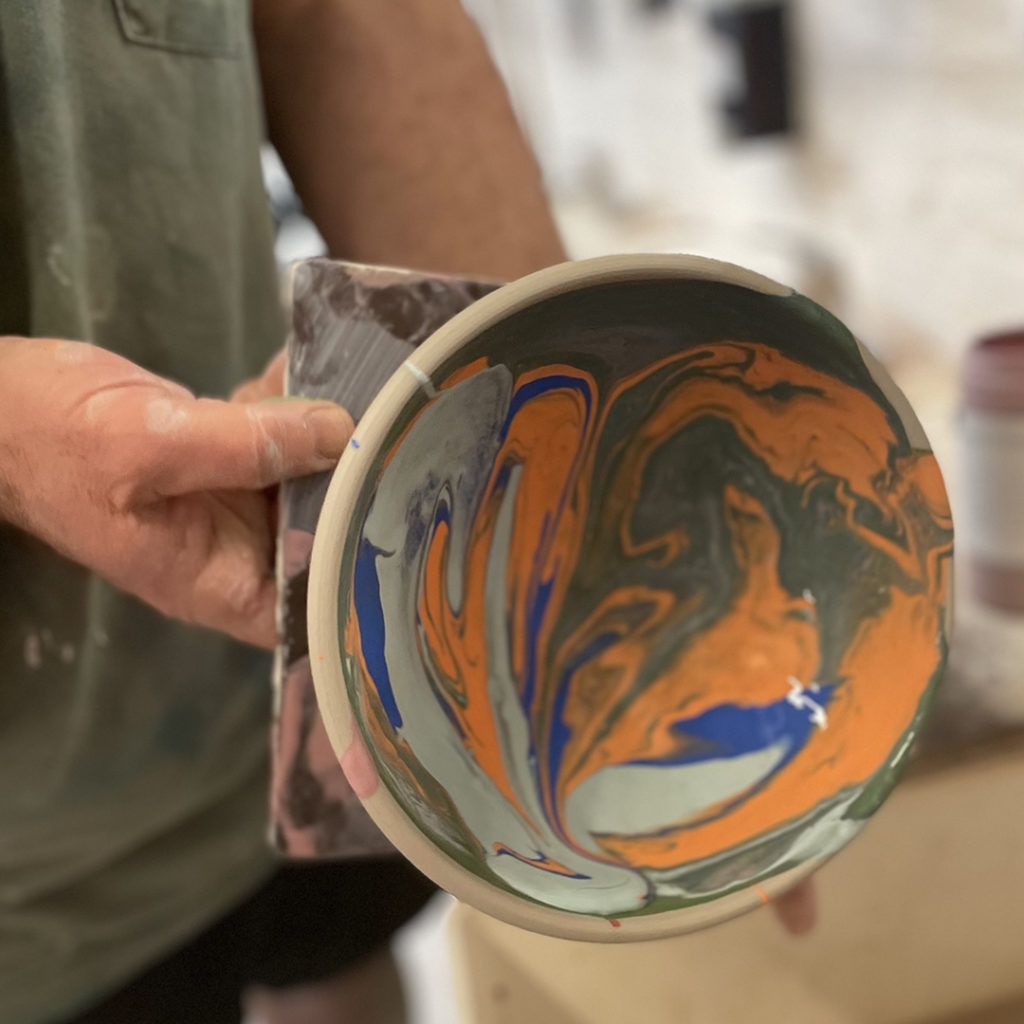
And yes, we LITERALLY just ran the water over the surface!!! It dissolves off the shaving cream, but leaves most of the color “attached” to the pot. The water does most of the work… so don’t scrub it or rub it off.

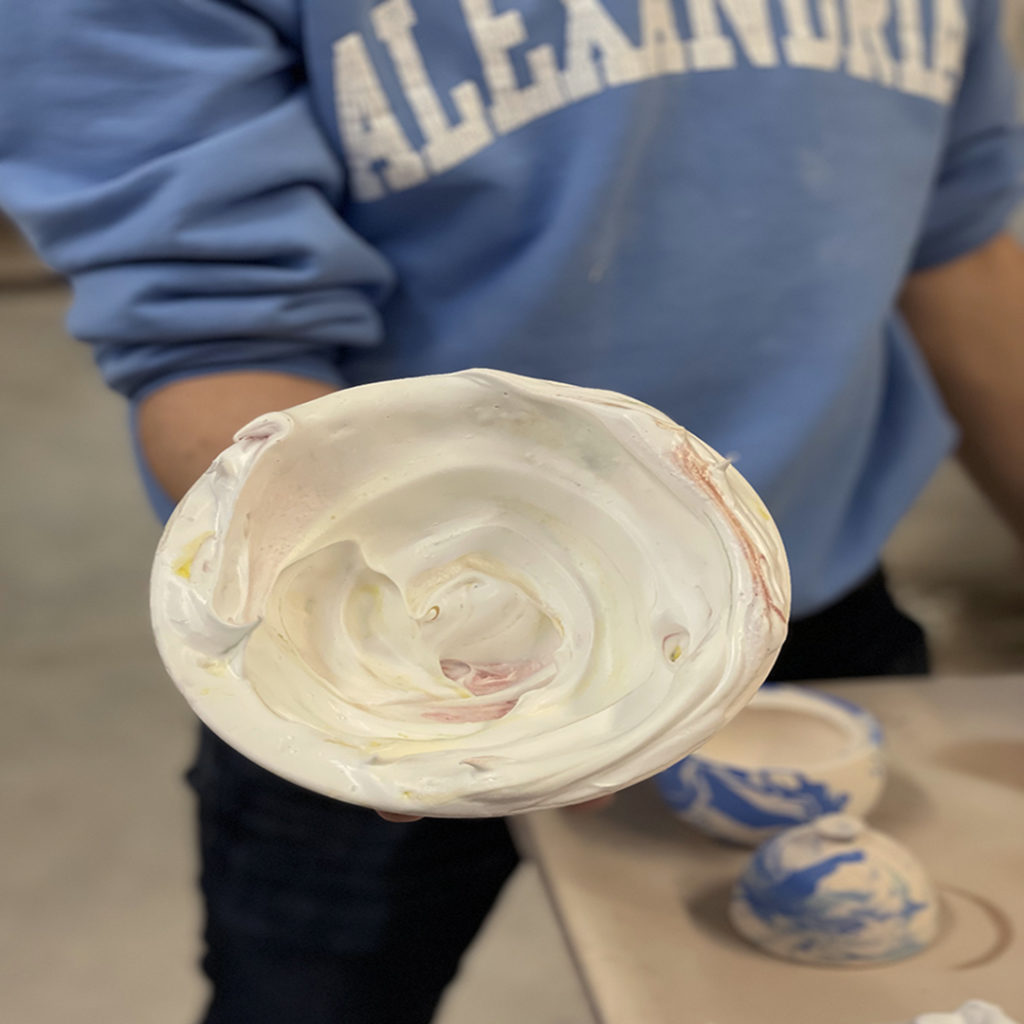
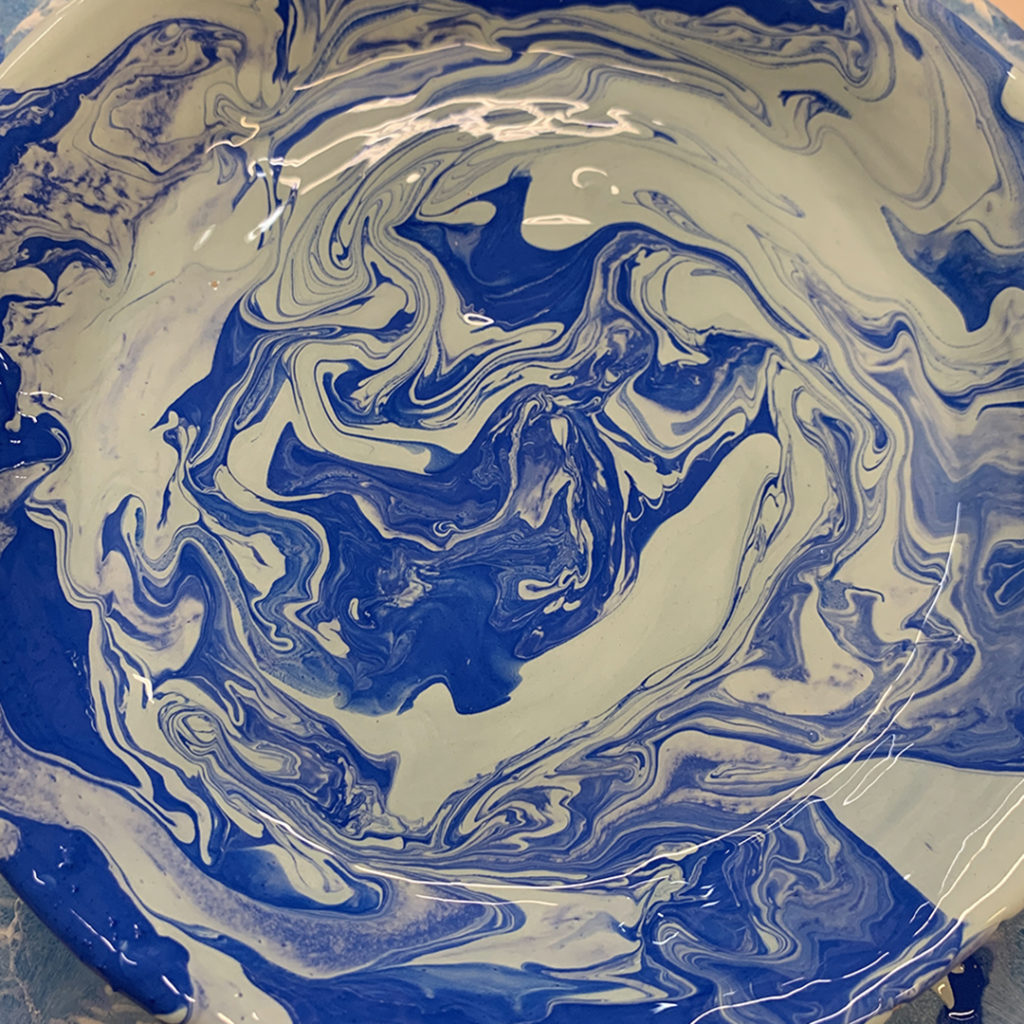
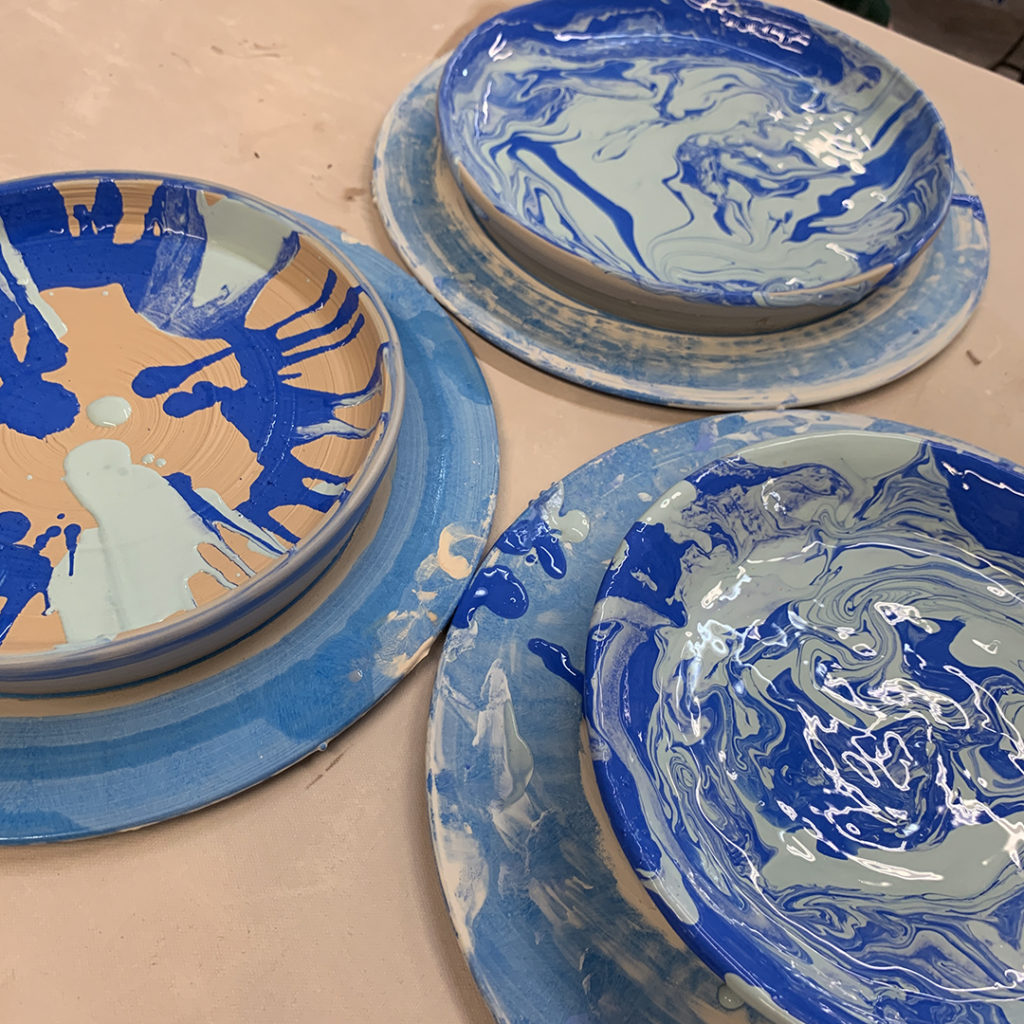
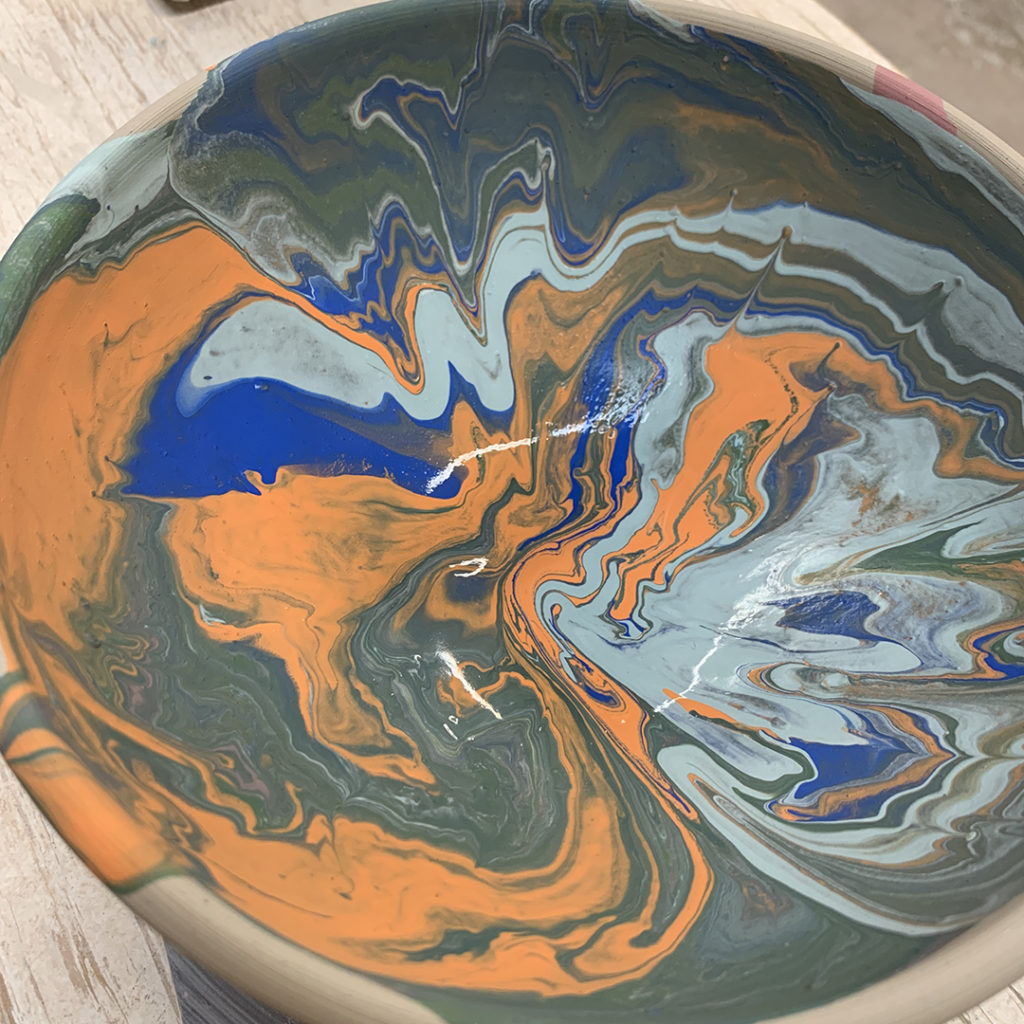
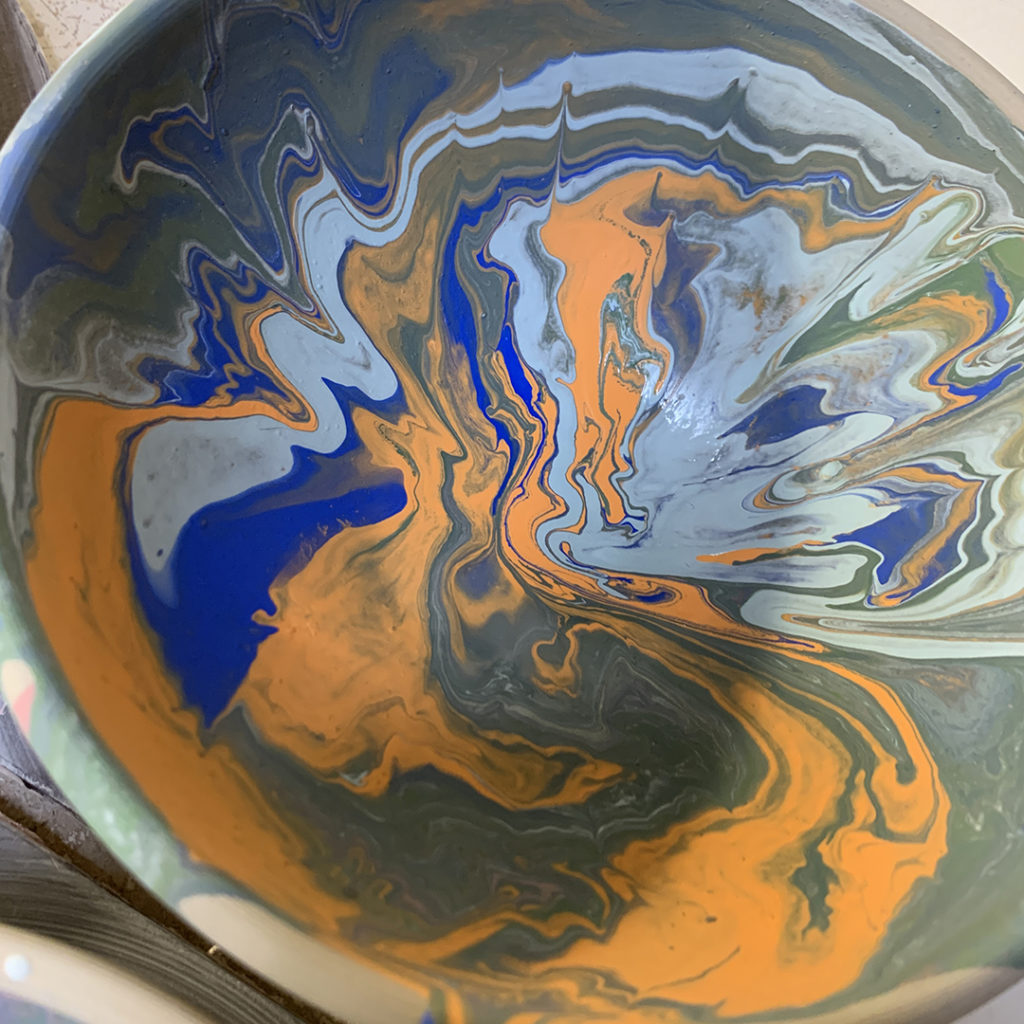
Once the shaving cream is gone… all you have left is colorful “tie-dyed” underglazes!!! You’ll need to let it dry overnight before glazing it. My “plan” is to do a bright color inside… maybe blue… and then a thin coat of spayed clear over the outside to help the colors POP!

Of course, these are underglazes… and we’re firing to cone 10… so there’s really no guarantee that these colors will all “survive” the firing. But we talked about high-fire underglazes in case they really like this technique!

Categories: bowls, color, surface decoration

After the demos, Ashley decided to go for it… with some better underglaze color choices… and she created this groovy set of plates. Not quite matching, but surely “related” in their grooviness!

Categories: bowls, classes, color, surface decoration

After “swirling” underglazes… one of my students said that it seemed a bit like the old-school “spin art”… so we did that too!!! Dripped in some underglazes and then spun it all REALLY fast on the wheel!!! It looked cool while it was spinning… but even more fun to watch it slowly run back down and sort of settle into its final groovy colored pattern!

Categories: bowls, color, surface decoration

Going back about a week, we also did some more “tie-dyed” surface decorations during my SURFACE DECORATIONS class last Thursday night. Like this version where we poured in some underglazes and then swirled them around… maybe more “marbled” than tie-dyed?… but you get the gist.

Categories: classes, surface decoration, textures

More thick slip textures created by rhythmic chattering with a rubber rib… gently tapping up & down with the rib through a layer of thick slip from the center outwards while the wheel is spinning. Kinda zen. Kinda groovy. Always fun!

Categories: mugs, process, production, stamped, surface decoration, textures

Just finished adding handles to my new batch of “hybrid mugs”… just in time to teach class tonight. Going to try to get these to dry & pack ’em into a bisque kiln quick… gotta get my glaze game going before I load for this weekend’s soda kiln firing.

But I also gotta get my taxes done… when?… not so sure… ugh!

Categories: classes, creativity, surface decoration

For this week’s LILLSTREET THROWDOWN, my students brought in their homework from last week. Which was trimming & decorating with slip trailing on the four “matching” vases they threw during class last week. It was fun to see how each of them approached the challenge differently… many of them slip trailing for the very first time!!!

Categories: classes, surface decoration

Last week in our LILLSTREET THROWDOWN class, we tackled some surface decoration with a bit of water etching. The basic idea is that you paint on some patterns using wax resist or shellac onto a bone dry bowl. When dry, the areas that are not “protected” by the wax or shellac will then be wiped away with cold water… taking those surfaces down a bit, while leaving the protected layers “higher” at their original level. It was a new technique for a few of them, and they more than stepped-up to the challenge!!!