07.13.2020
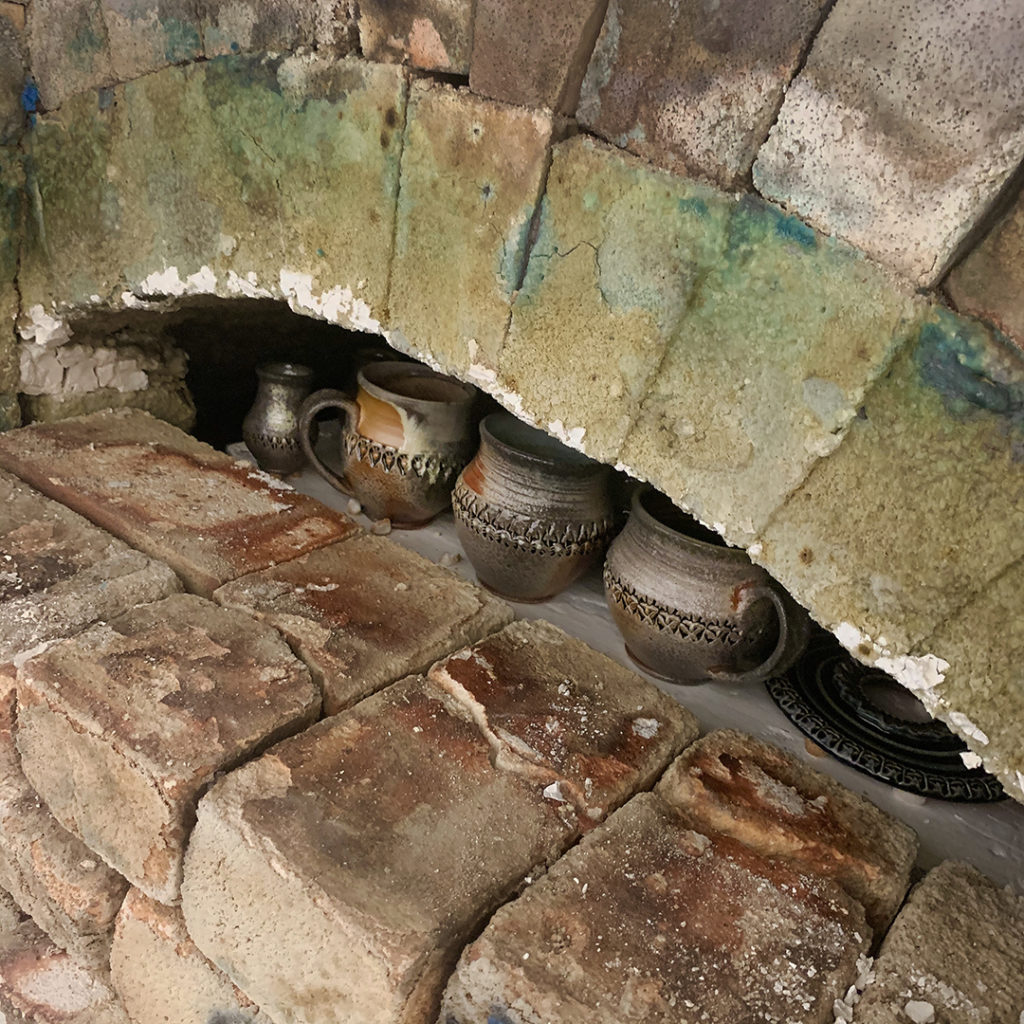
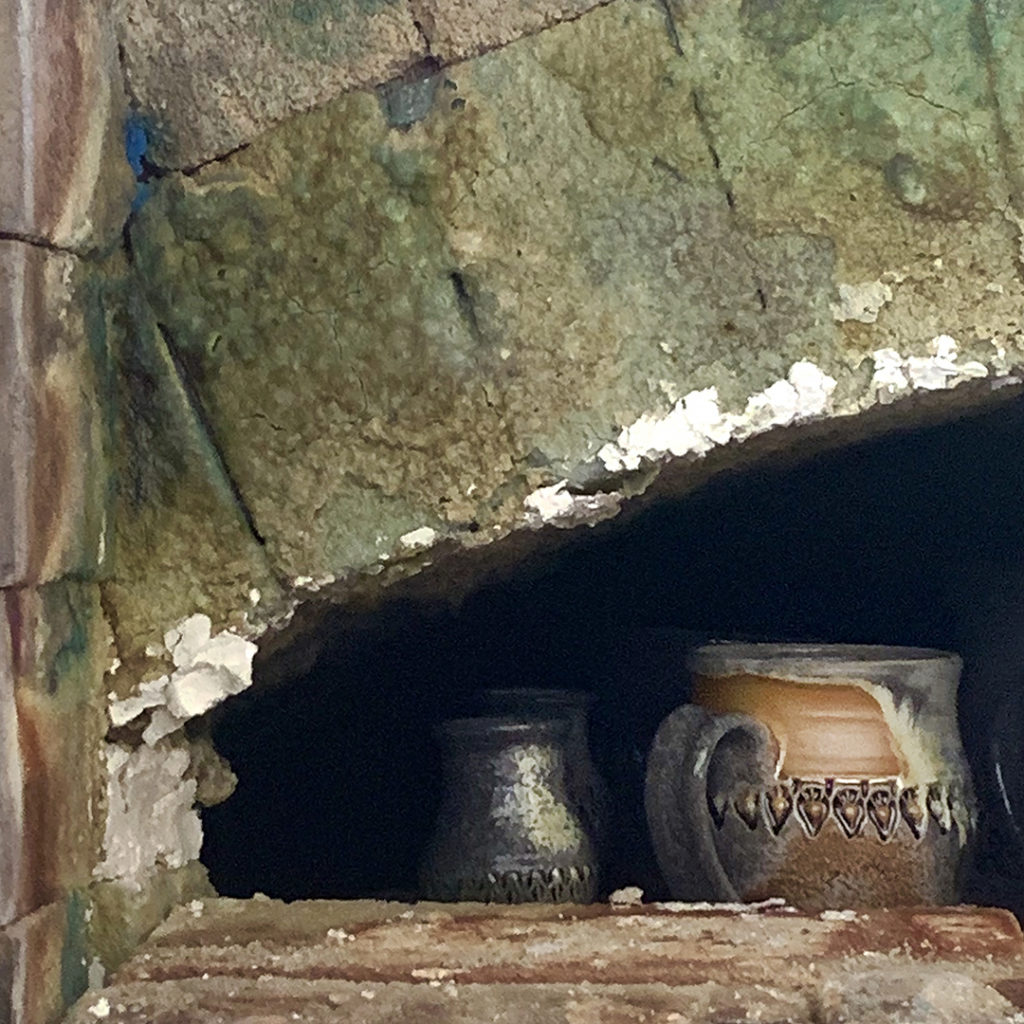
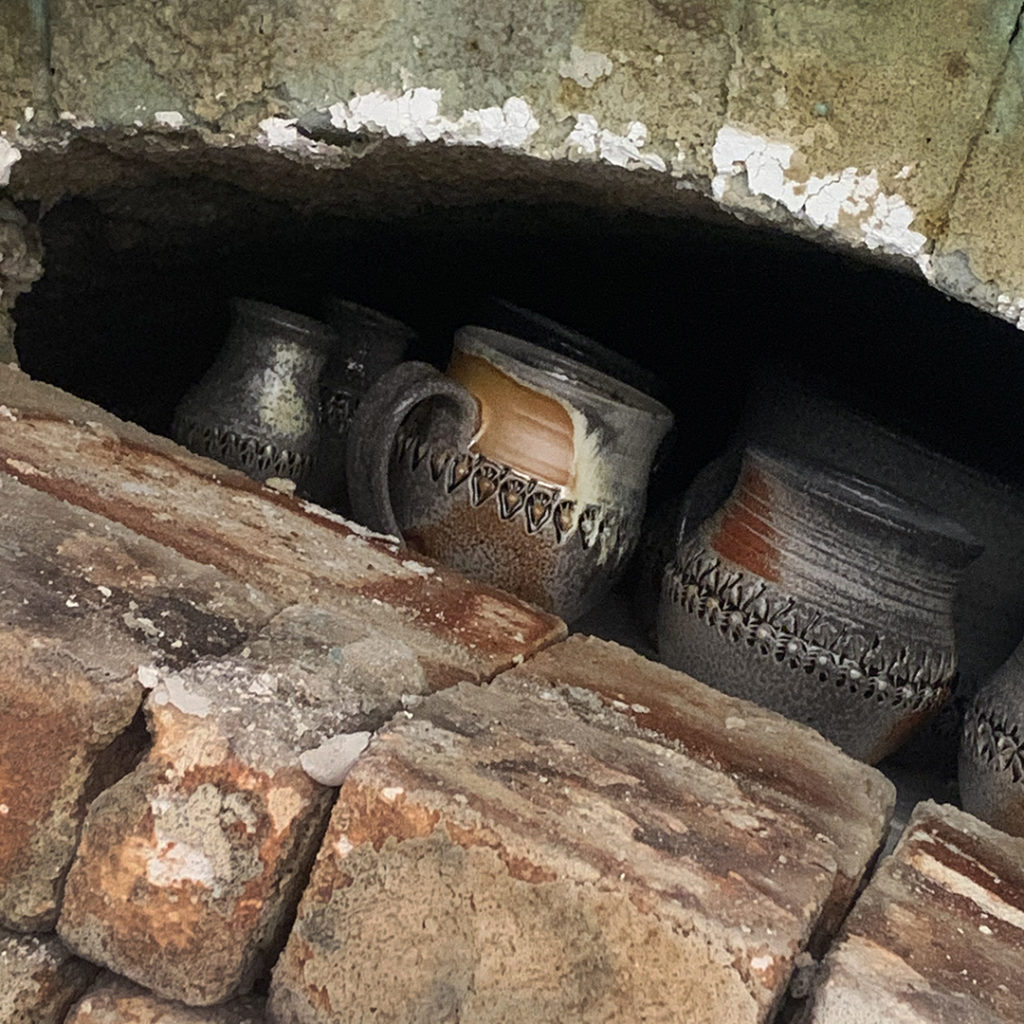
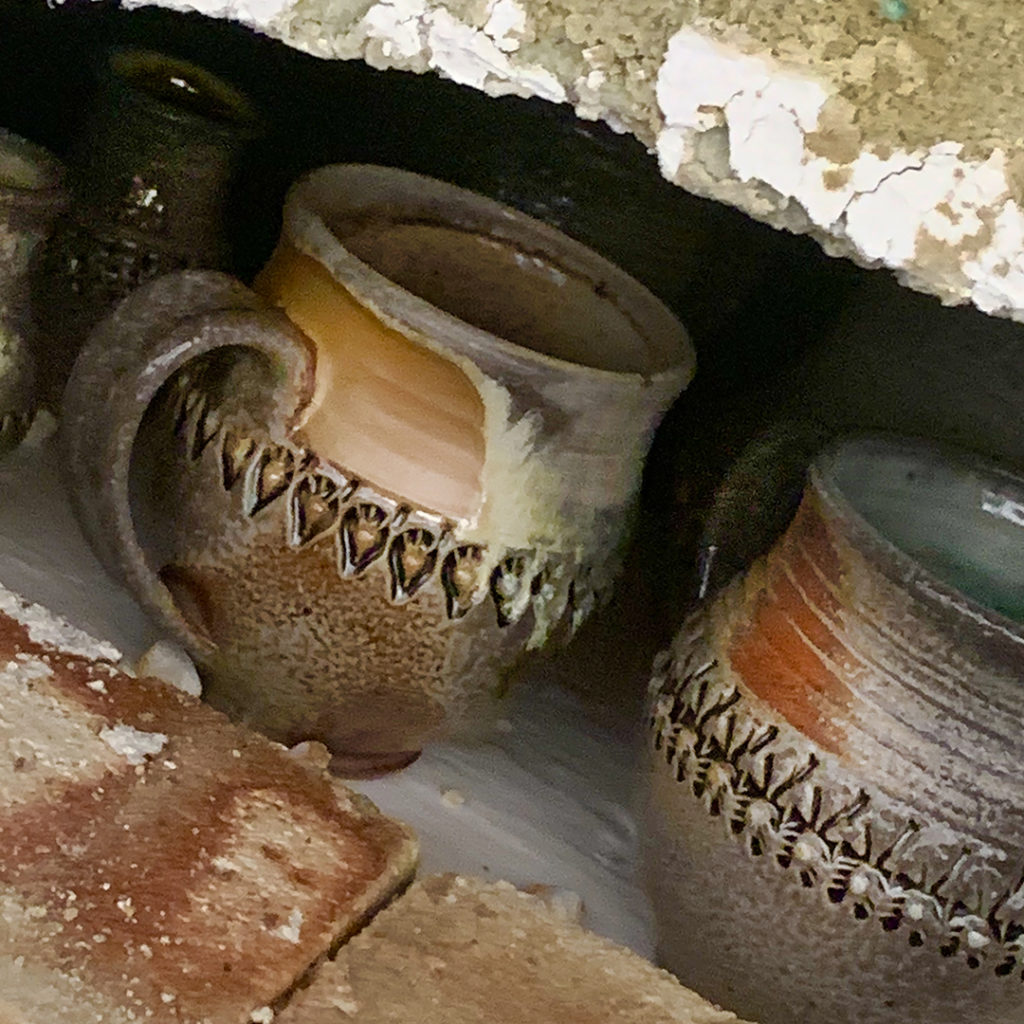
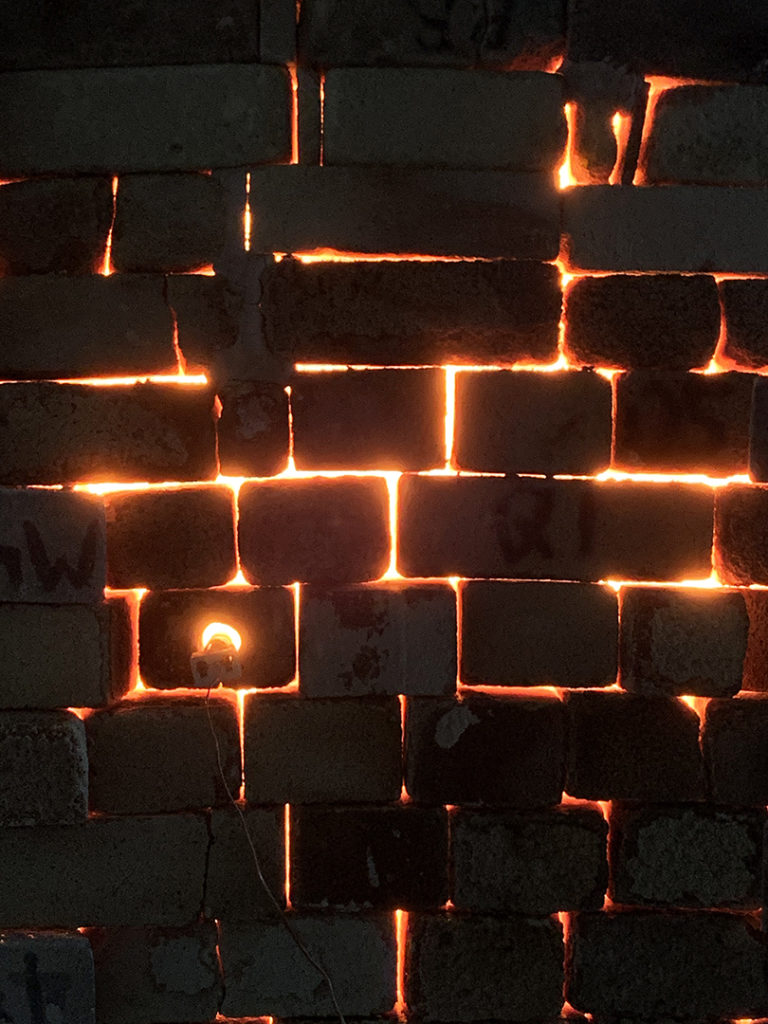
Another layer of bricks coming off as the kiln cooling continues… encouraged by this new view into the kiln! Especially on this another Mugshot Monday!
Gary Jackson: Fire When Ready Pottery
A Chicago potter’s somewhat slanted view of clay & play |
Another layer of bricks coming off as the kiln cooling continues… encouraged by this new view into the kiln! Especially on this another Mugshot Monday!
Popped the top. Cooling the kiln… getting ready to unload tonight!

After a full day of firing, it’s always a little nerve-wracking to me to turn the kiln off. It’s been going all day, flames shooting out everywhere with the fan & gas valves making a good amount of noise. So it’s a big change when you turn it off and it’s suddenly silent!!! Just hope you’ve actually done all you can.
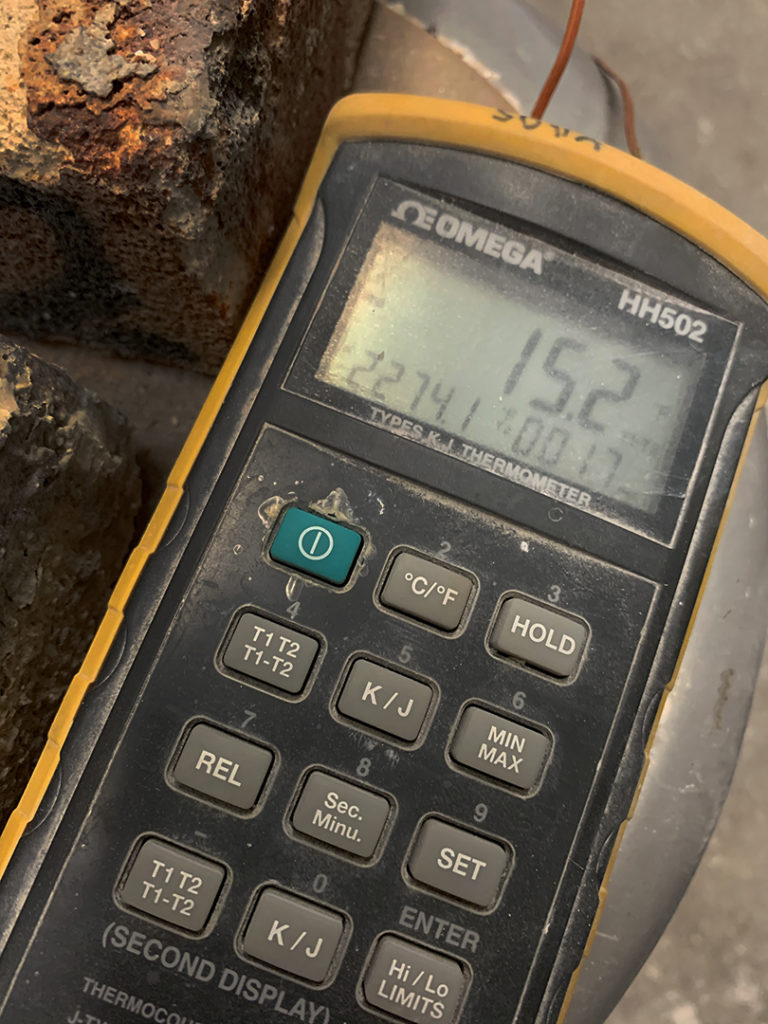
Also great to look at the digital pyrometer kiln at the end to see the difference top-to-bottom… for this firing it was just 15-degrees! Sweet!!! Can’t wait for it to cool now… so I can unload to see the new “treasures” Monday night!
Pretty exciting when you’re adding the soda mixture into the kiln… it’s already in reduction… and somehow the flames find their way of to shoot out of every nook & cranny!

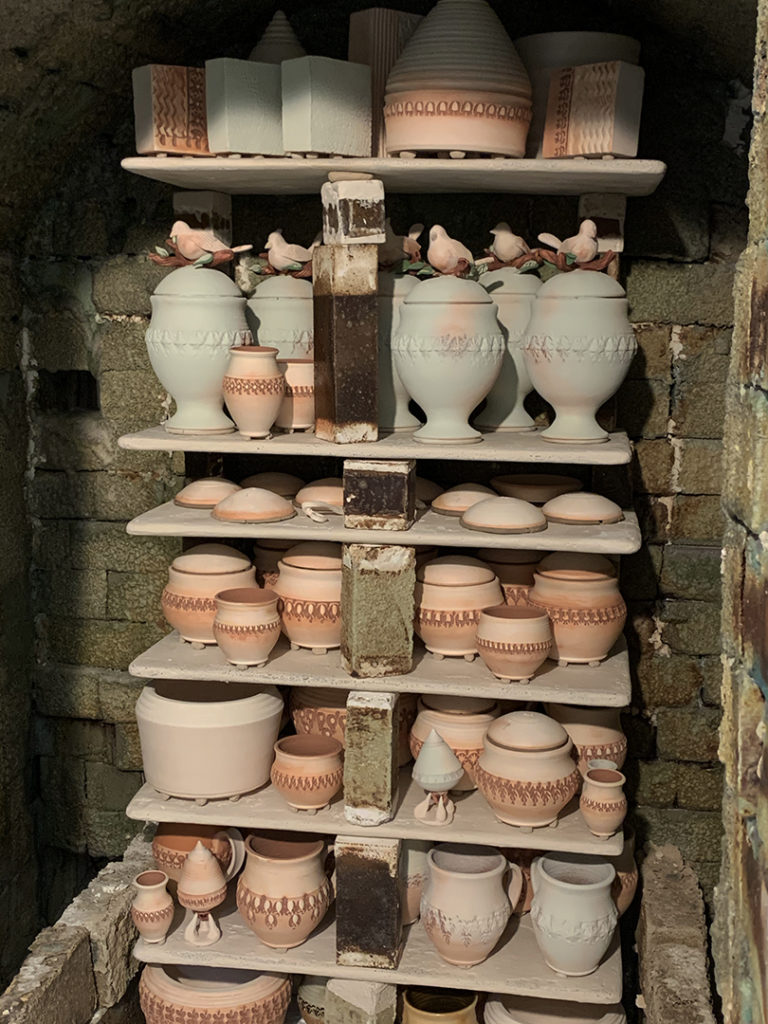
Three stacks of pottery, shelves & bricks from tonight’s loading. A lot of work “crammed in there”… hoping that the soda atmosphere can still make its way around inside to move the soda around!
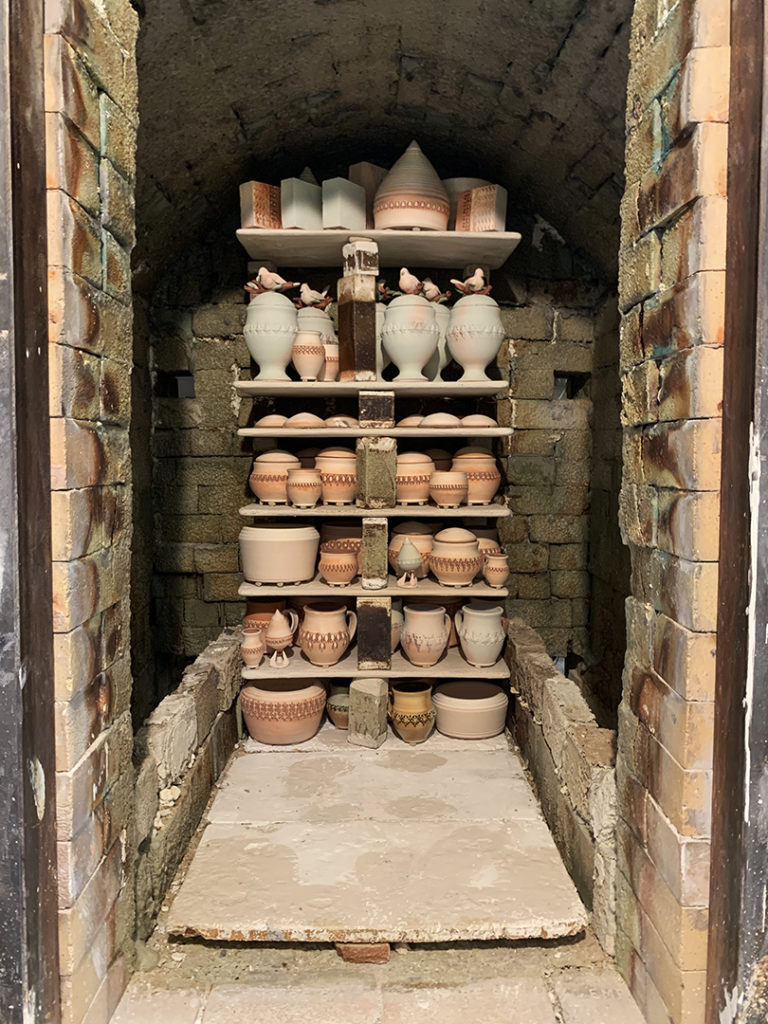
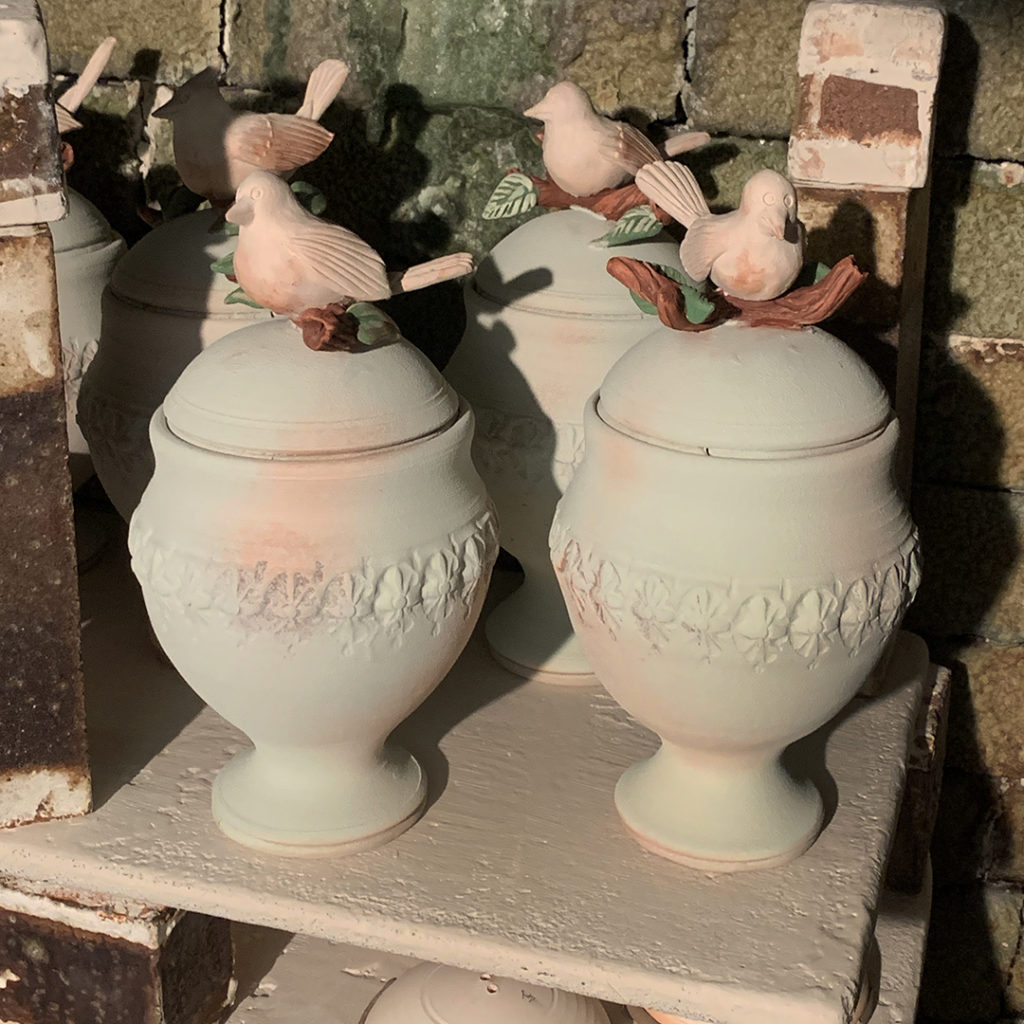
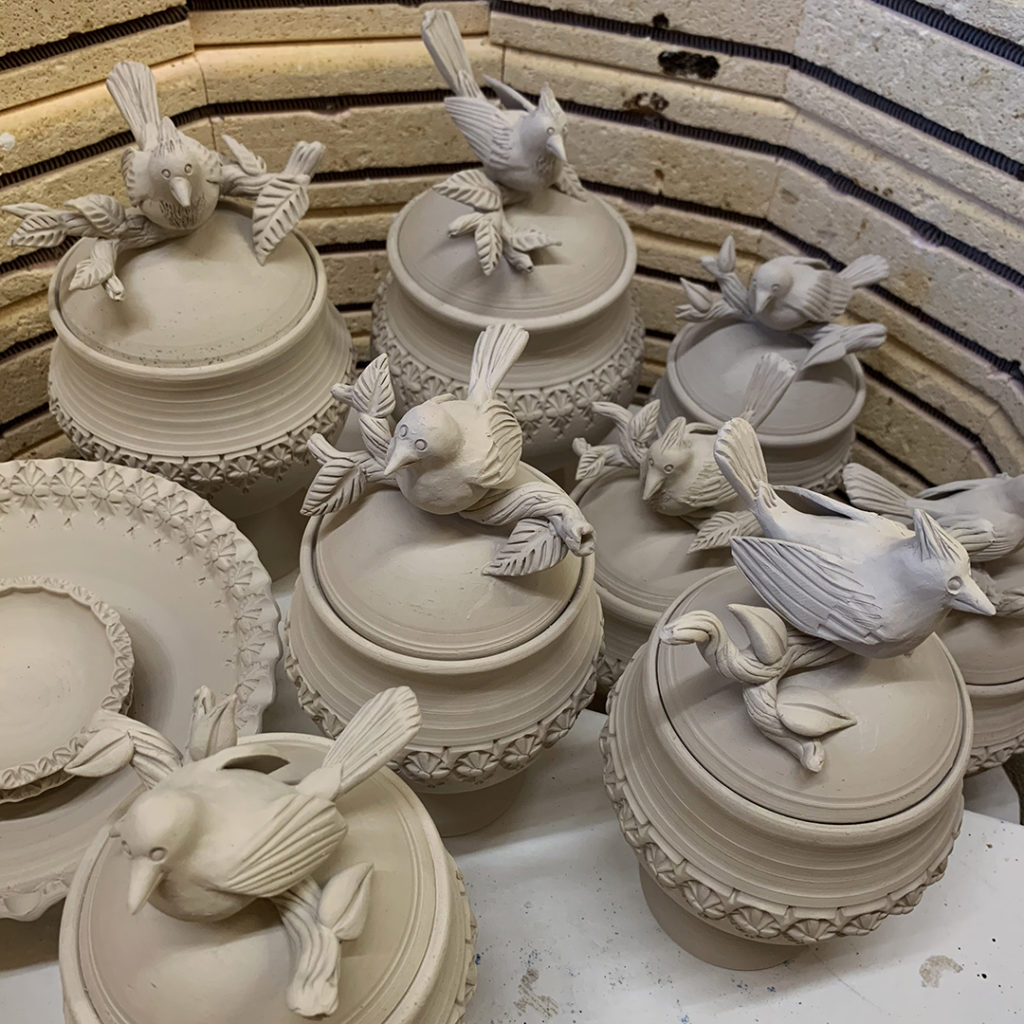
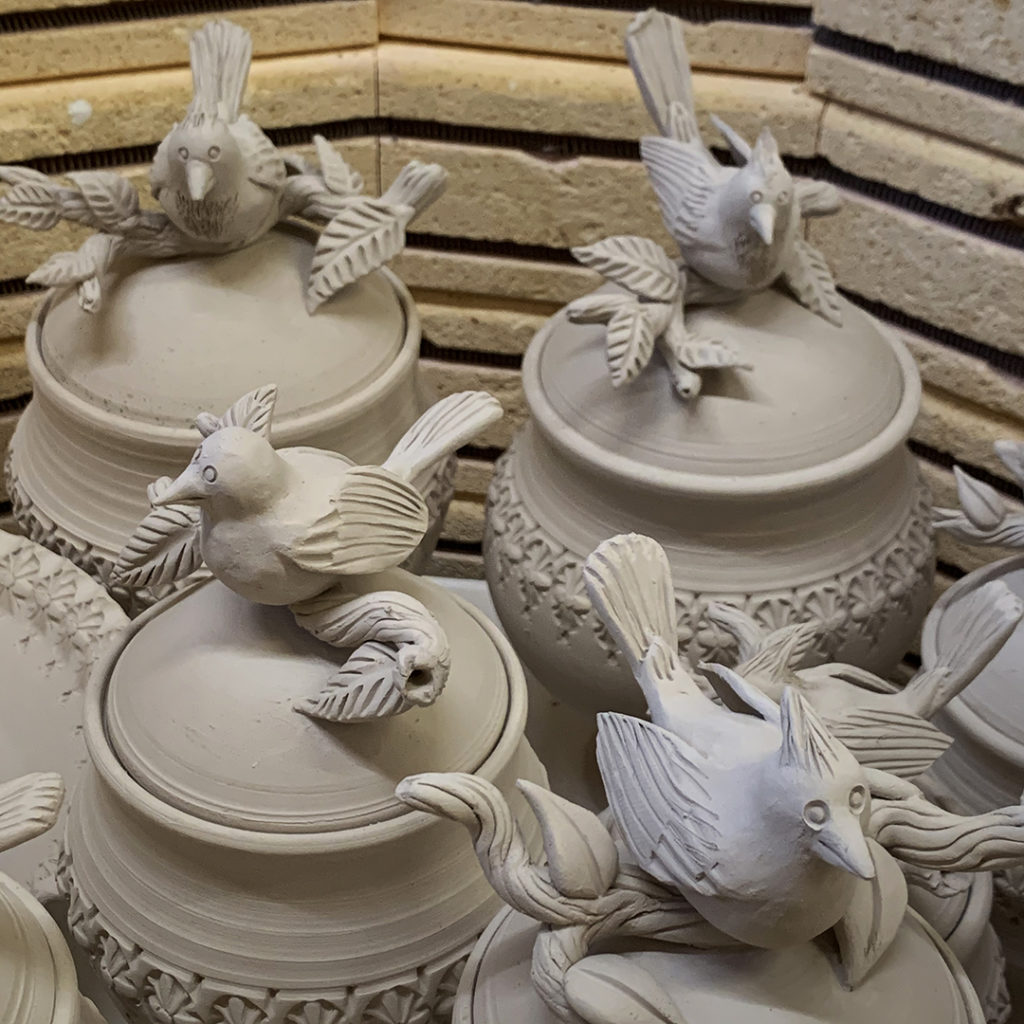
If you look close, you can also see where my flock of birds have landed!!!
And then the front stack…
which is actually a “square” made of two shelves side-by-side”
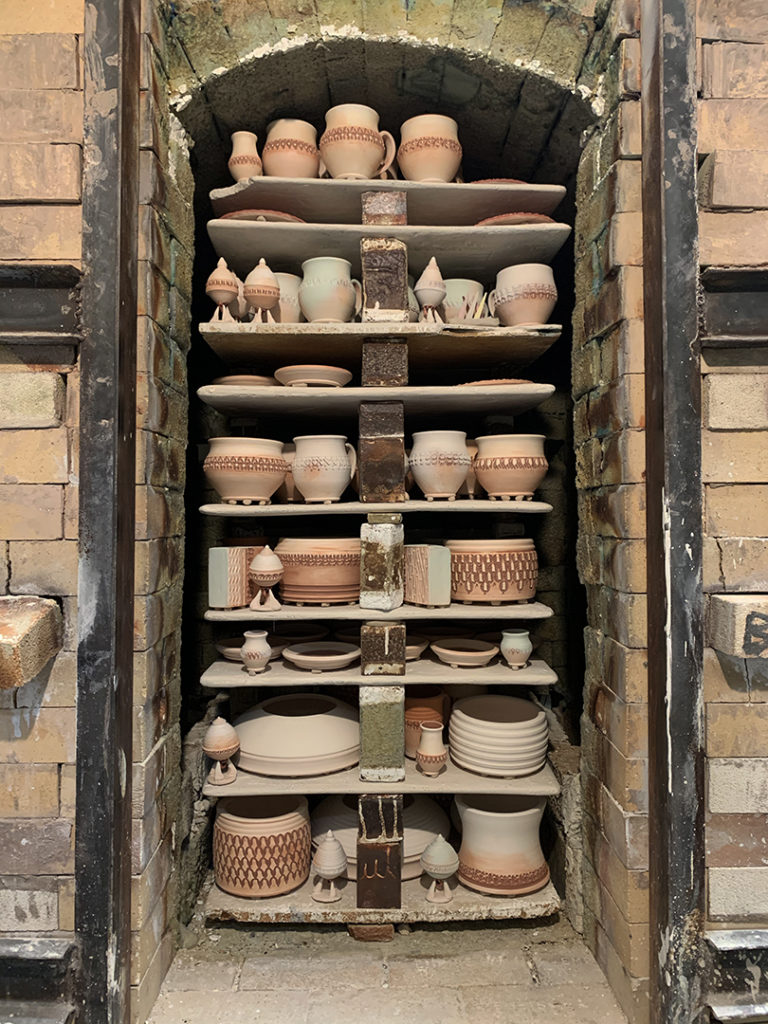
An empty kiln filled with potential.
Tonight I loaded it up with LOTS of pots!!!
Feels so good to be getting back into a more “normal” routine. Classes have started. Summer Camp has started. And I’m firing my first “post-quarantine:” soda kiln. Sure, masks all the time is NOT “normal”… but I’m more than glad to do my part to keep our numbers down!!!
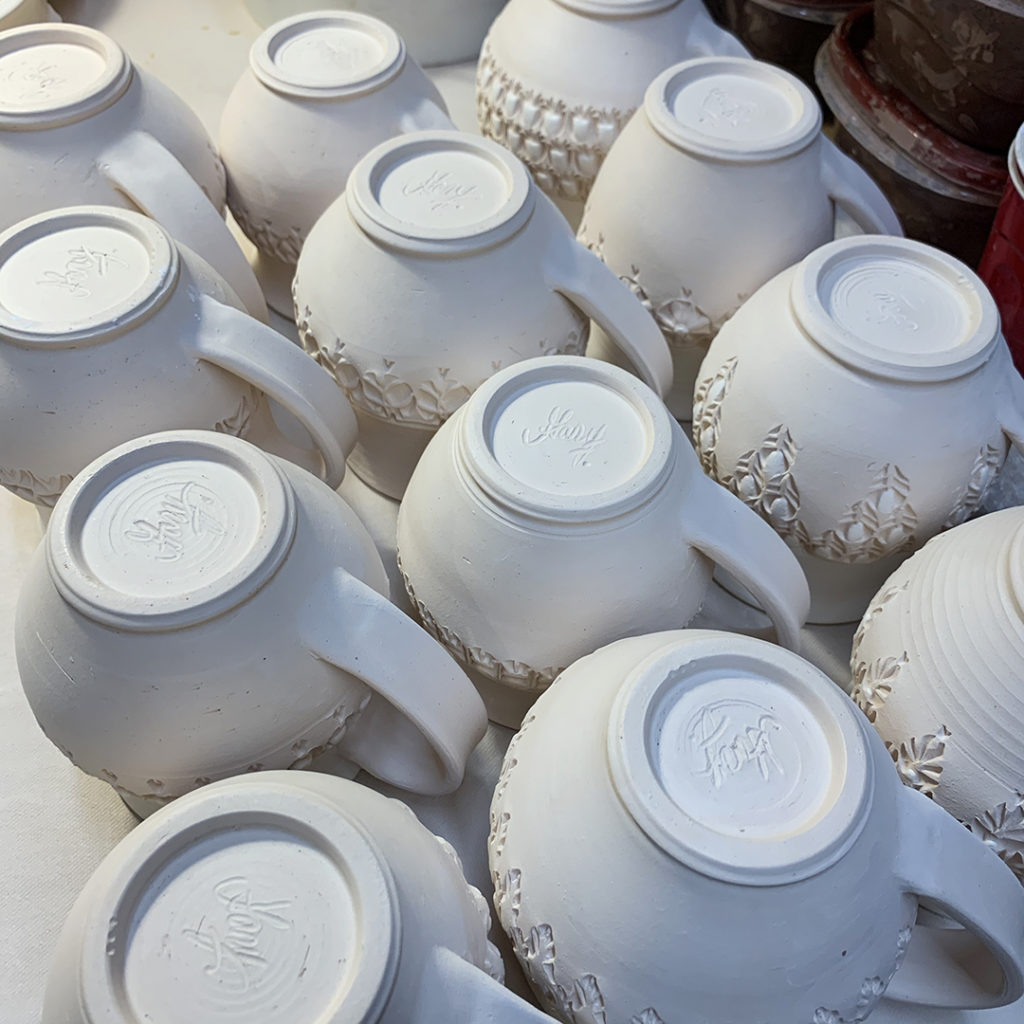
Just a few more pieces fresh from my bisque kiln to glaze quickly…
as I load the soda kiln tomorrow night after Summer Camp!
I fire all-day Saturday… so I’ve got to stay focused and get this done!!! Inlay glazes into the stamped impressions, liner glazes, clean, wad & ready to go!


Four magical letters… possibly the best four letters of any firing process!
CPLT = COMPLETE.
Always a big sigh of relief to see that something crazy didn’t happen along the way. We’re one step closer…

The flock has flown into the kiln… ready for a bisque firing.
And let me just say, I’ll feel a LOT better when these have all successfully “survived” the bisque firing. So much safer when they are “solid” and not so fragile as when they’re just dried clay!
|
Gary Jackson: Fire When Ready Pottery
Lillstreet Studios ∙ 4401 North Ravenswood, Chicago, Illinois 60640 ∙ 773-307-8664 gary@firewhenreadypottery.com |
