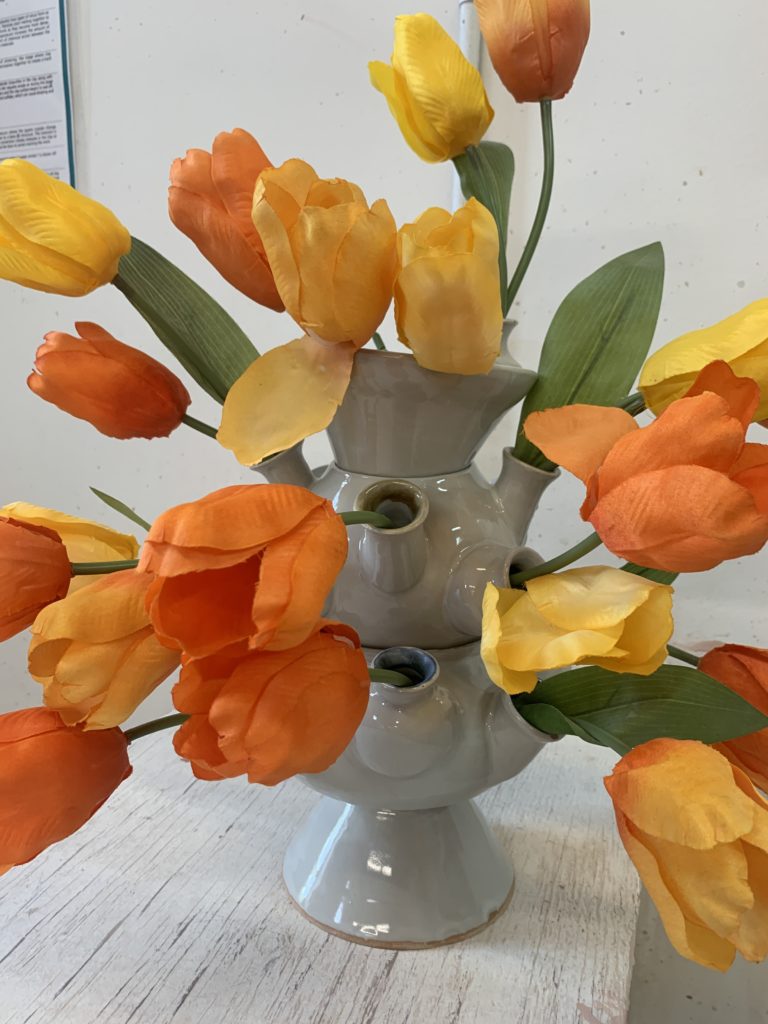
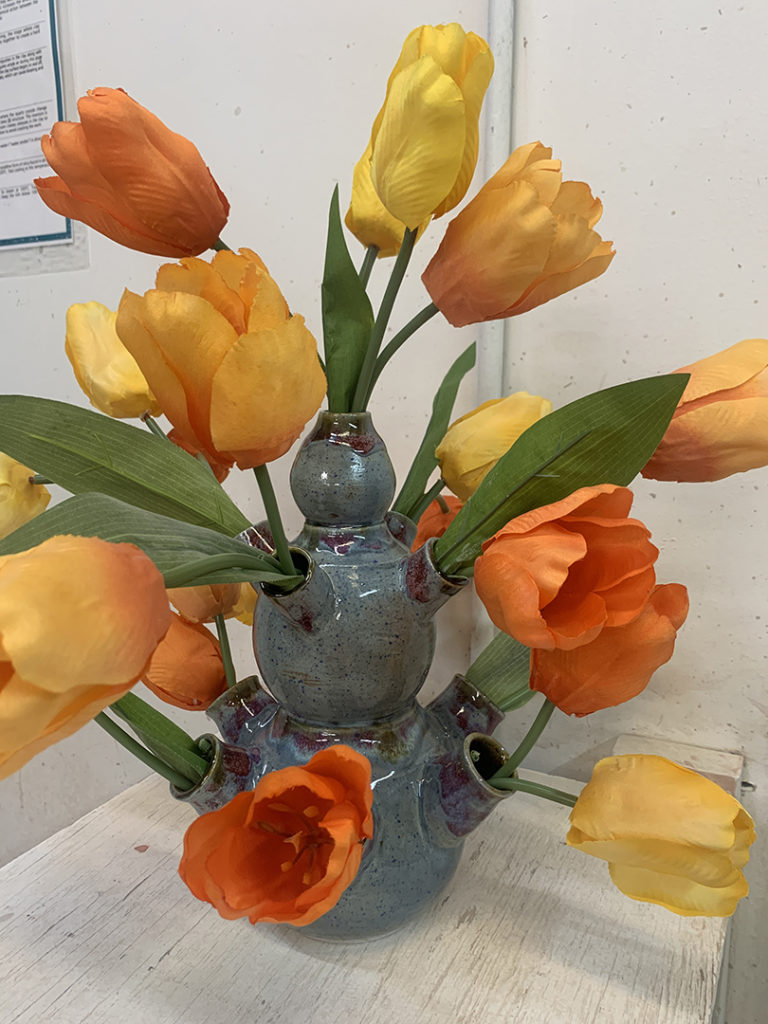
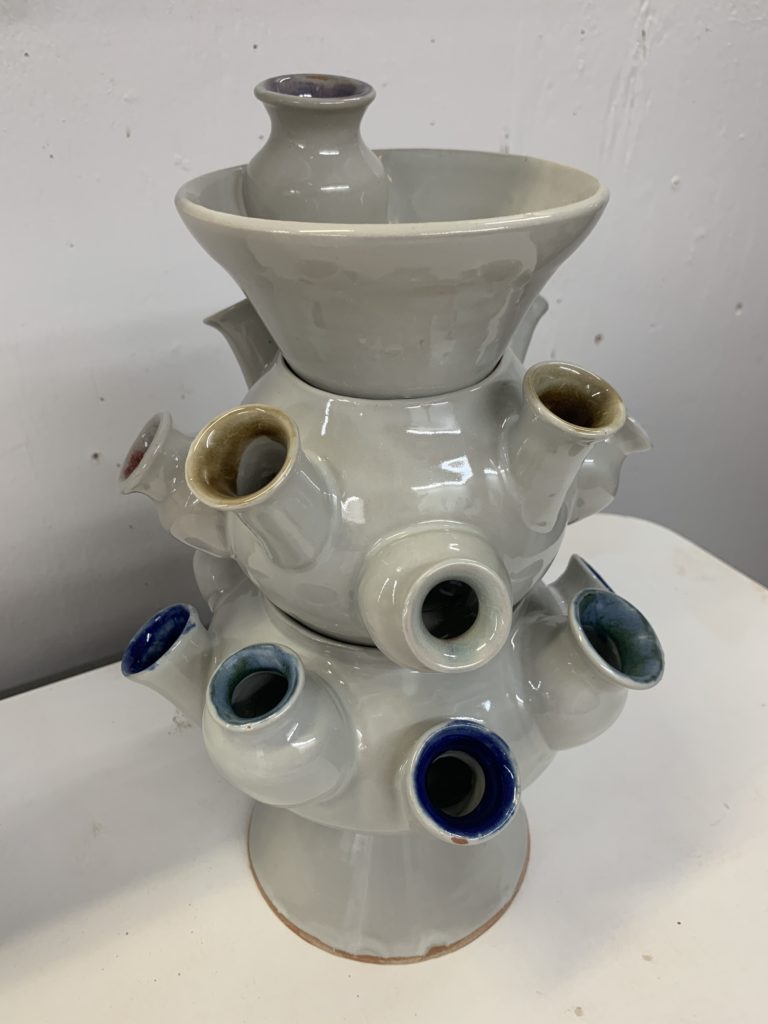
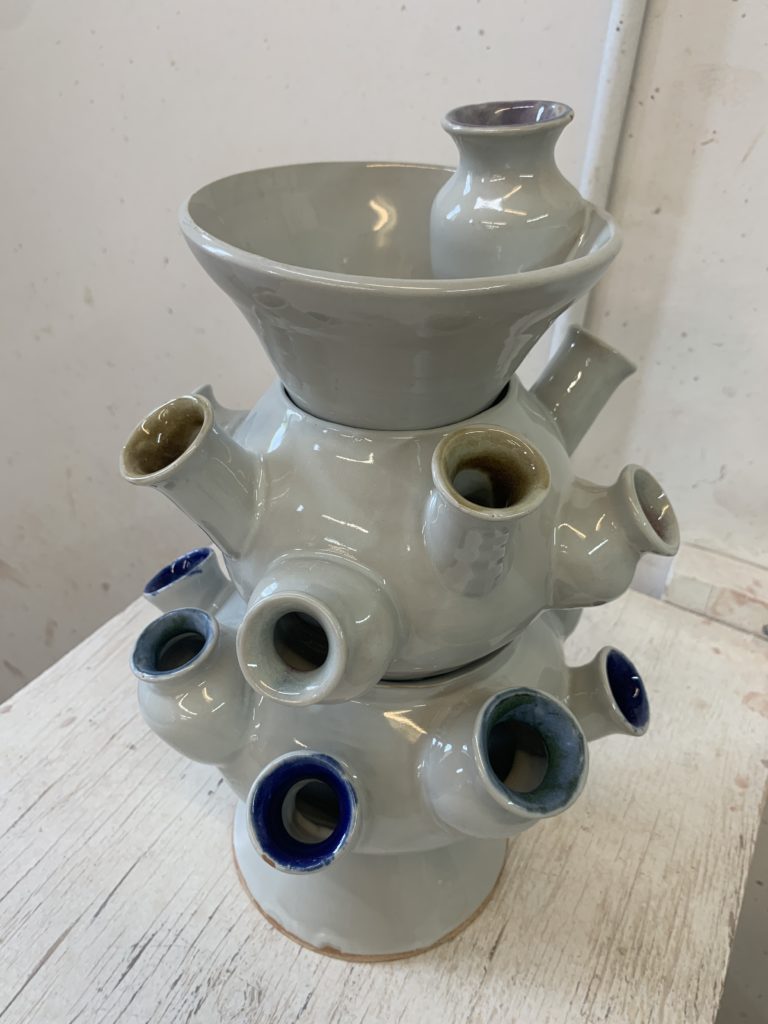
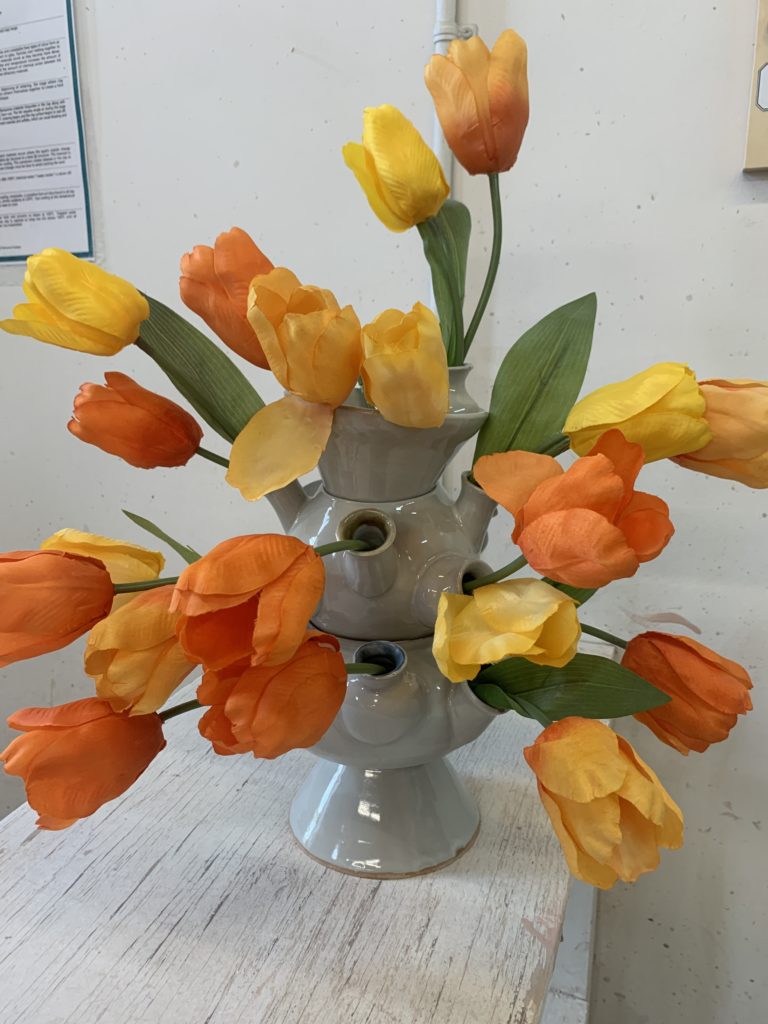
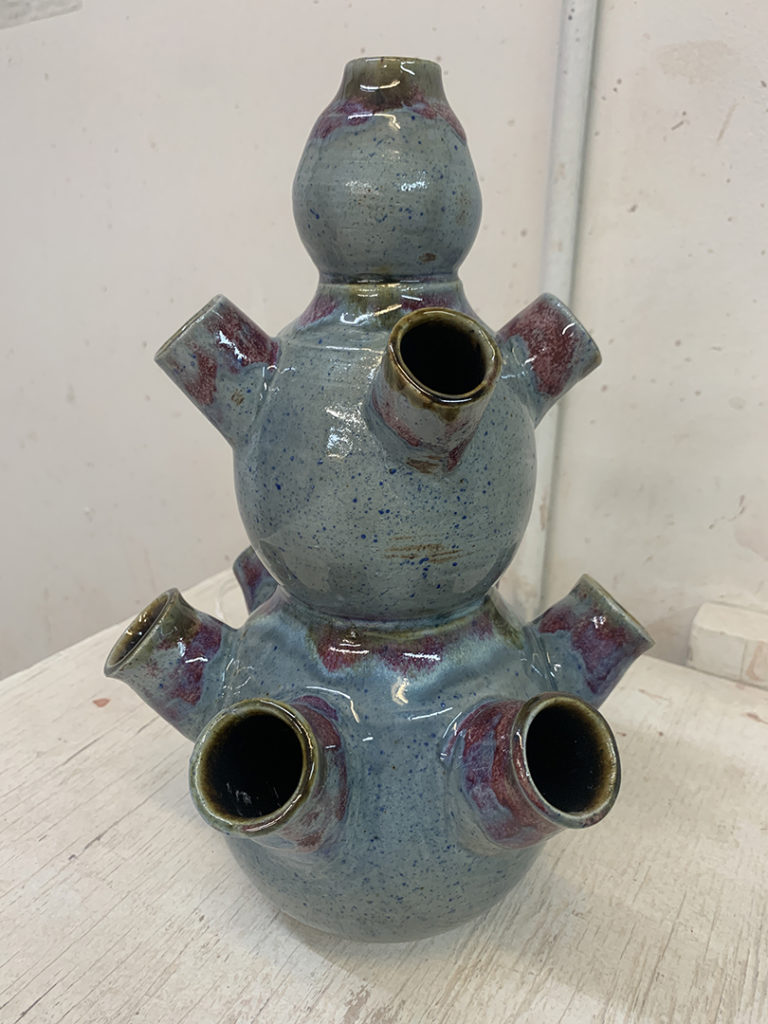
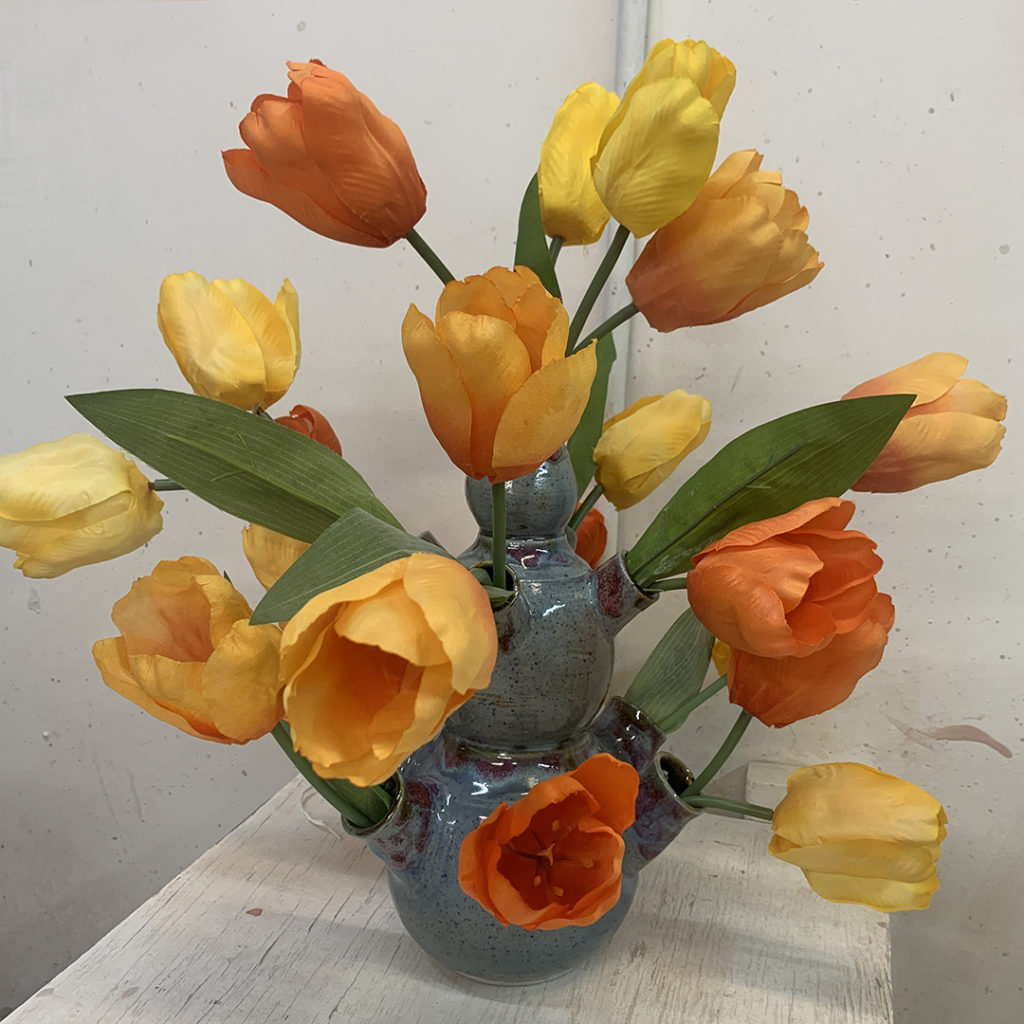
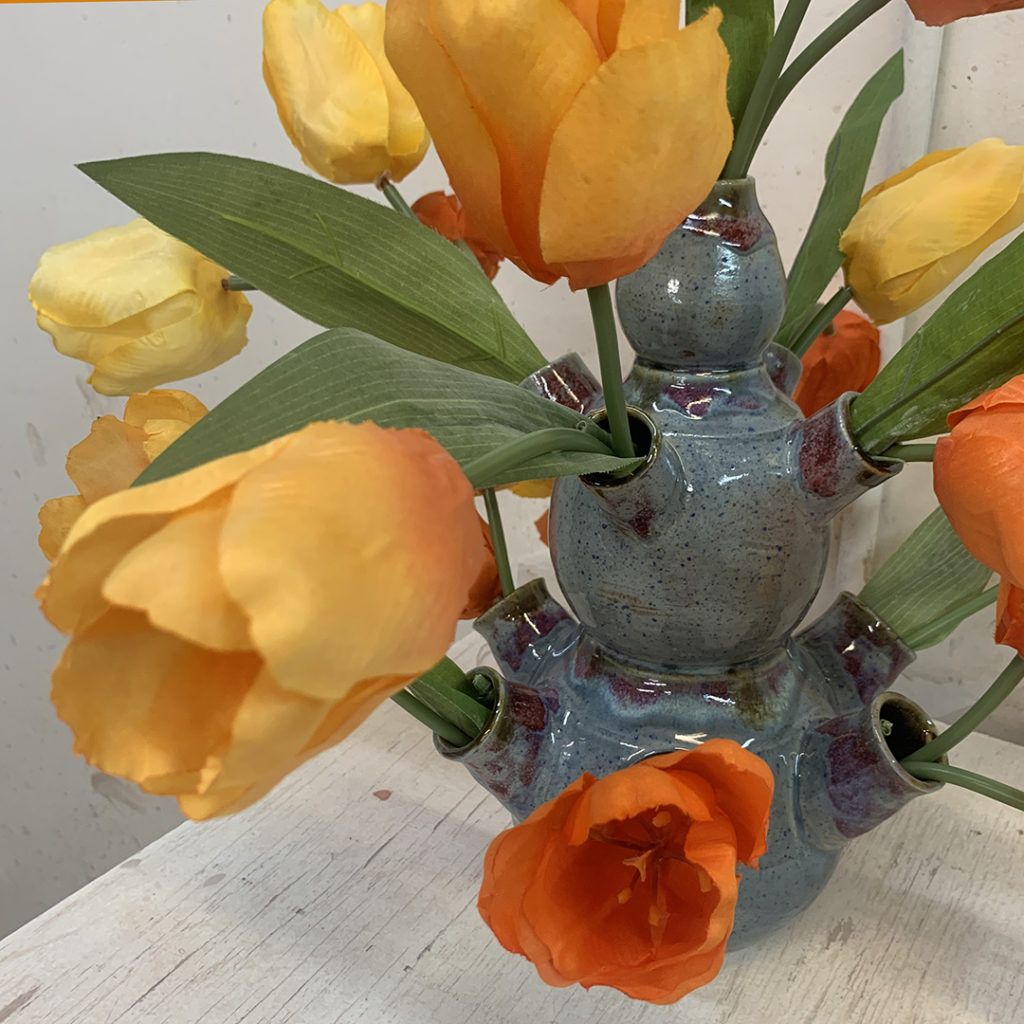
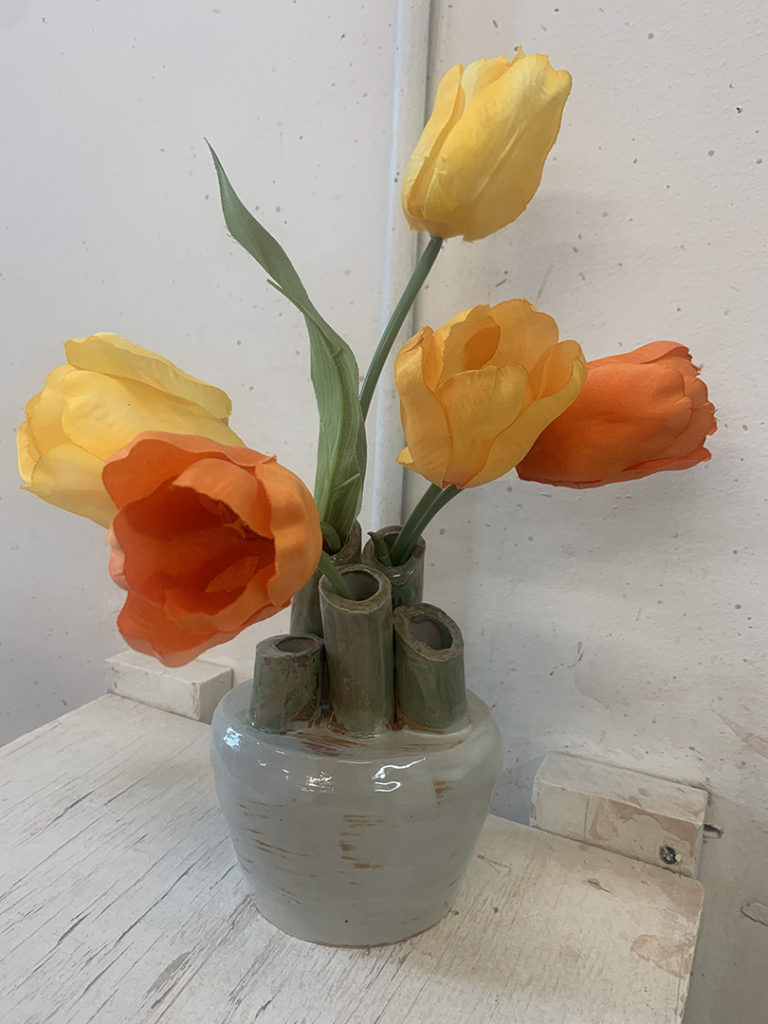
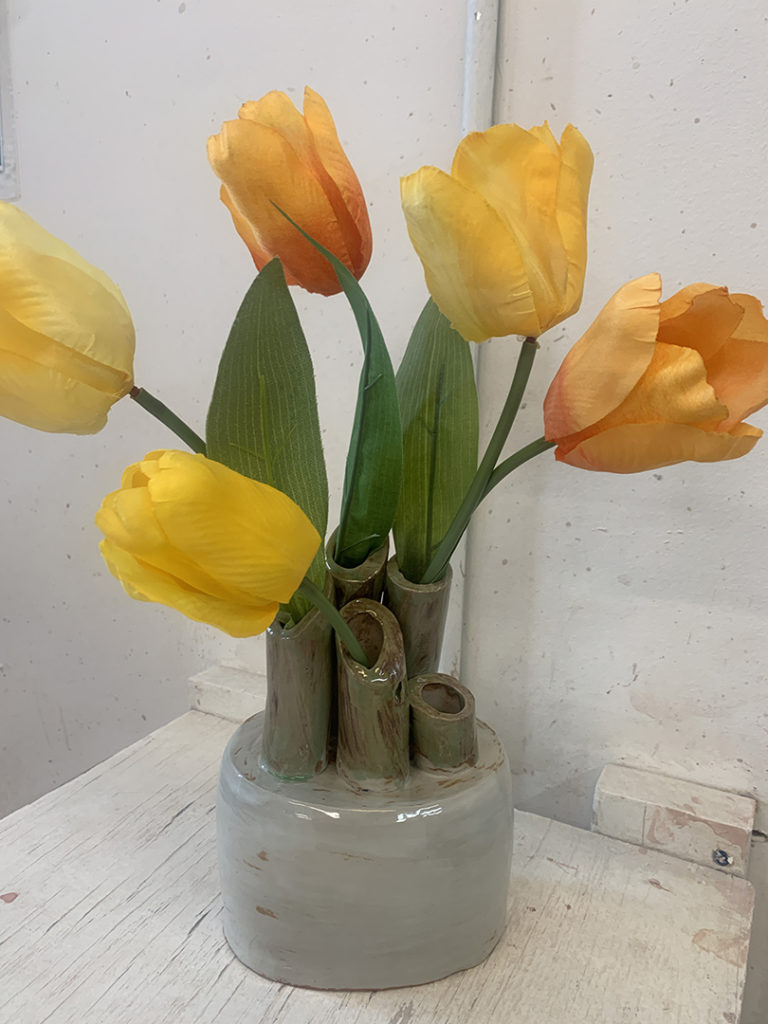
Tonight in my Intermediate Wheelthrowing class, we finished off the session by sharing some finished vases. They had asked for a class “challenge”… and I gave them a TULIPIERES!!! During the session, several of them tackled building their own tulipiere vases! Clara went for three sections stacked with a mini vase on top! Christine made one piece with a beautiful blue & red glaze. Ashley combined her wheelthrown oval bases with extruded tubes. And I provided the fake tulips… I thought that was the most I could do!!!
So here’s a few more pictures of Clara’s tulipiere…
And here’s a few more picturs of Chritine’s tulipiere…
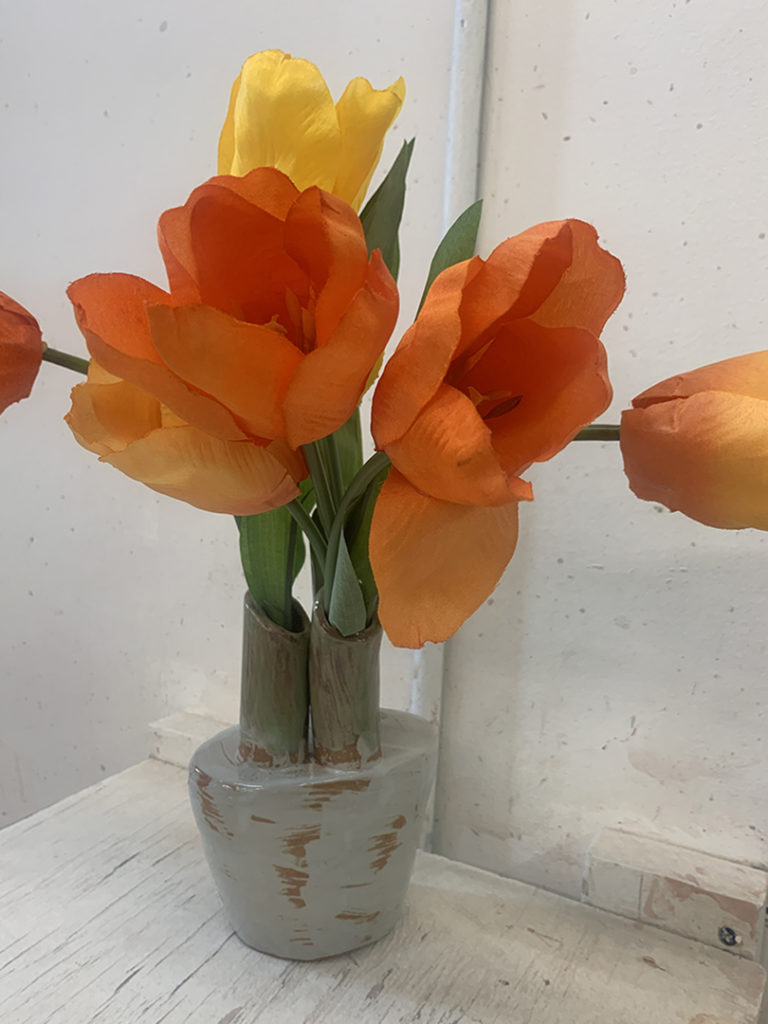
Plus, a few more shots of Ashley’s tulipiere…
We had a couple more who were tackling the tulipiere challenge… but ran into kiln issues and they weren’t quite done in time for class tonight!
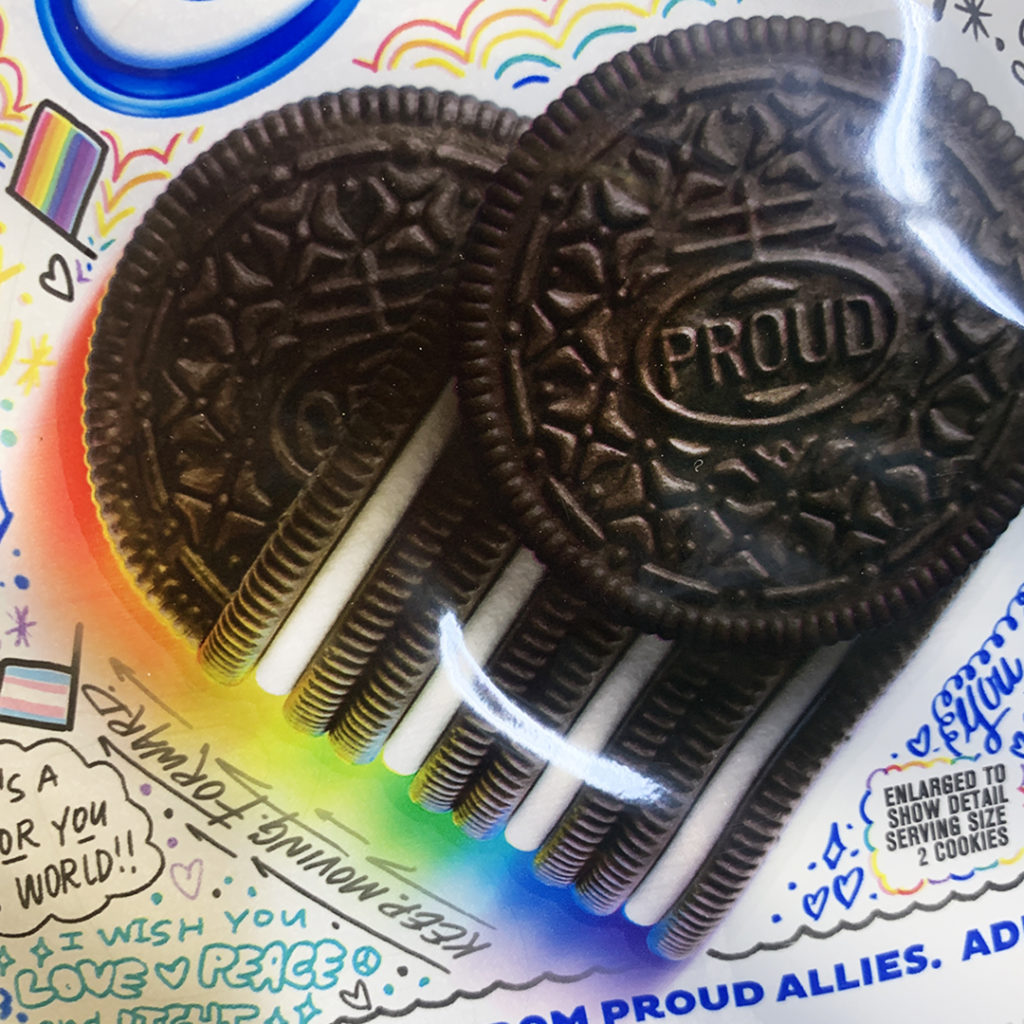
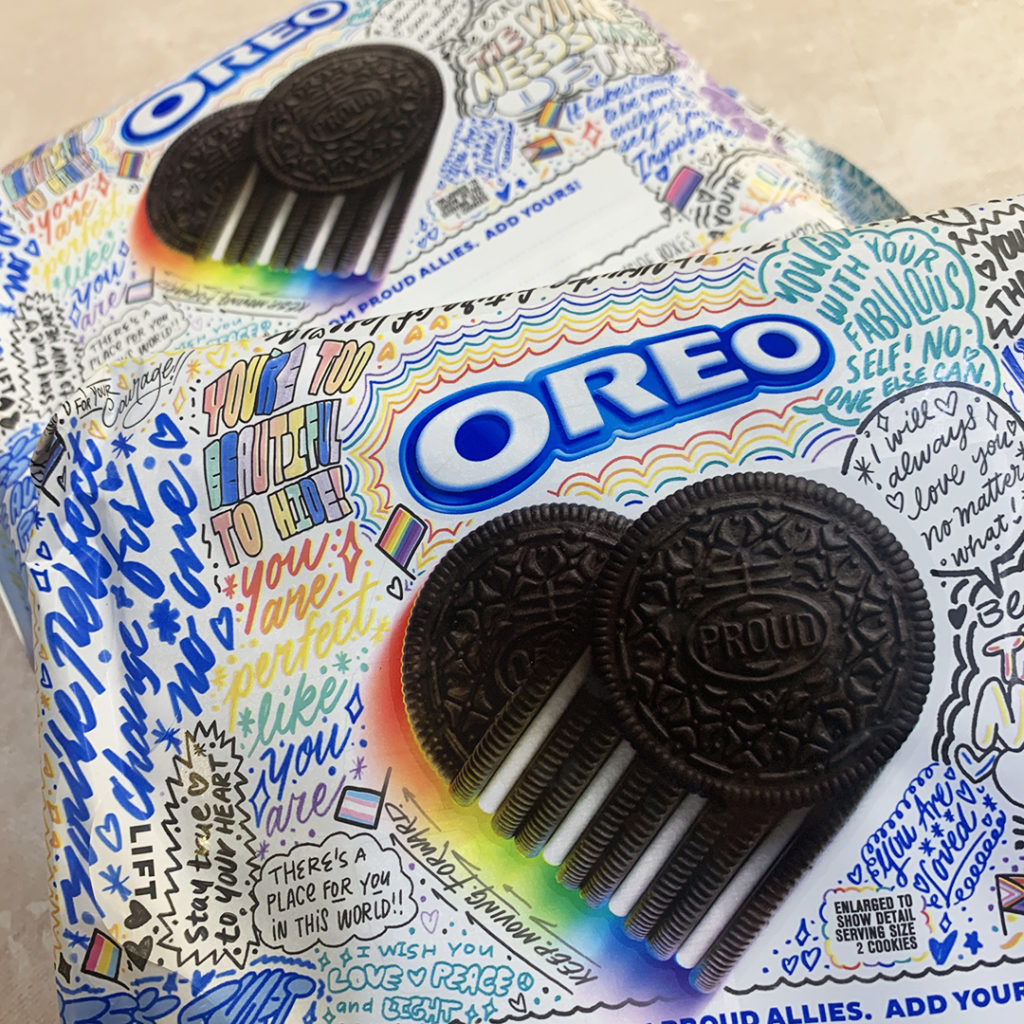
And we may have “allegedly” had another YELLOW TOWEL moment… with the newest special flavor of OREO’s. They were good… very sweet… lots of filling. But then again my memories of neopolitan ice cream go along with scooping out only the chocolate flavor… and then being done with the rest!!! So the three “mixed-layered” flavors concept was a little new to me!!! HA!!!
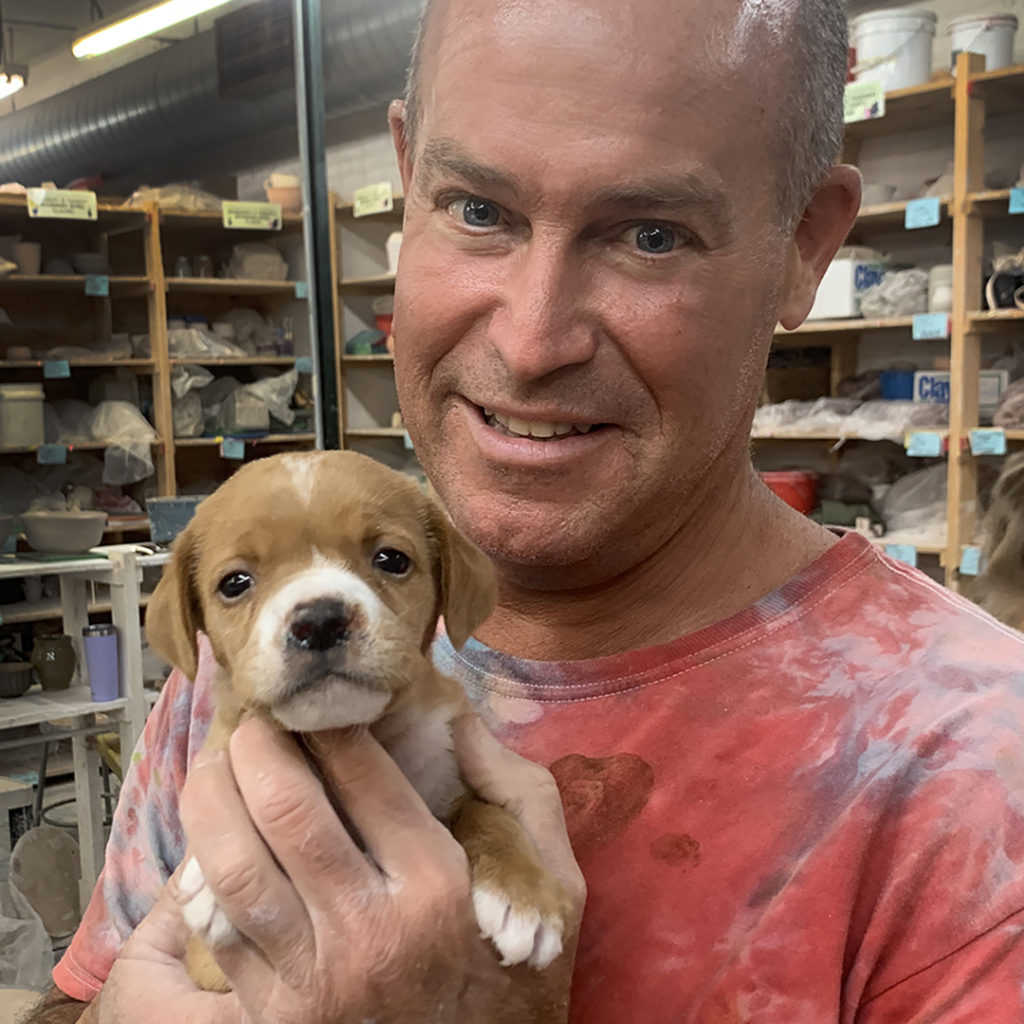
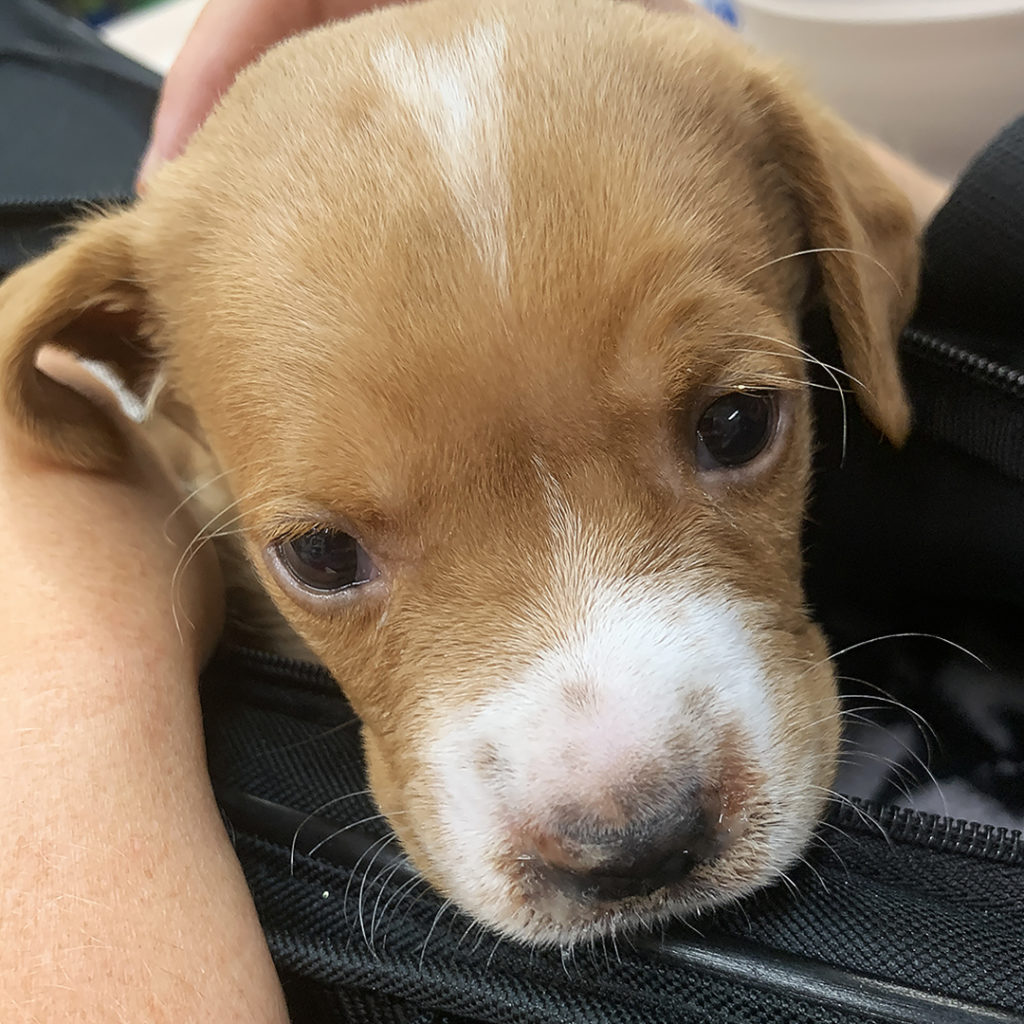
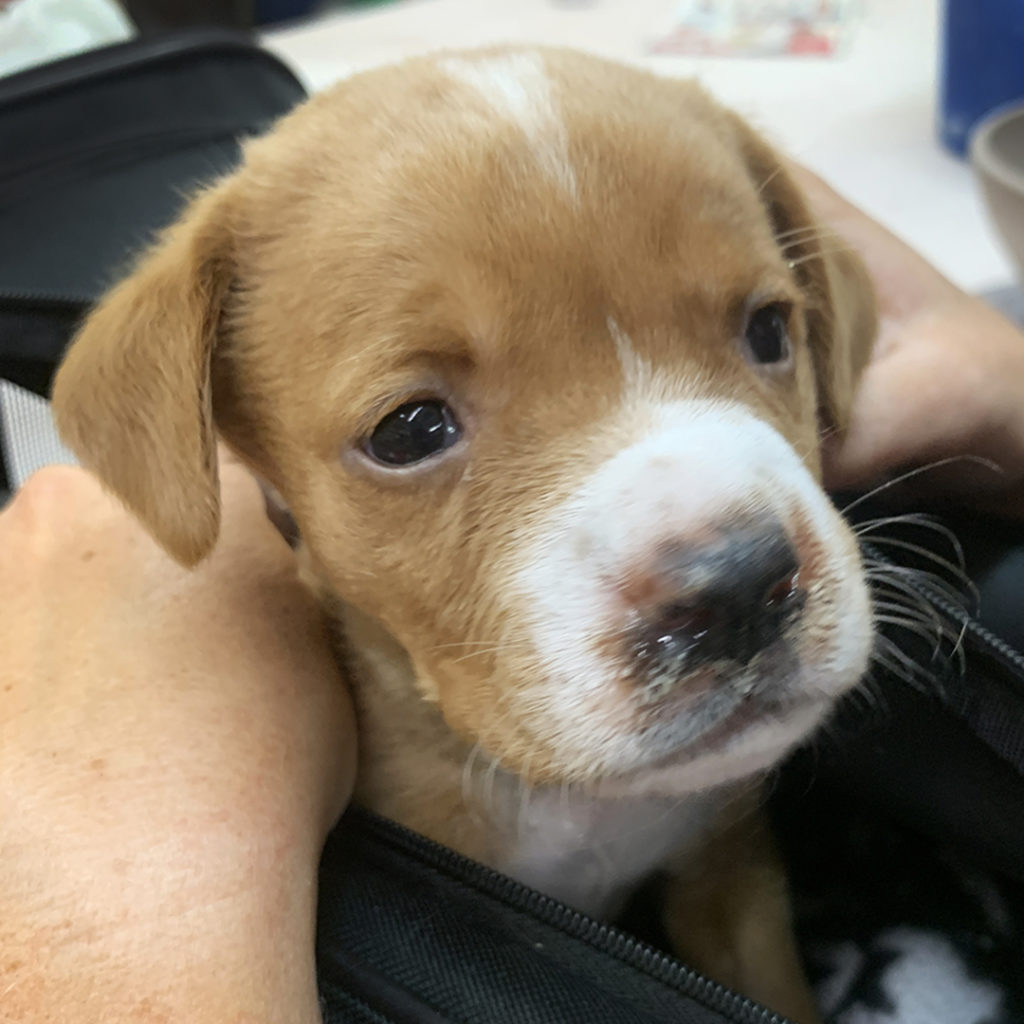
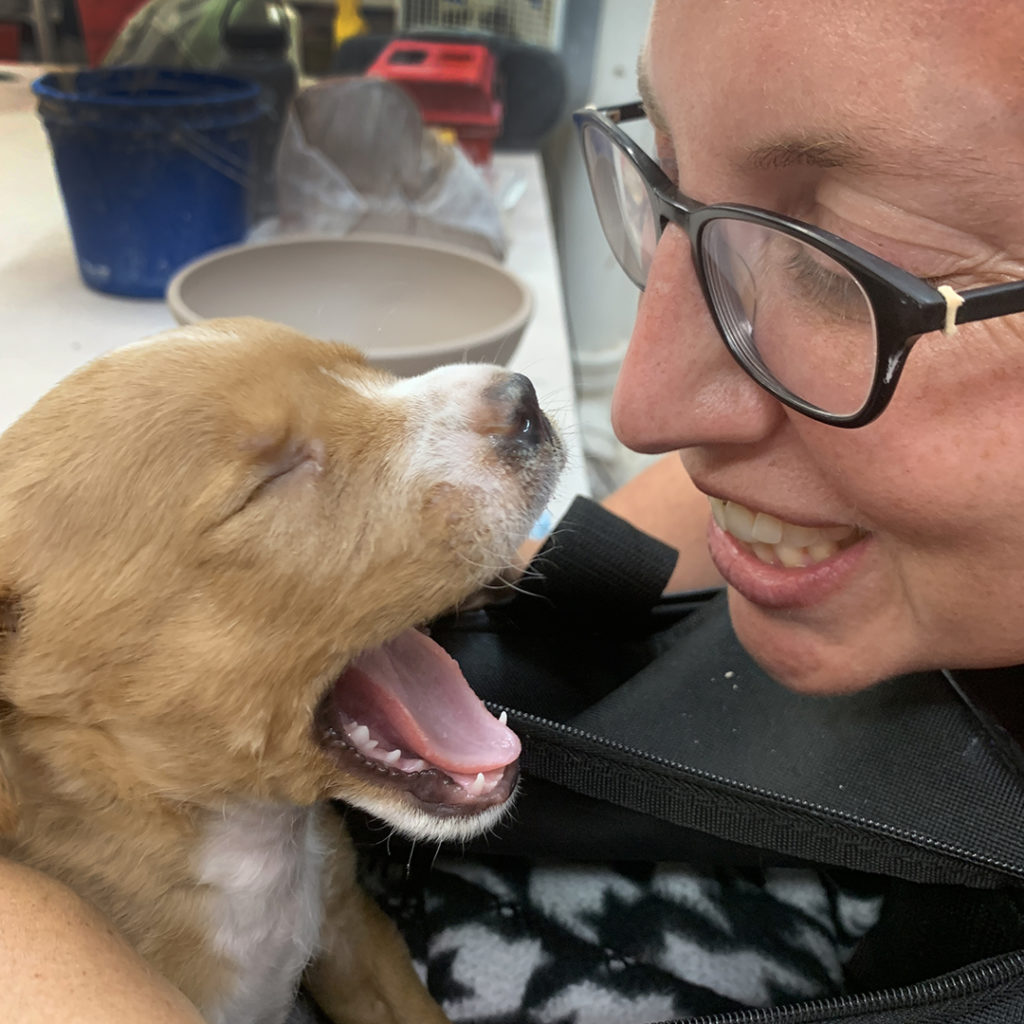
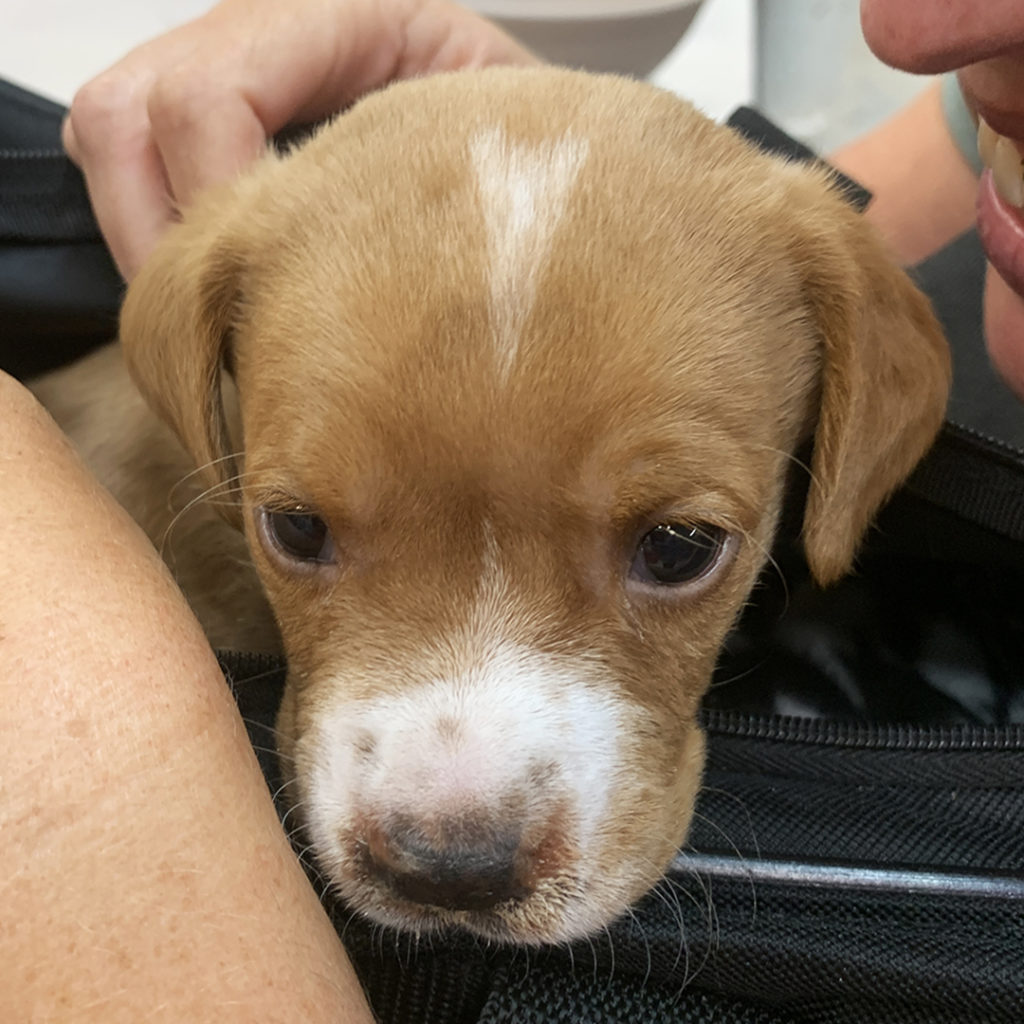
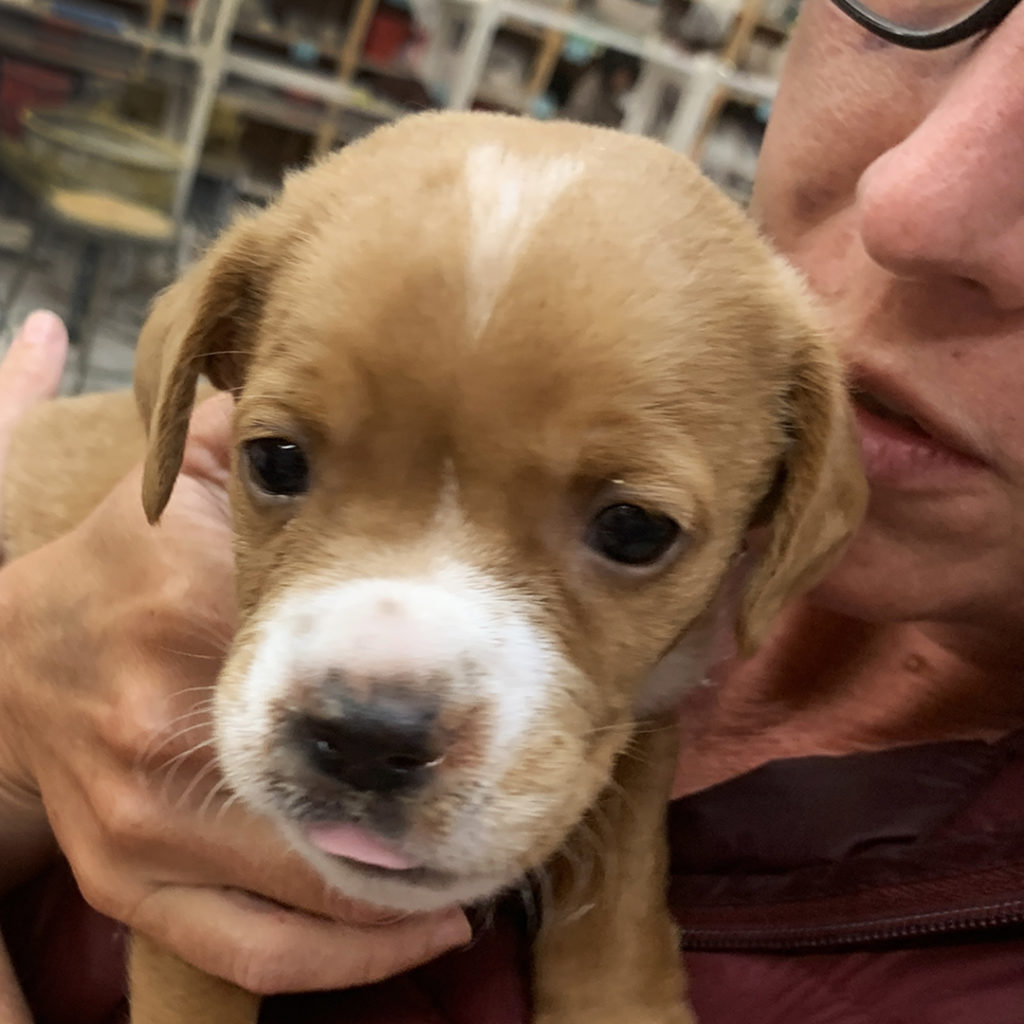
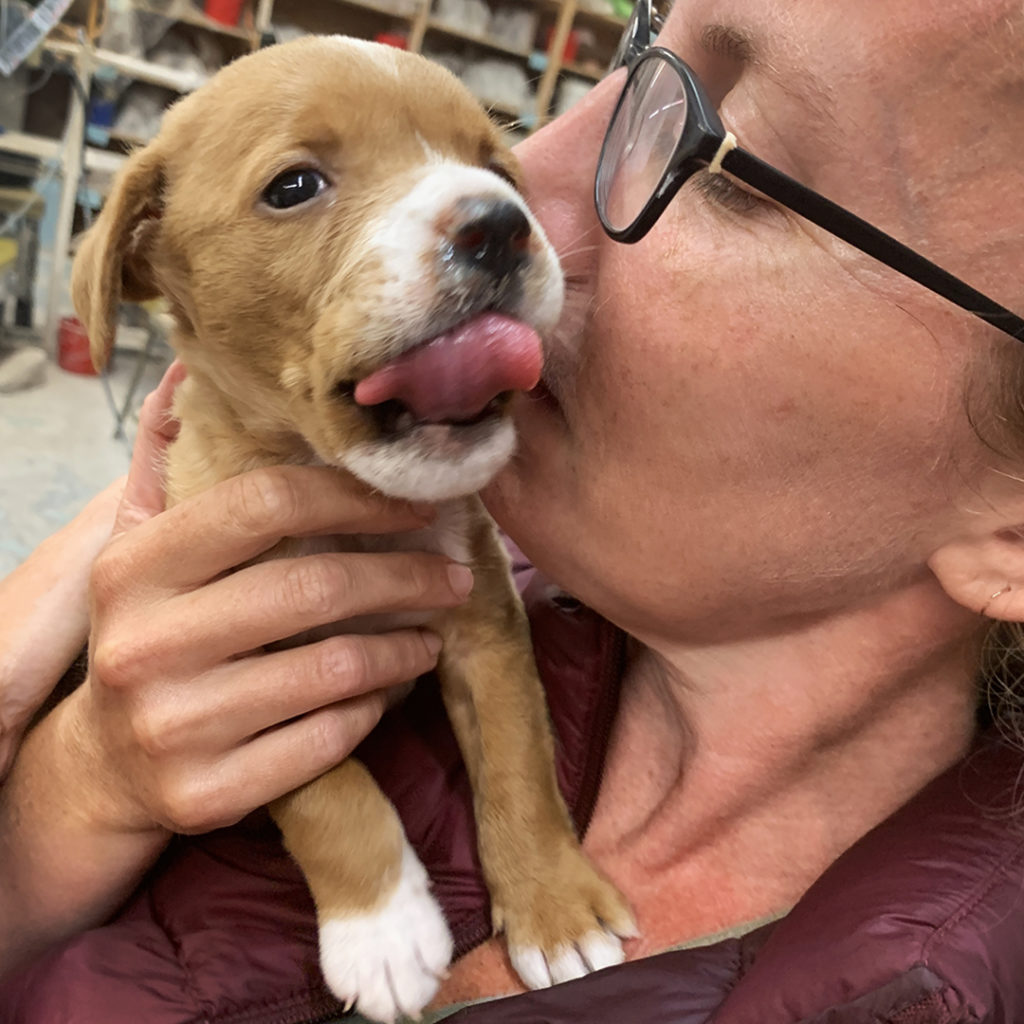
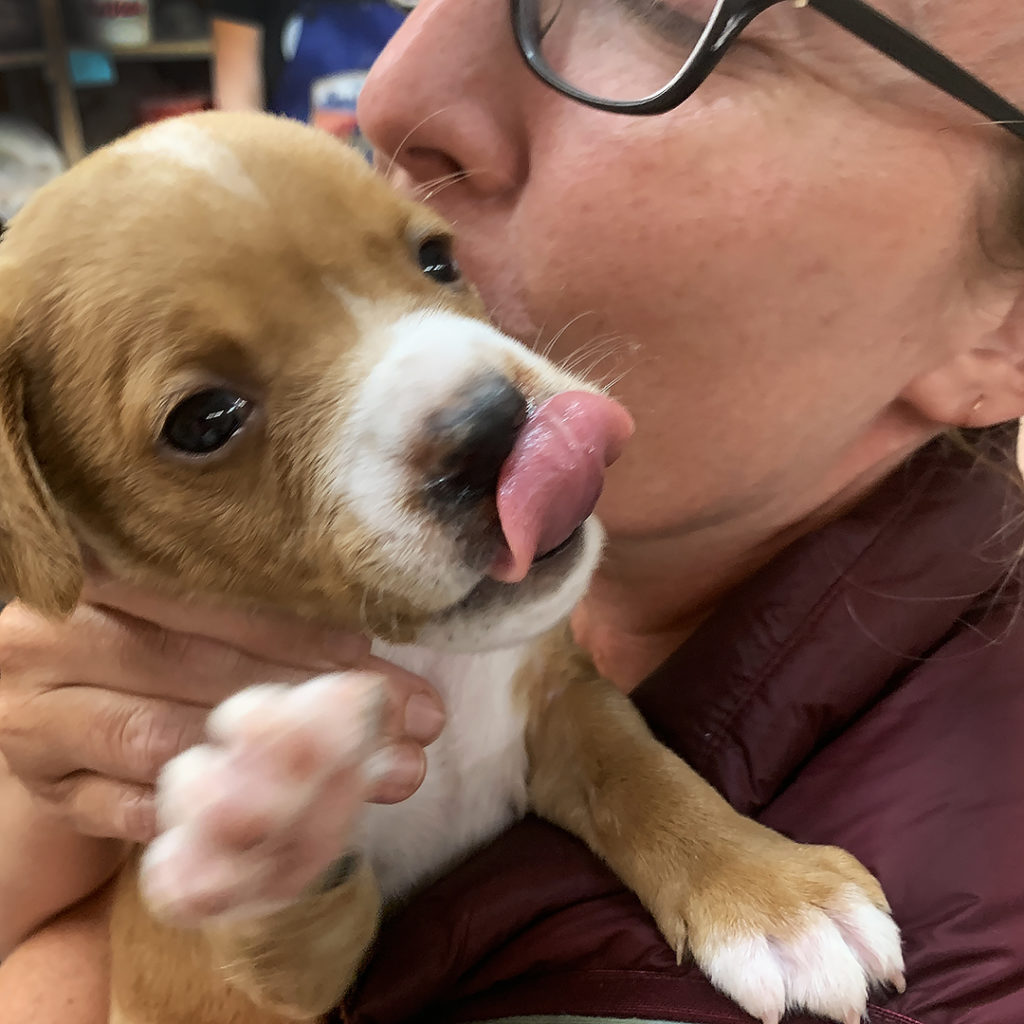
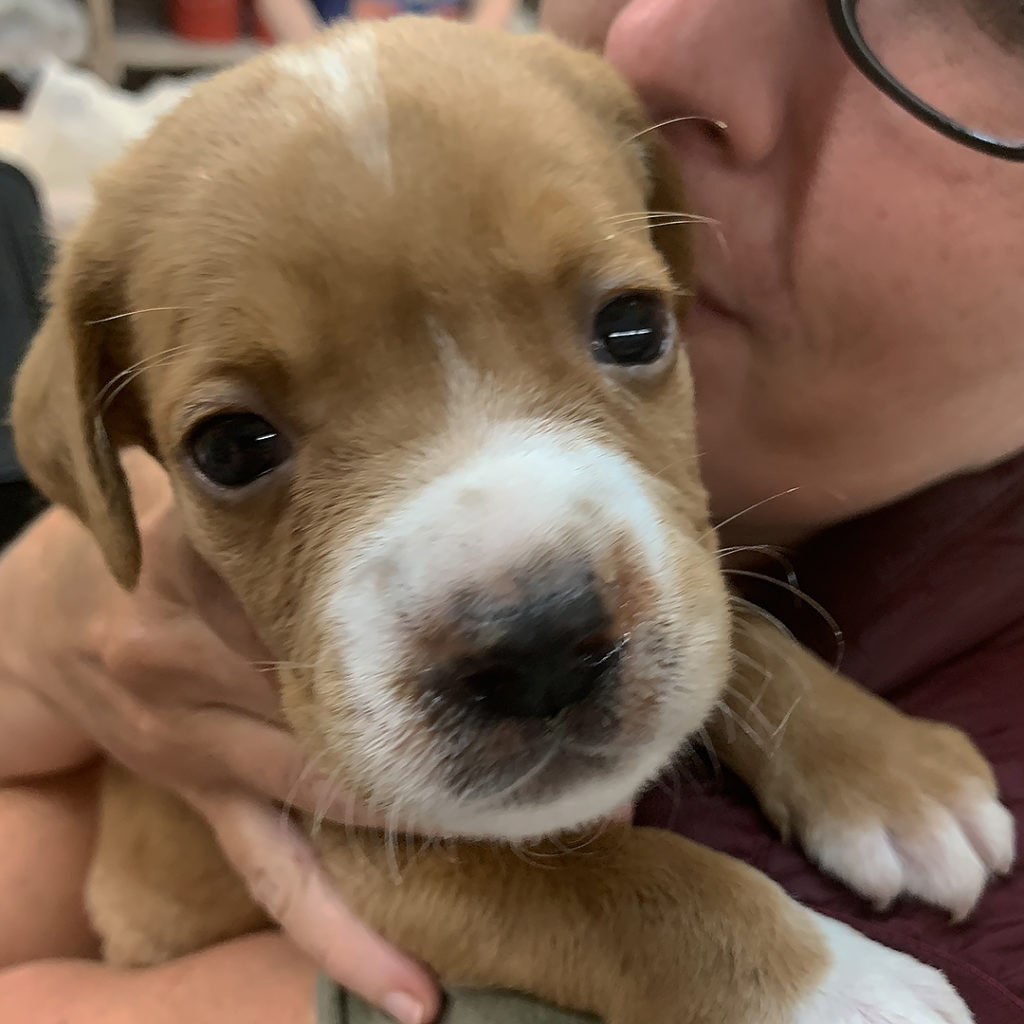
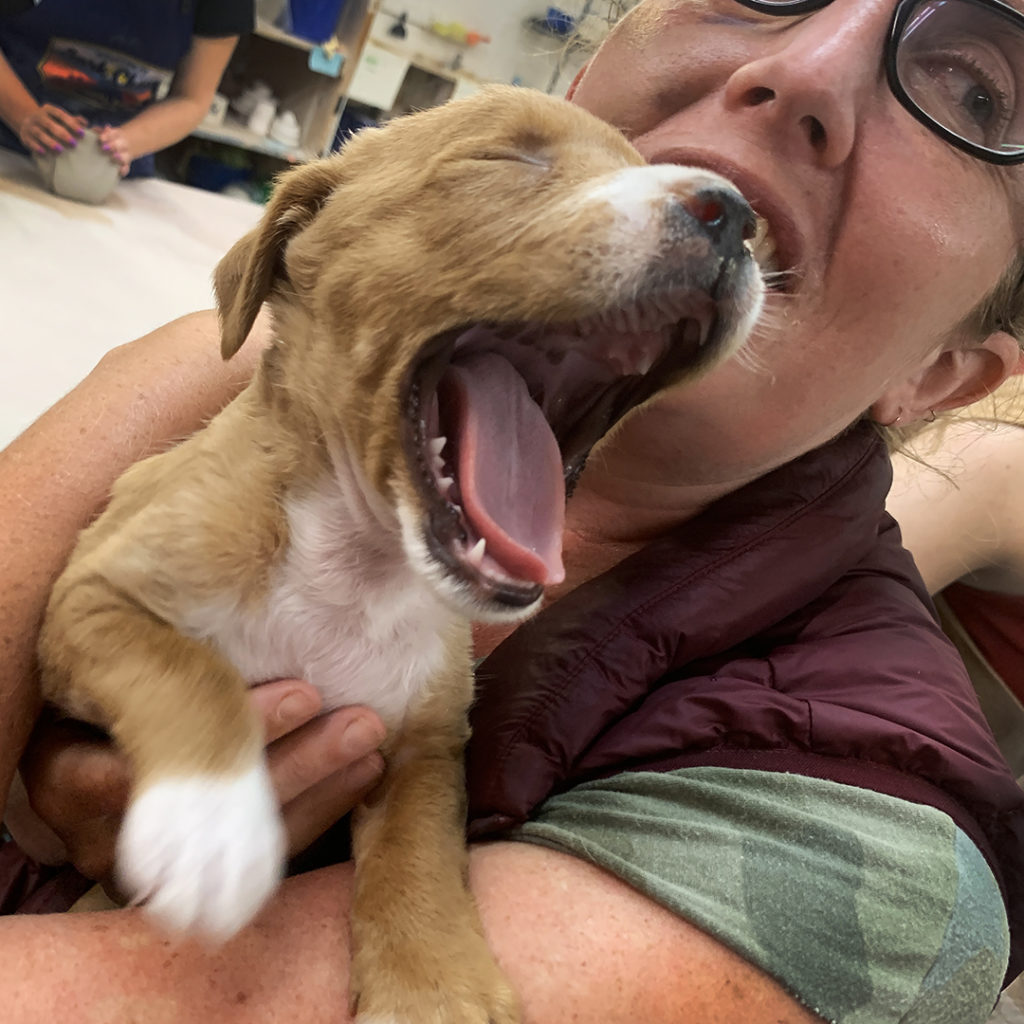
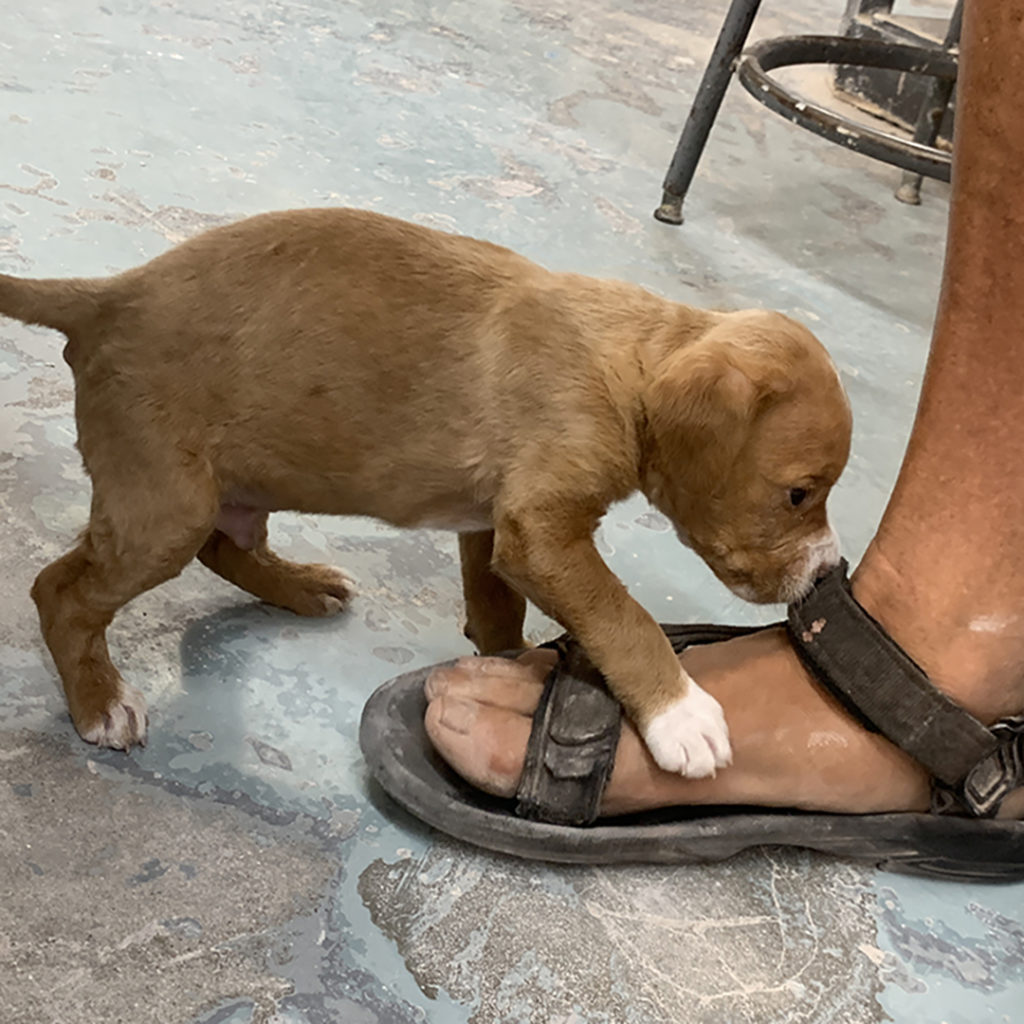
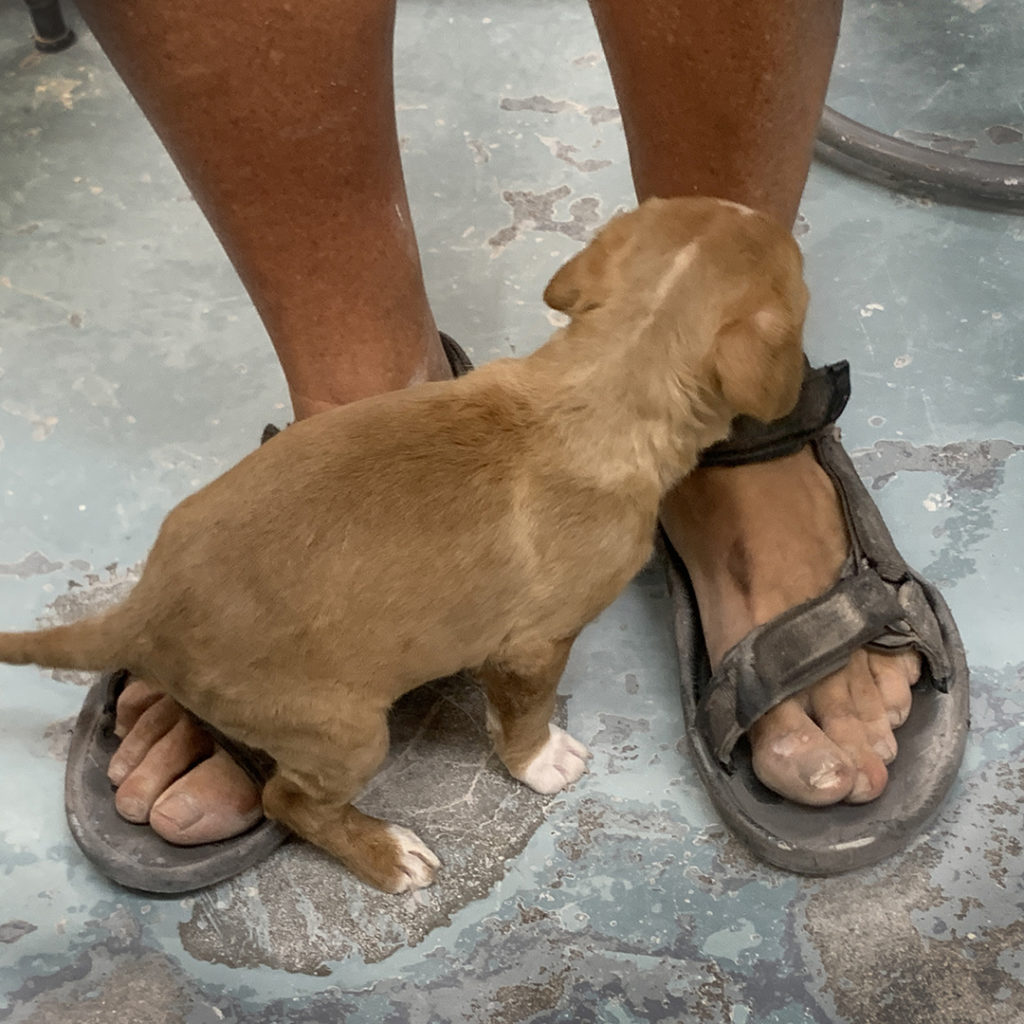
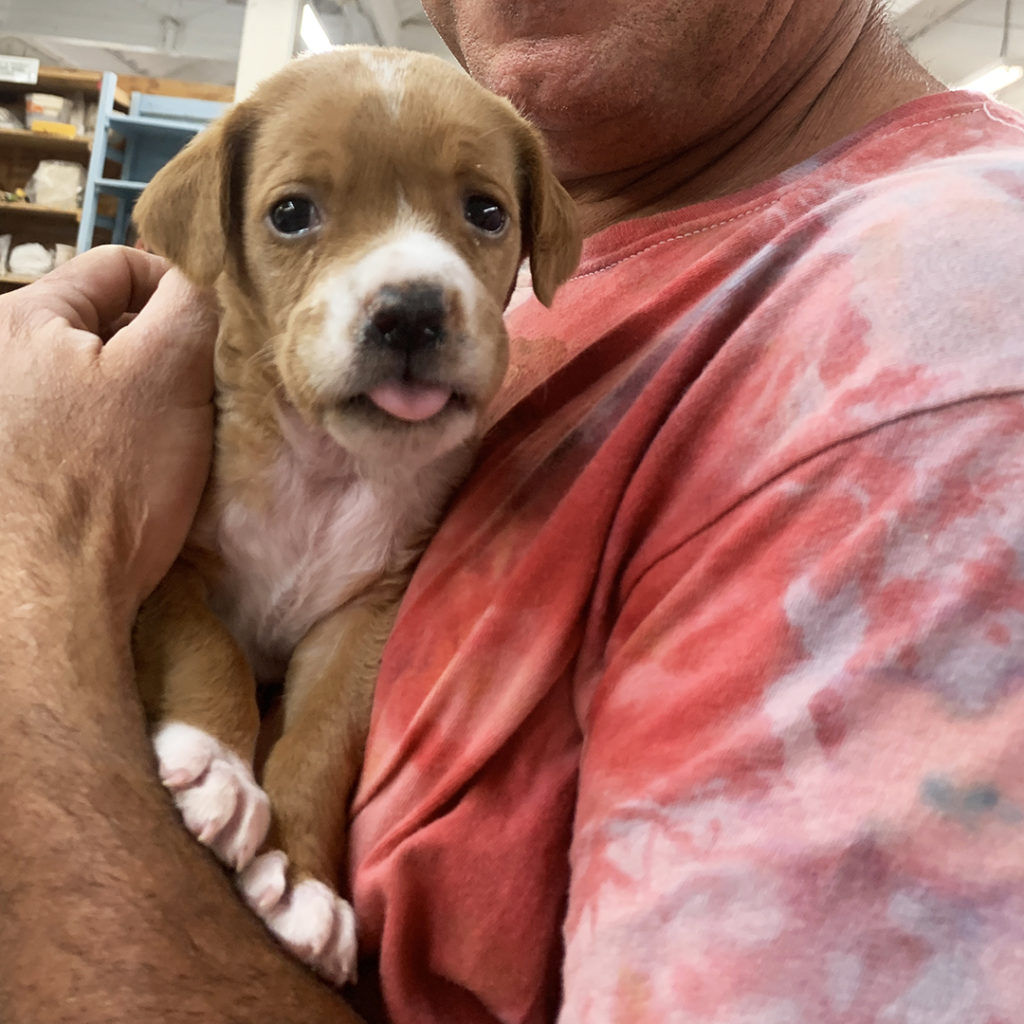
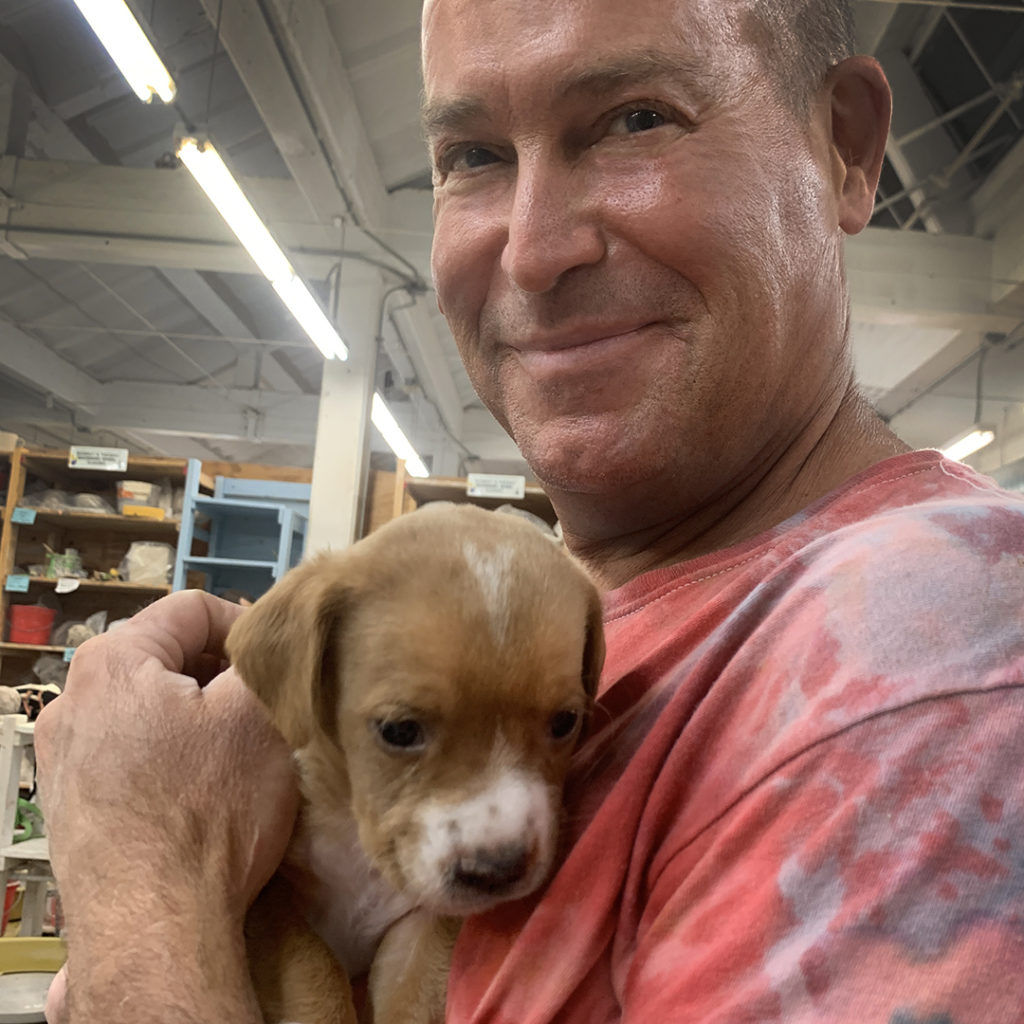
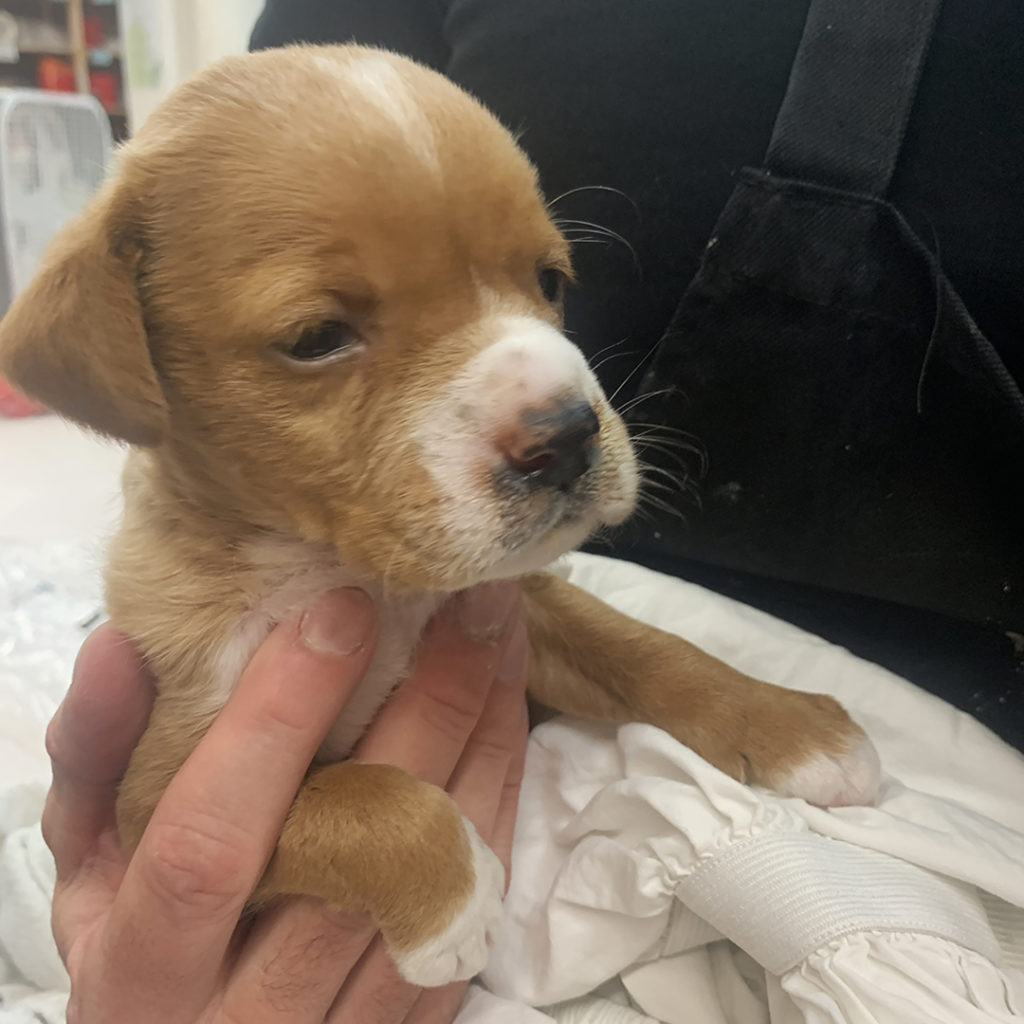
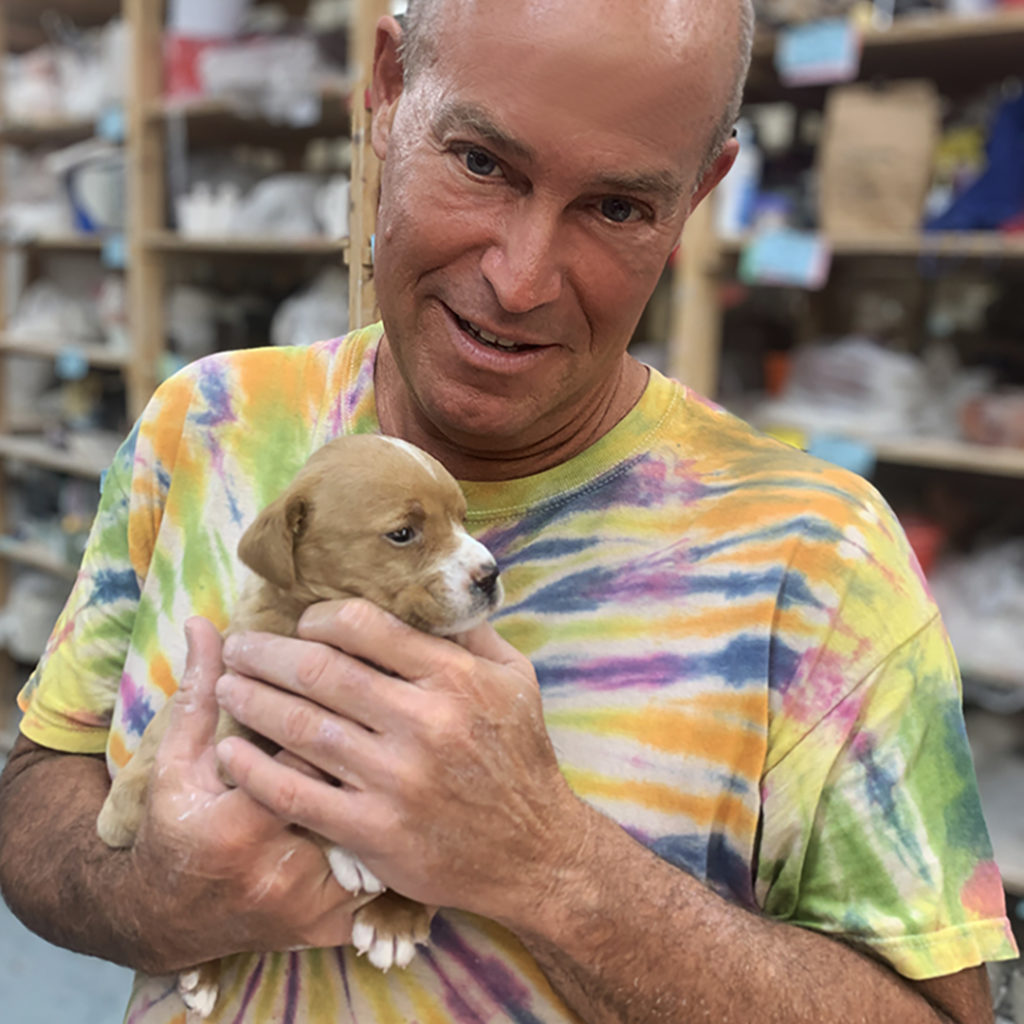
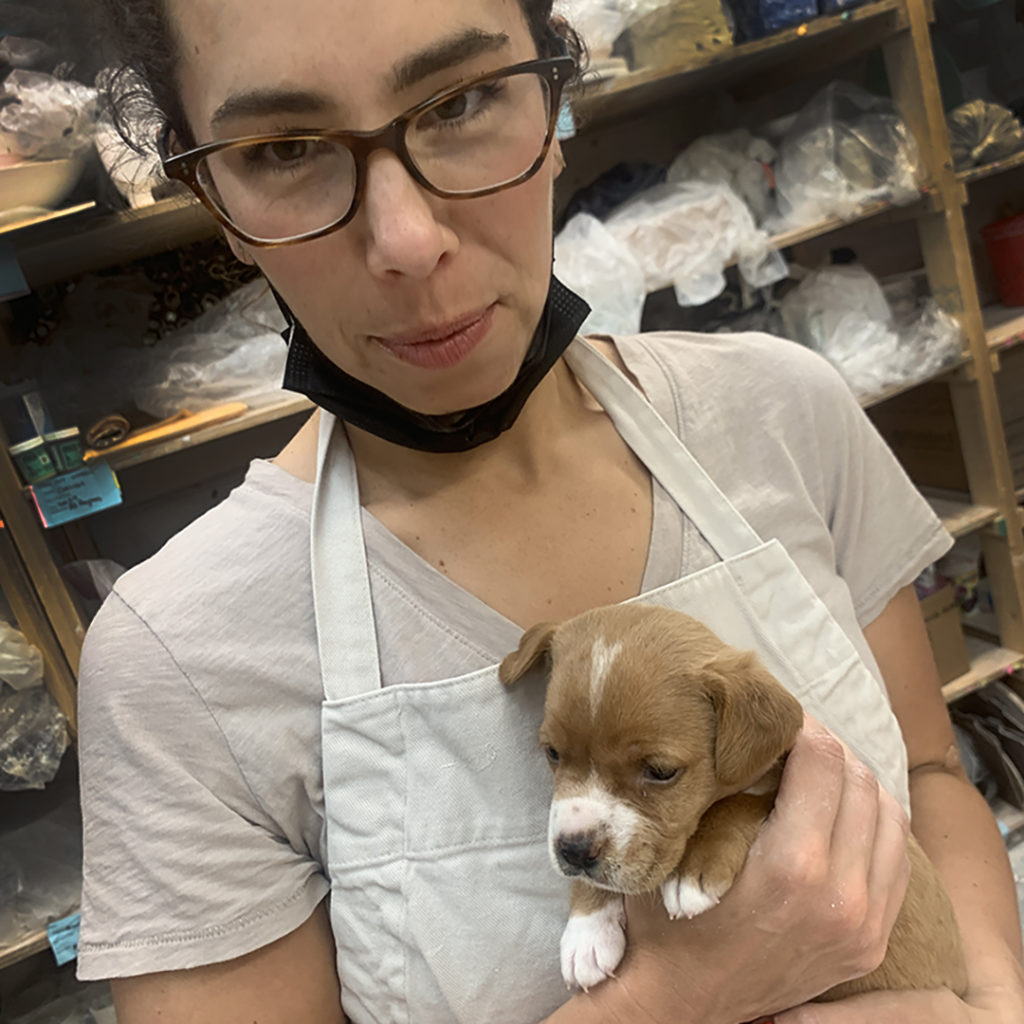
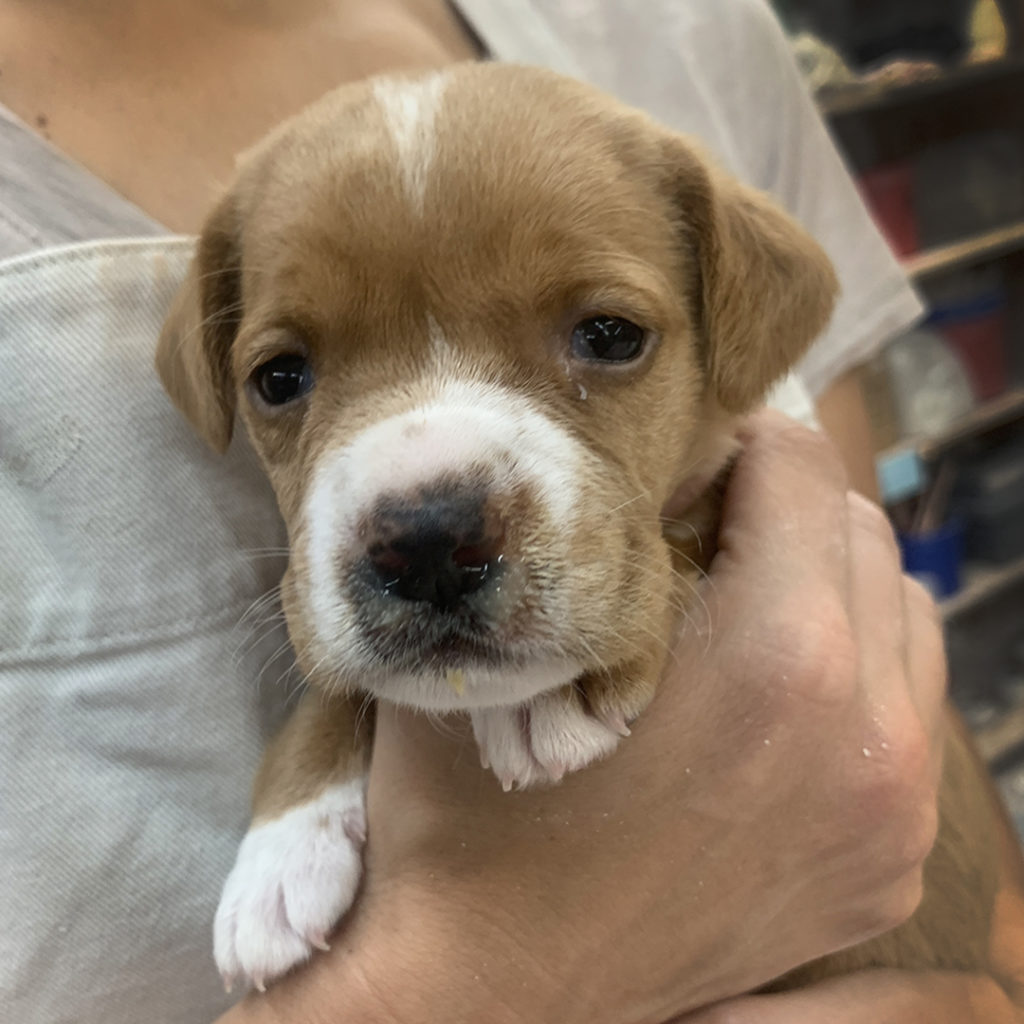
Look who made another visit to my Tuesday night pottery class!!! Student “Nick the Vet” brought this little cutie back into class… and when the puppy pops out, all pottery kinda stops! I mean, how can my pottery demos compete with this little nugget??? Three weeks in a row… and you can tell he’s growing fast!!! Sadly, rumor has it we “may not” see him next week as Nick will be out-of-town!
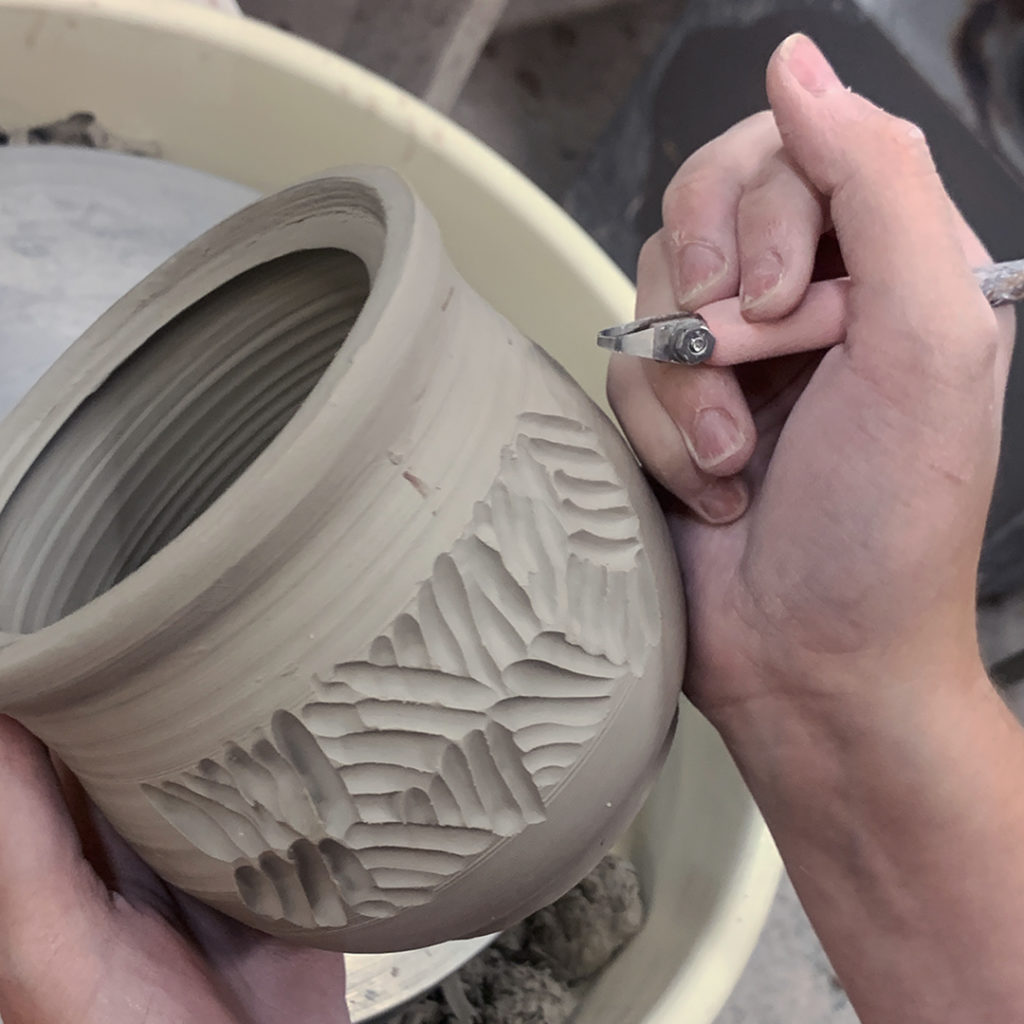
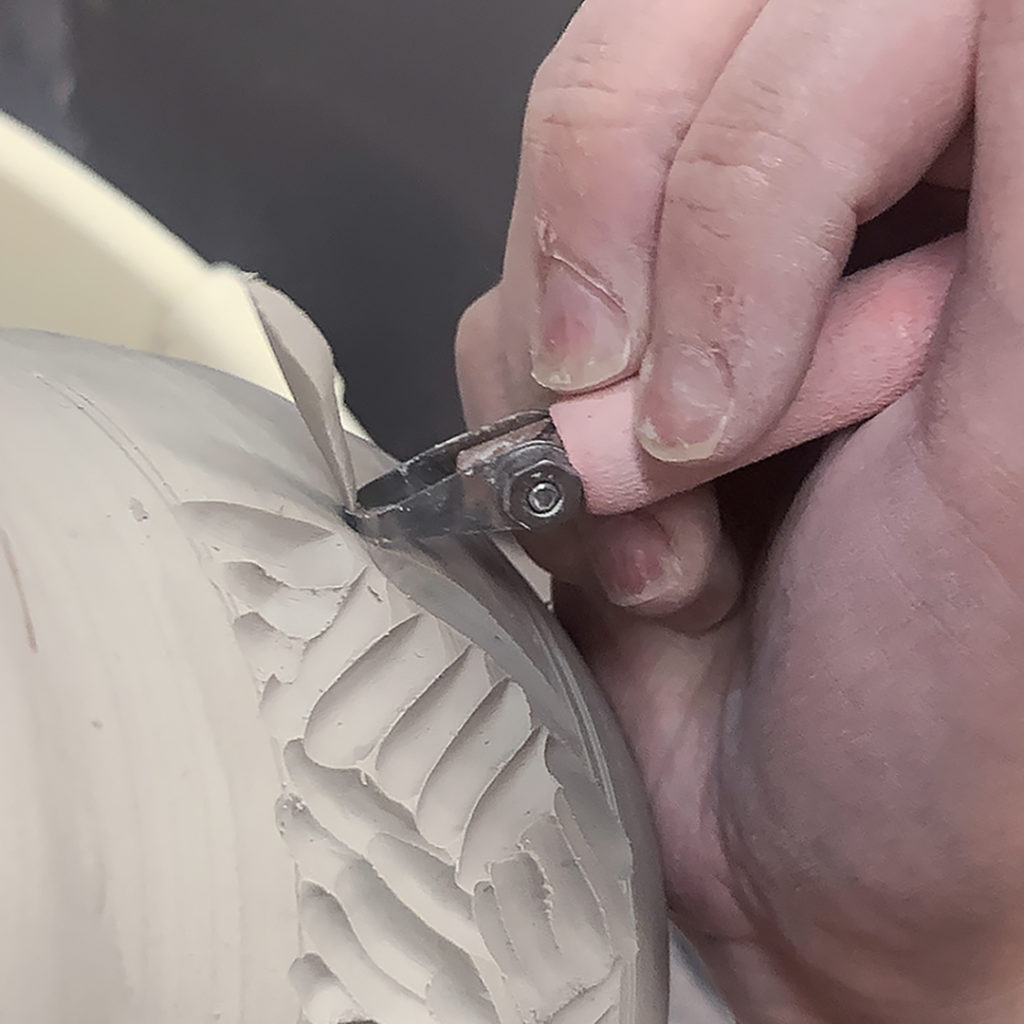
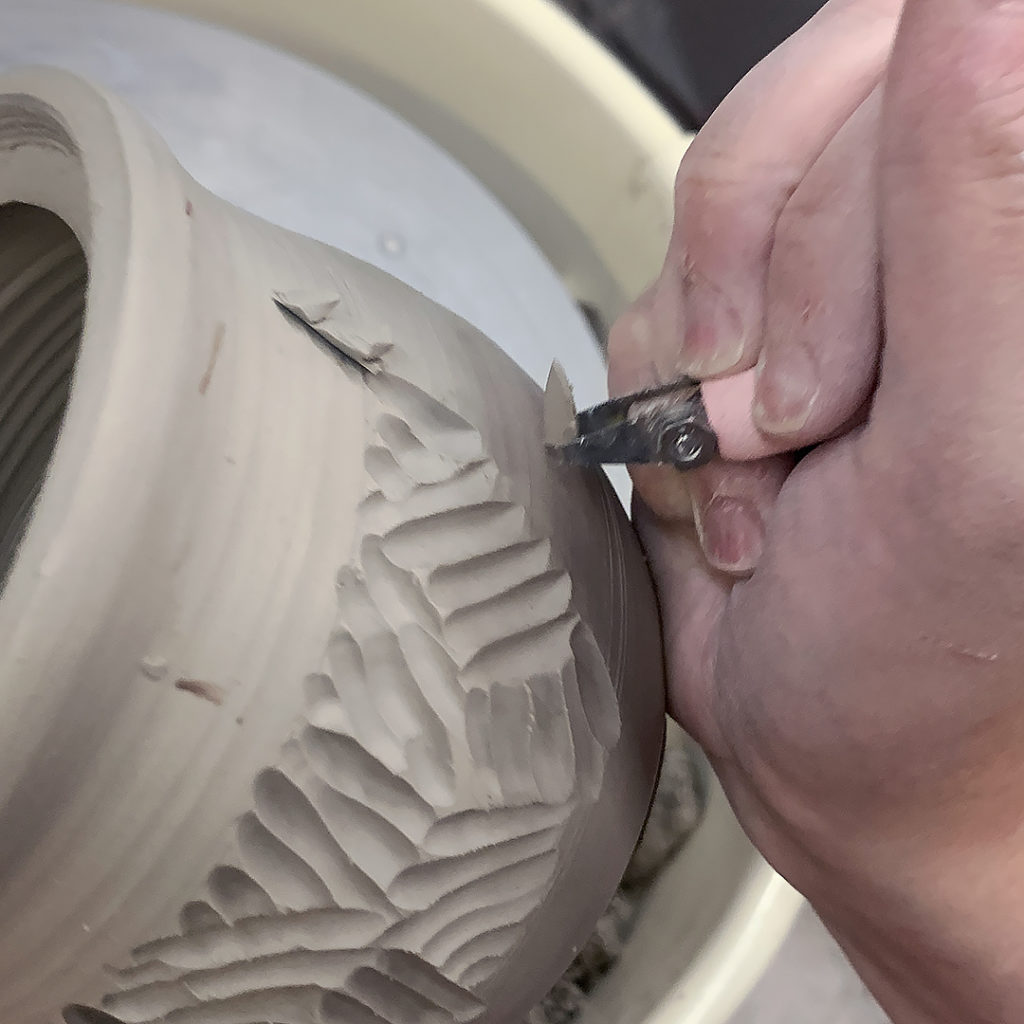
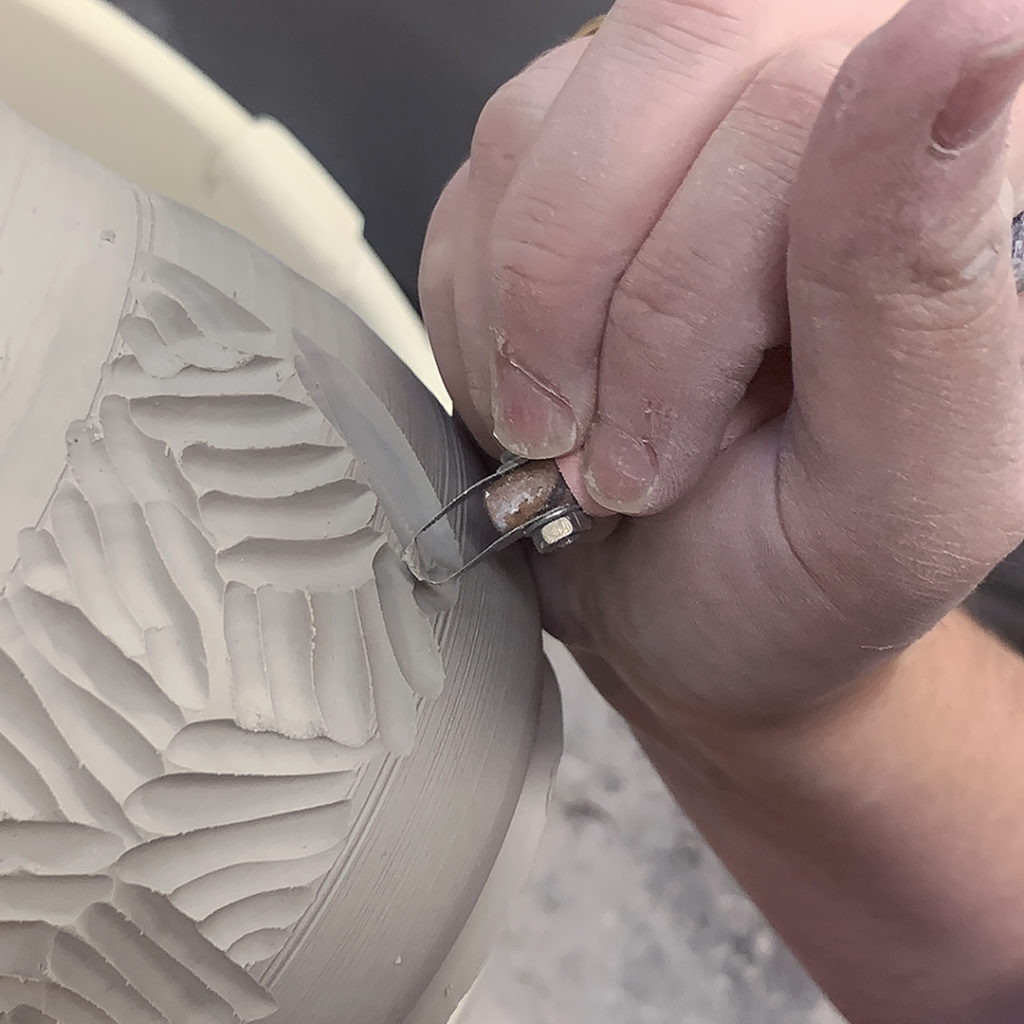
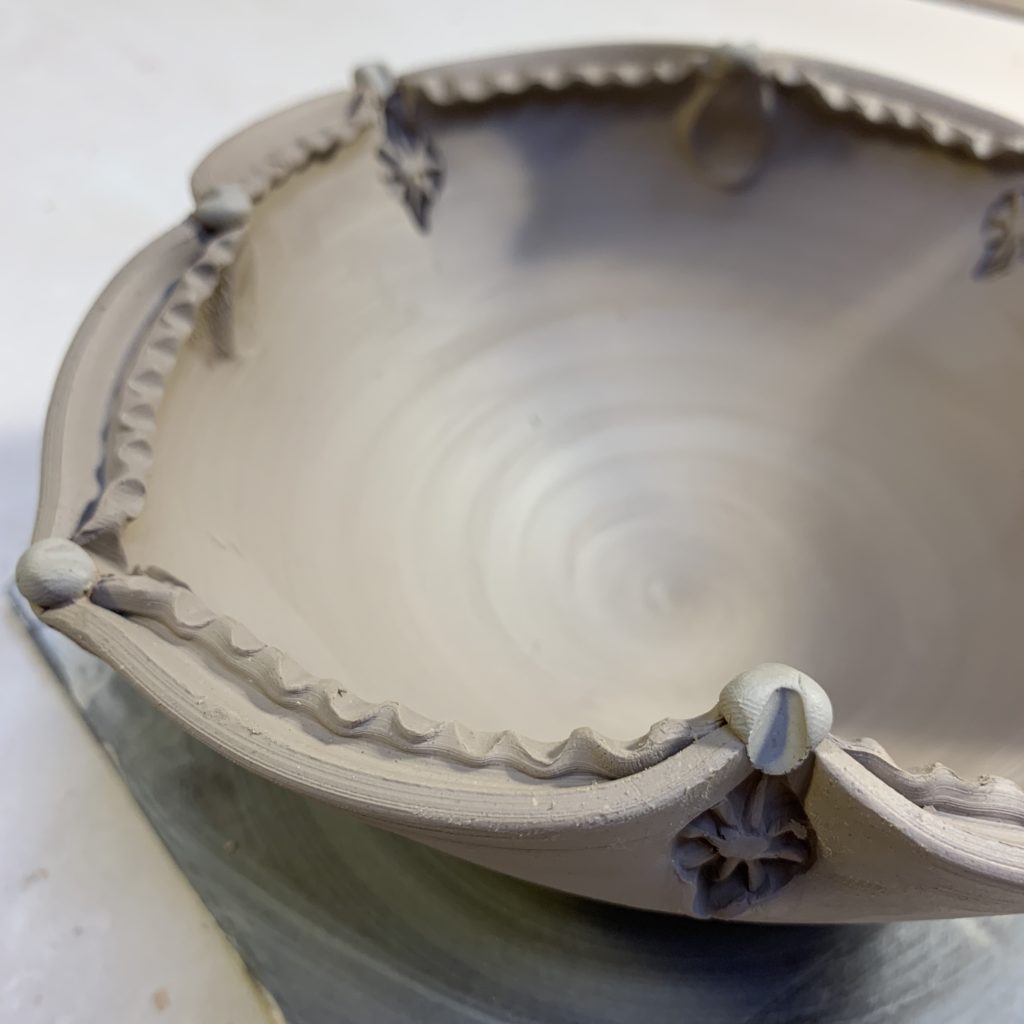
Always willing to share my DiamondCore Tools with my students… especially when they do some crazy cool carvings like this lidded jar that Ari was working on in class! Crisp & clean carving lines for everyone!!!
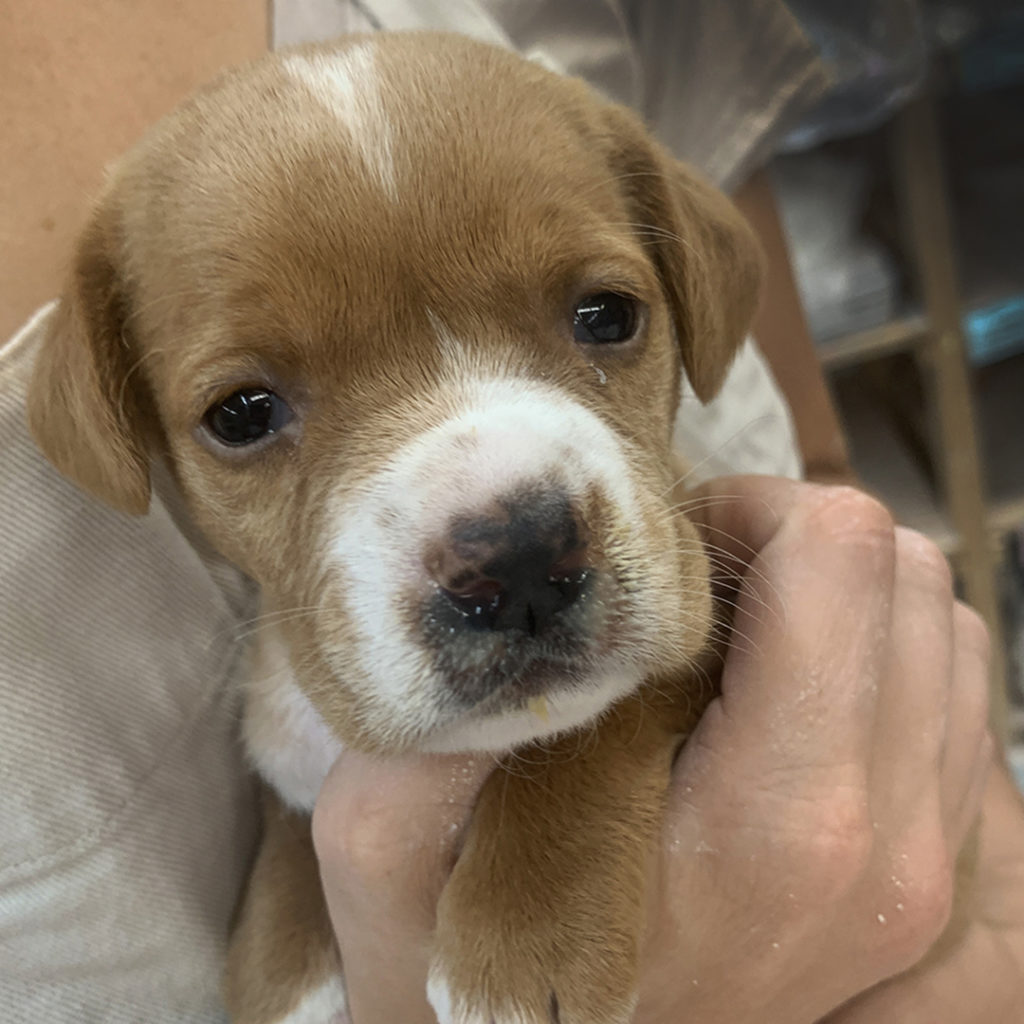
So look who came to join us again for another week of my Tuesday night Beginning Wheel class! Yep… our little “abandoned-puppy-friend” was back for another week with our student & vet Nick who is caring for this little 5-week old cutie!
Also, my fellow teacher Chelsea had been having a tough week… so he also supplied some much-needed PUPPY THERAPY!
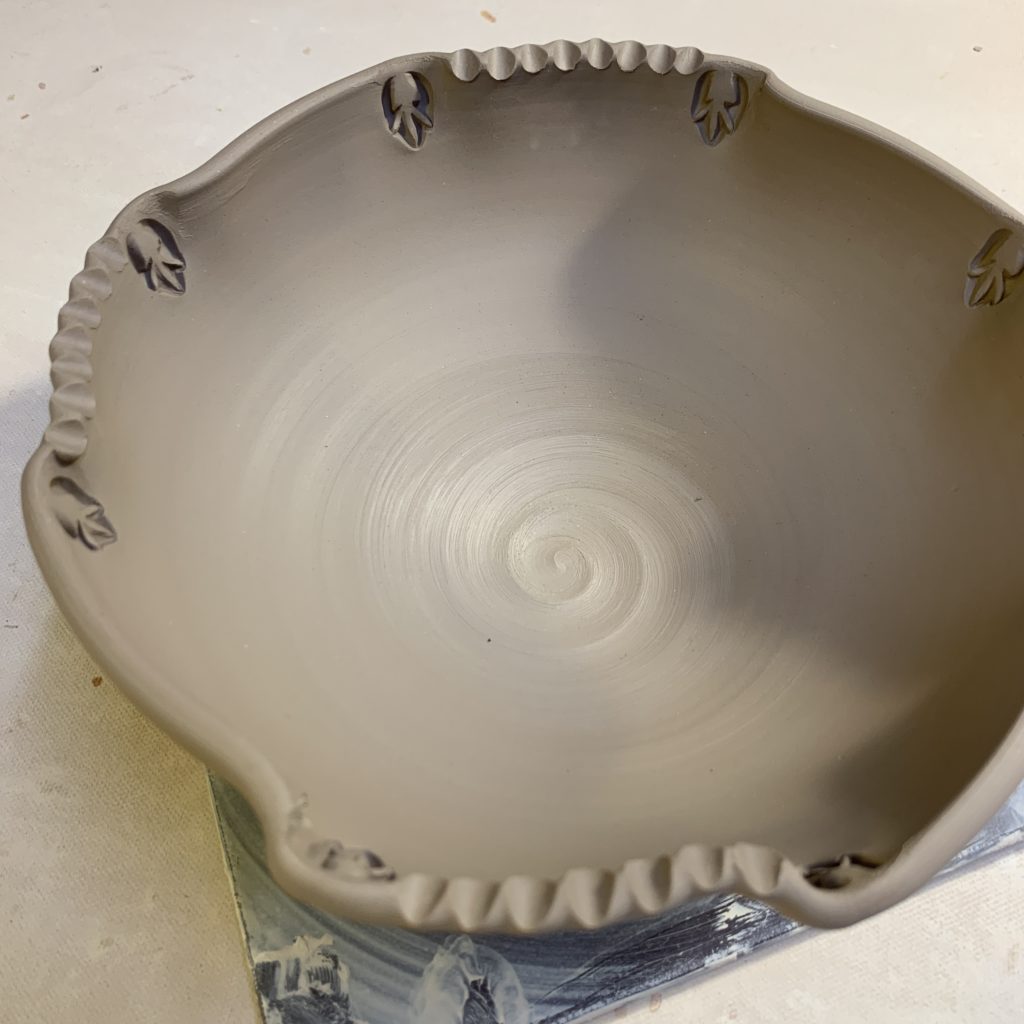
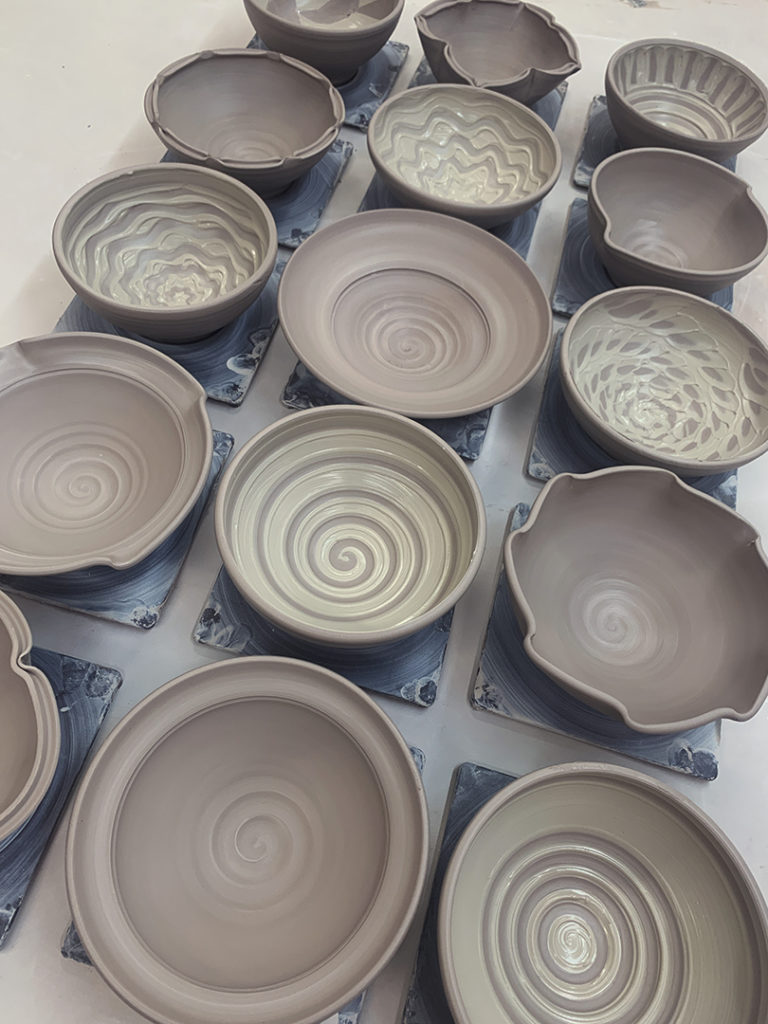
After this week’s “bowls om purpose, not a cylinder gone bad” demo… I was left with fifteen bowls to finish up. Sure, I “coulda” left them the way they were. But, you know I co e from the school of MORE IS MORE!!! So here’s a few shots of what I’ve done with them since class!
So for now they’re all stamped & detailed… just waiting to be trimmed!
This week in my Beginning & Advanced Beginning Wheelthrowing class, we discussed making bowls on purpose and NOT cylinders gone bad. We talked about how they need to start making the bowl curve inside their bowl right form the very start. And that they should be looking for a nicely rounded interior… and NOT a flat bottom, corners and a curved side like a cylinder gone bad!!!
After the first bowl demo, I sent my students back to their wheels so they could start throwing some nicely rounded bowls. And then I went back to my wheel to make “a few” more bowls…
And then we re-grouped and talked about how I believe the wheel does most of the work making a nice round bowl. But it’s up to each student to make that bowl their own… employing some quick tricks & techniques to make their bowls new & different… and a bit more “stylish” than the others!
So here are the “tricks” that I showed them all…
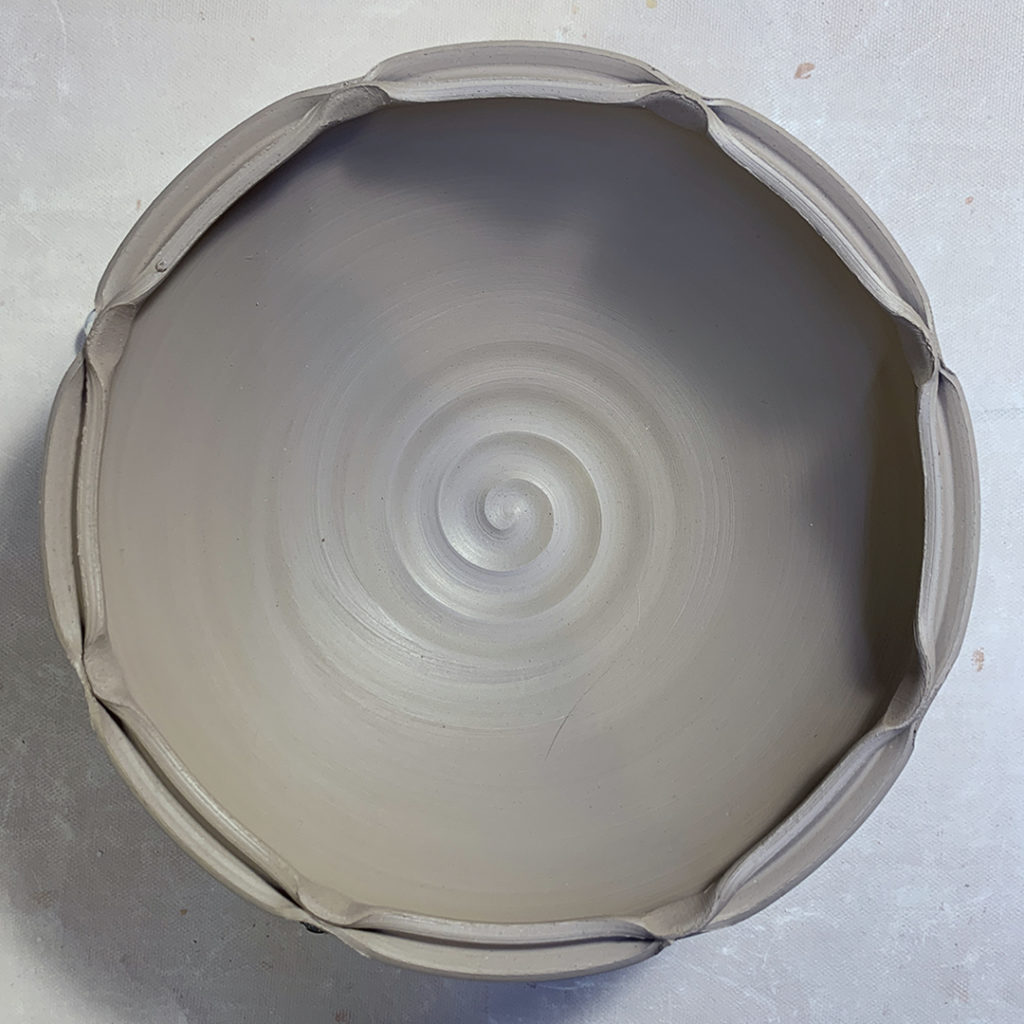
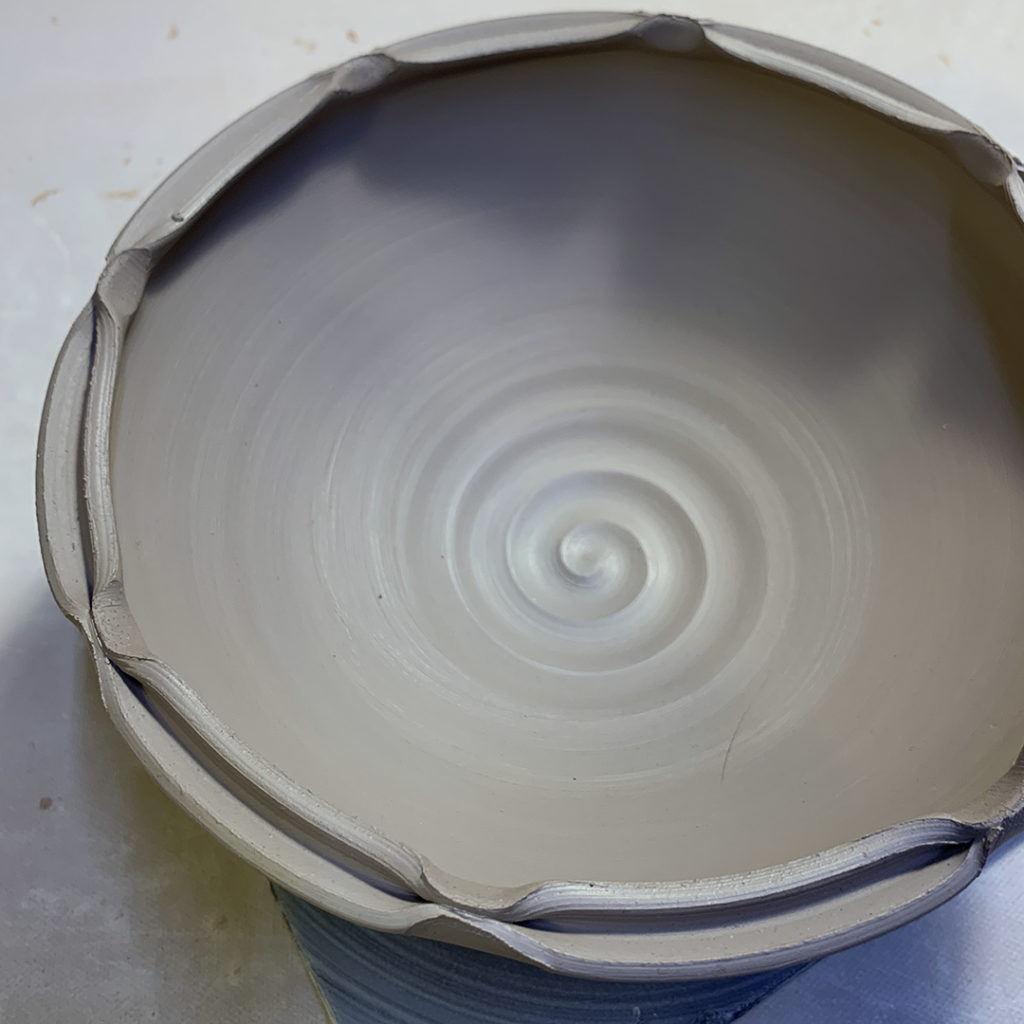
BOWL #1 – two fluted edges… gently asymmetrical.
BOWL #2 – if two fluted edges are nice, EIGHT might even better?!
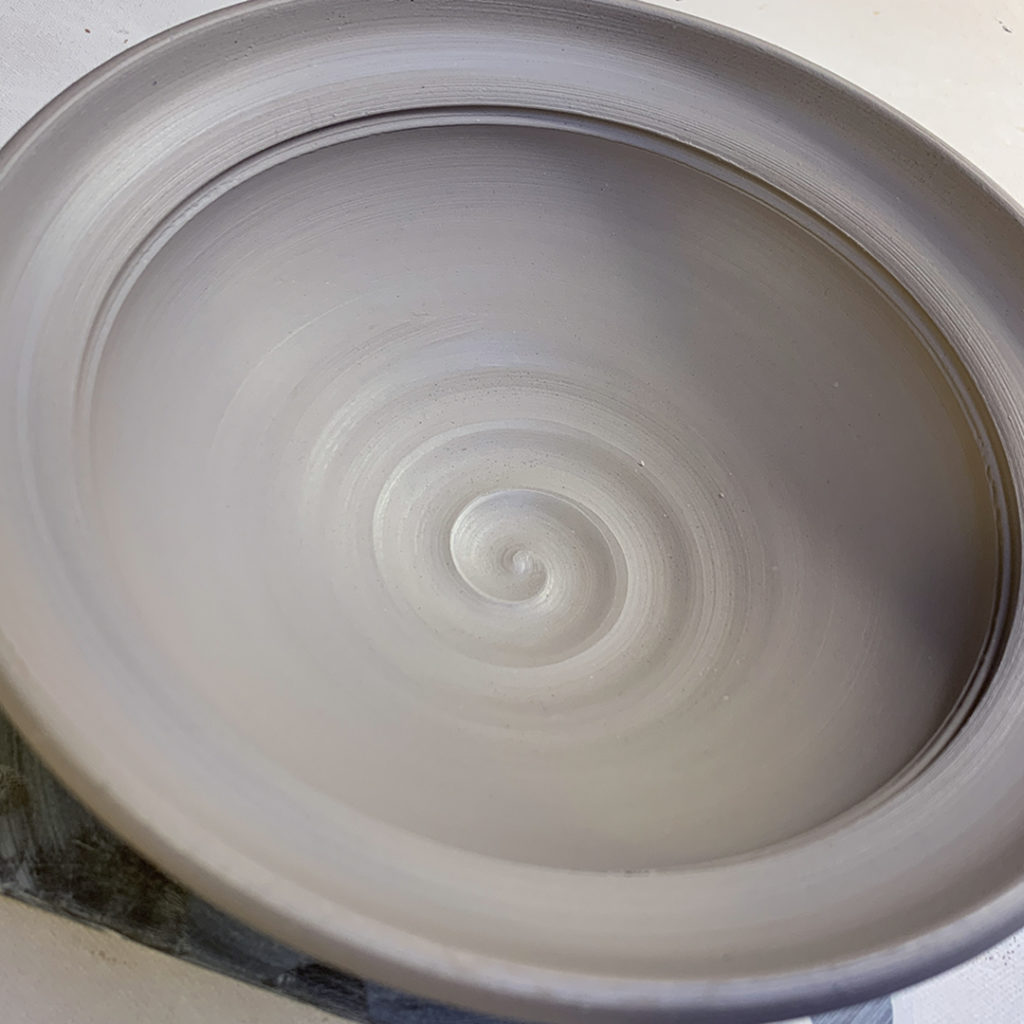
BOWL #3 – a flared flange… approximately 1″ rim
BOWL #4 – if one inch is good, maybe three or four inches are even better?!
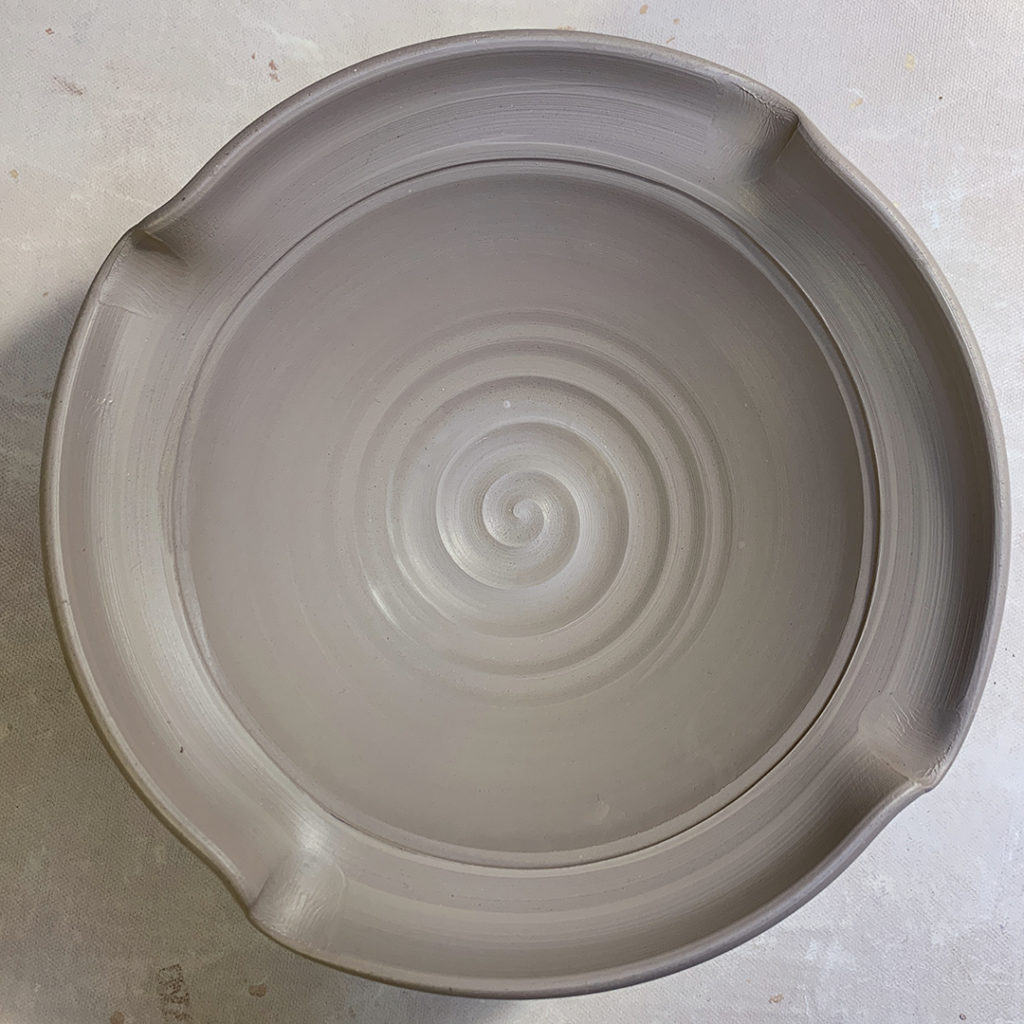
BOWL #5 – combined flared flange with four flouted edges
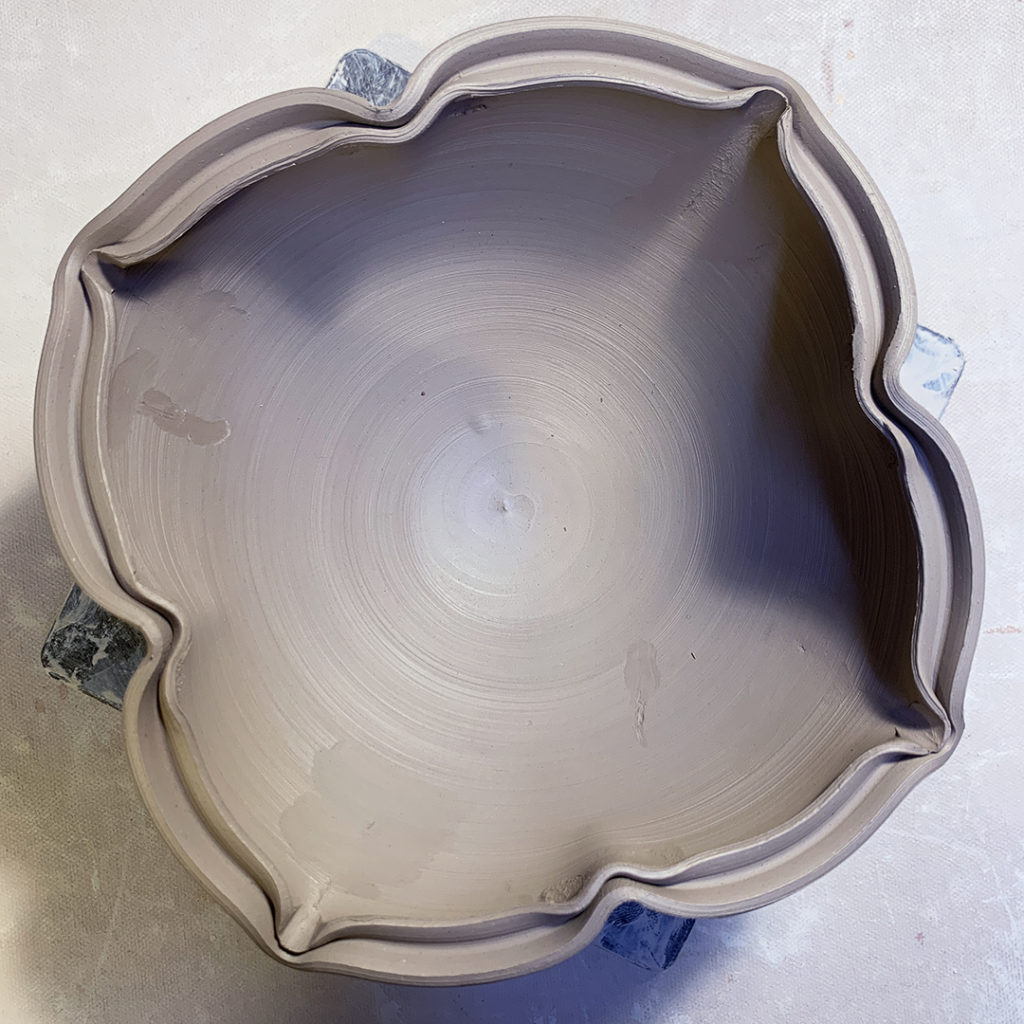
BOWL #6 – a split rim pinched back together in eight places
BOWL #7 – a split rim dented-in at four places
BOWL #8 – a split rim bowl dented-in at four places & dented-out at four places… kinda giving it a “lotus” shape?!
So after altering some rims, I decided to introduce colored slips as another possibility for decorating their bowls. I decided to use white slip for my demo purposes… but any choice of colored slips would have worked.
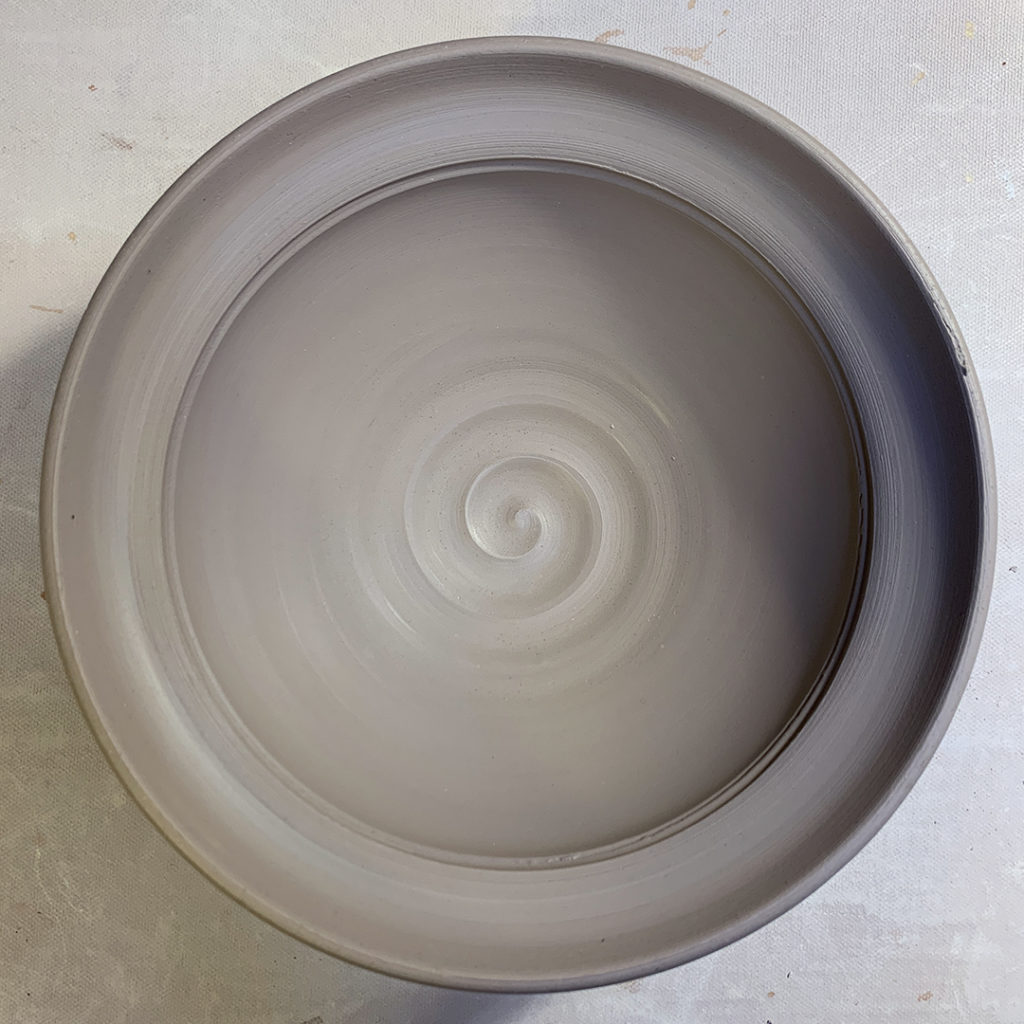
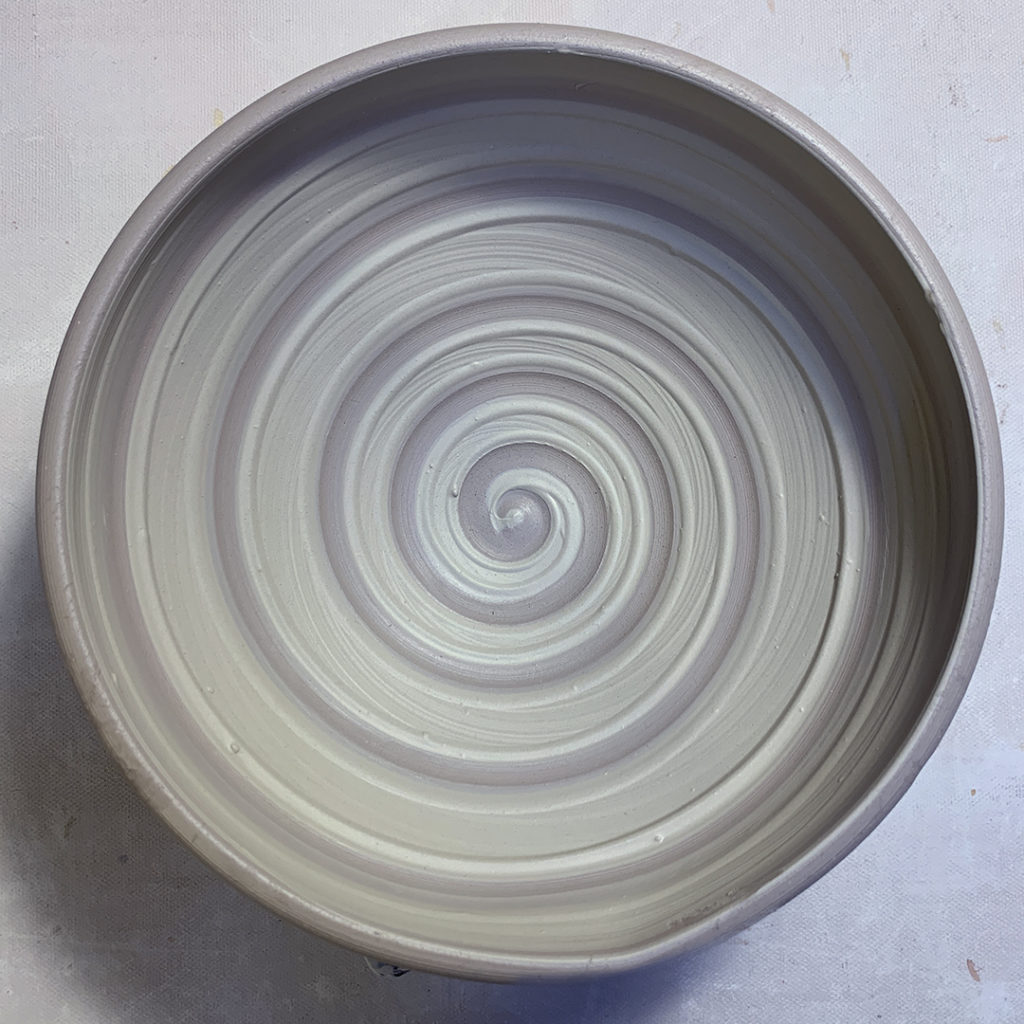
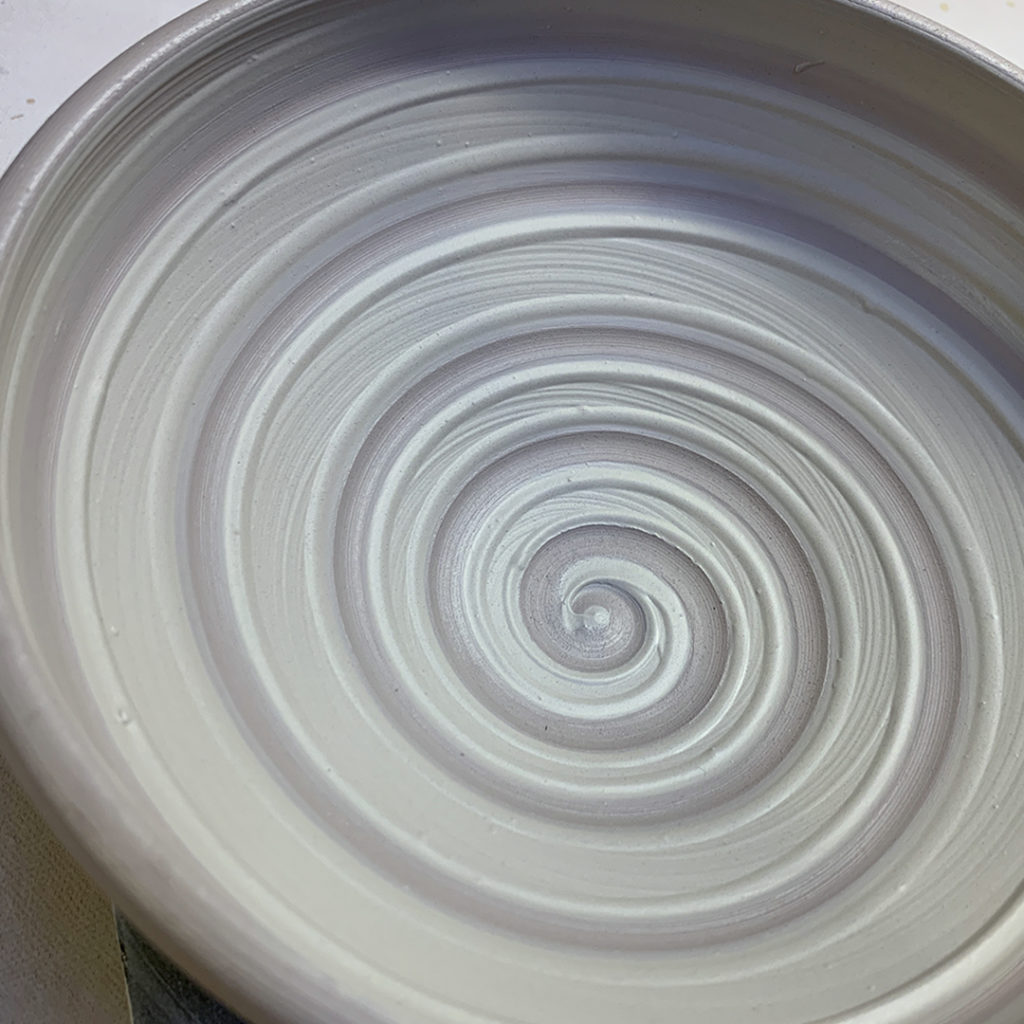
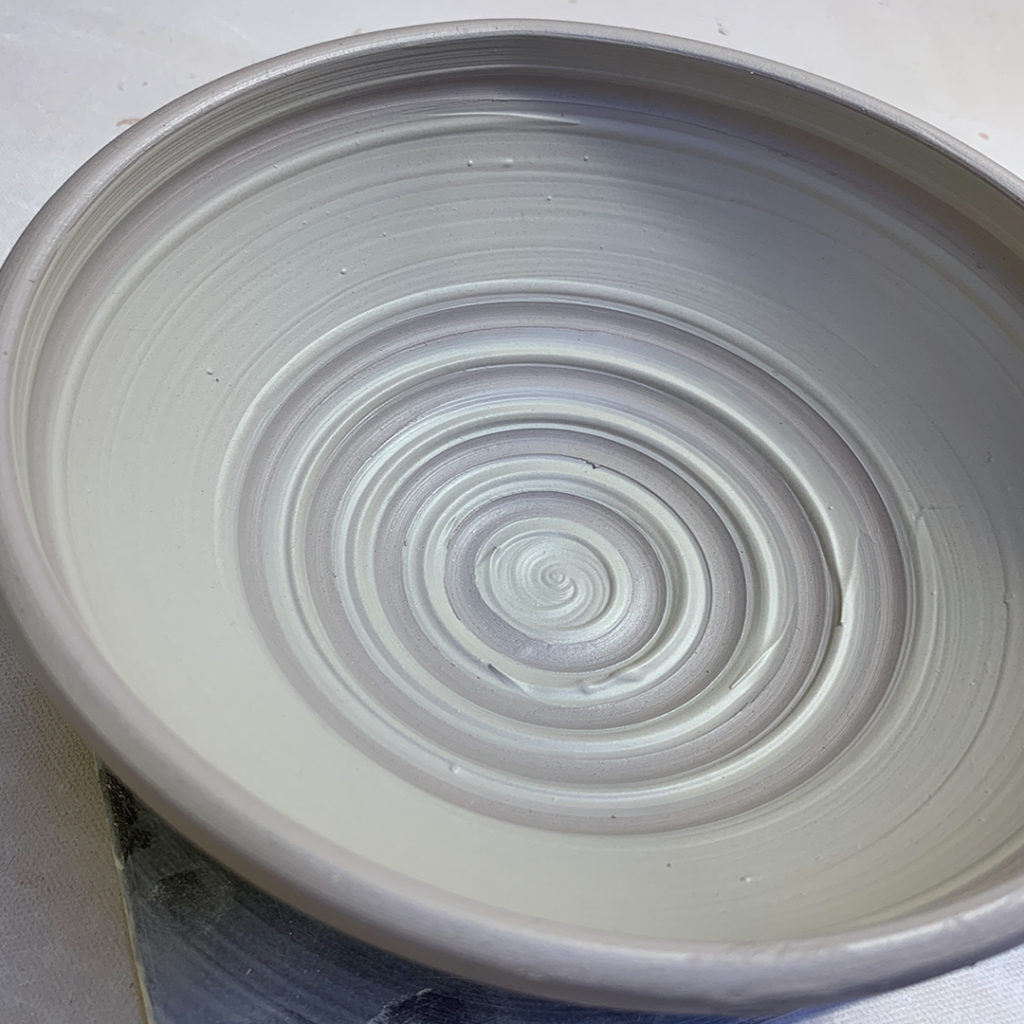
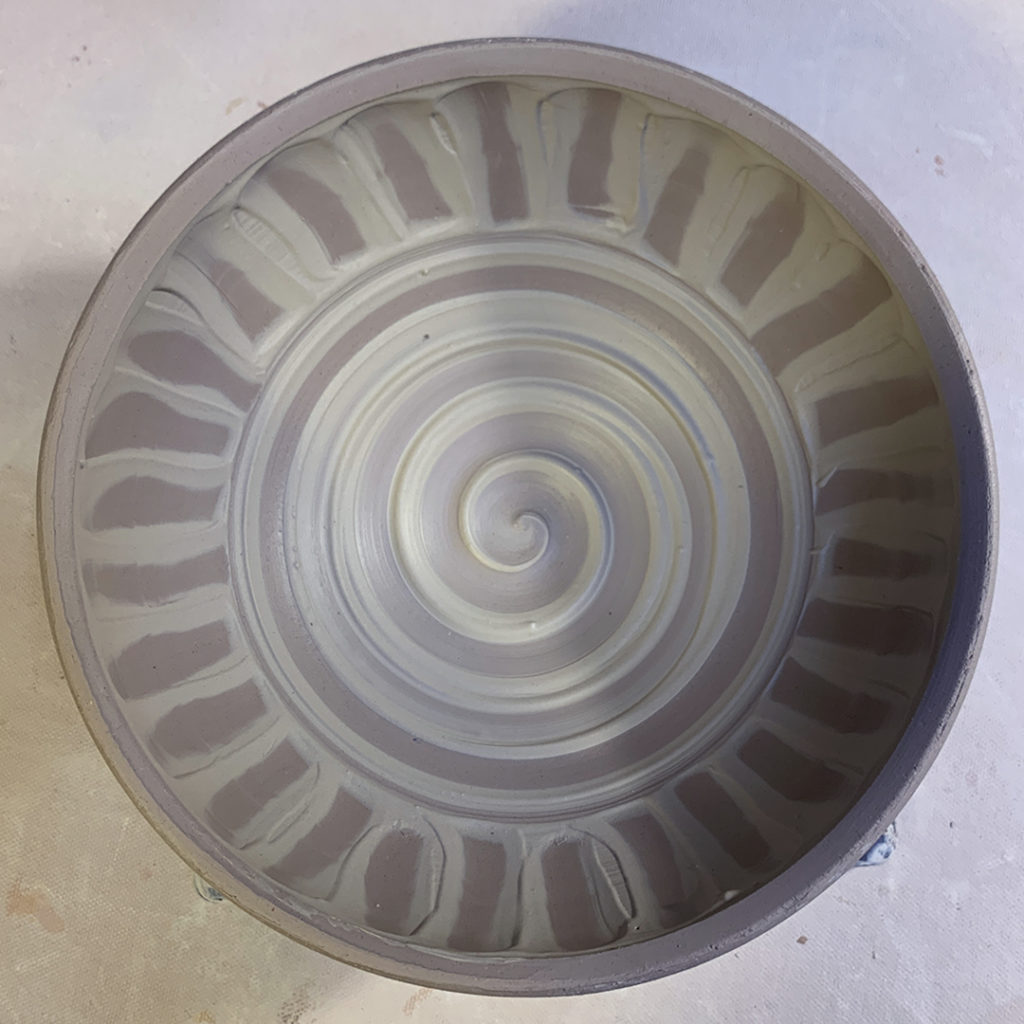
BOWL #9 – thick white slip with a spiral dragged through to reveal the color of the clay body.
BOWL #10 – thick white slip with some banded stripes dragged through.
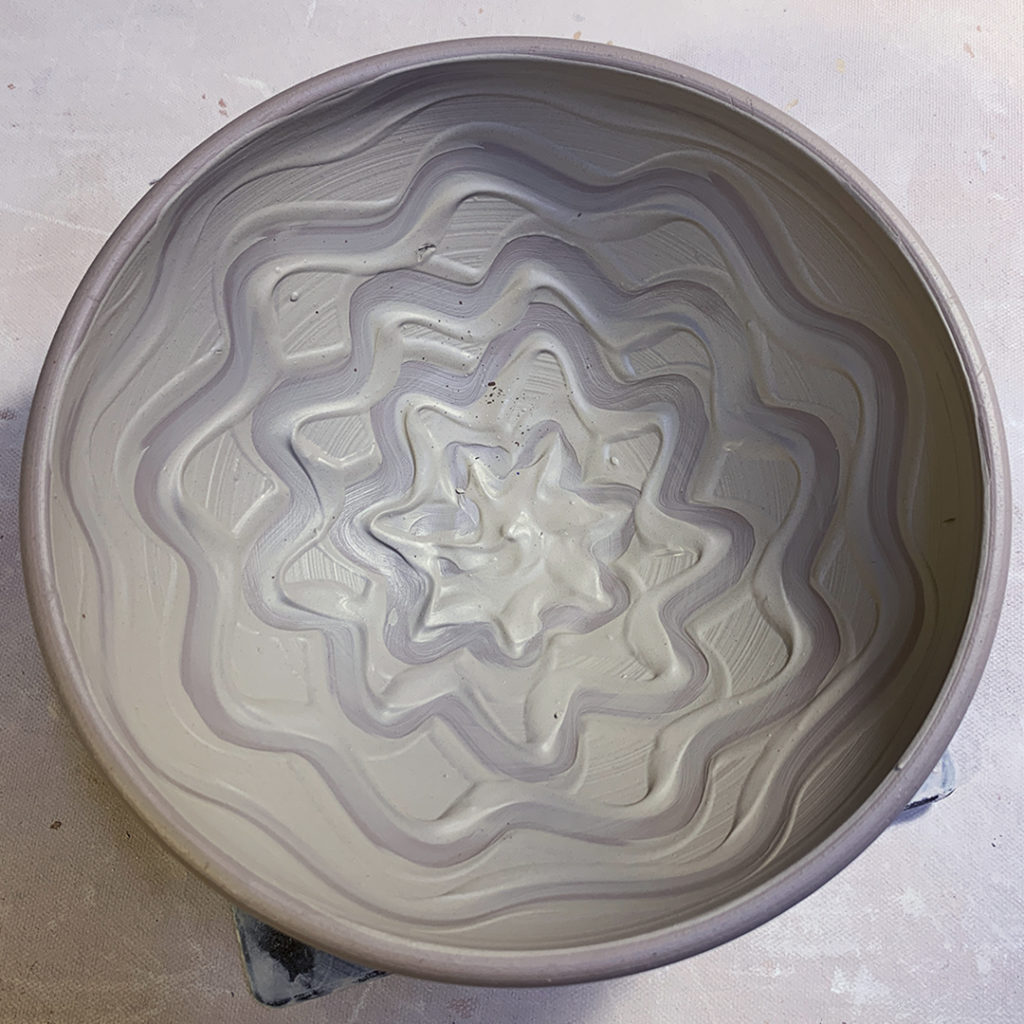
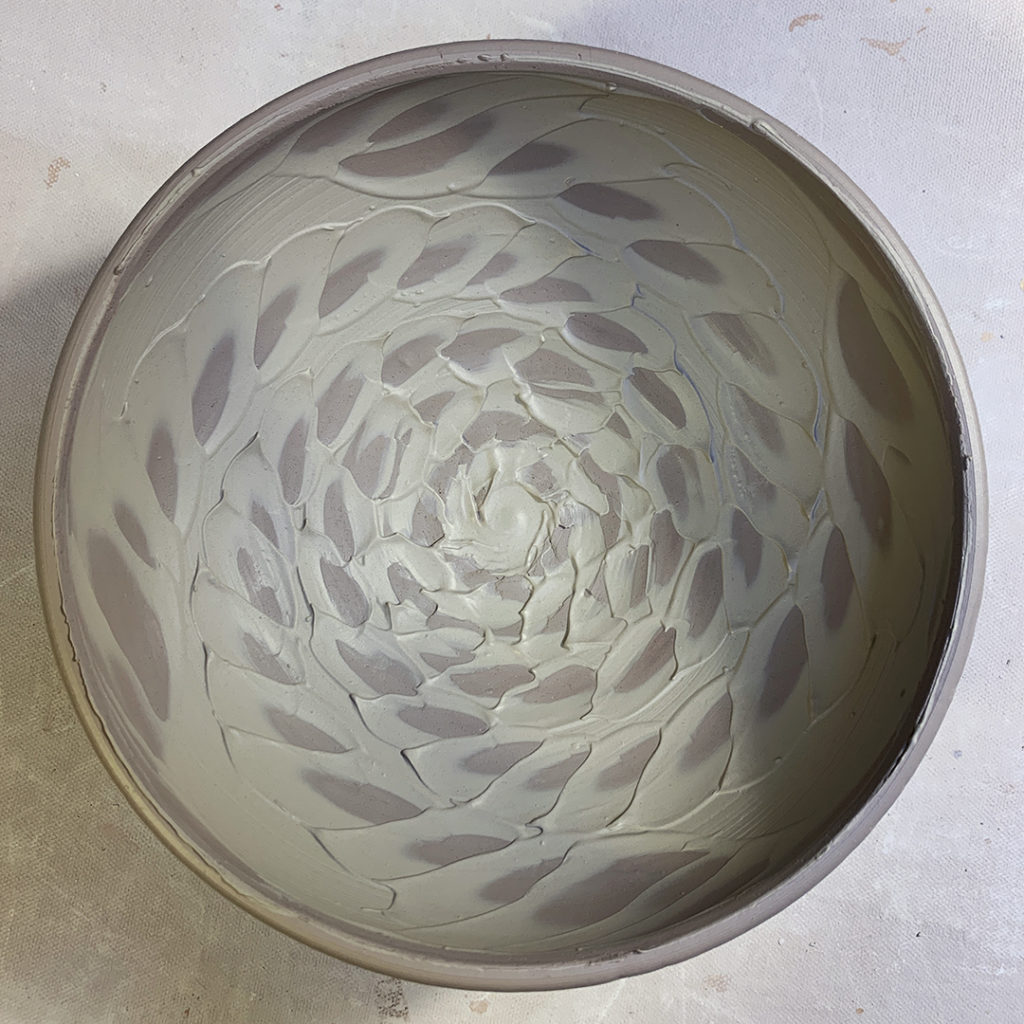
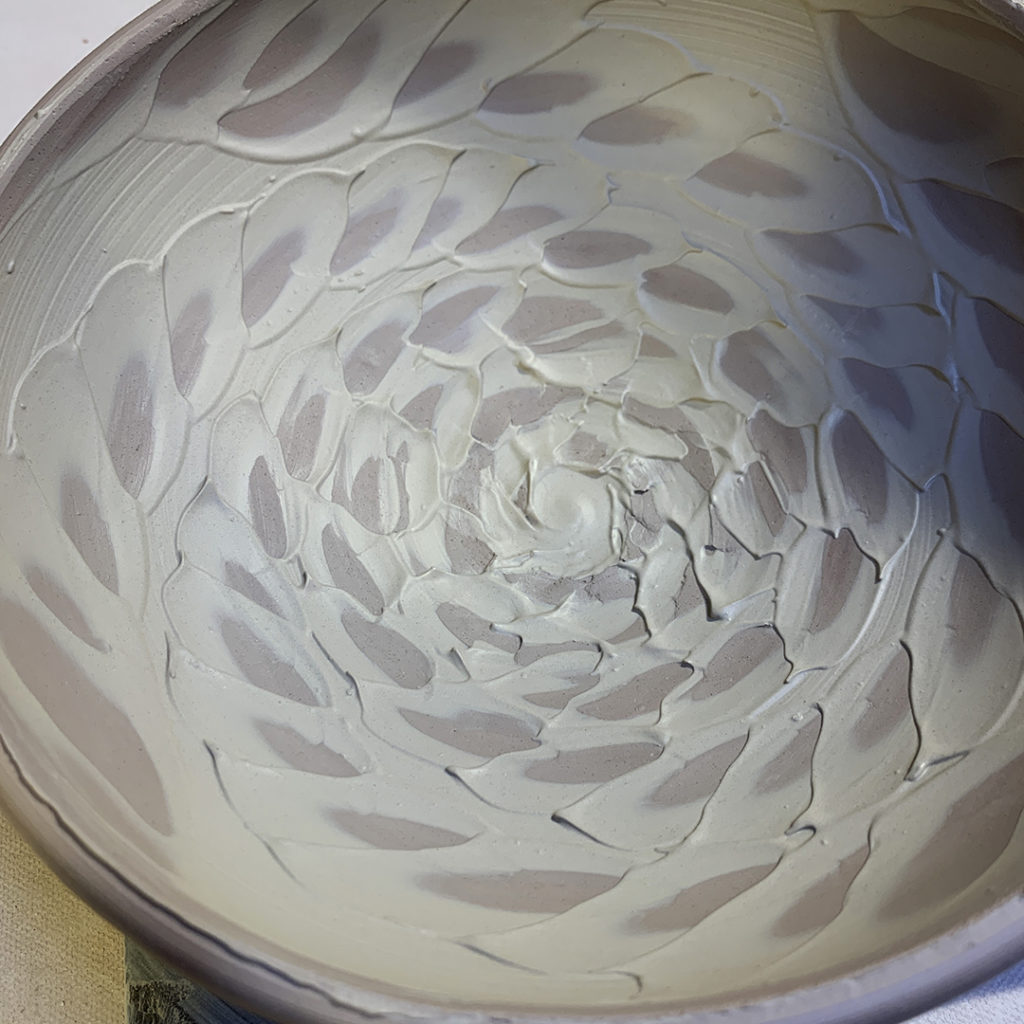
BOWL #11 – thick white slip with some groovy finger squiggles.
BOWL #12 – back by popular demand… another one thick white slip with some groovy finger squiggles… a little closer together than the first one!
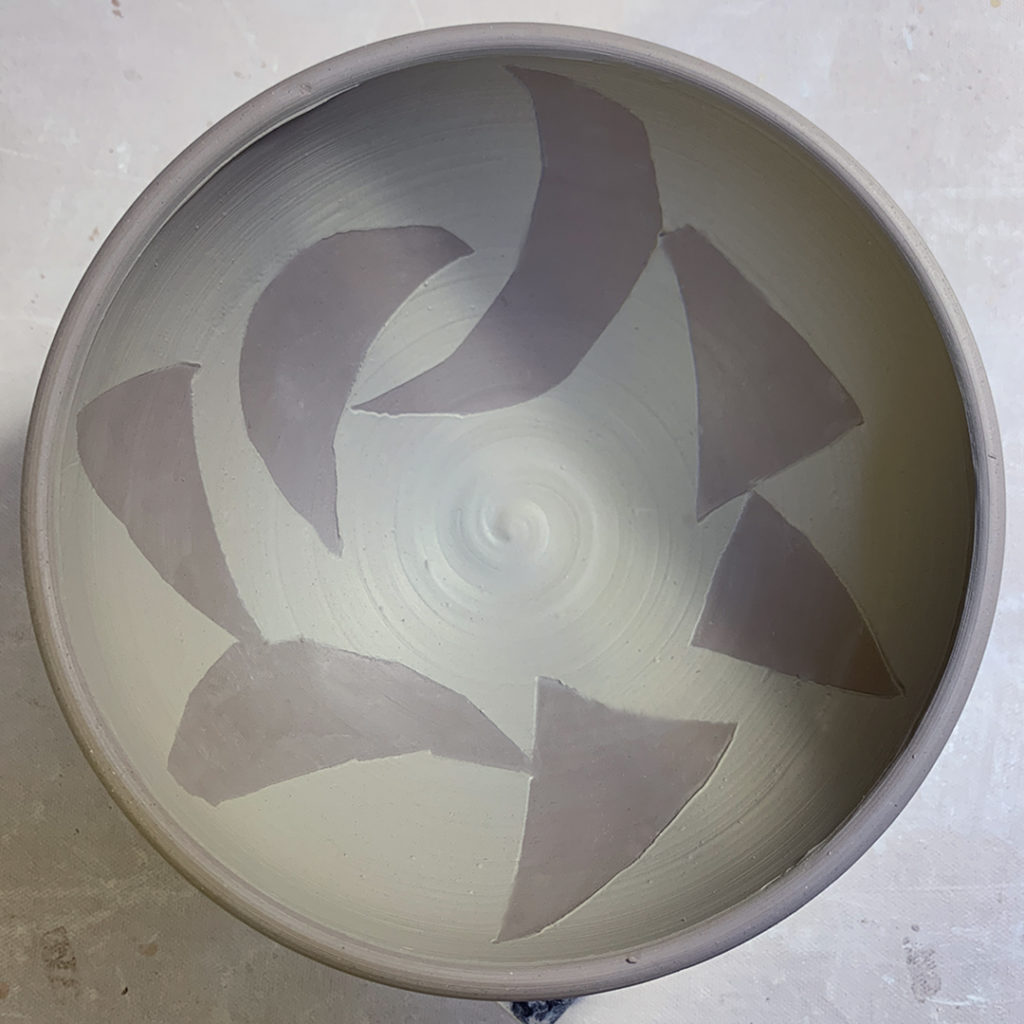
BOWL #13 – newspaper pieces cut out, applied with a bit of water, and then covered with white slip… and then gently pulled out to reveal the original clay body under the newspaper stencils.
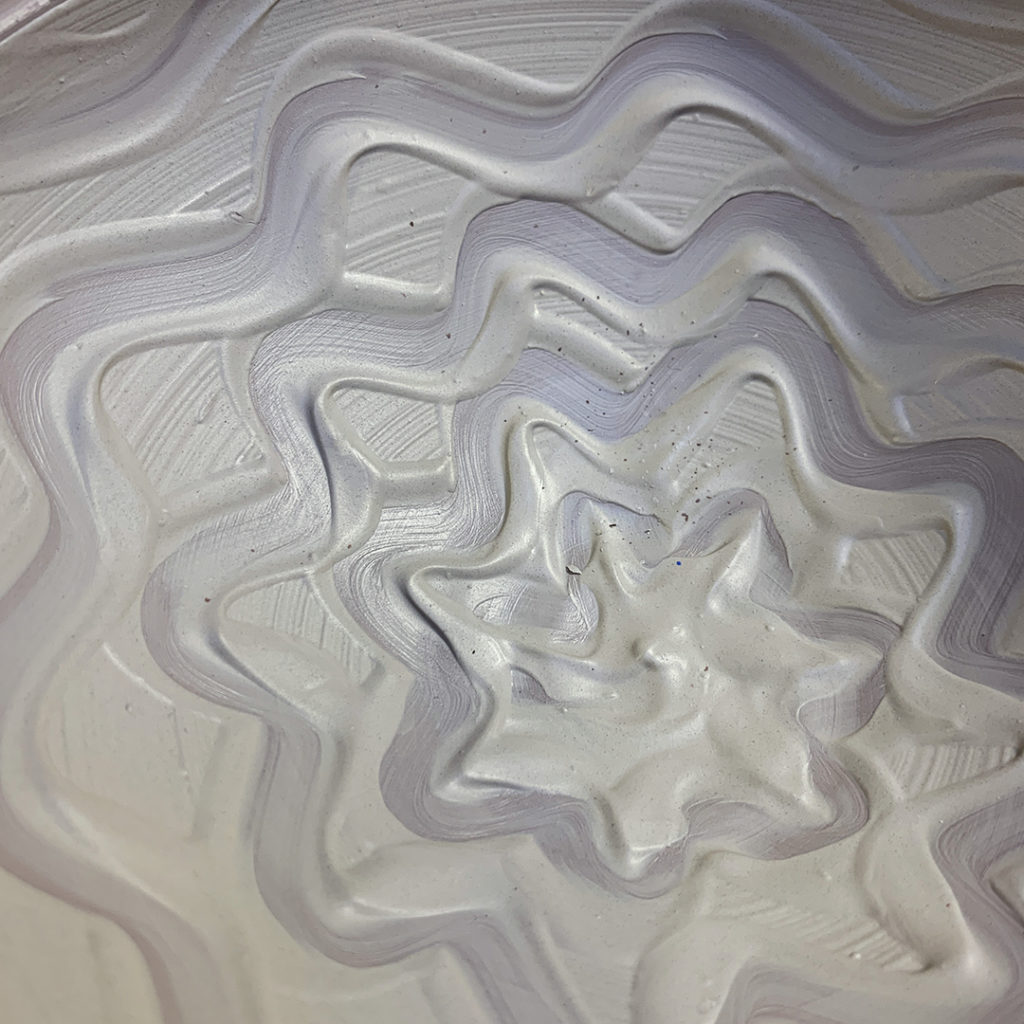
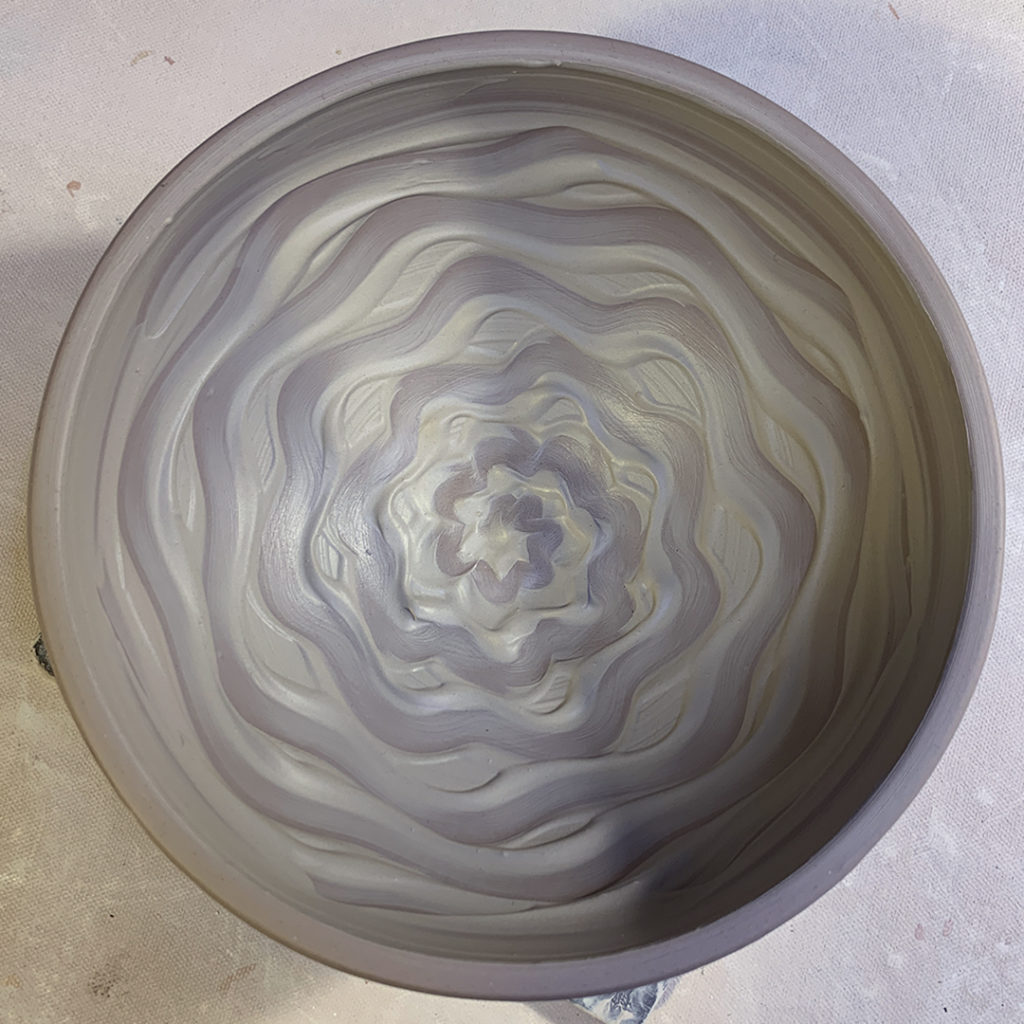
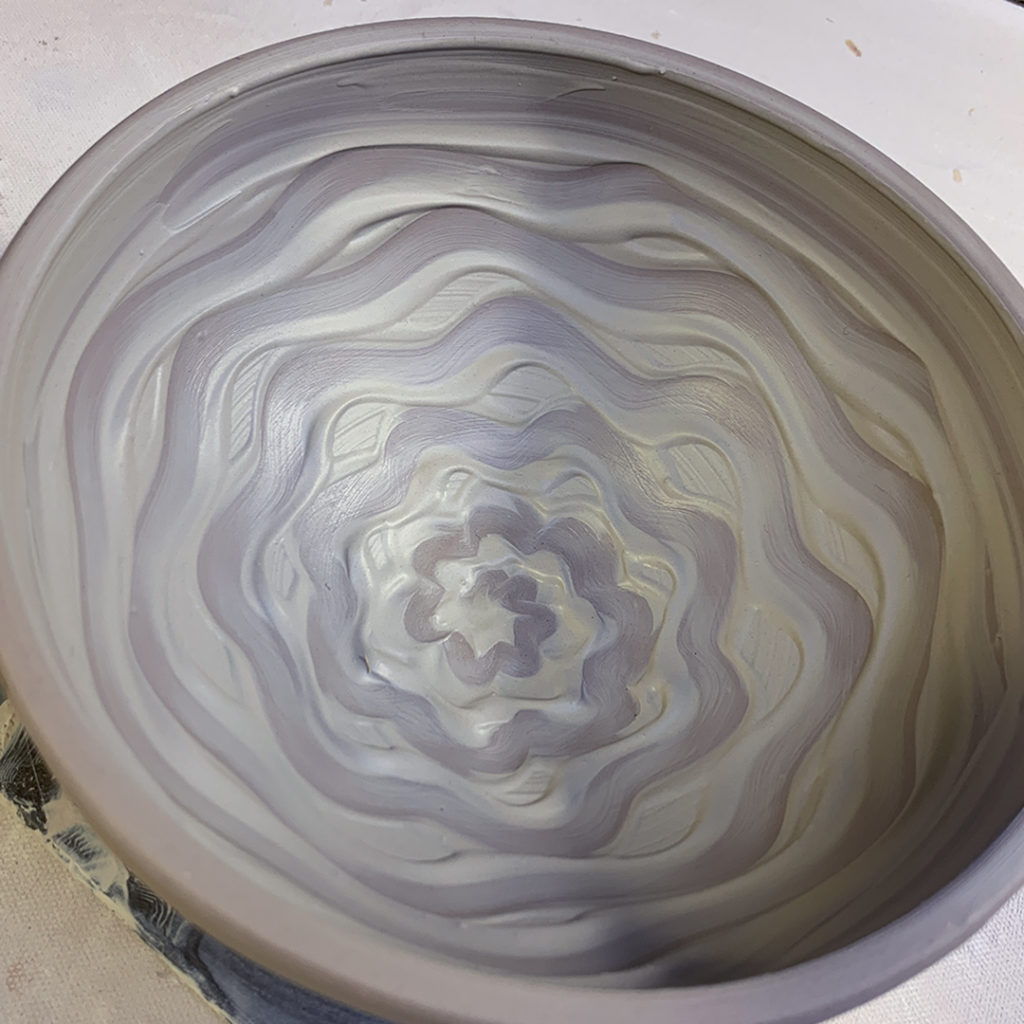
BOWL #14 – thick slip with vertical “swipes” made with a rubber rib, and then a spiral dragged through the middle section.
BOWL #15 – thick white slip chattered with a plastic rib… rhythmic tapping of the rib through the slip while the wheel is spinning.
So for now, my new “not-so-basic” bowls are all decorated from my class demos… and under plastic for the night. I want to keep them wet because there “just might be” some more stamping & decorating to be done! Remember, MORE IS MORE!!!
We had a surprise guest in my beginning pottery class Tuesday night! Nick came into class with a black duffel bag asking where he could stash it somewhere quite & clean. We put it under the wedging table… only after finding out that there was a four-week old puppy inside!!! My student Nick is a veterinarian and was at the vet clinic when someone found this cutie abandoned on the side of the road and brought him in. We all loved it… and told Nick that we now expect a different puppy in class each week!!! HA!!!
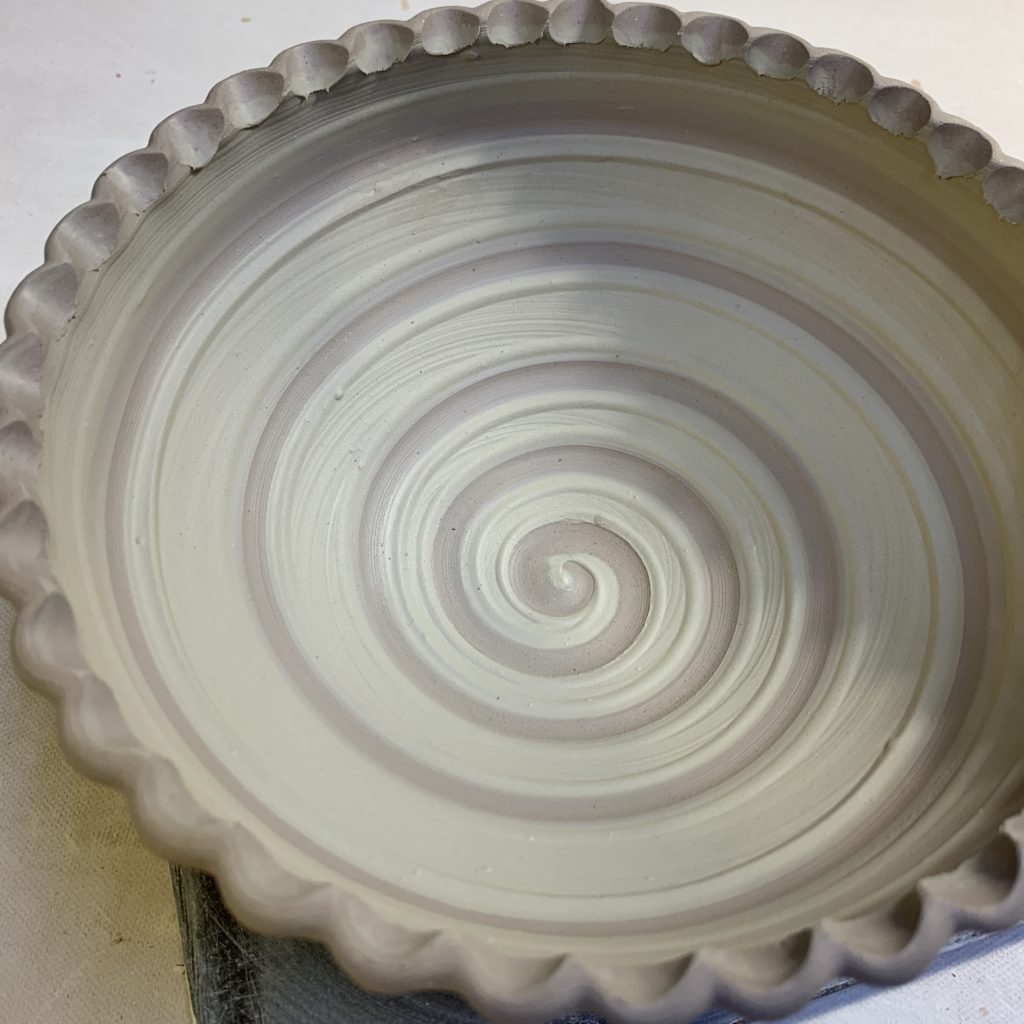
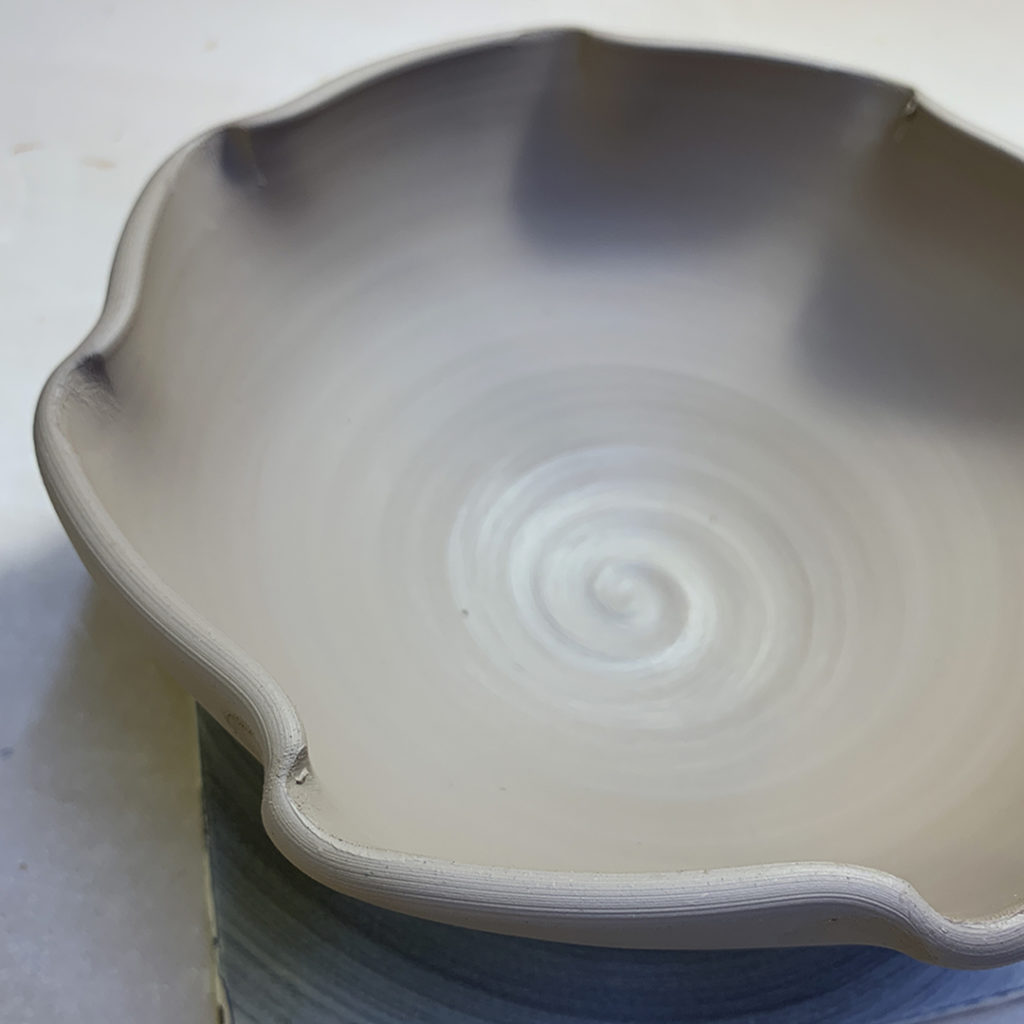
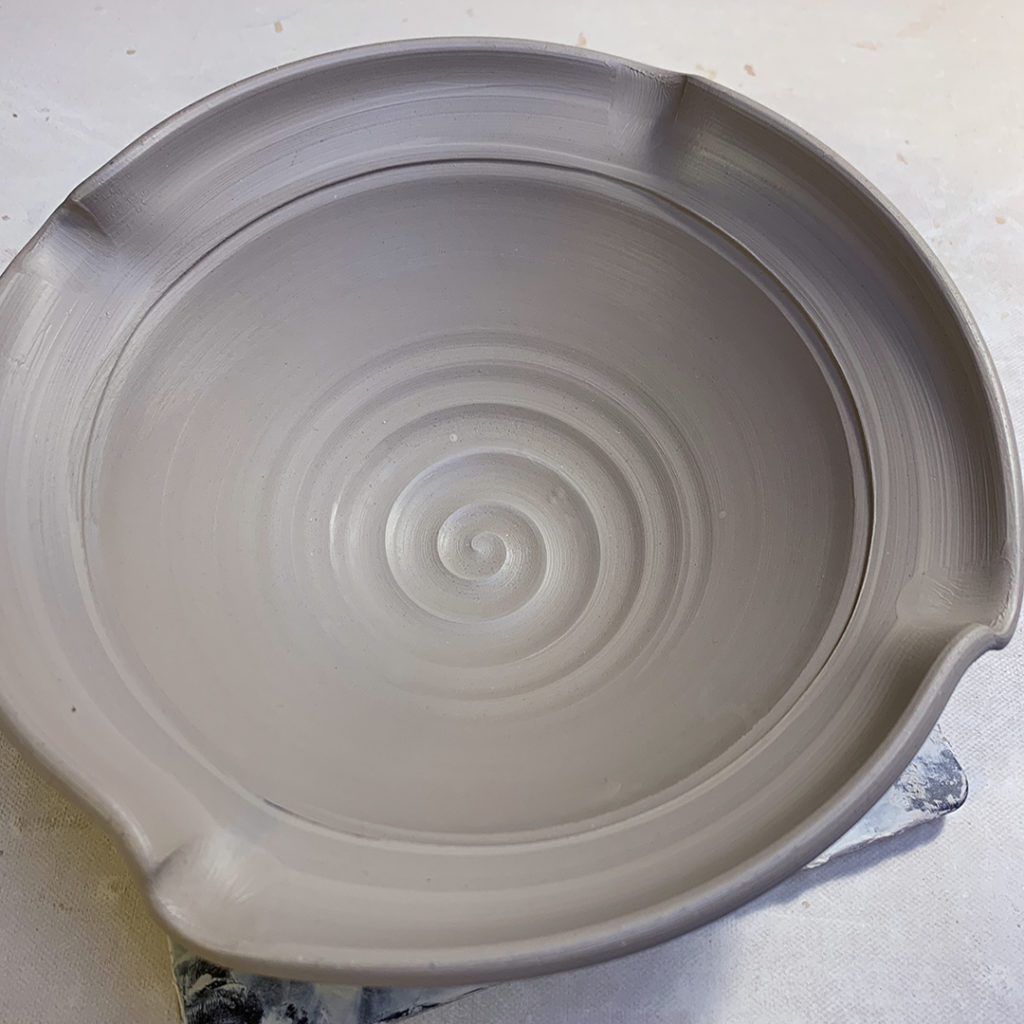
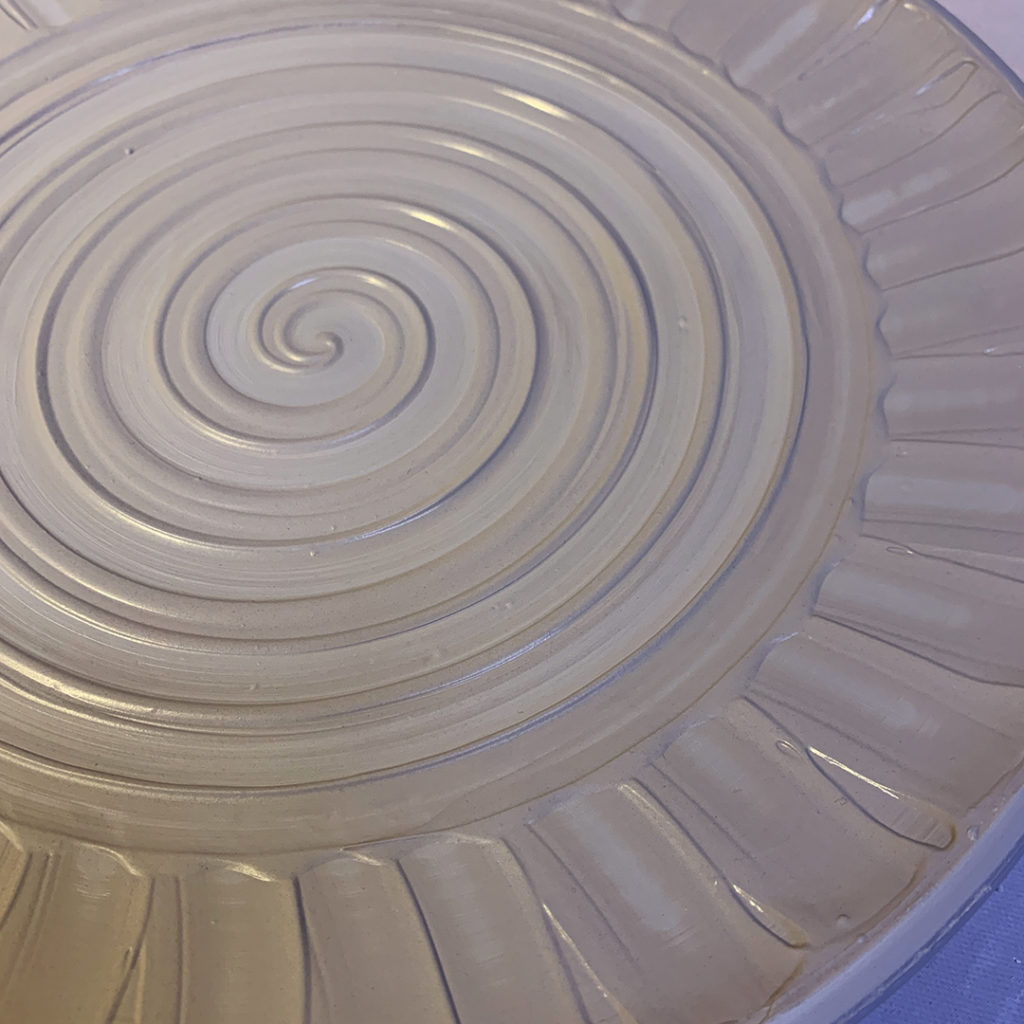
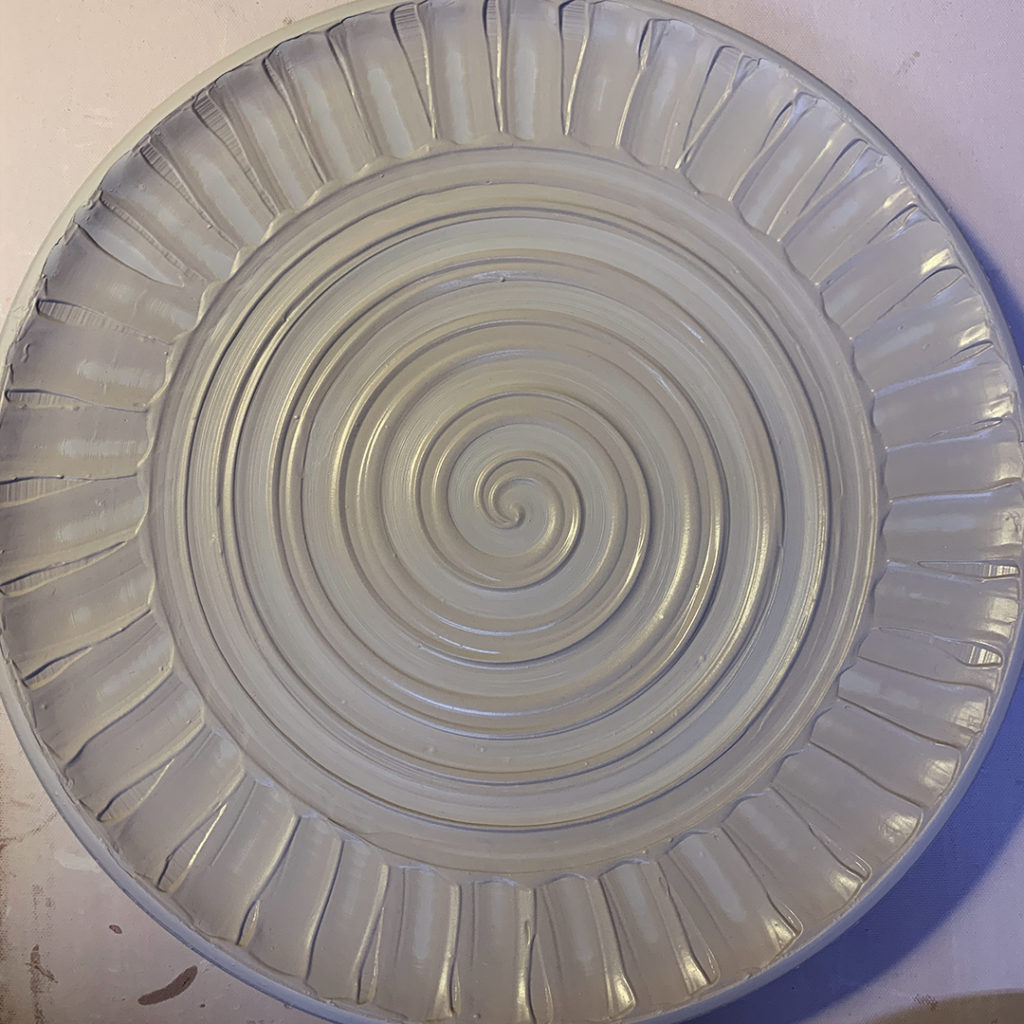
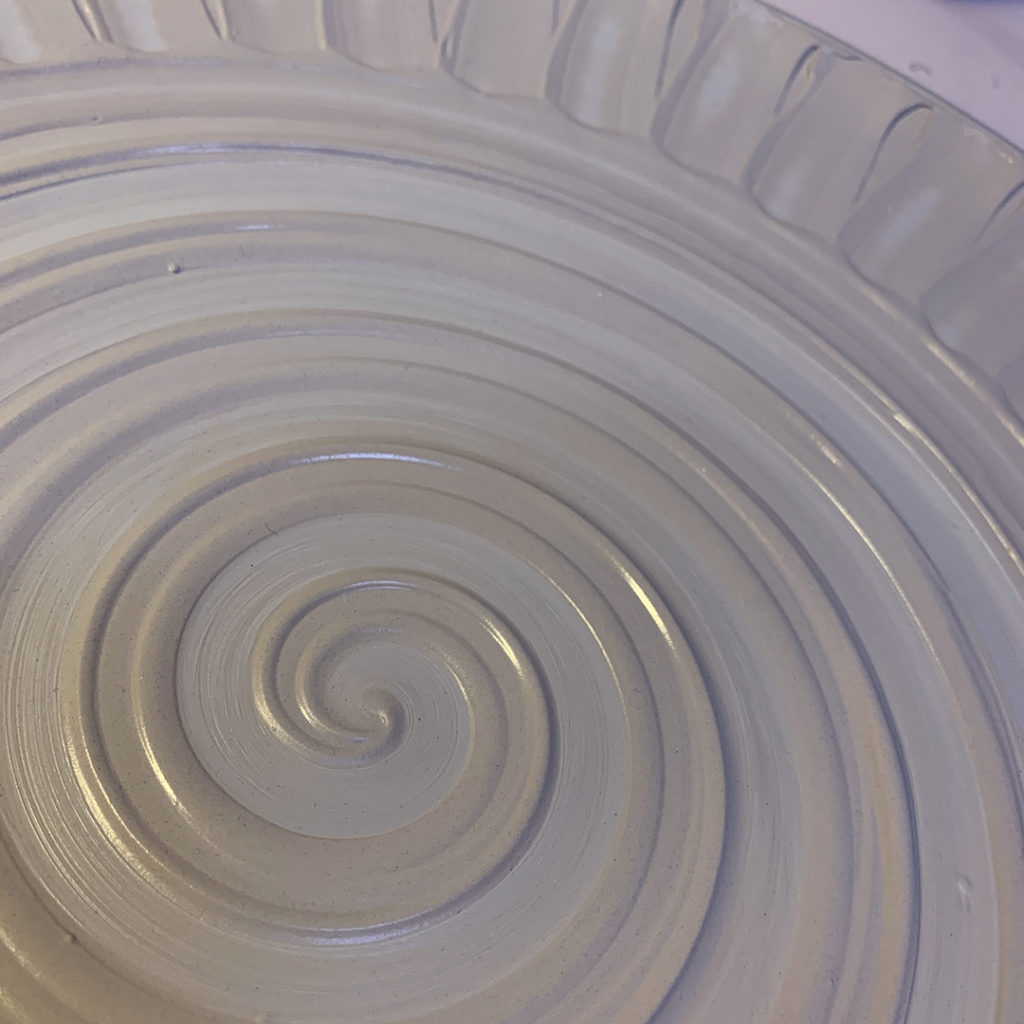
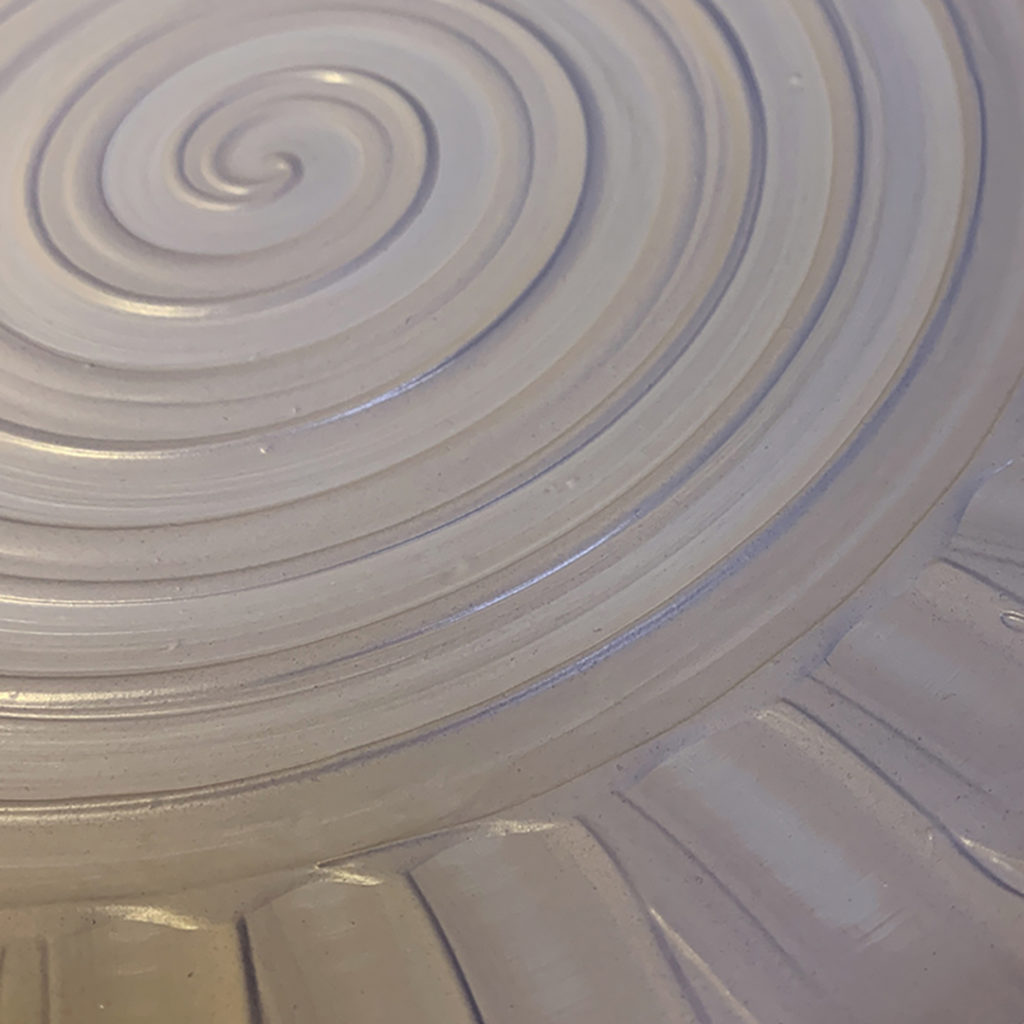
In class Monday night, we tackled a few different forms & decorating techniques. Like this large platter with some thick white slip decoration. The rim has a bit of a “Steven Showalter” influence… someone you should definitely be following on Instagram… and yet you know I can’t resist a good spiral… and there “might” just be a bit more stamping to come too!!!
This week we may have had a couple “yellow towel” moments… celebrating diversity with our favorite cookies! However… we all kind of agreed that they may have missed the mark… as we were all hoping for some rainbow colored filling, edible glitter, or something else a bit more FABULOUS!!!