Well, I’ve run out of bisqued test tiles. Yeah, the ones I made back in January, but who’s counting? Since I went through that first batch so “quickly”, I figured I needed to make another batch so I can get them bisqued and move forward!
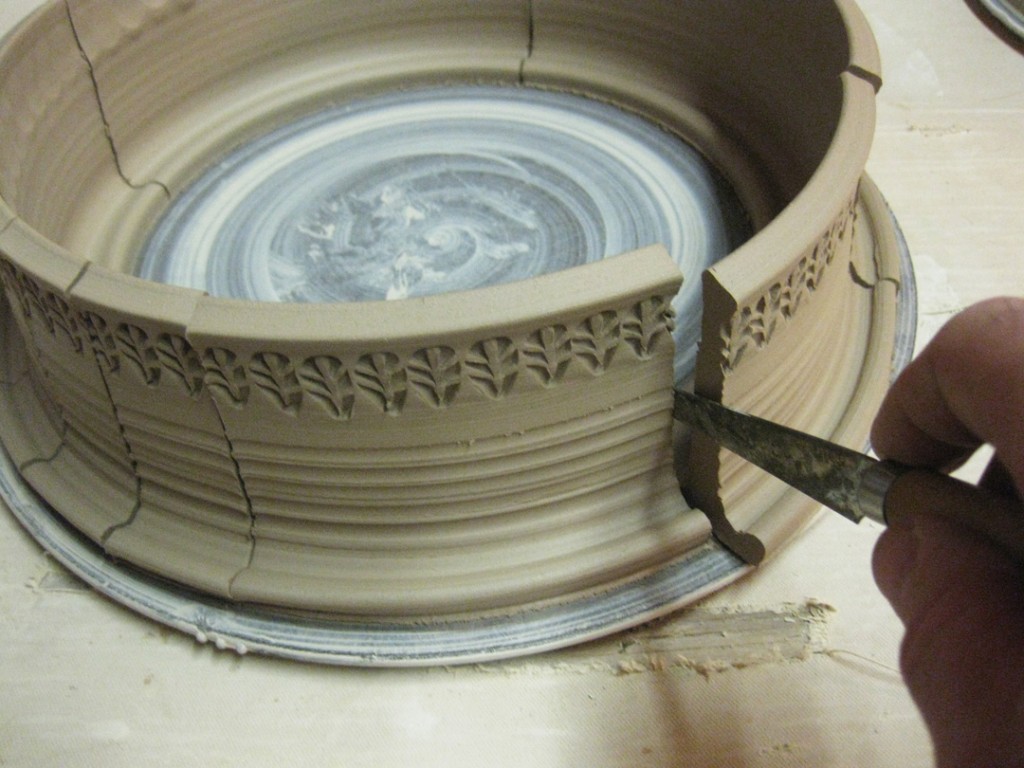
So I started by throwing two bottomless cylinders, one in stoneware and another in soda clay. I added a bit of texture & stamping to help simulate how the glaze test might react on one of my “real” pots if I ever get that far.
Once the cylinders were leatherhard, it was time to cut them up to create some standing test tiles. I threw them with some intentional “glaze traps” at the bottoms. That way if the glaze test runs a lot it will get caught on the tile, and not run onto the kiln shelf.
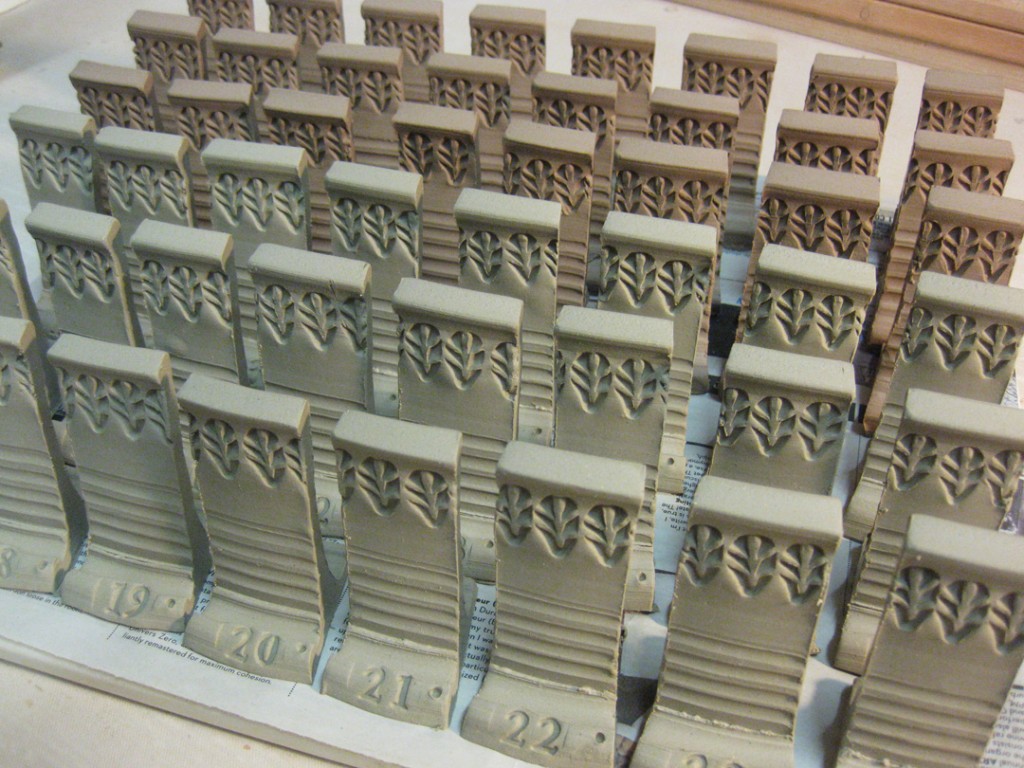
As I smoothed out the edges, I also added some numbers to the fronts of them. I figure it’ll be part of my coding system, to keep track of which test tile matches up with which batch of glaze after it’s been fired.
So now they’re all lined up and drying overnight…


A great idea for better test tiles.
Also where did you get the stamp with such nice big numbers? The numbers on my stamp are readable but really too small.
LAWRENCE –
There’s a pretty good selection of letter stamps at most craft stores. I think I found mine at Michael’s. Check the rubber stamp selection by the scrapbooking stuff. But also look by the “make your own stepping stone” kits. Frequently there are larger letters there!!!
With the “glaze traps” at the bottom, these might just make neat business card holders when your glazes are used up…
Thank you, for posting your test tiles they are beautifully done.