My class Tuesday night was great fun… and always my favorite demo of the session. My new beginners have nbeen working on their centering & throwing skills on cylinders. And of course they’ve “found” a few bowls along the way. Well this week we focused on throwing a good bowl on purpose instead of a cylinder gone bad.
So the way the demo goes is I first sit down to tshow them out to make the basic bowl with a nice rounded interior. No beginner bulges here! After the demo & questions, I set them free to go make their own bowls…. while I continue to throw a full bag of clay into bowls! Once all sixteen bowls were thrown, we re-grouped at my wheel to do some quick tricks & techniques for altering the bowls. I’m a big fan of putting your own twist or design on a bowl… instead of just leaving it round. Anyone can do that. So here are the sixteen tricks I showed the,….
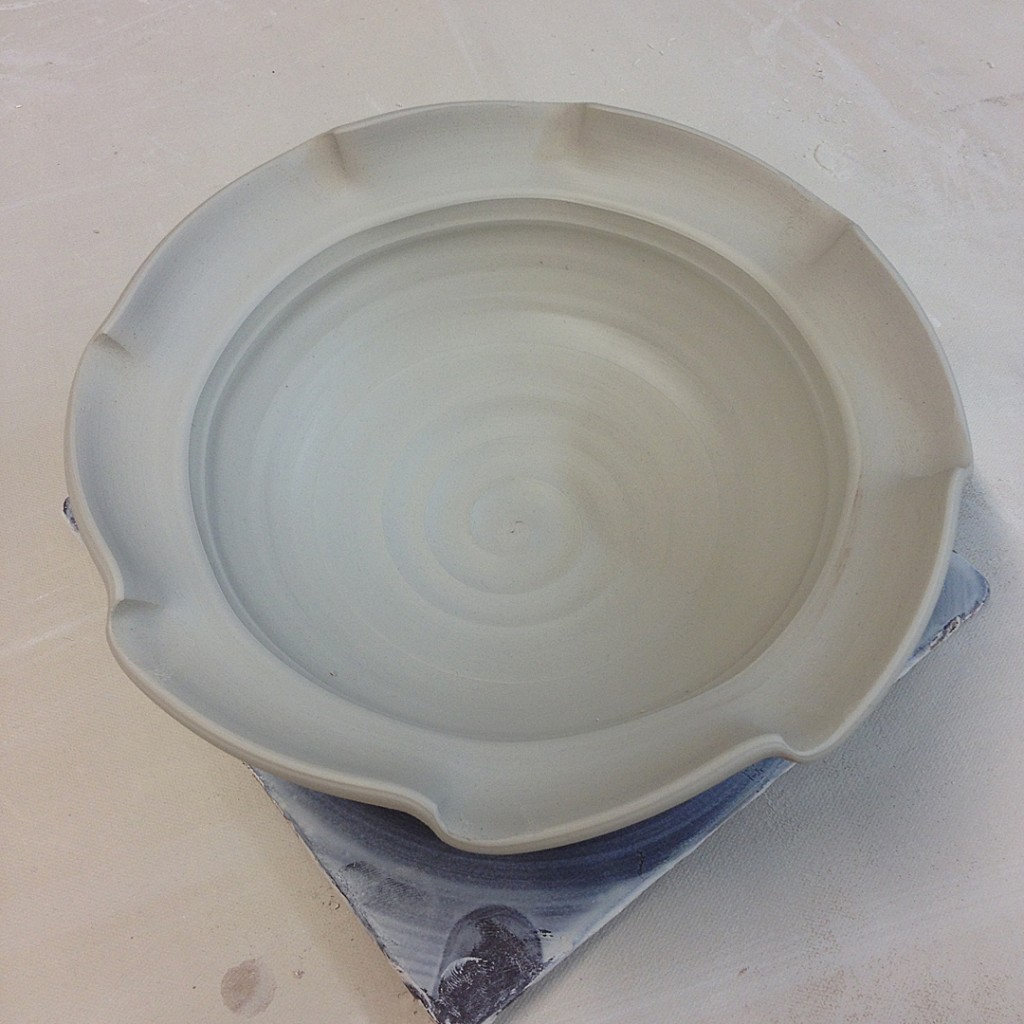
Bowl 1 – a simple bowl with four fluted points and a nice spiral in the bottom.

Bowl 2 – And if four fluted spots are good, maybe eight would be better?

Bowl 3 – Then we flared out the rim to create a nice flanged rim. A perfect sot to do some decorating later. Carving, stamping, slip, glazing, whatever… you now have a nice “canvas” there on the rim.

Bowl 4 – And if “some” flange is good… “more” flange might be better???

Bowl 5 – And then we combined the fluted rim with the flared flange rim.

Bowl 6 – A simple texture pressed into the bottom with a metal dragonscaling tool.

Bowl 7 – And who says bowls need to stay round?… not me…
as we dented in four points to make a clover-ish shape.

Bowl 8 – Next we decided to split the rim with the point of a wooden knife. I then pinched it into four even spaces… and then two more on opposite sides. They all loved that… but the gasps were audible when I stretched it out of shape to an oval. I don’t think they like this one too much…. but I’m sure they’ll come around when they see it with a strap handle to turn it more into a basket later.

Bowl 9 – Again with the split rim, this time four flares out and four flares in…
denting it with the curved side of my wooden knife.

Bowl 10 – Next I introduced them to colored slip. And showed them how easily they can create a two-tone pot faster & cleaner with slip than they would be able to with two buckets of glaze. This is a simple black slip… which I believe I’ll be carving into for a little sgrafitto demo next week.

Bowl 11 – For this one I coated the interior with a thick white slip, and then dragged the rounded end of my wooden knife through to reveal the clay color while the bowl was turning on the wheel.

Bowl 12 – The same coating of thick white slip inside the bowl… but this time some squiggly finger-painting & dragging through the bowl while it was spinning.

Bowl 13 – Again with the thick white slip interior, this time chattered with a rhythmic tapping of my green rubber rib… up & down through the slip, and out towards the rim as the bowl is sinning. This design is slightly different every time based on the speed of your tapping and the speed of the wheel rotating.

Bowl 14 – A simple spiral of black slip as squirted from a small bottle… and a small fluted edge using the side of a medium Sharpie marker!!!

Bowl 15 – A simple lesson on how easy it is to make bands of color… just hold the paint brush still and spin the wheel. My guess is that these bands of green slip will be carved through at some point.

Bowl 16 – An ombre blend of white to green slip… and I’m loving the tight spiral of thick slip in the bottom of the bowl.

So for now… all sixteen bowls are up in my studio under plastic. I’m “pretty sure” that there will be some stamping, decorating & refining of these before I get around to trimming. Just a hunch.


[…] Gary Jackson: Bunches Of Bowls […]
Love all your wiork! So inspiring! Thanks for sharing