Timing is everything. I frequently tell my students that it is one of the hardest parts
of the entire pottery process. Trying to catch your pieces at the right stage of drying
so that you can effectively stamp, alter, trim, slip, whatever. Well, today was that day!
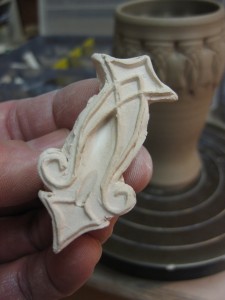
Not only did I have a table full of pots to stamp, but I also had some new stamps
fresh out of a bisque kiln. Remember a few weeks back when I tried a new method
of making stamps? Well now that they’re bisqued, I can finally use them on pots.
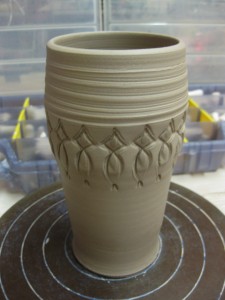
So here are the first three cylinders that I stamped with them. The jury’s still out…
not sure if I like them, not quite as “clean” as I would like, and I need to work them
into my own style if I’m going to make more of them. We’ll see…Â it’s all part of the
“learning curve” when trying new things. Some times they work. Sometimes they don’t.
Sometimes they just need some more time to “percolate” in your head!
I did a few with the new stamps, but had a LOT of cylinders to be stamped. So I set forth &
stamped all day long. Cylinders for mugs, and taller cylinders that will become tumblers.
Once they were all stamped, they were then also ready to be trimmed.
So I started trimming them and putting them back under plastic to keep them moist
enough overnight. Tomorrow I need to add the handles to make them mugs!
Again… timing is everything!


Gary,
Have you had any more luck with your “new stamps”?
Love, love, love this blog.
Thanks for all of the great inspiration!
FIONA – I’ve been using my own stamps for SO long now, that it feels really odd to use these “new” stamps. I’ve made a couple batches of things, but need to keep refining the process. I will keep working on them and hopefully land upon something worth sharing again soon! Thanks for asking.
I had just seen the post on how to make the new stamps (I’m trying that technique out myself tomorrow and I wanted to brush up on it and be sure I understood it properly) and I was glad to find the post where you tried them out so easily!
I have a suggestion for you. When you make the plaster cast stamp, carve closer to the design and do it on the inside as well as the outside to get a really deep, clear impression. I’ve previously made stamps with coils and then applied them to a handle, but it’s kind of a pain so I’m going to experiment and see if I can use the plaster mold technique instead and just cut it deeper. (I hope this makes sense, and I know that this is a year-old post … LOL You’ve probably got it all figured out by now)
P.S. I meant, when you cut around the design, do it closer. I’m too tired to make sense!