I had several comments on Facebook when I posted a picture of a class demo oval
that I made with a stamped & fluted rim. So I thought I would go ahead and re-create
the demo in a photo version for those who couldn’t make it into my class!!!
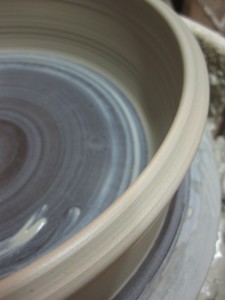
The first thing you need to make a simple oval is to throw a bottomless cylinder.
The the choice is yours… a decorative fluted rim or plain?! For this demo, I chose fluted.
So just before finishing it off, I take a pointed wood tool and literally split the rim
into two equal sides. These two “sides” of the rim will be converted to the fluting.
Once the bottomless cylinders are thrown, they need to set-up a bit before stamping.
These ones I wrapped in plastic overnight, and they were still just a bit stickier than
I would have liked. When I came back the next night, I carefully re-wired them off the bat
and formed them into the oval shape I was looking for. In this case, a nice oval casserole.
Still a little too sticky, but I went ahead… and stamped away with reckless abandon!!!
I then use the spacing of the stamped pattern to determine where the fluting will occur.
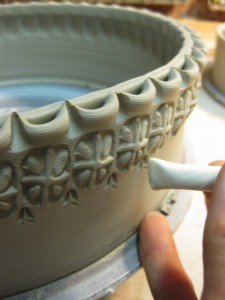
I take another stamp with a smoothed edge and literally press it into the outer rim until
it meets and attaches to the inner rim. It’s that easy, as long as your cylinder is still wet
and sticky enough for them to join back together. Make sure your cylinder is still on the
“wetter” side of leatherhard so that when you press the two rims together they will stick.
And if a few stamps are nice, even more stamps are better. So I went even further and
added another row of stamps, this time smaller, to add another nuance to the pattern.
And then, just for fun… I used the same little stamp to create a little interior stamp detail
where each of the fluted sections connected. Feel free to stop stamping anywhere along
the way… if you can. It’s kind of addicting…
So now, you’ve got a decorated oval or two… without a bottom! Set them aside
and let them stiffen up a little more while you move on to the next step.
While your ovals are open to the air and stiffening up, throw a slab of the same clay
and the same thickness as your oval. Then carefully place your decorated oval-cylinder
on top of the slab and “trace” around it with a needle tool. The remove the cylinder.
With a metal fork, I go around and score deeply just inside of the traced line. I also flip
the cylinder over and very carefully score the bottom of the cylinder too. Then it’s a row
of slip on top of the slab scoring. Gently place the oval on top and line up your scoring.
Gently press them together until some of the slip squishes out. I then carefully flip them
back over again and use a thin wooden spoon to “paddle” them together… creating a little
angle on the edge, as well as sealing the seam very tightly.
Once you have the bottom & edge all cleaned up, you can carefully flip it back over again
and smooth out the interior seam. Hopefully you’ve got a tight connection and a clean line
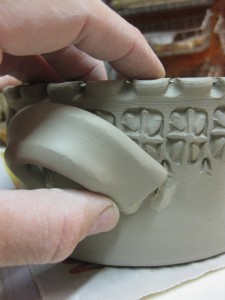
to smooth together inside. As this is a larger oval, I decided to add a handle on each of the
ends of the oval. If someone is going to actually cook in this casserole dish, the handles
will make it more functional and easier to pull in & out of the oven. Again, be sure to
score & slip, press it together and smooth out your edges.
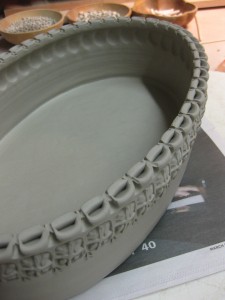
And there it is! A finished oval ready to start drying slowly. I want all of the parts to find
a sort of “moisture-equilibrium” before I let it start drying. So I keep it wrapped under
plastic overnight. Then, I unwrap the plastic loosely for the next couple days. Then it’s
fully unwrapped, drying and ready to go into the bisque kiln.
Good luck with your ovals… and if you have any questions, please let me know!
And remember, the same decorative technique can also be used on other shapes.


Brilliant!
Wow Gary that is really impressive!
You Rock!
Love it. Must try tonight!
Very pretty and explained well!
I am fascinated with your stamping. You have taken stamping to a very high level.
Parabénsssssssssssssssss!!!!!
Muito bom, amei!!!!!
Parabéns!
Explicaçoes excelentes!
Grande aprendizagem.
De grande valia para nós amantes da Cerâmica!
Sucessos sempre!
Cleide Ferreira
Amei as Peças!!!!!! As técnicas nos acrescentam muito!
Cleide Ferreira
CLEIDE – Thank you for the wonderful comments. I’m not fluent in Portuguese… but I understood the message. Thank You.
All this awesomeness on one casserole dish!!! Nice!!!