04.01.2021
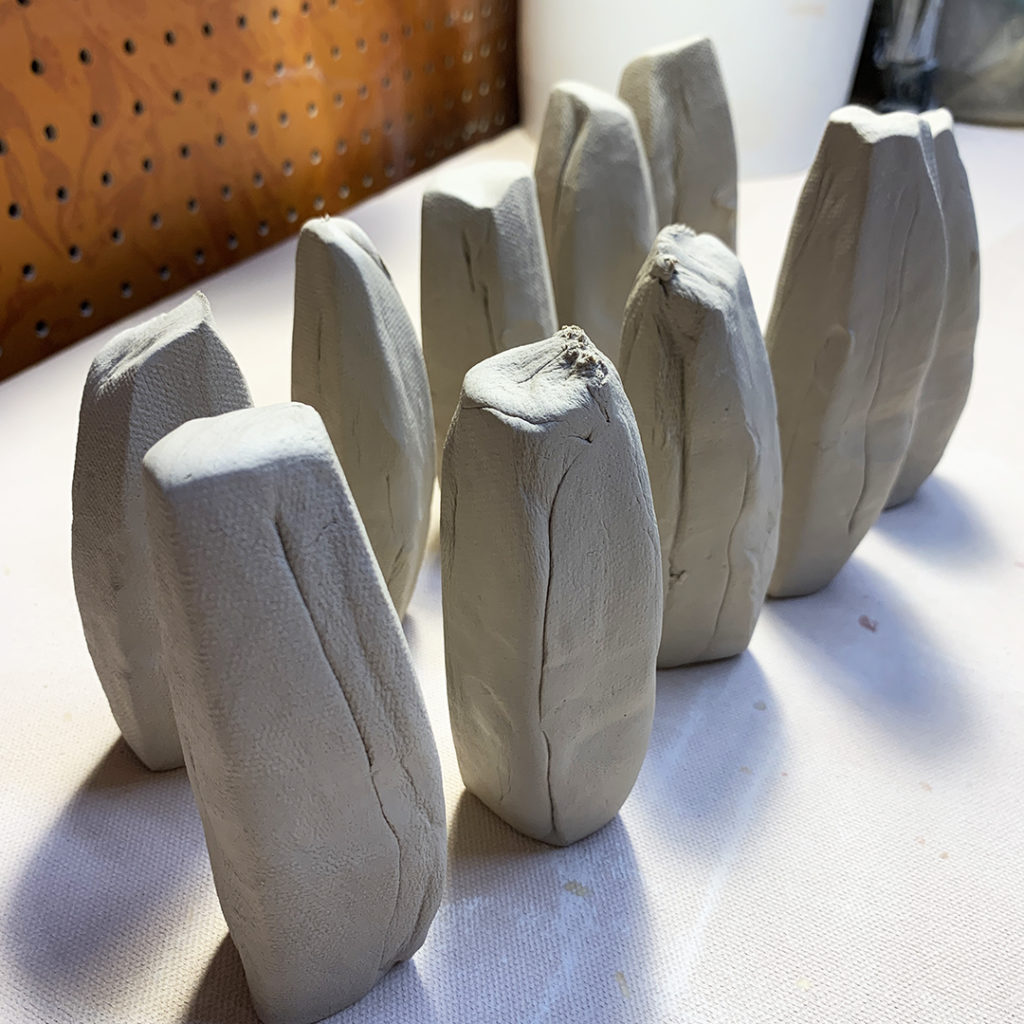
Got my clay wedges ready… kinda like ClayHenge…
ready to start pulling some handles for the latest batch of mugs!
Gary Jackson: Fire When Ready Pottery
A Chicago potter’s somewhat slanted view of clay & play |
Got my clay wedges ready… kinda like ClayHenge…
ready to start pulling some handles for the latest batch of mugs!
Now with handles attached, these “wheelthrown-handbuilt-combo” mugs needed a bit of color. So I dipped the top portion of them into a thin colored flashing slip. I held them upside-down by the footring & dipped them in the bucket… and then “floated” them on kiln bricks so they could drip-dry!


The slip does a really good job of “filling” any of the little cracks & imperfections… as well as adding color. These flashing slips will change colors & add some flashing drama when fired in the soda kiln!


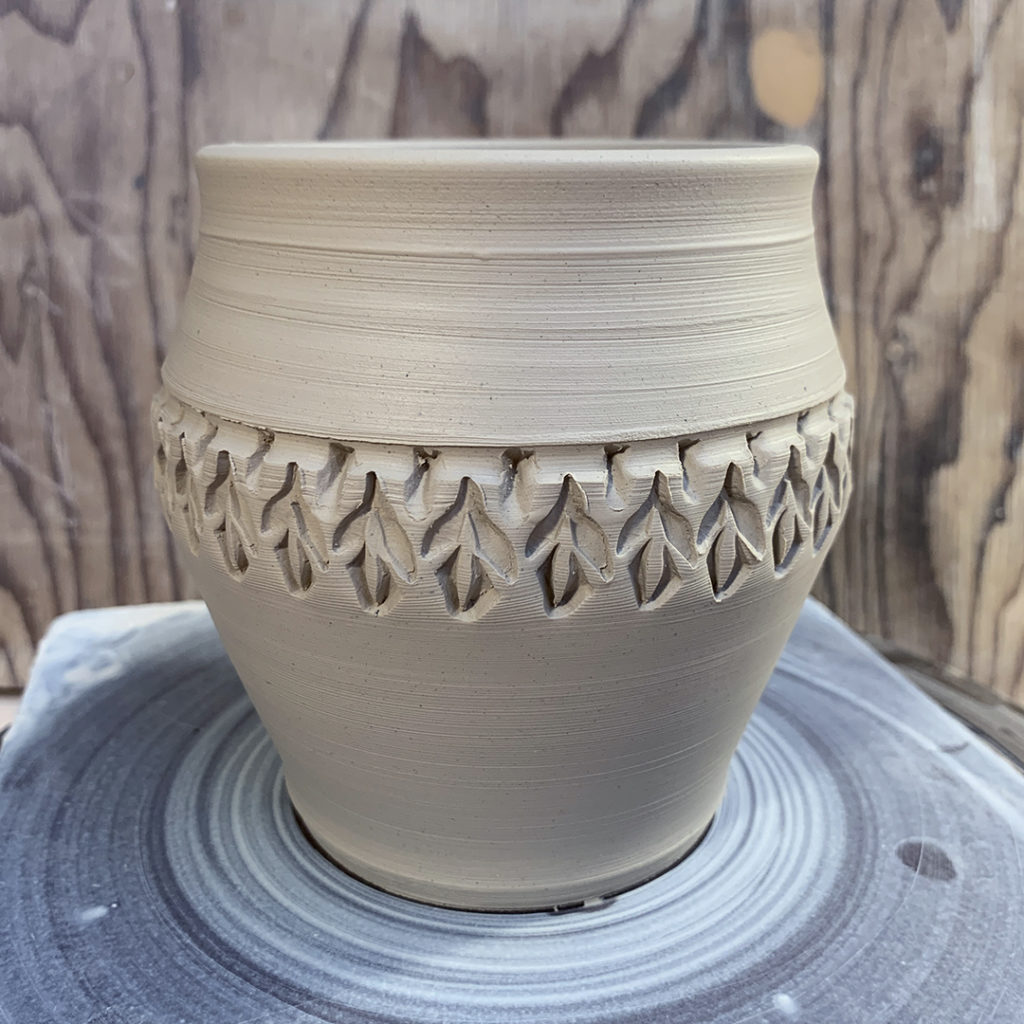
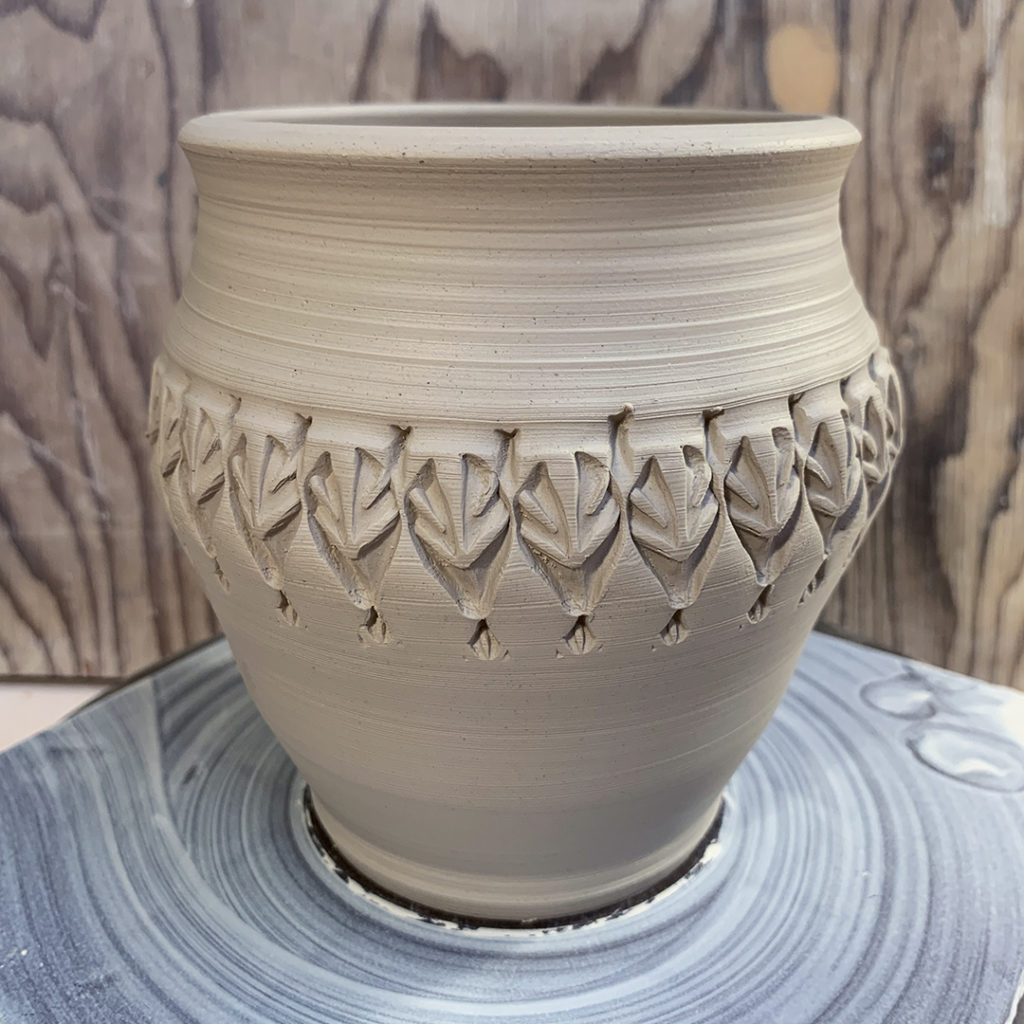
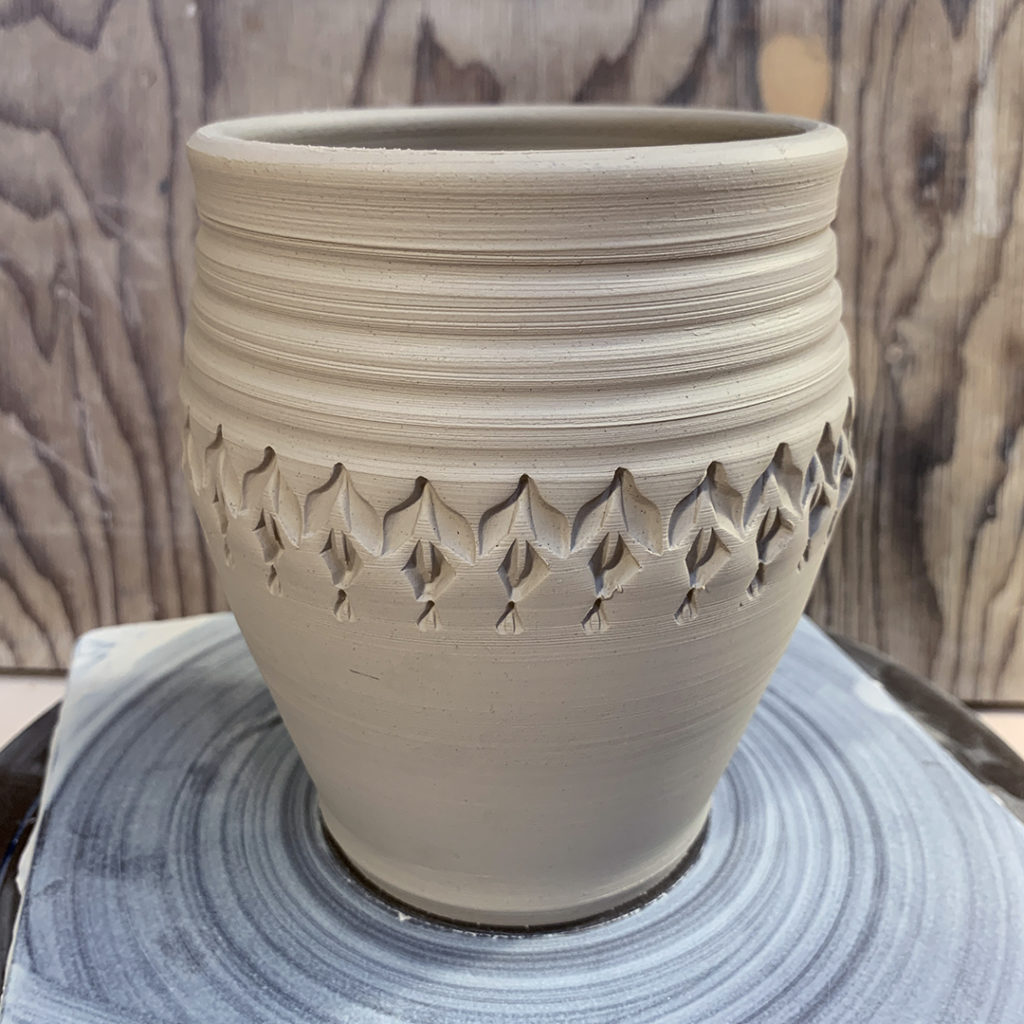
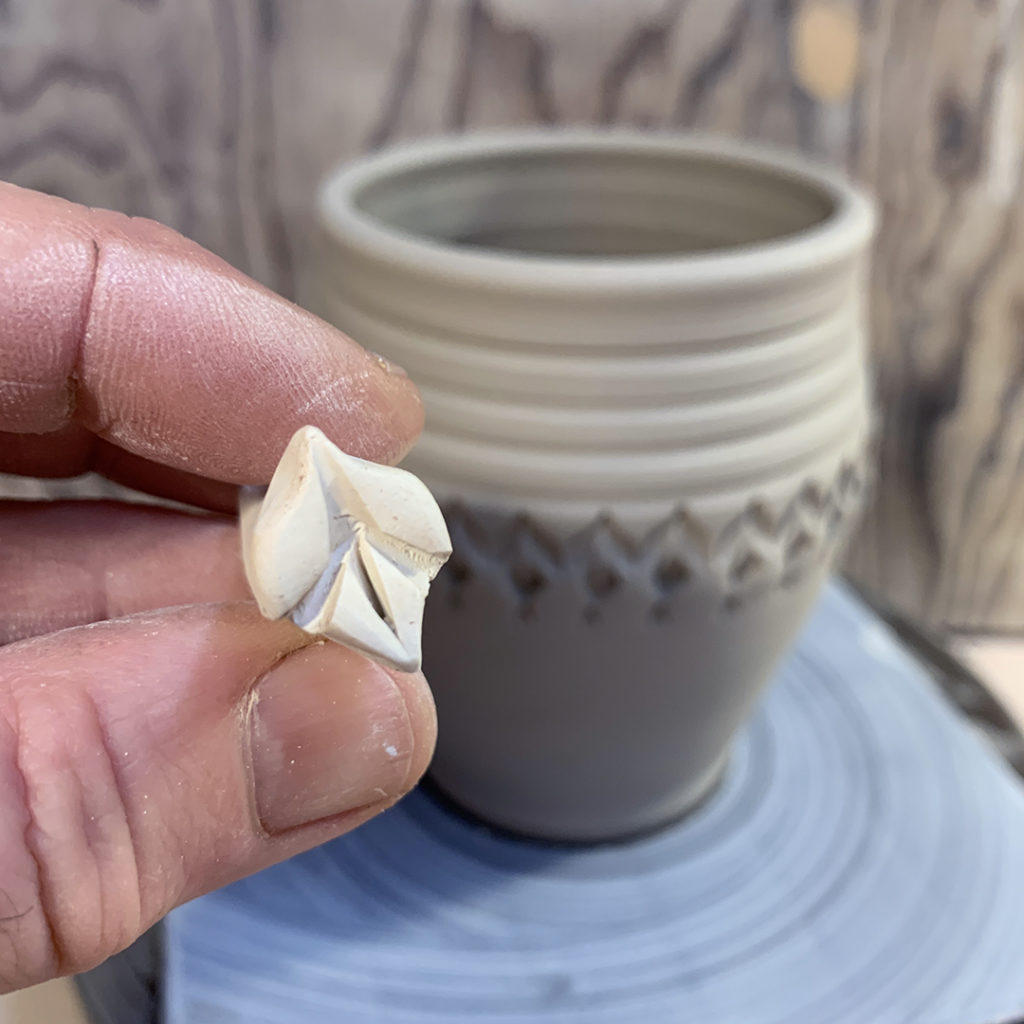
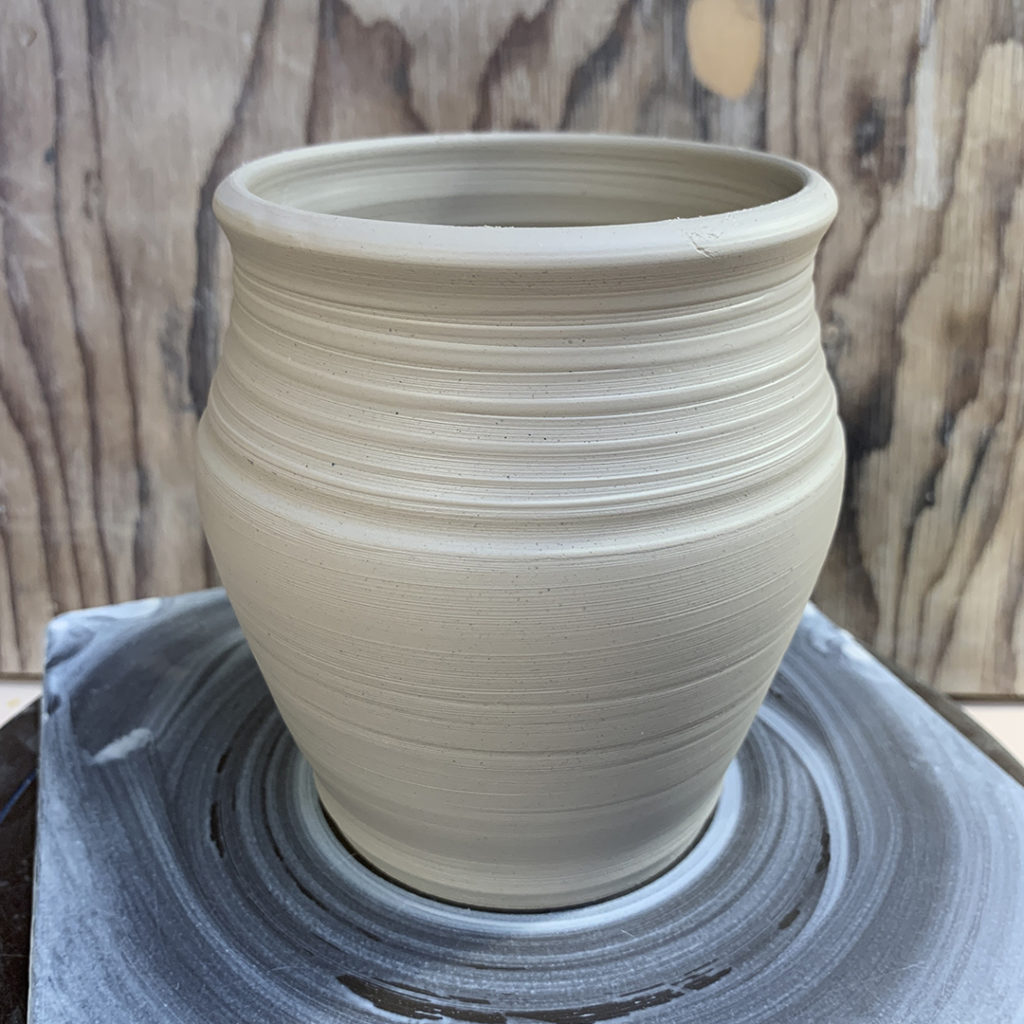
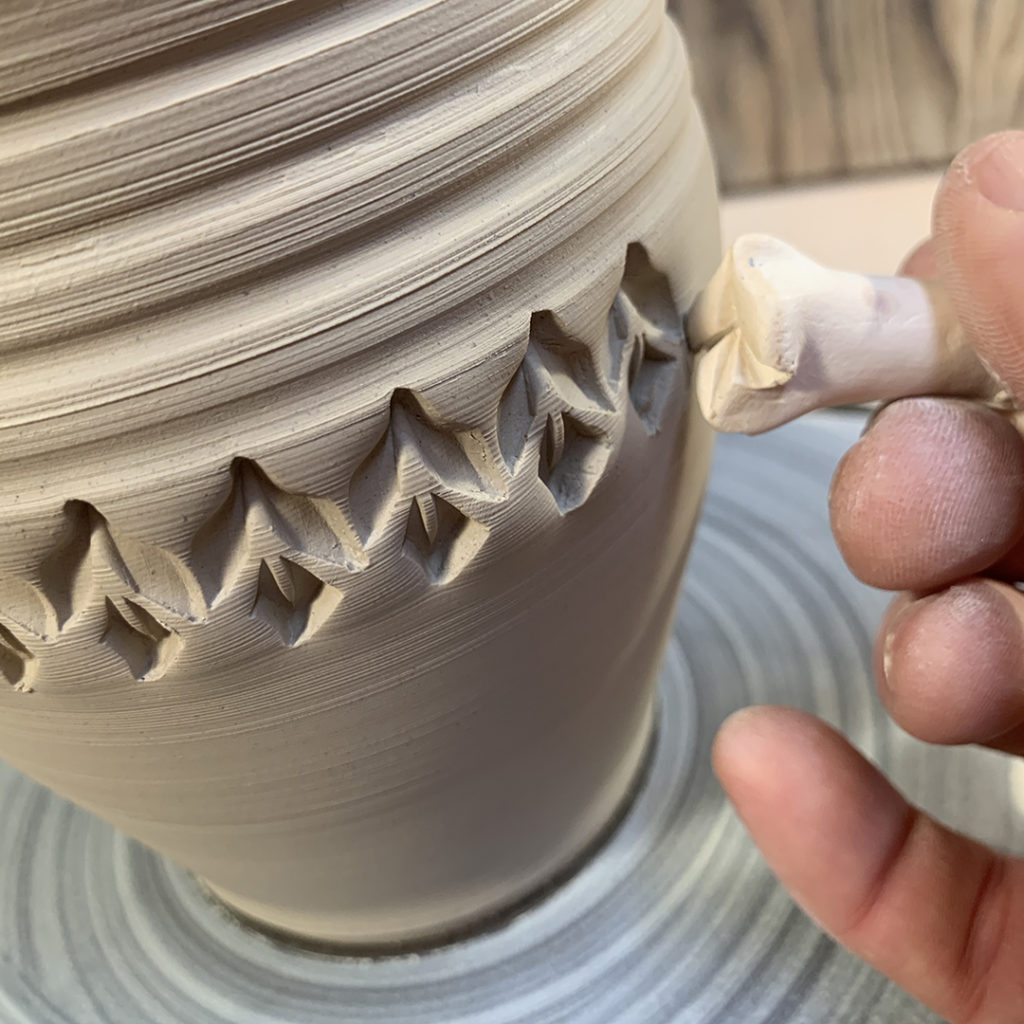
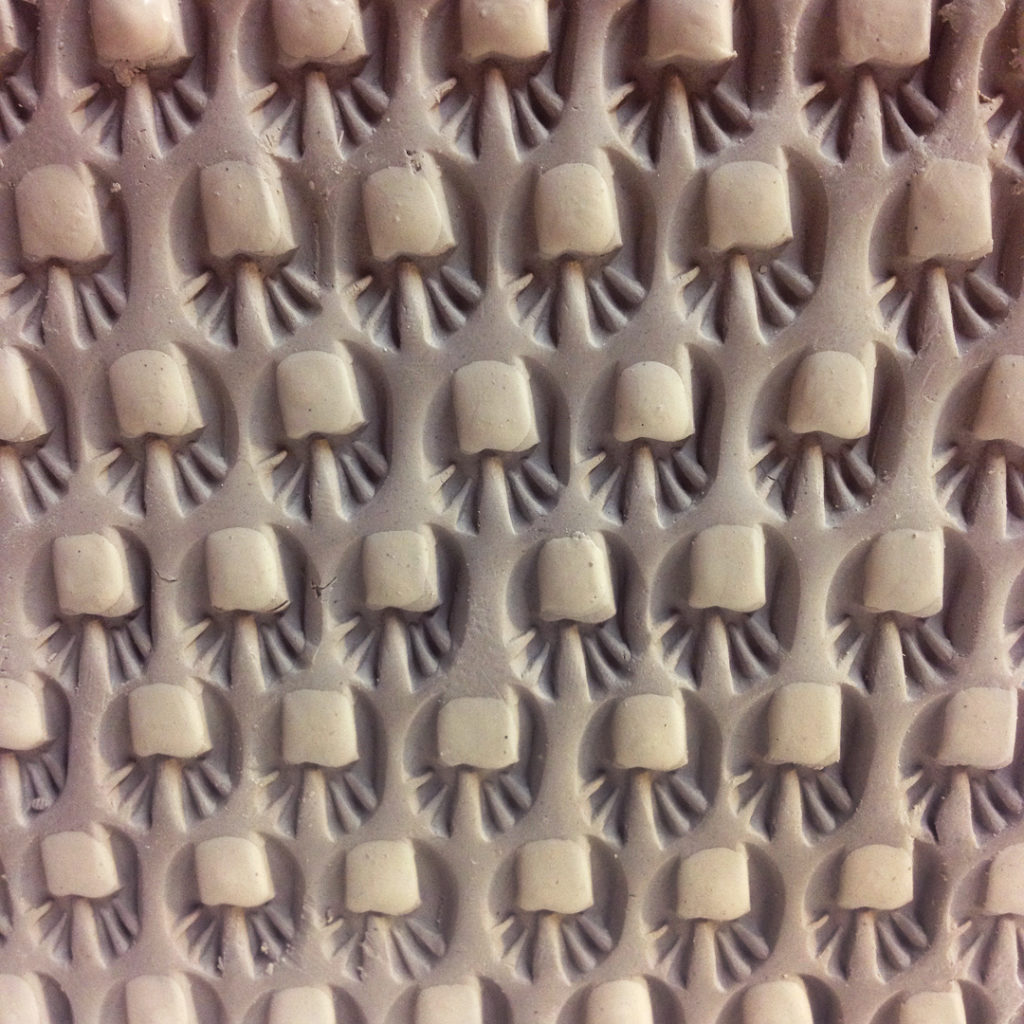
So I’ve just finished stamping the newest batch of cylinders… getting one step closer to becoming mugs! Stamping each of the cylinders with my own handmade stamps… one stamped impression at a time… again, and again, and again…
MUG 1 –


MUG 2 –


MUG 3 –


MUG 4 –

MUG 5 –


MUG 6 –


MUG 7 –


MUG 8 –


MUG 9 –


MUG 10 –


So now they’re back under plastic for the night…
as I’m hoping to trim the bottoms tomorrow.
Stamping patterns one indentation at a time… over & over again… to get a repetitive textured pattern all the way around the mug. I like to make my own clay stamps with my own patterns… better than buying someone else’s designs! I don’t sell my stamps… but I do teach my students how to make them & encourage everyone to try.
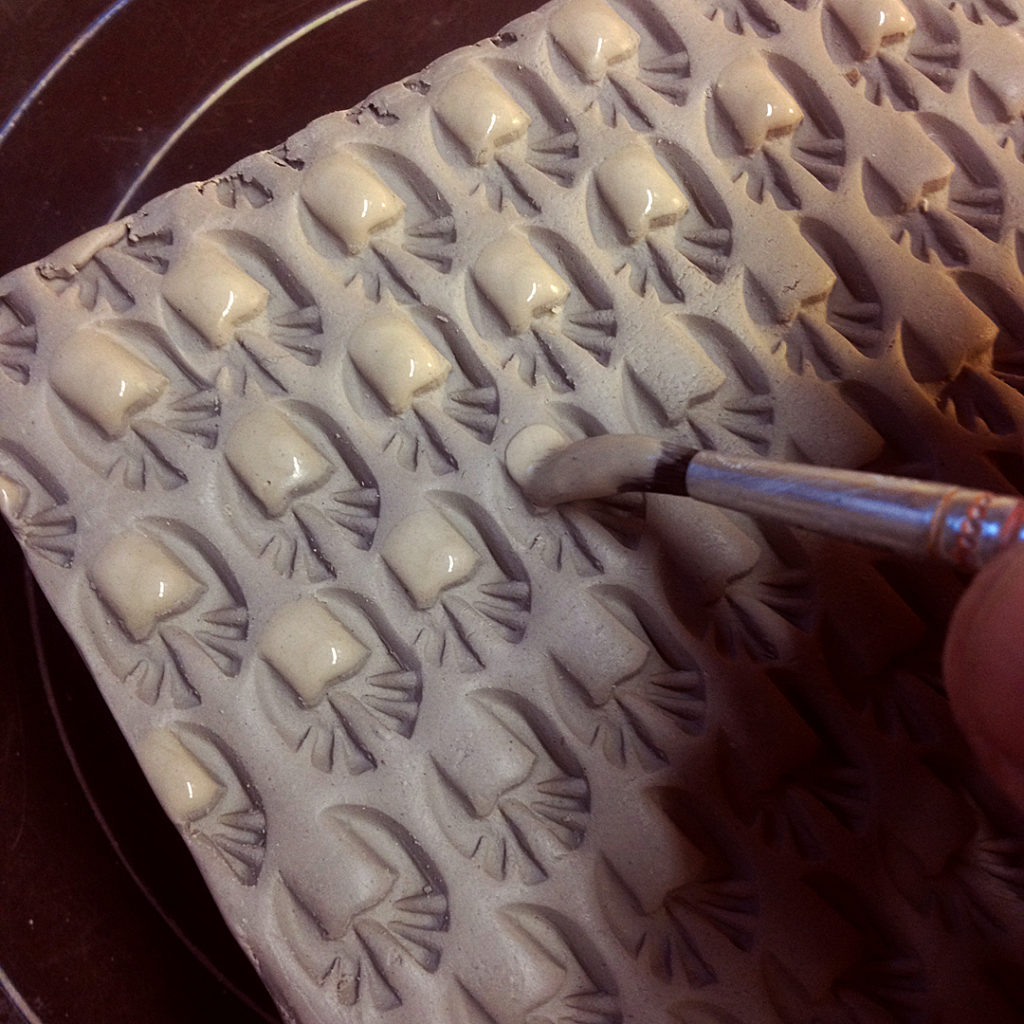
Celebrating another TEXTURE TUESDAY! Adding some accents of colored flashing slip onto each stamp. This slip color will change to shades of orange when soda-fired!!!
Working on another batch of my “wheelthrown-handbuilt-combo” mugs… trimmed the feet & waiting for handles to be attached!

Last night in my Intermediate Wheelthrowing class, we did a little “exchanging-trading-stealing” game… and the theme was FLOWER POTS with a plant inside! We all had a great time sharing our flowerpots & plants. And THEN… Christine pulled out another bag all wrapped up for ME!!! What?!… A late entry into the “sharing game” just for me?!
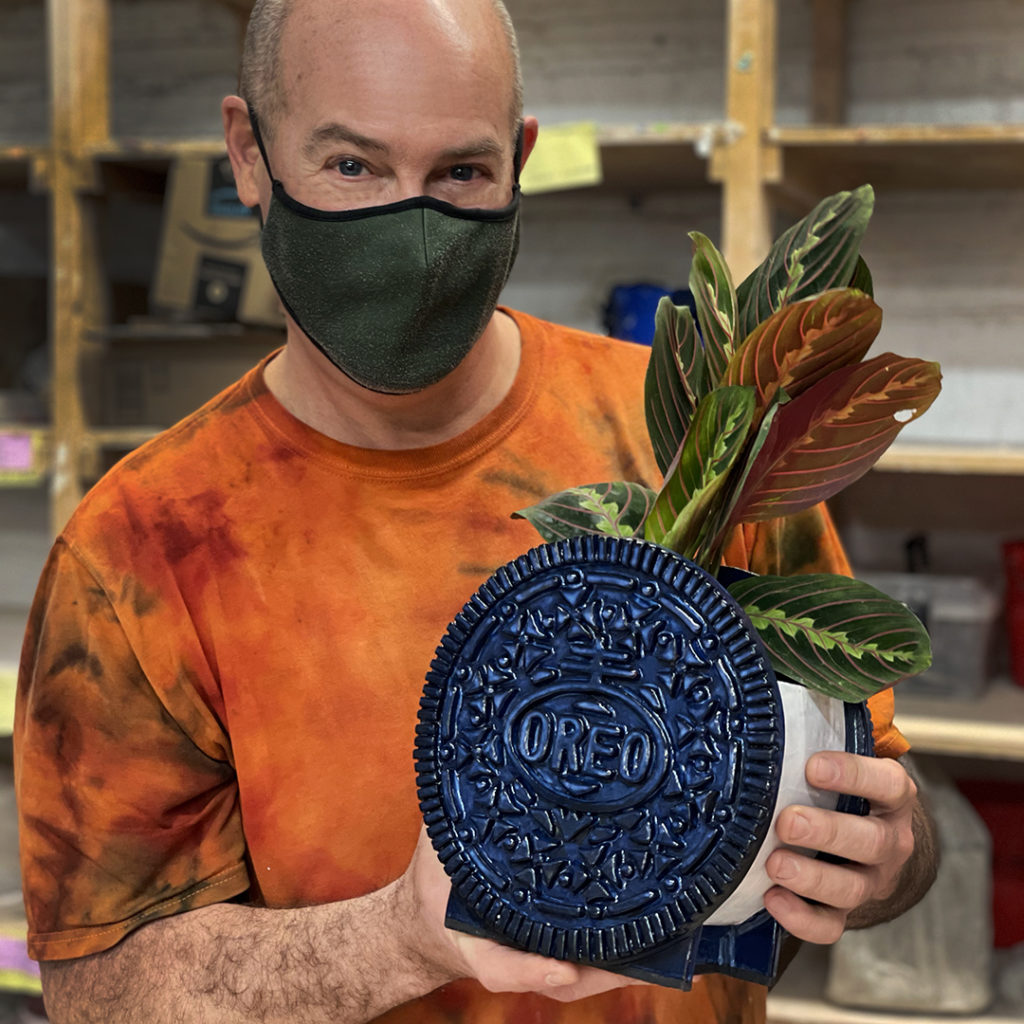
And it turned out to be this AMAZING cookie creation!!! Sure, she might just know a little somethin’-somethin’ about my OREO addiction?!

Christine is fairly new to the handbuilding… with this being only her SECOND handbuilding project ever. Never one to shy away from a good challenge, Christine took it upon herself to build this amazing flower pot! Even better – working at her new make-shift pottery studio workspace at home in her kitchen! Recently pulled together due to the pandemic restrictions and her ever-growing addiction to clay!
So here’s a little step-by-step process story for you… with special THANKS to Christine for sharing all of her process photos!
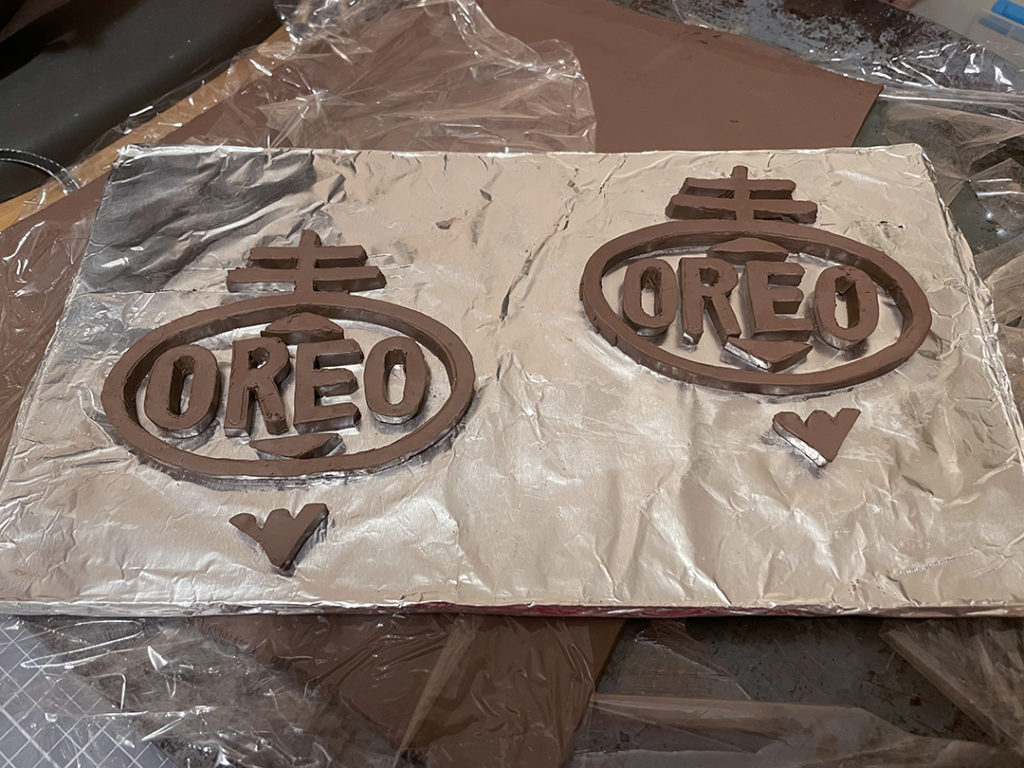
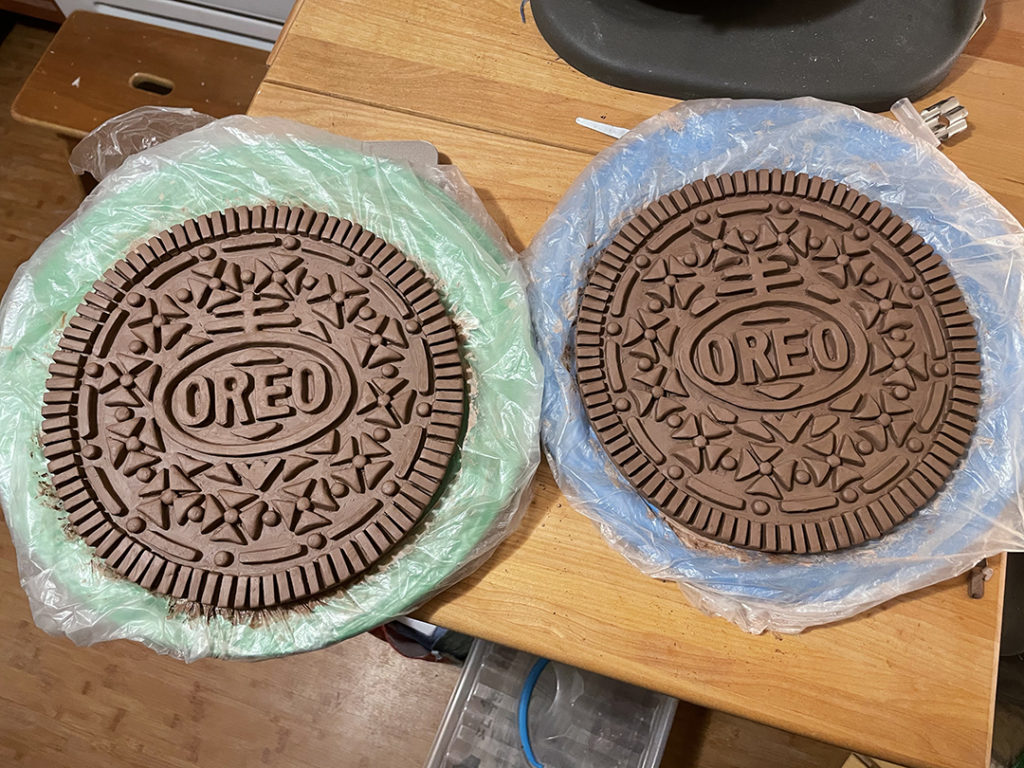
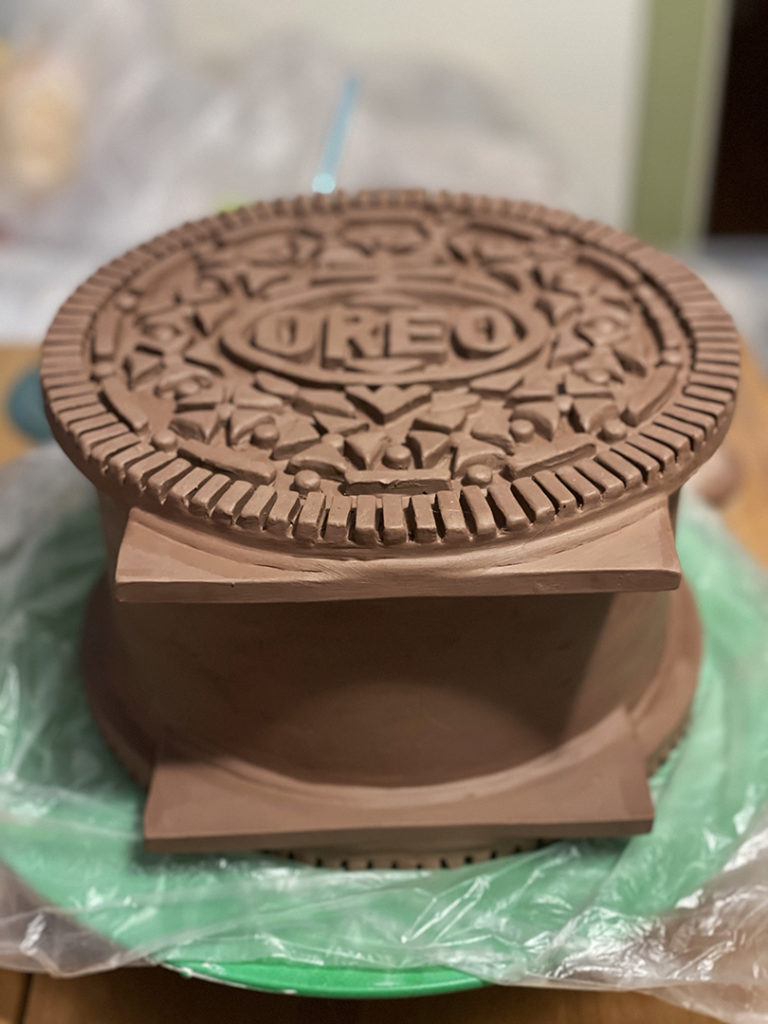
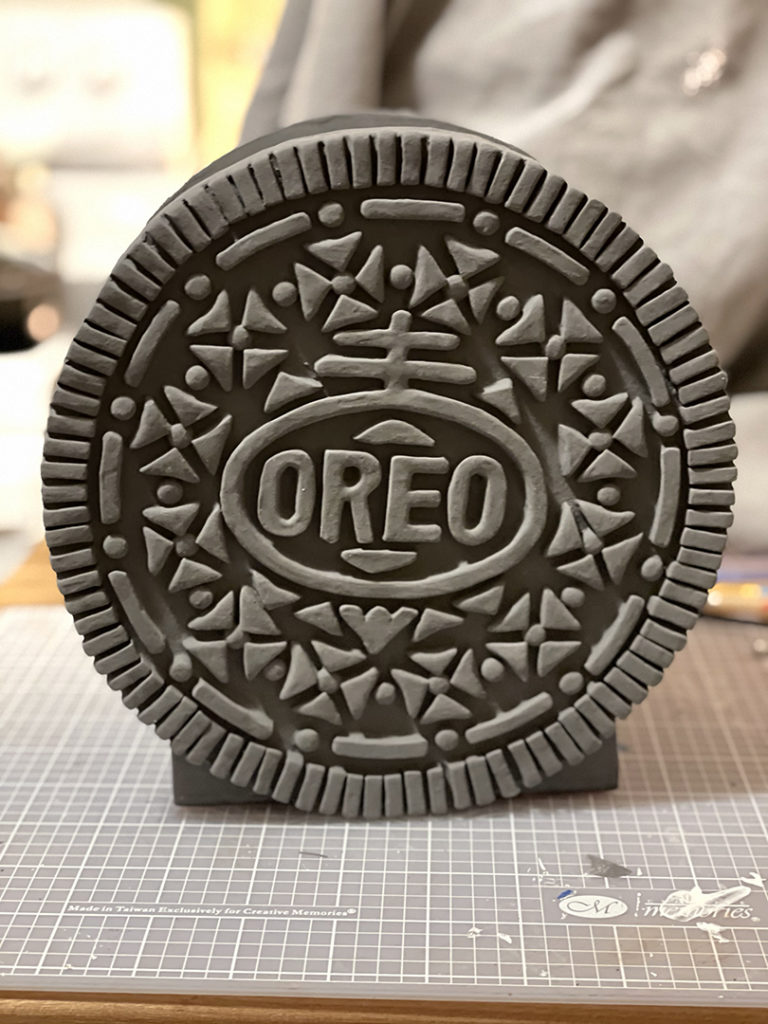
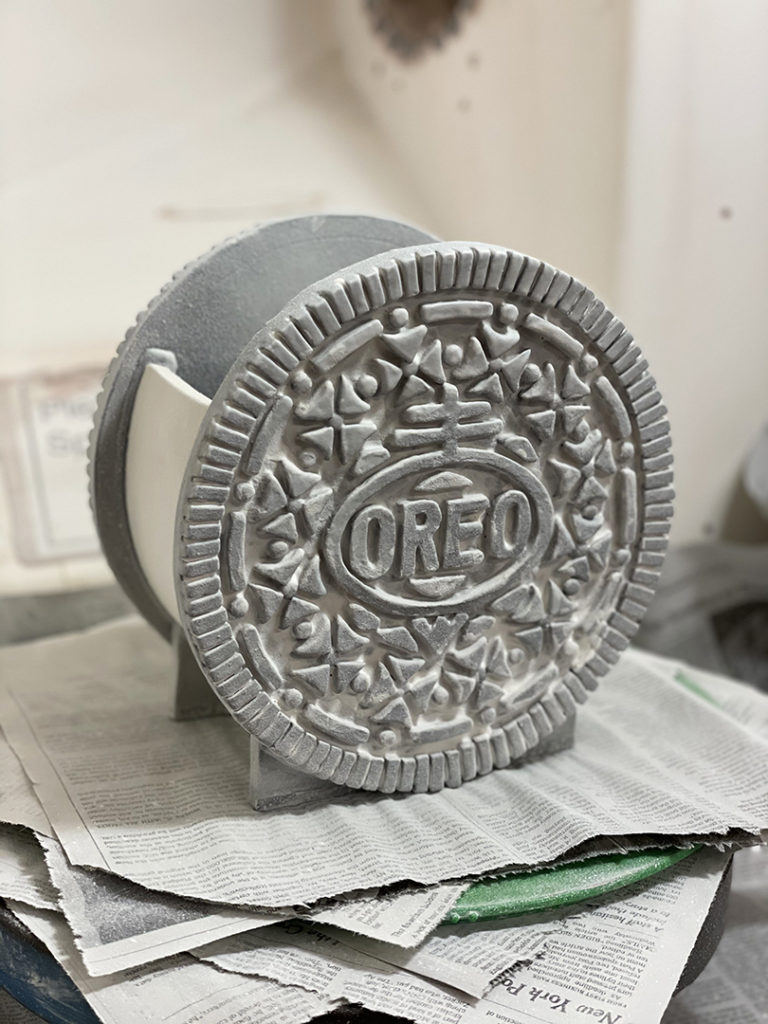
It looks like Christine started by enlarging the famous OREO pattern embossed on the cookies… and then cut them out to use them as templates & stencils for the project.

Using the patterns, Christine cut out the logo from a slab of clay. Funny thing… I was right there while Christine was rolling out her slabs on the Lillstreet slab roller.. and had no idea what she was working on! And then she continued to cut out all of the other parts & pieces. Good thing Christine has a nice “damp box” at home to store all of these pieces as she’s working on them.
Using the original stencils, Christine then transferred the pattern onto the large “cookie” circle disc of slab clay. This process makes it a LOT easier to places the pieces later.
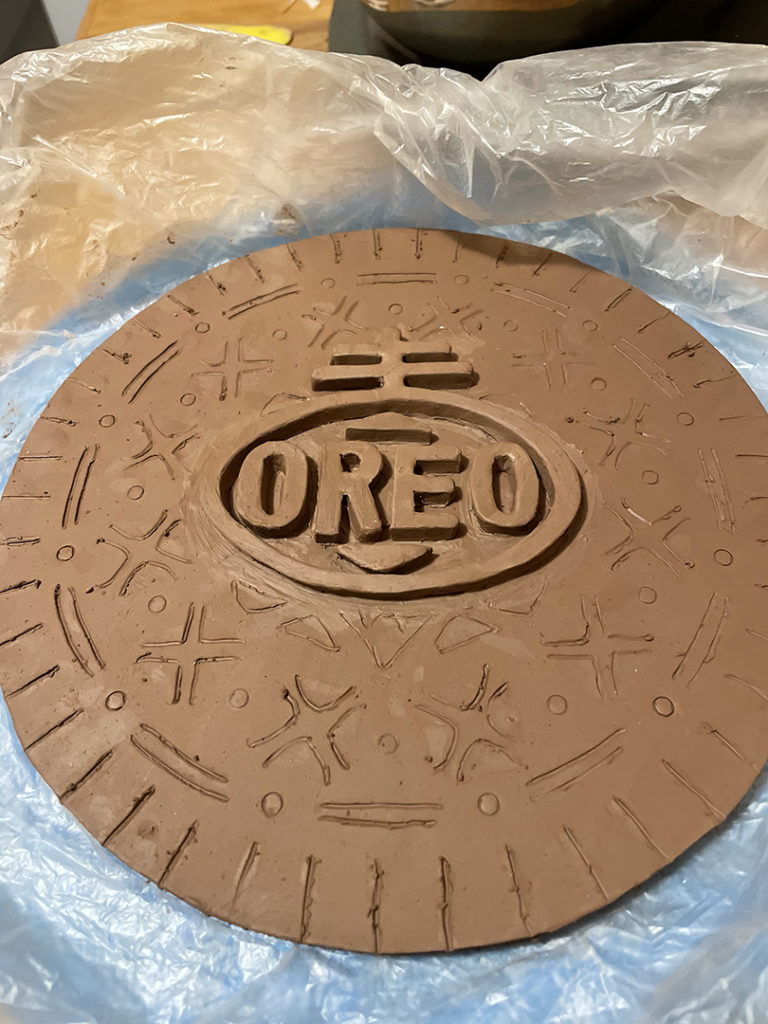
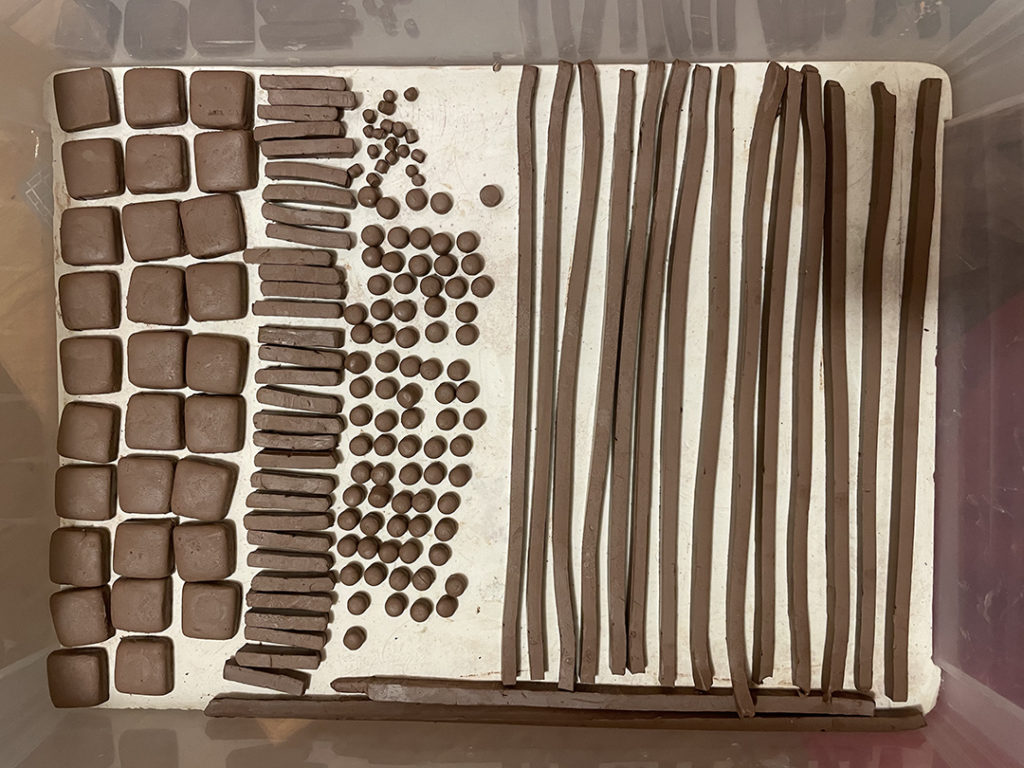
After a LOT of scoring & slipping… the textured & embossed “cookie” was coming along nicely… still waiting for the decorative border of little rectangles. A lot of them!!!
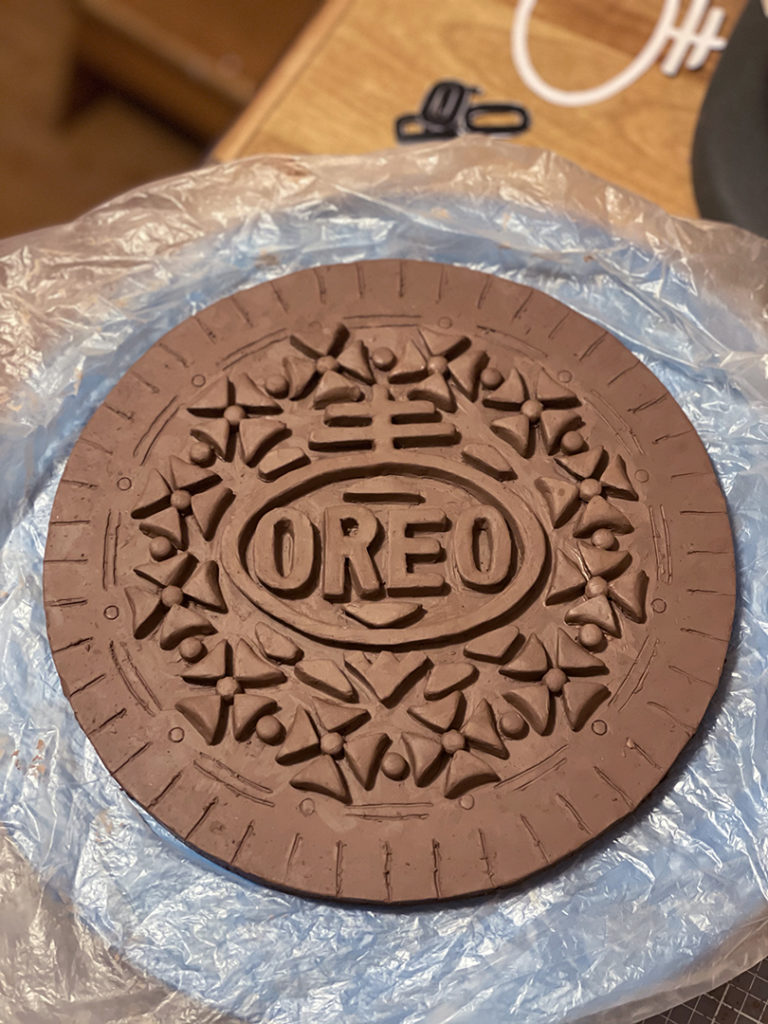
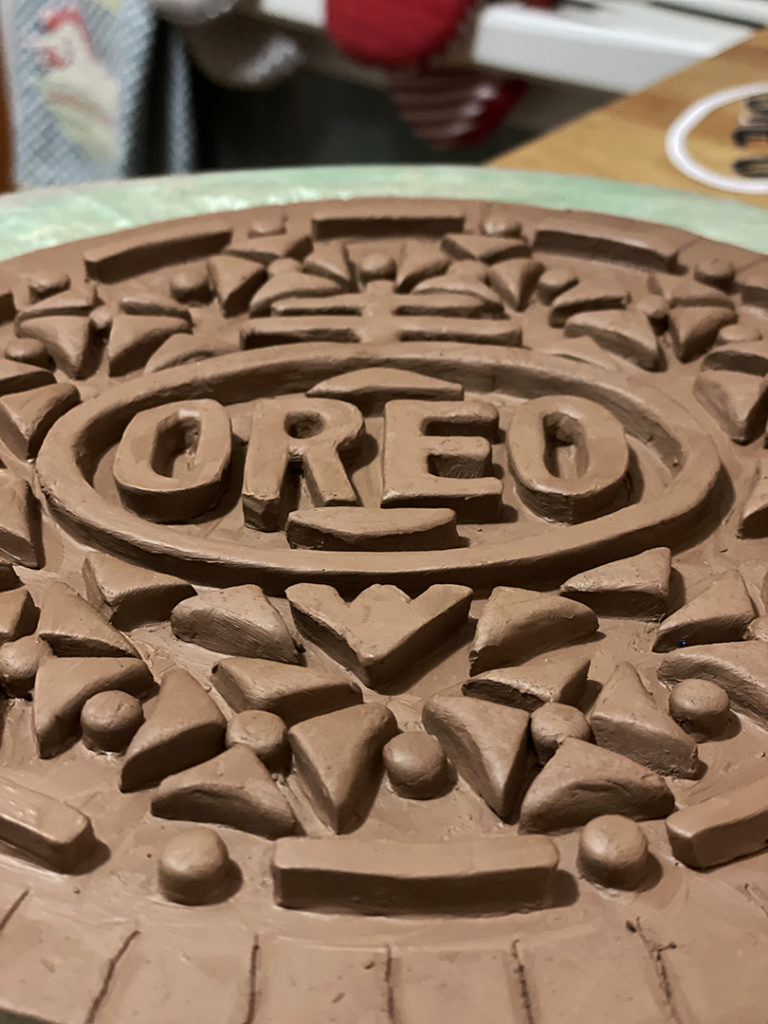
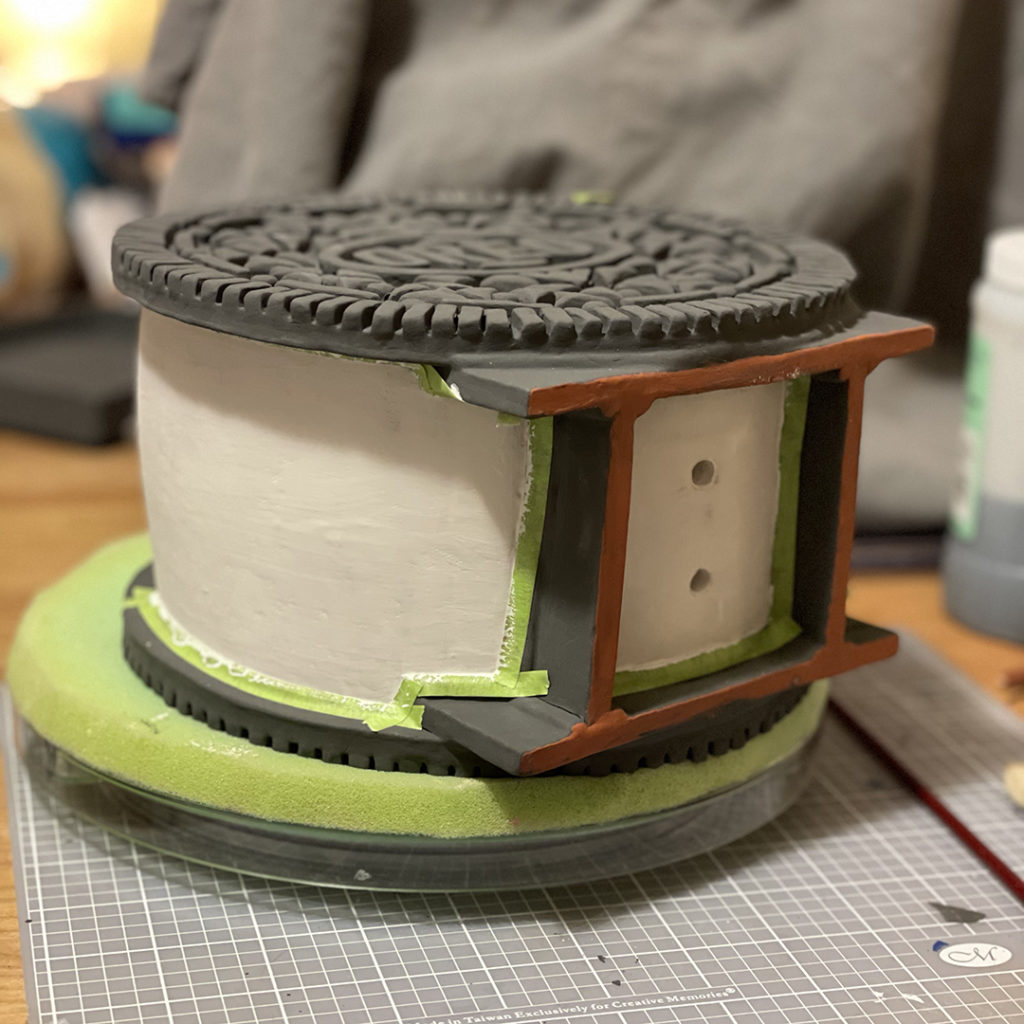
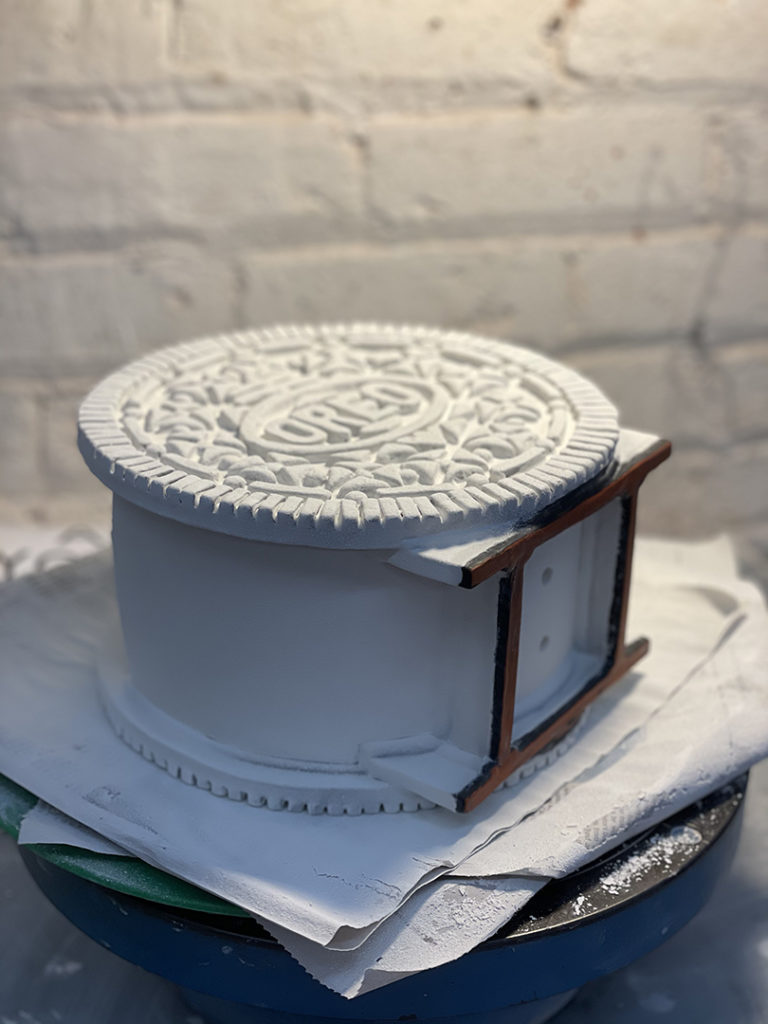
So here are the two oversized “cookies” just waiting for the cream filling… the “container” portion of the flower pot!!!
The flower pot portion was created out of slabs as well… looks like this one might be TRIPLE STUFFED!!!

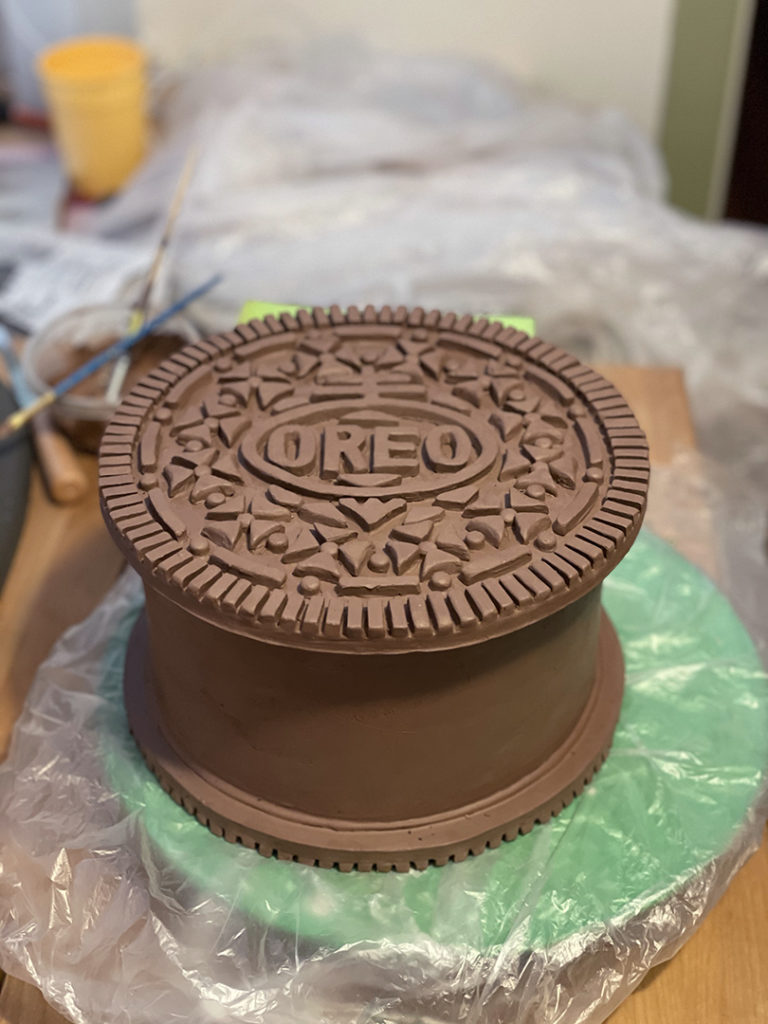
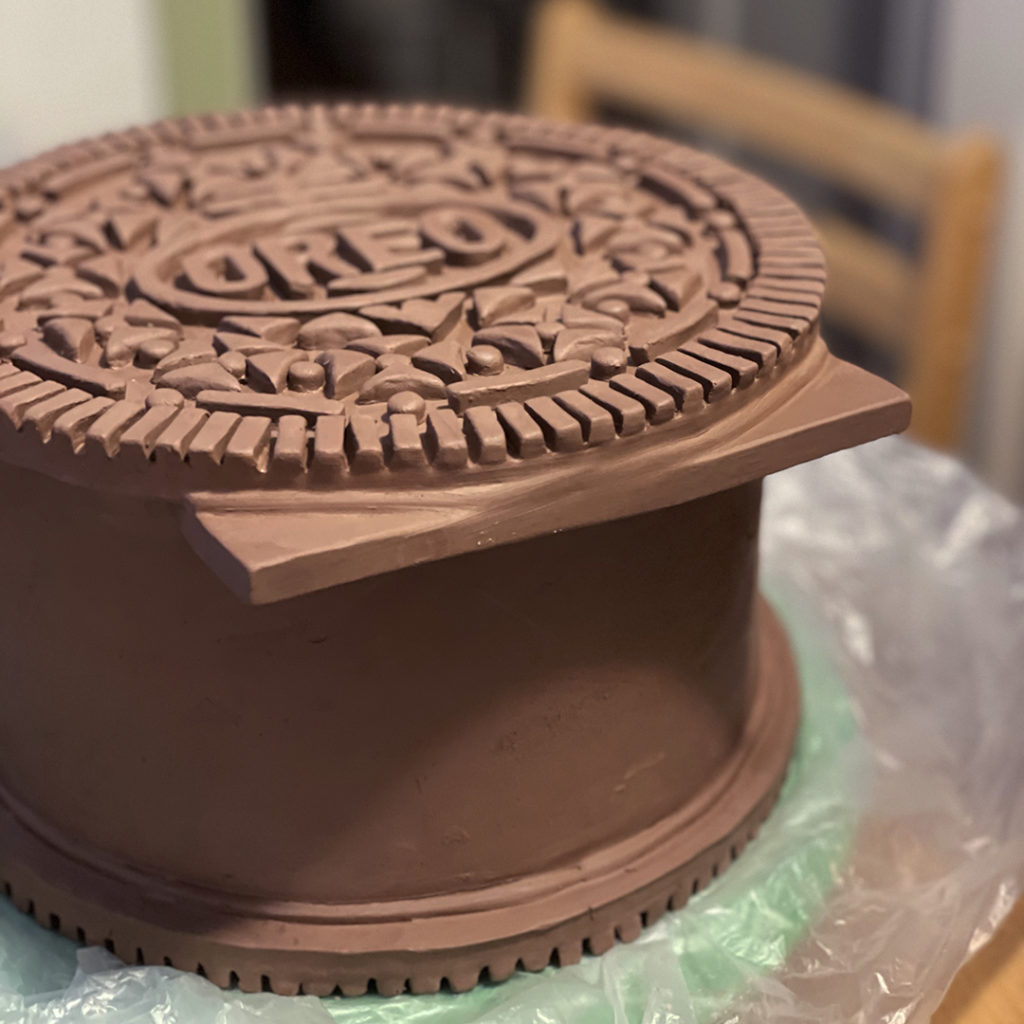
With a little chunk of sponge to support the cookie walls, the flower pot was assembled and allowed to stiffen up without sagging.
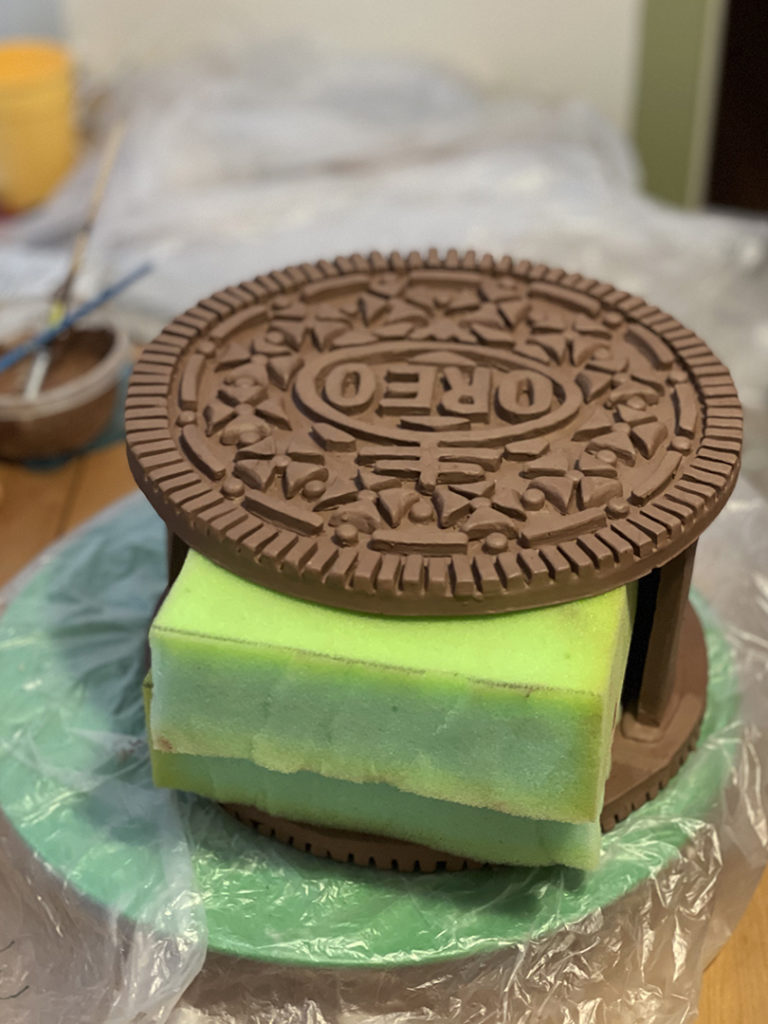
Christine then added some slabs to the bottom as “feet” for the flower pot to stand on… and NOT roll around like a cookie on its side!
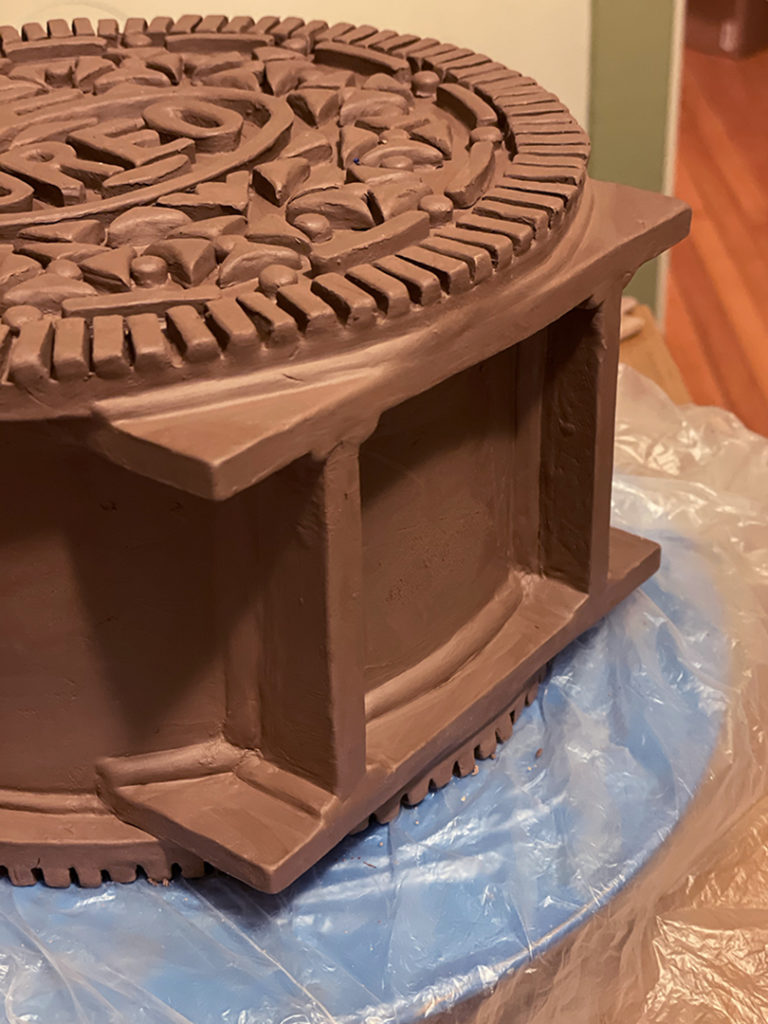
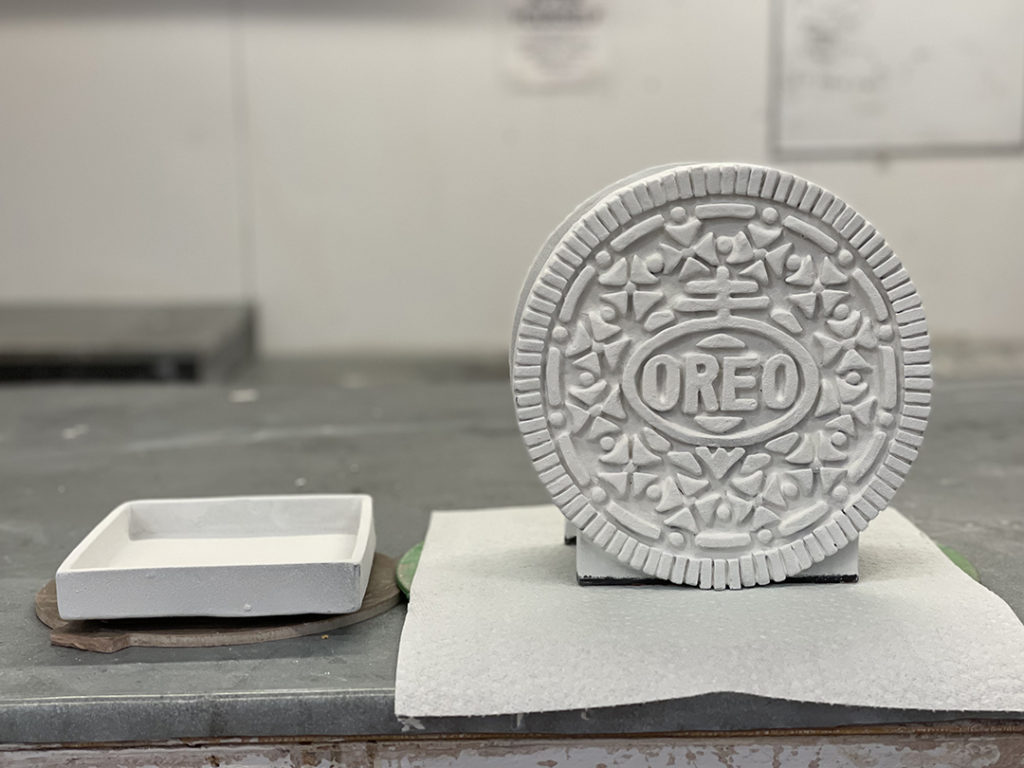
While the flower pot was setting up, Christine made a small water trip tray to fit under the flowerpot.

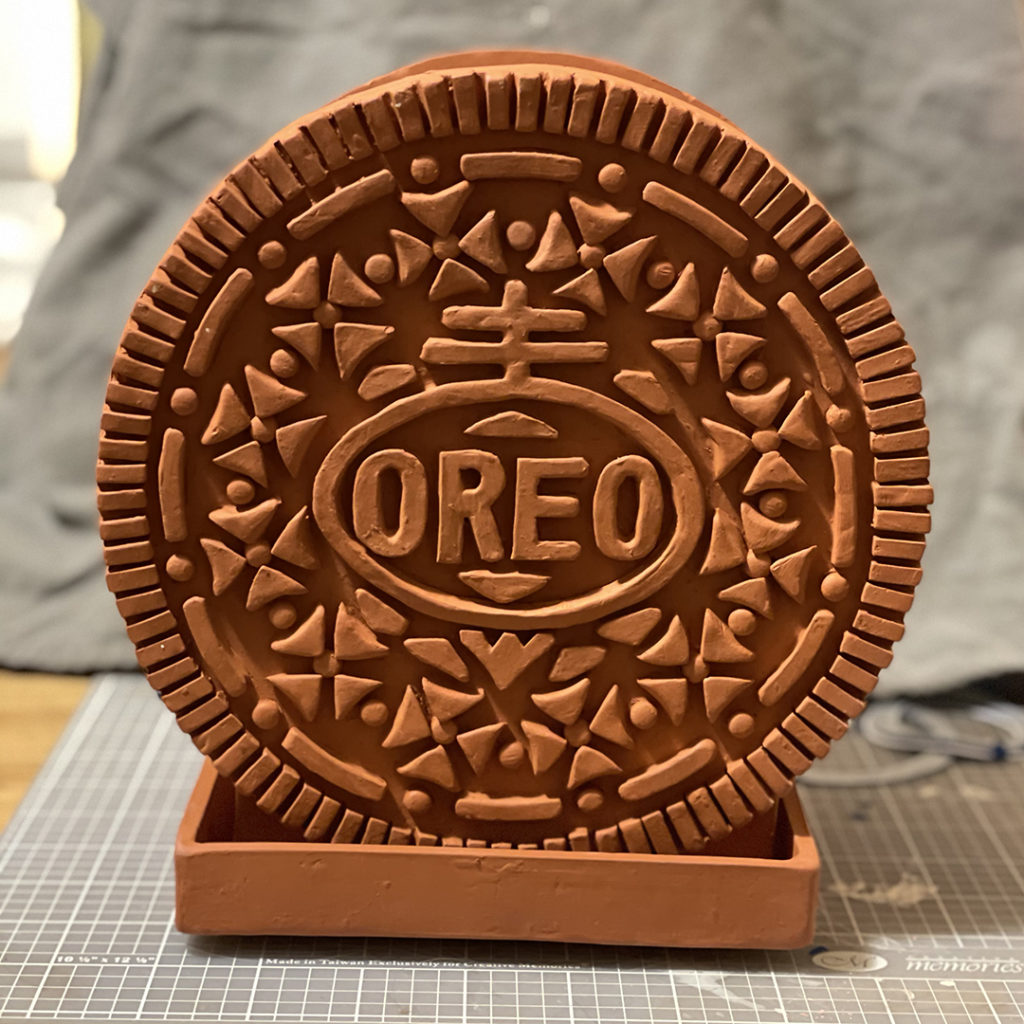
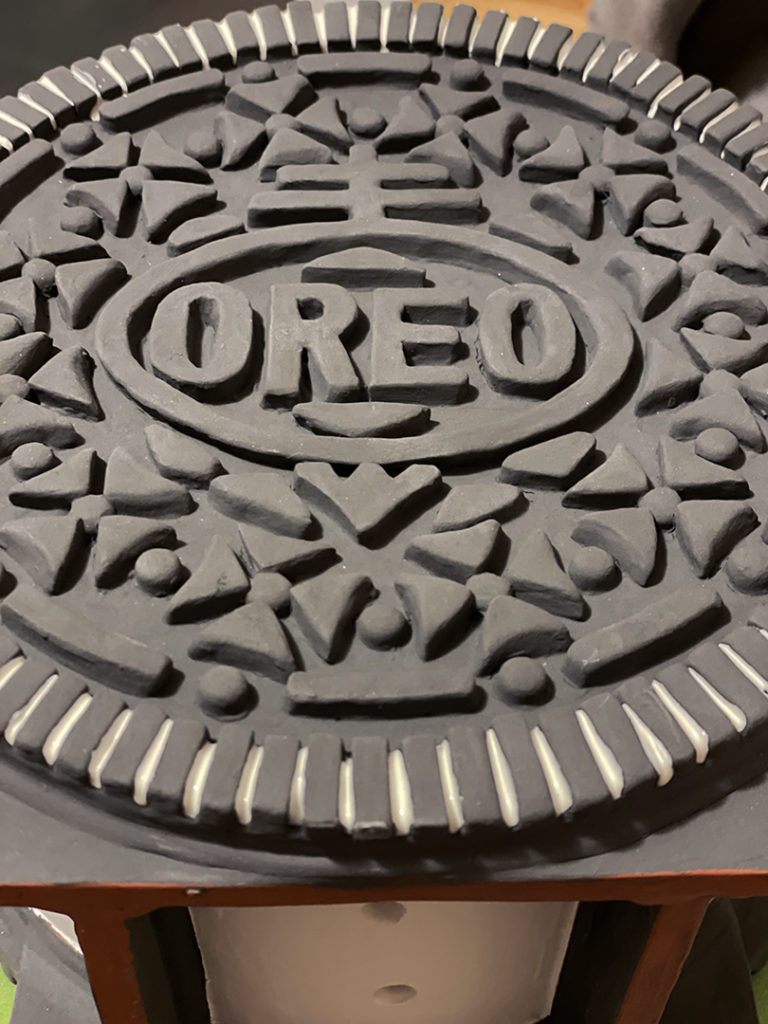
When both pieces were finally dried, they were bisque-fired… bringing out the “traditional” terra cotta coloring we all love!
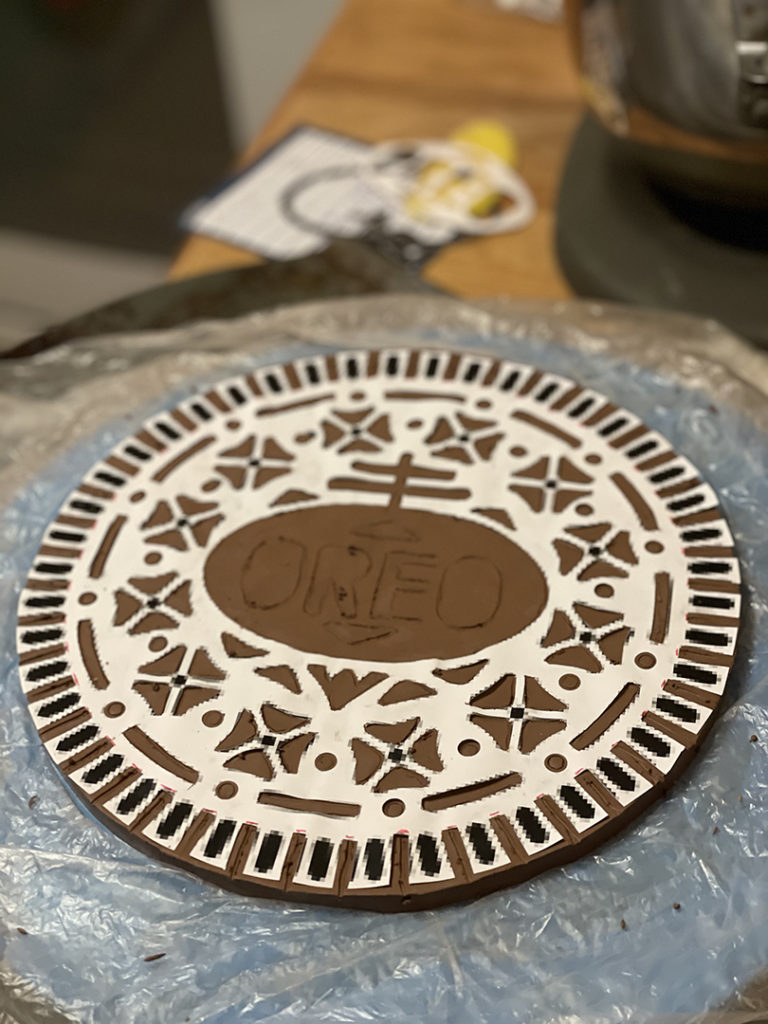
And then a couple coats of underglaze to give it that special OREO cookie color!!!


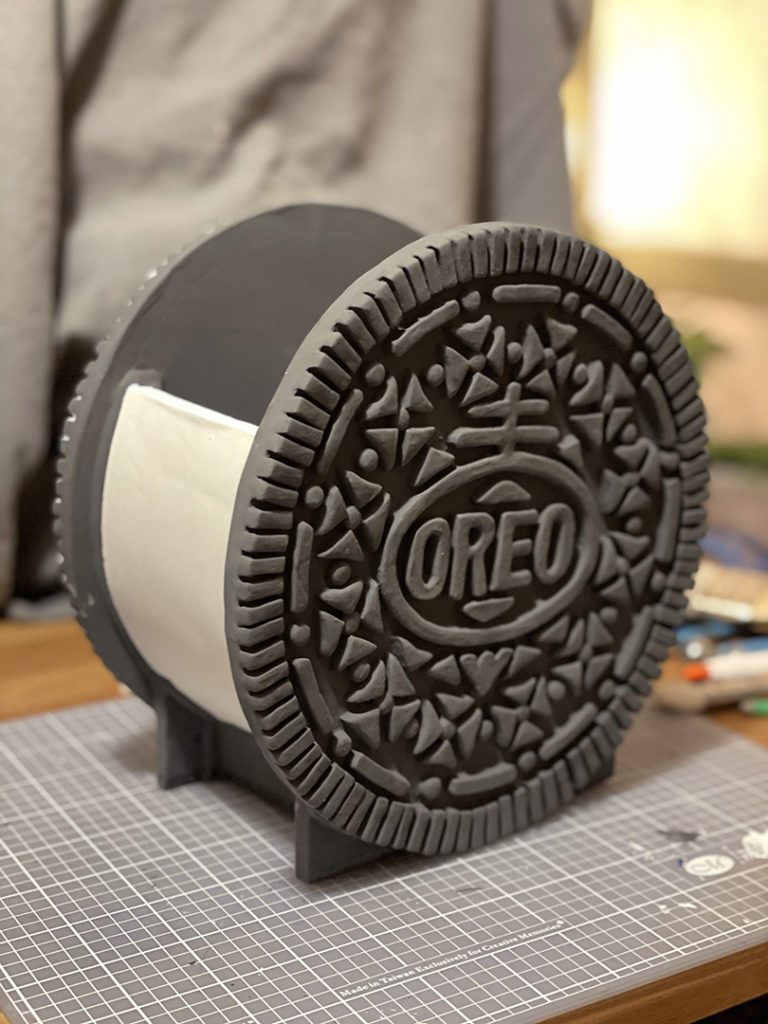
But then the triple-stuffed “filling” needed to be painted with white underglaze… using green tape to make nice clean lines between the colors.
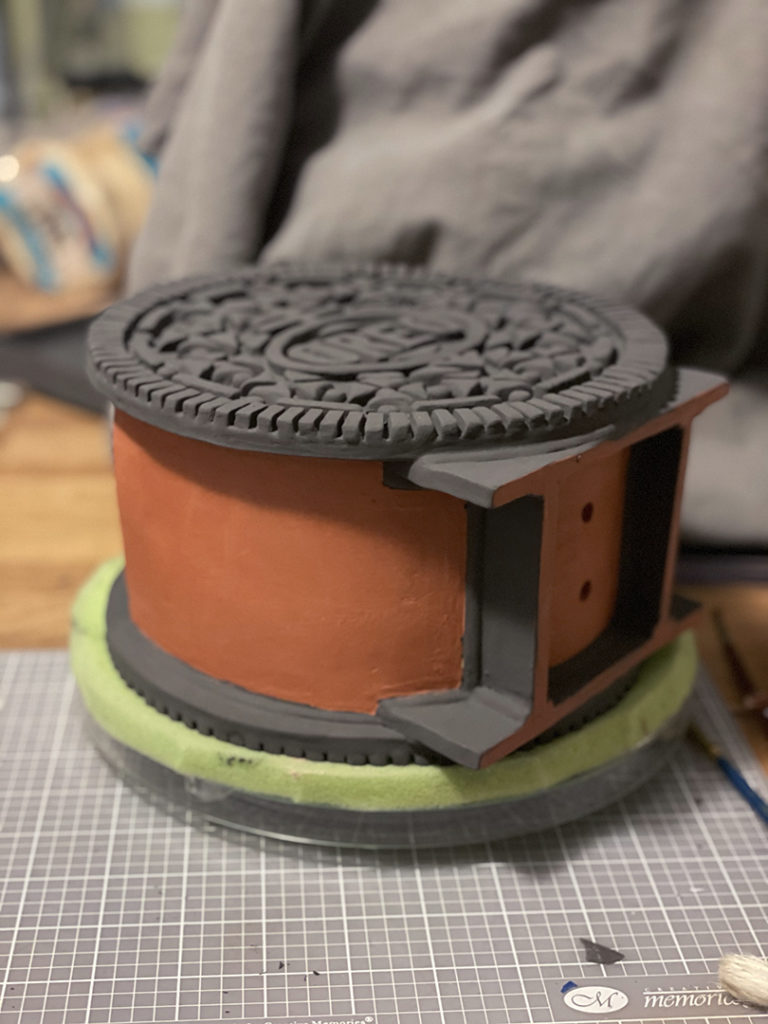
All coming together… looking more & more like an OREO cookie!!!
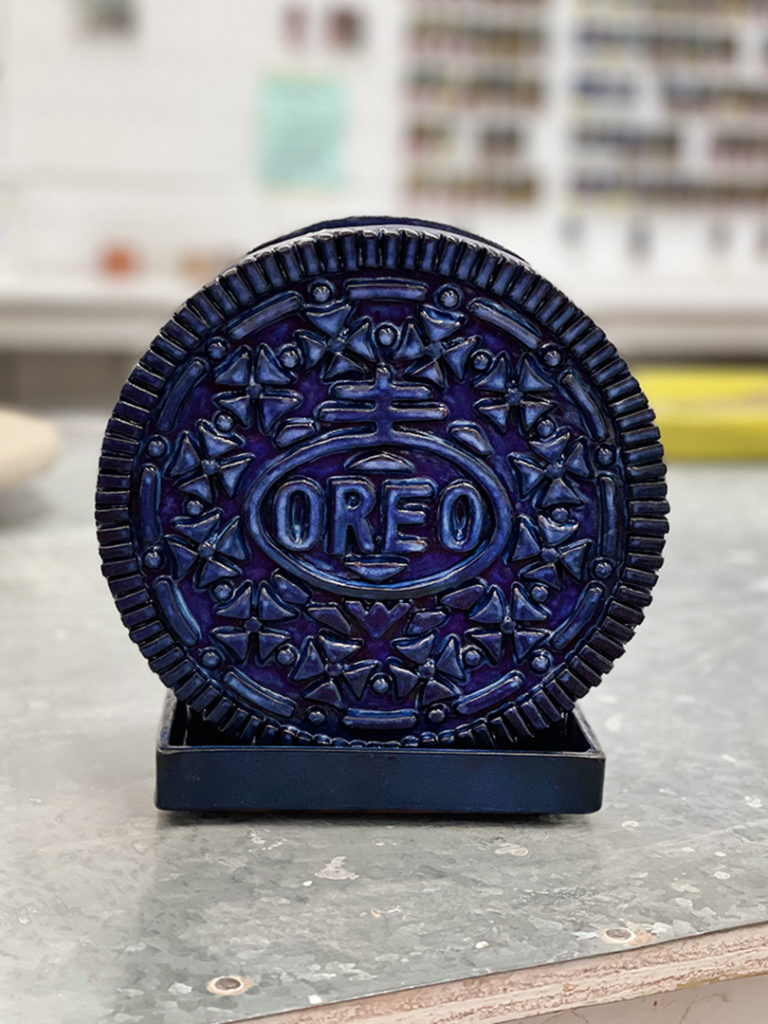
And then a couple layers of glazed sprayed on to give it some shine.
And then it was ready to go back into the kiln for the glaze firing. Huge thanks to Dave Trost for being Christine’s “cohort-in-crime” – helping to facilitate this covert project. Apparently there was a lot of hiding & stashing of this piece so that I wouldn’t happen upon it ruining the surprise. A lot was going on around me… and I had NO IDEA!!!
After the glaze firing, it looked great. Christine apologized a bit for the coloring… bringing up that they have made Blueberry OREOS in the past!!! Sure, the traditional dark brown OREO might have been nice, but the blue hue makes it a bit more fun & magical.
Such a wonderful surprise by one of My Talented Students!!!
THANK YOU AGAIN CHRISTINE!!!
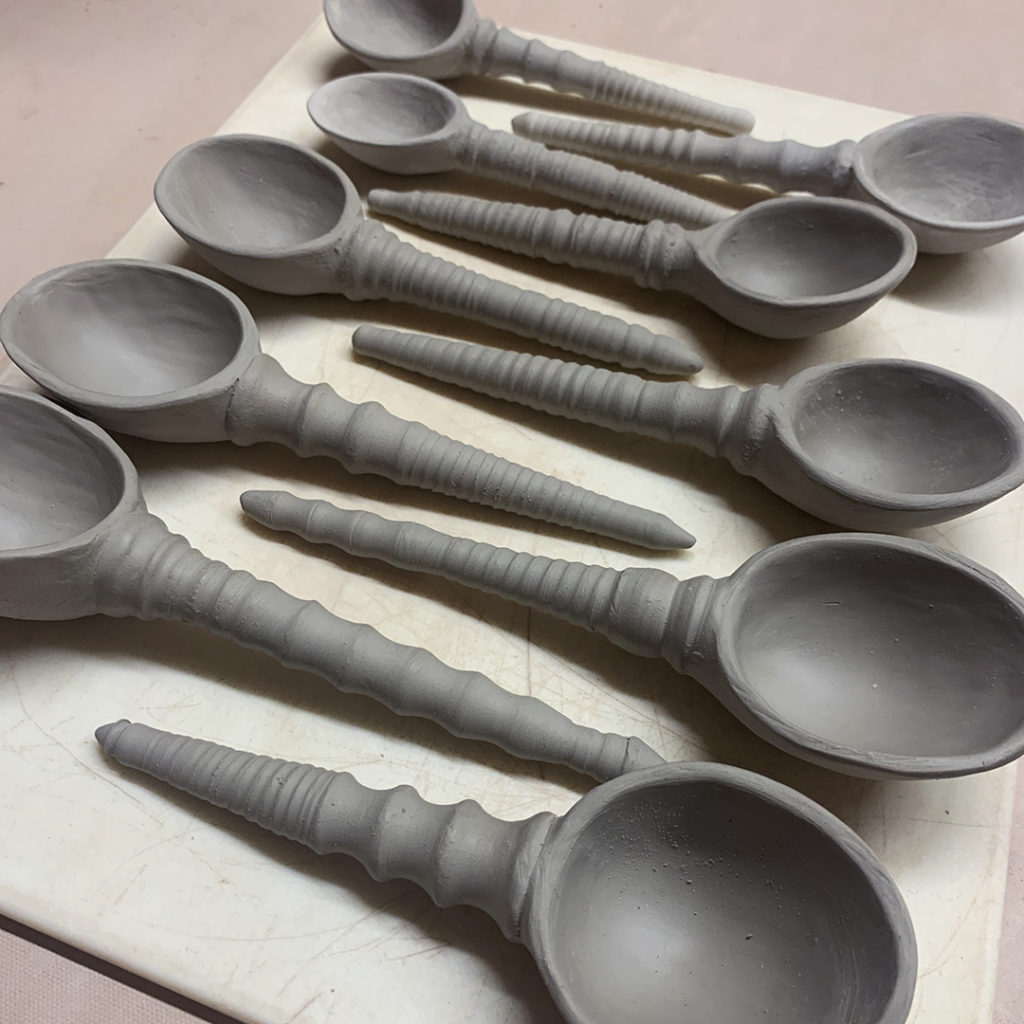
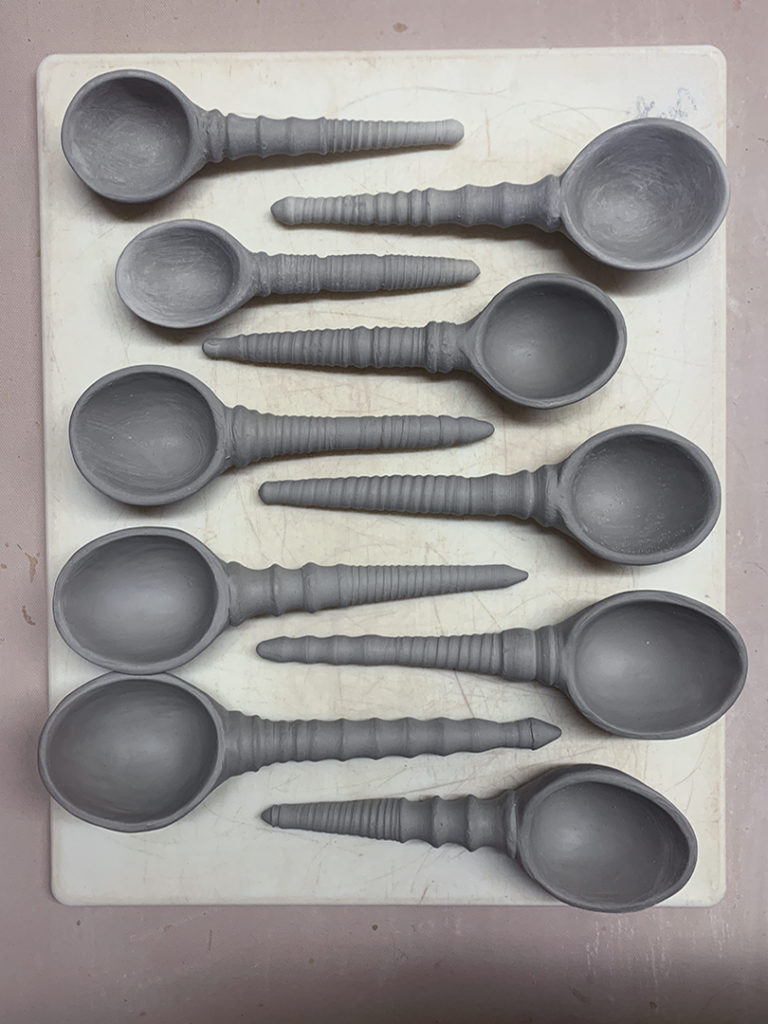
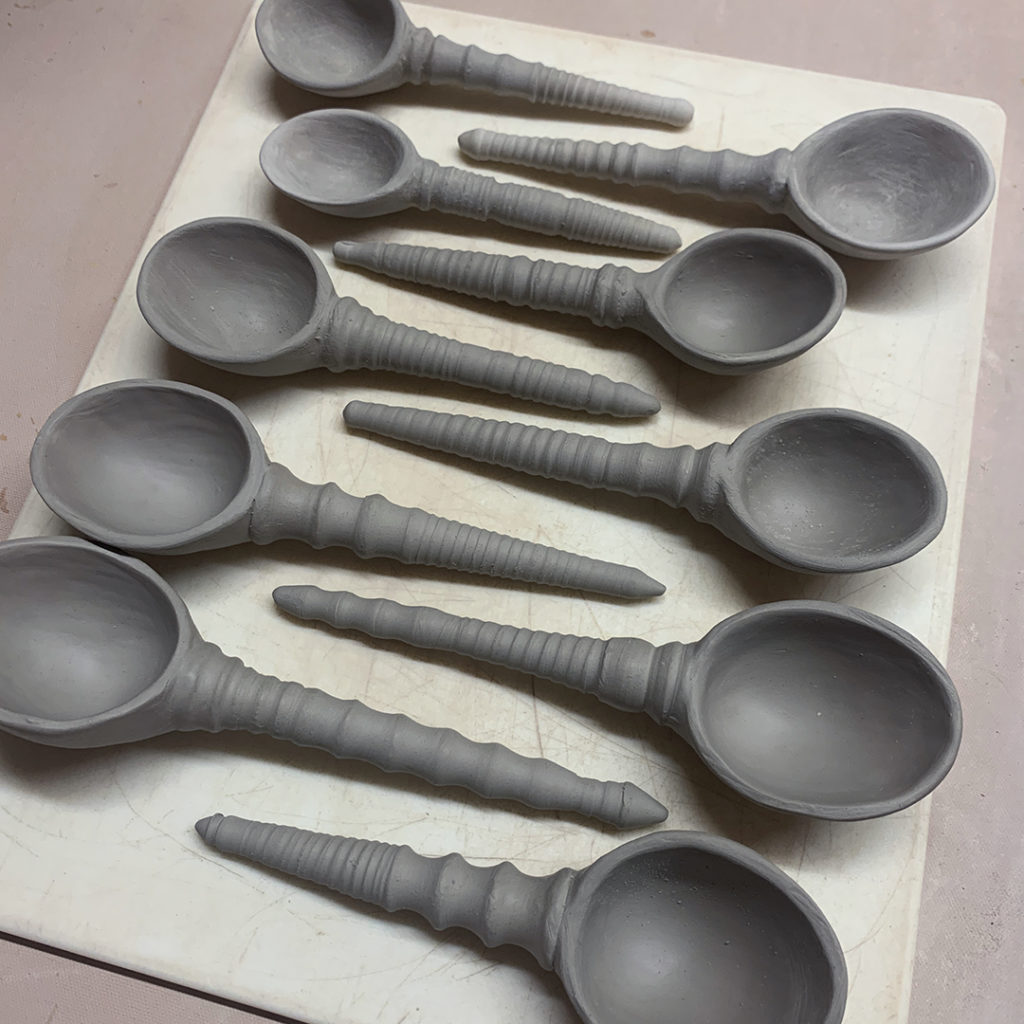
After a little more pinching, shaving, shaping & smoothing… I kind of felt like this batch of spoons was ready to call done. They’ll dry now and then need to be bisque fired before I send them through the soda kiln. I’m going to leave this batch “plain”… but already considering the next batch might need some stamping & colored flashing slip accents.
You know my motto… MORE IS MORE!
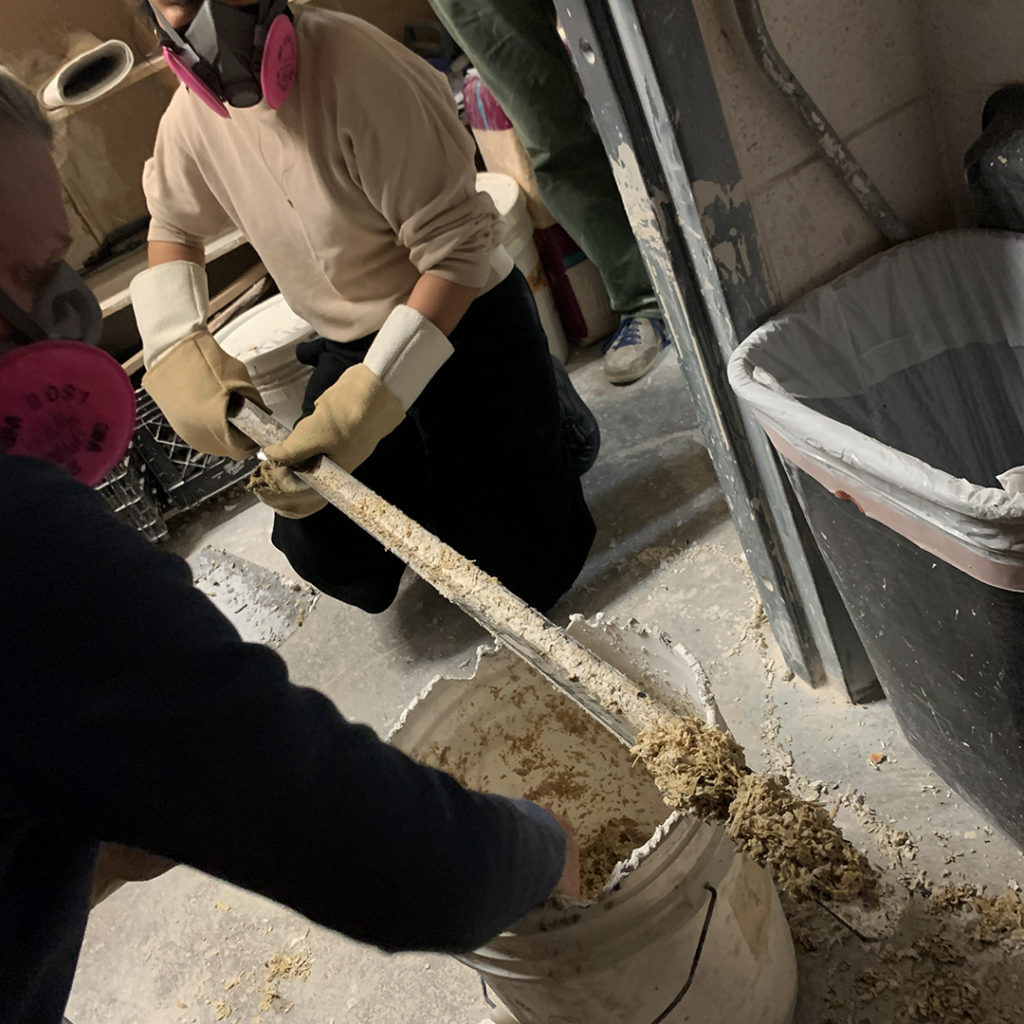
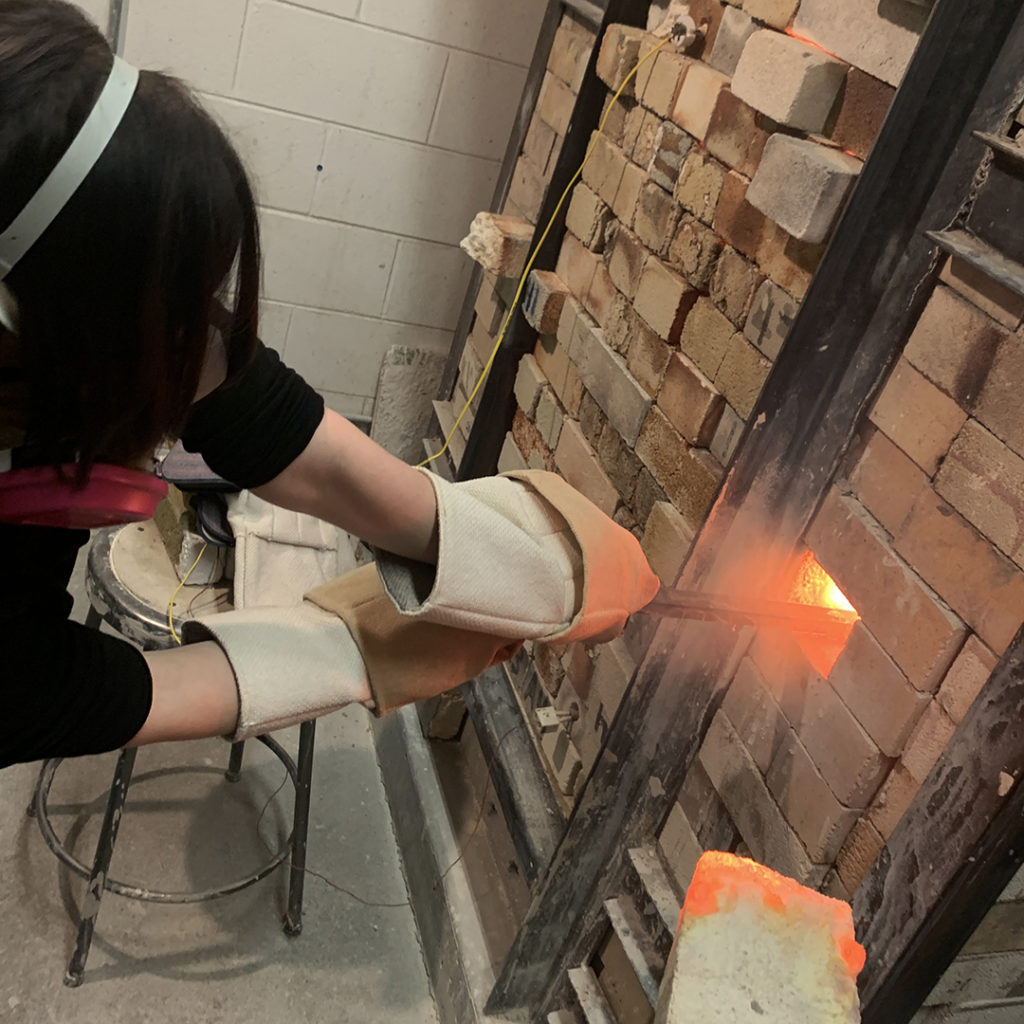
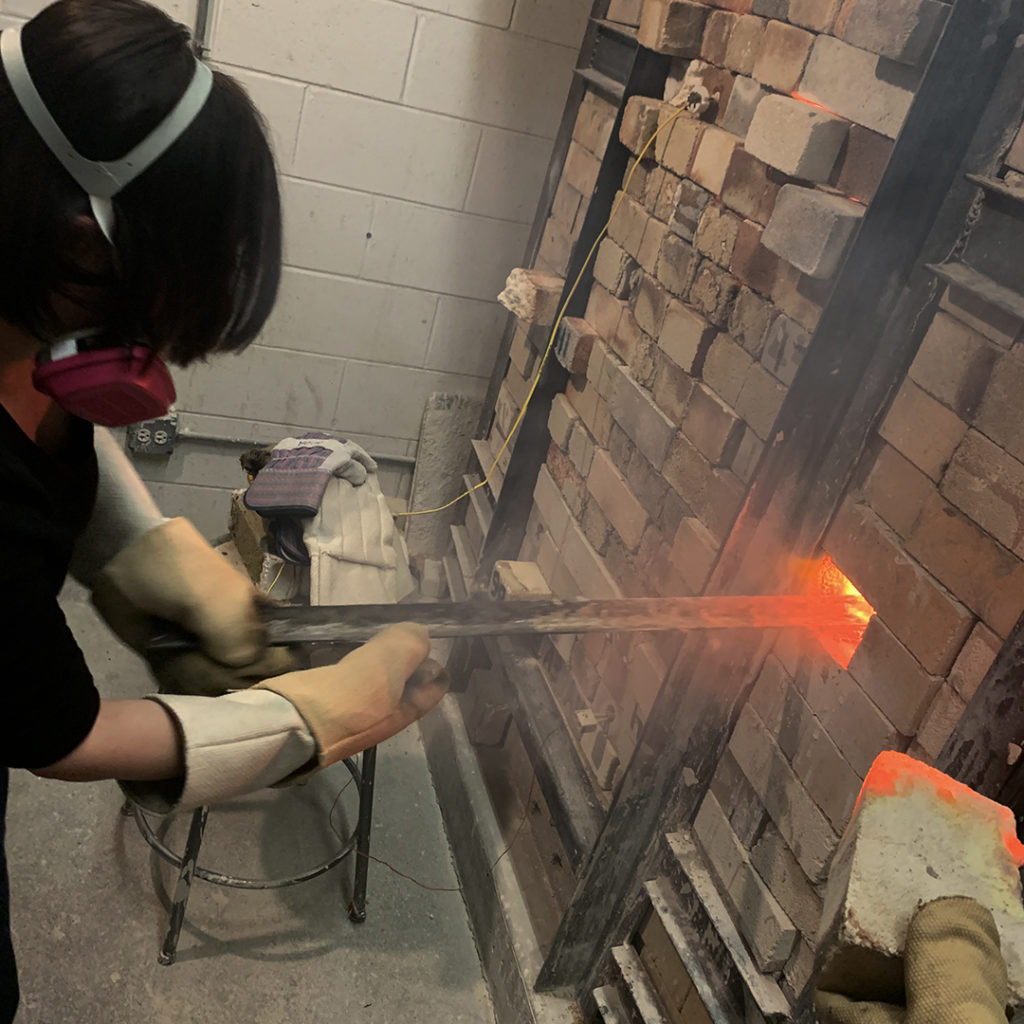
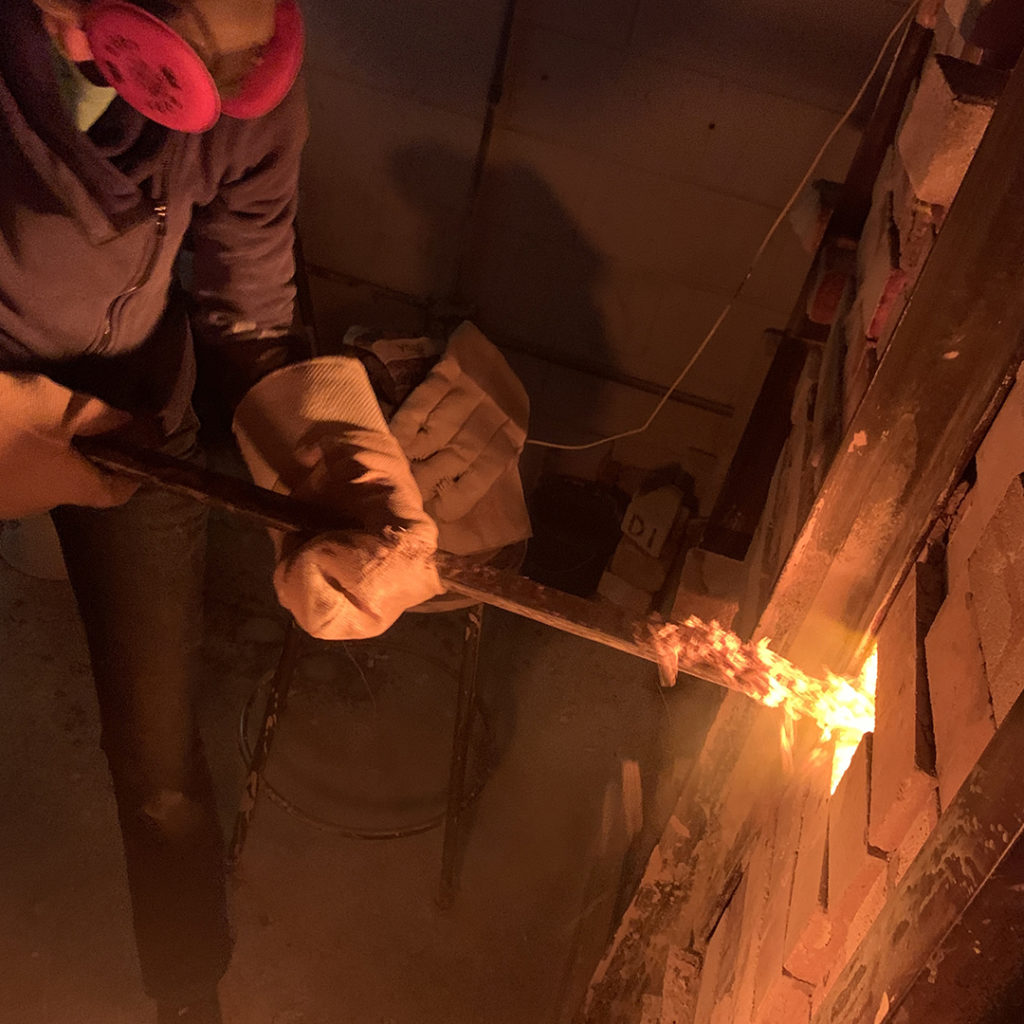
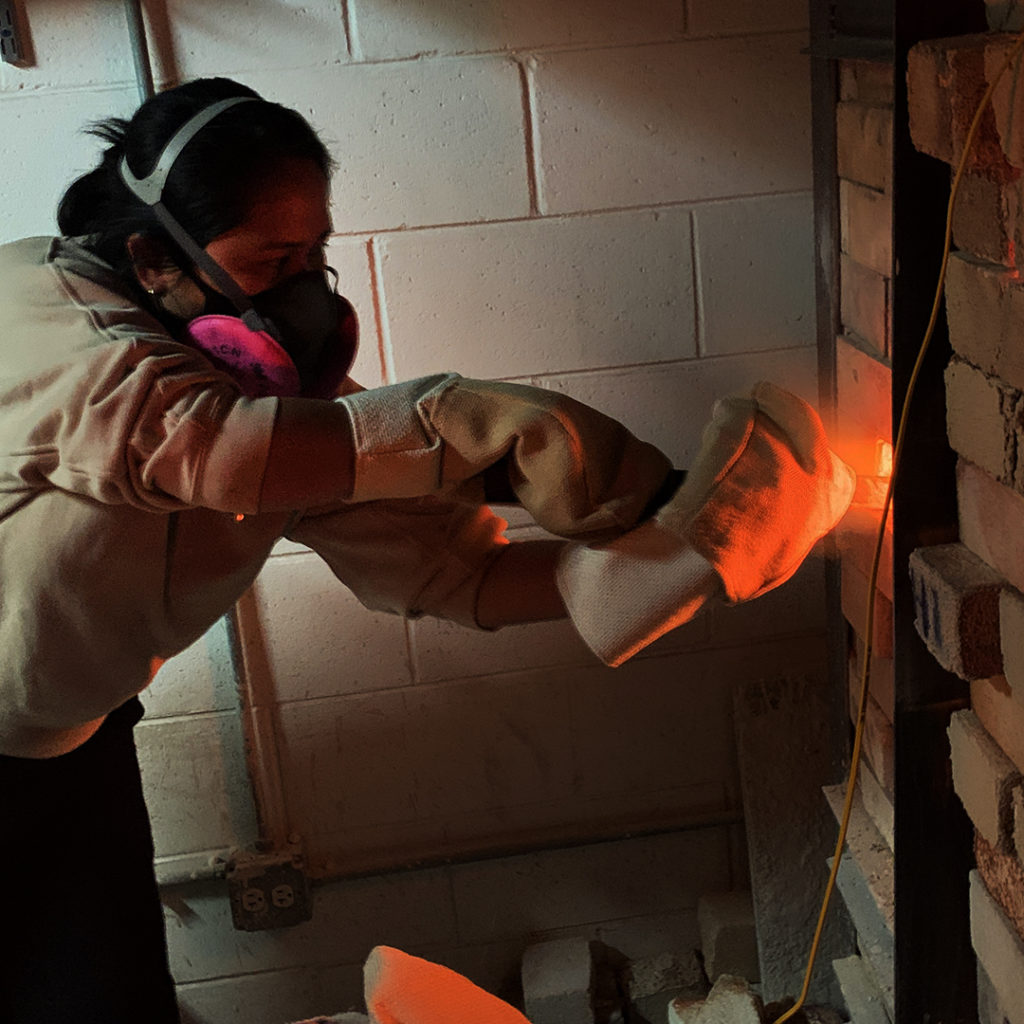
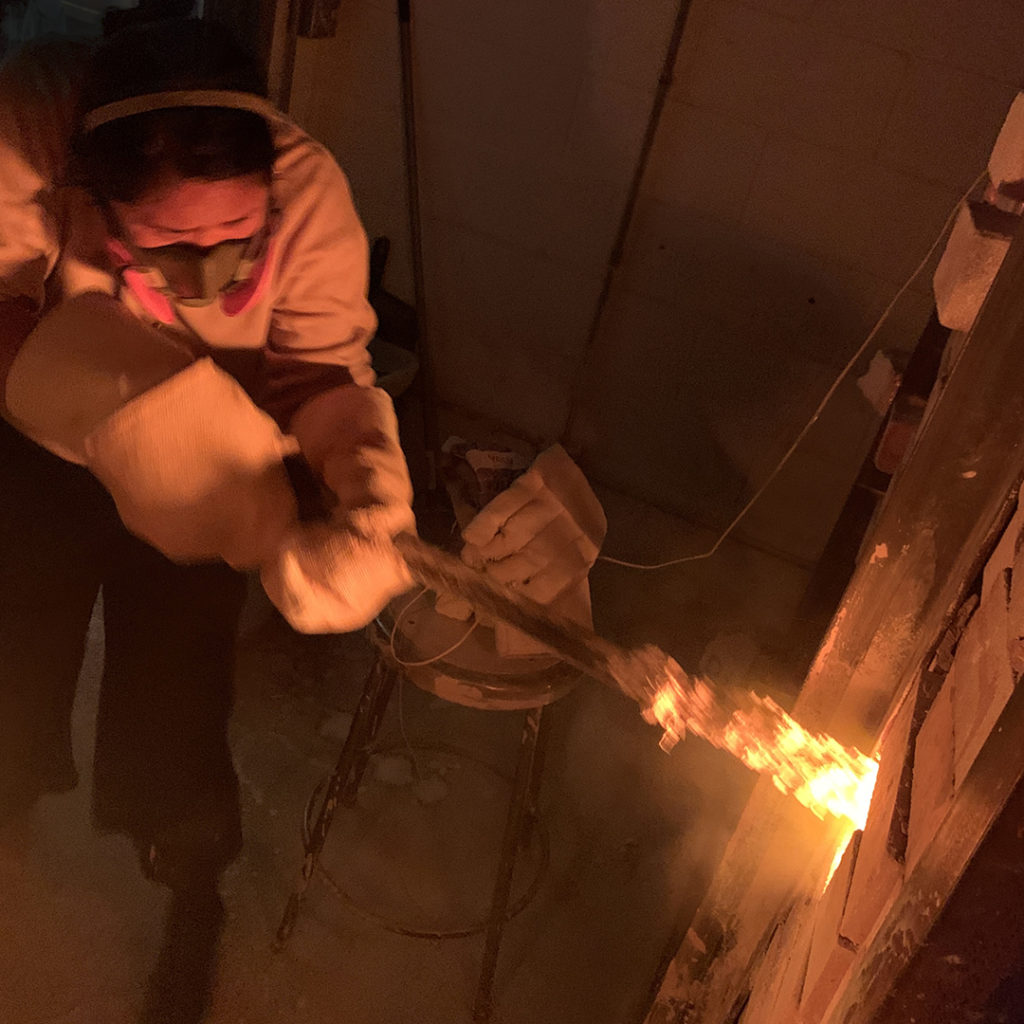
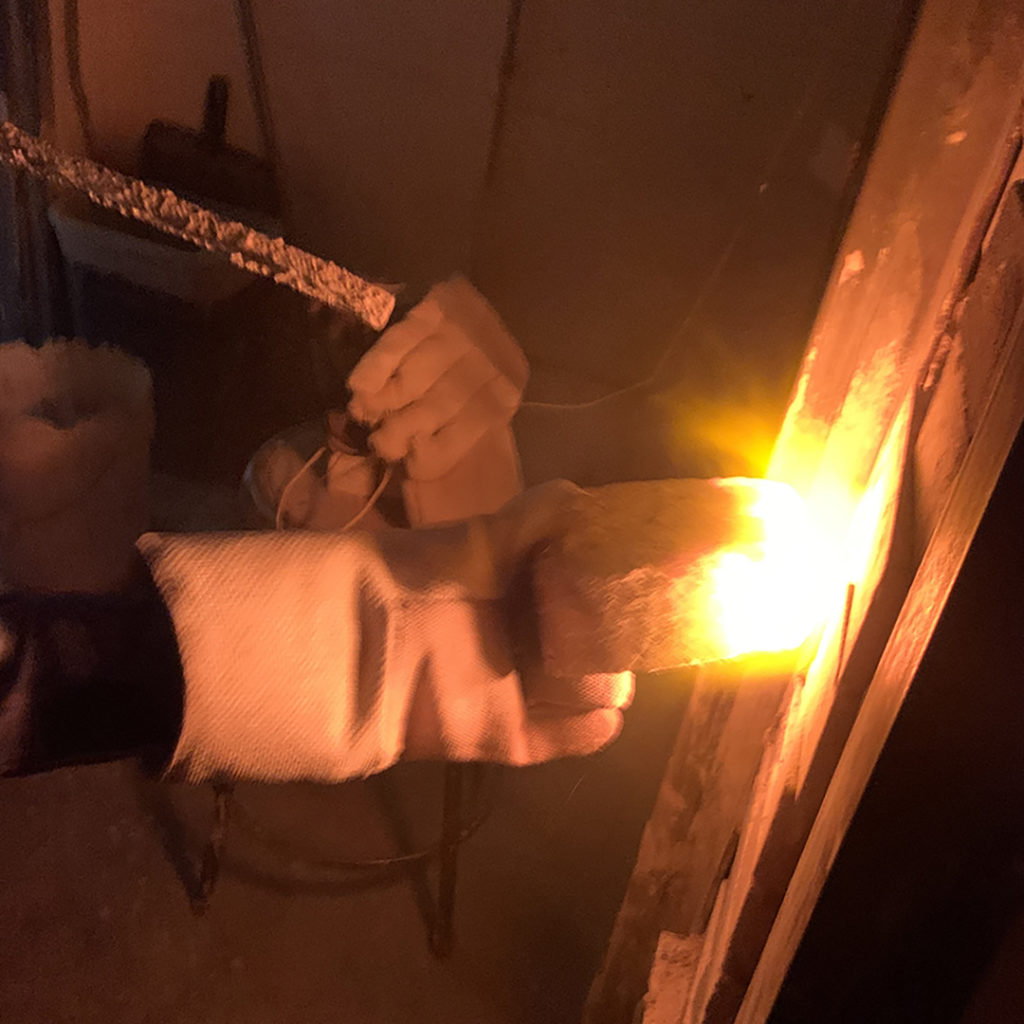
When the kiln finally got up towards its top temperatures tonight, my class started scooping the soda mixture onto an angle iron preparing to insert it into the kiln to create the soda atmosphere. They had a great time “playing†with the flames, inserting the soda & making some “magic†happen inside the kiln!!!


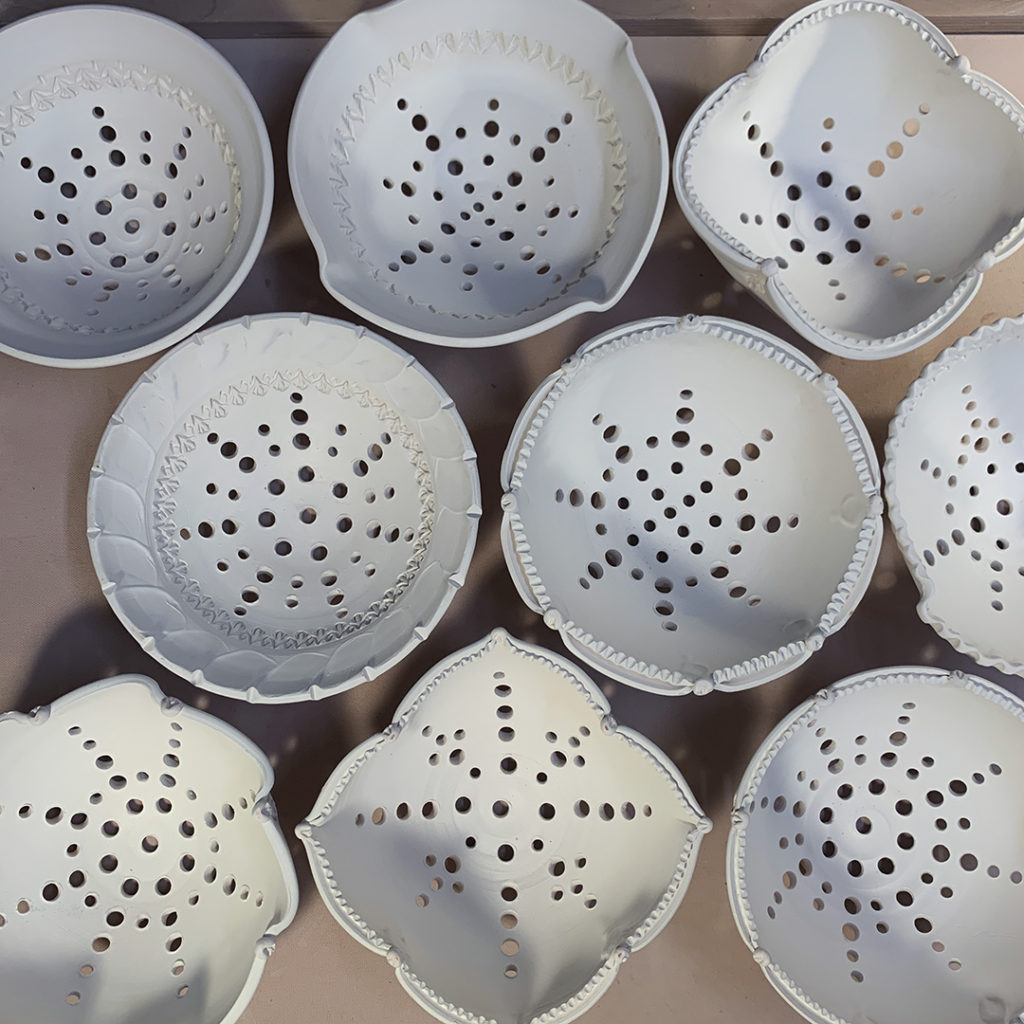
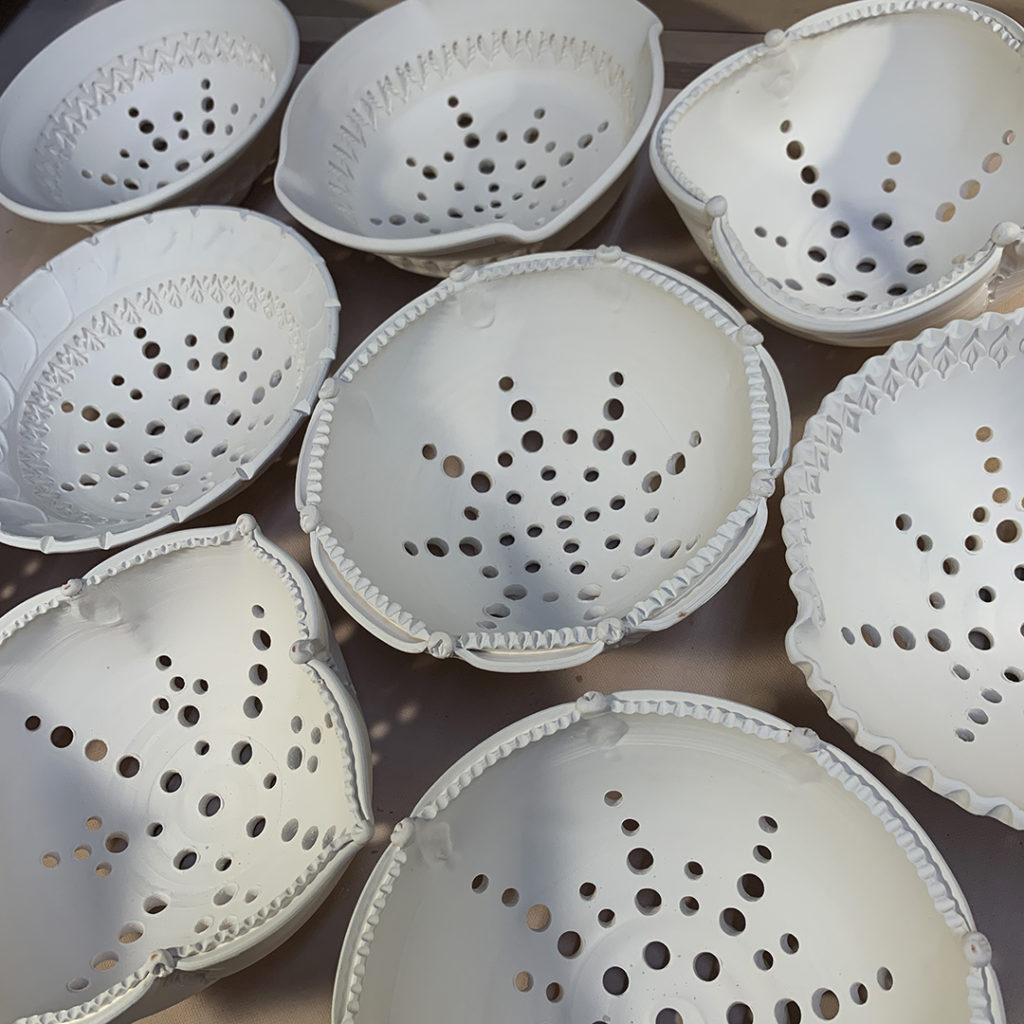
While I’m firing the soda kiln today, it’s a good chance to get some work done in the studio like glazing, cleaning & re-organizing! Glazing is always my least favorite part of the process… but it’s got to get done at some point. And since I’m “trapped” here all day firing, today might just be the day to tackle glazing these new berry bowls!
|
Gary Jackson: Fire When Ready Pottery
Lillstreet Studios ∙ 4401 North Ravenswood, Chicago, Illinois 60640 ∙ 773-307-8664 gary@firewhenreadypottery.com |