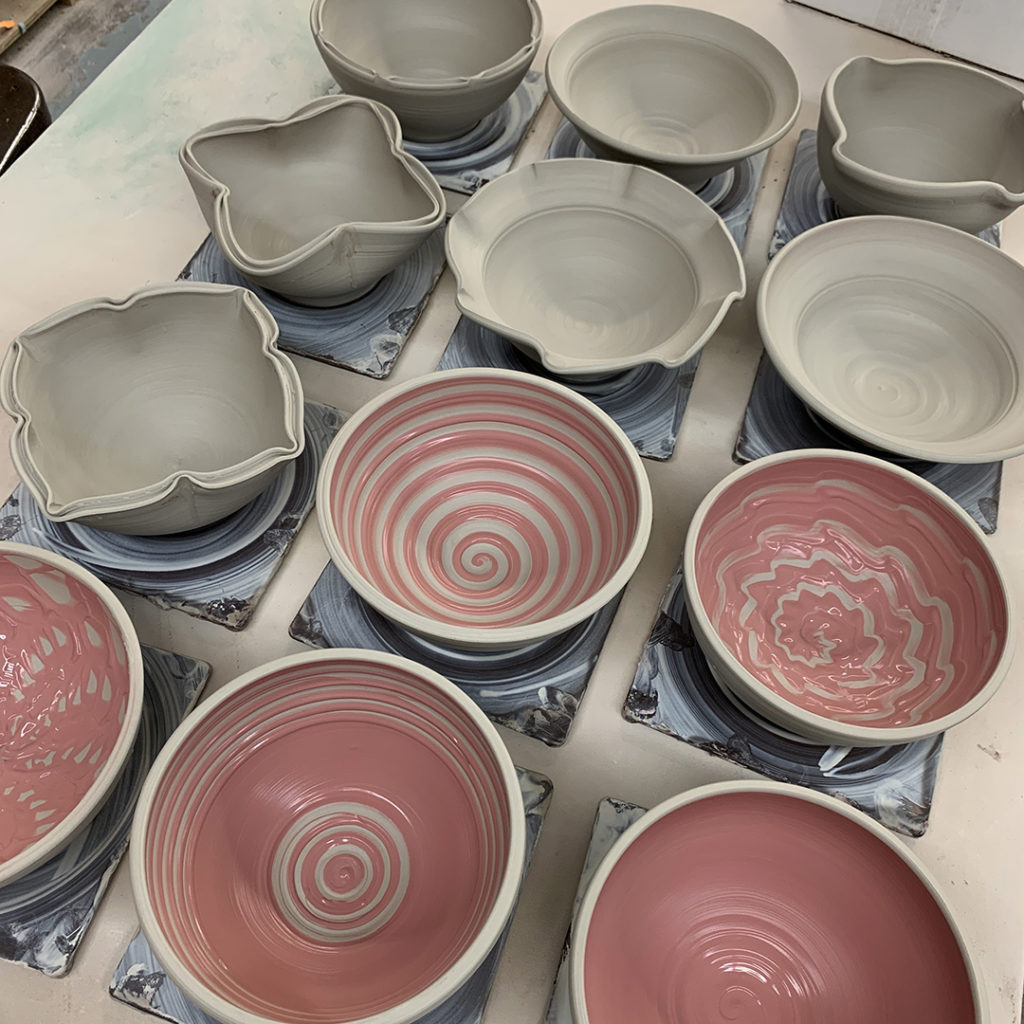
After showing my Beginners how to make a “bowl on purpose” instead of a cylinder gone bad, I then proceeded to throw a bunch more during class for us to “play” with later!
When I had all twelve bowls thrown, we re-grouped and I showed them some quick tricks & techniques to make their bowls more personal & more stylish… and a little less-basic!!!
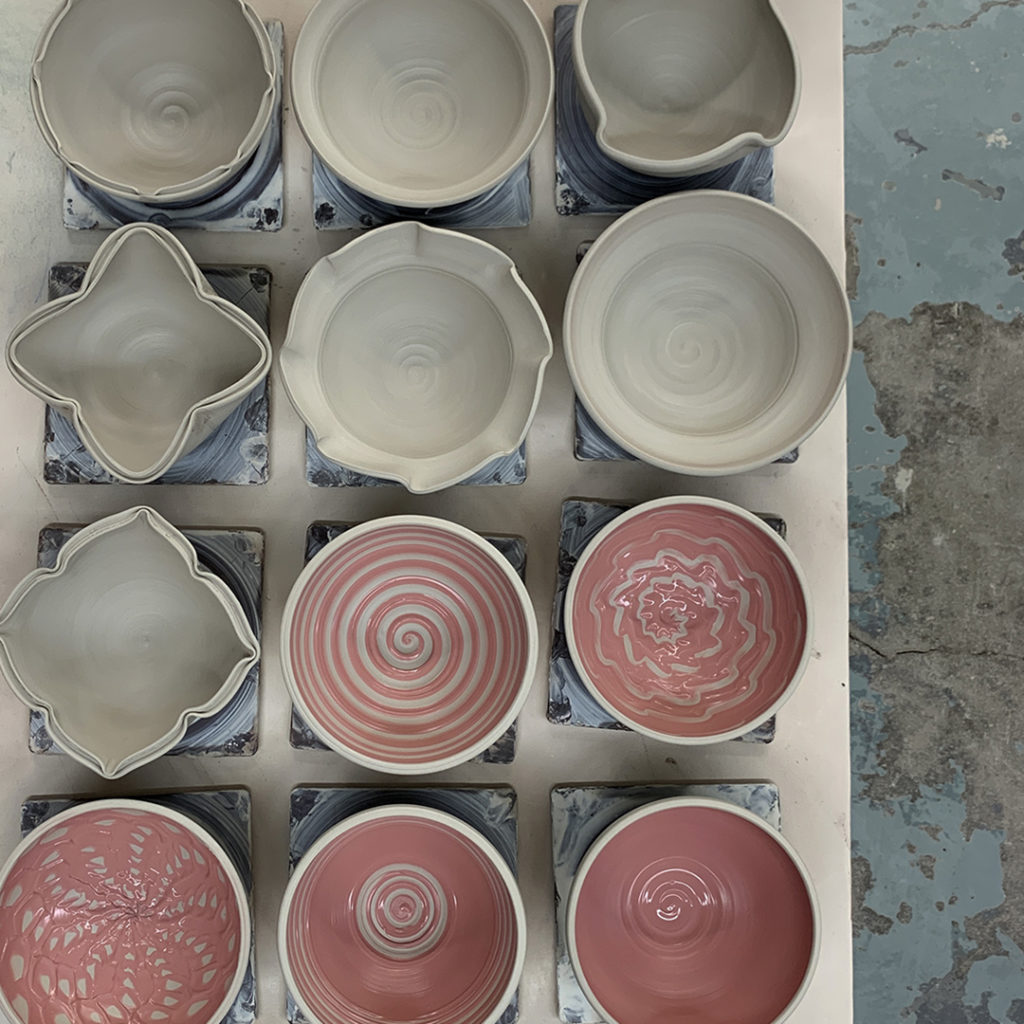
And here they are… in the sequence that we made them! You can kinda see the progression along the way!
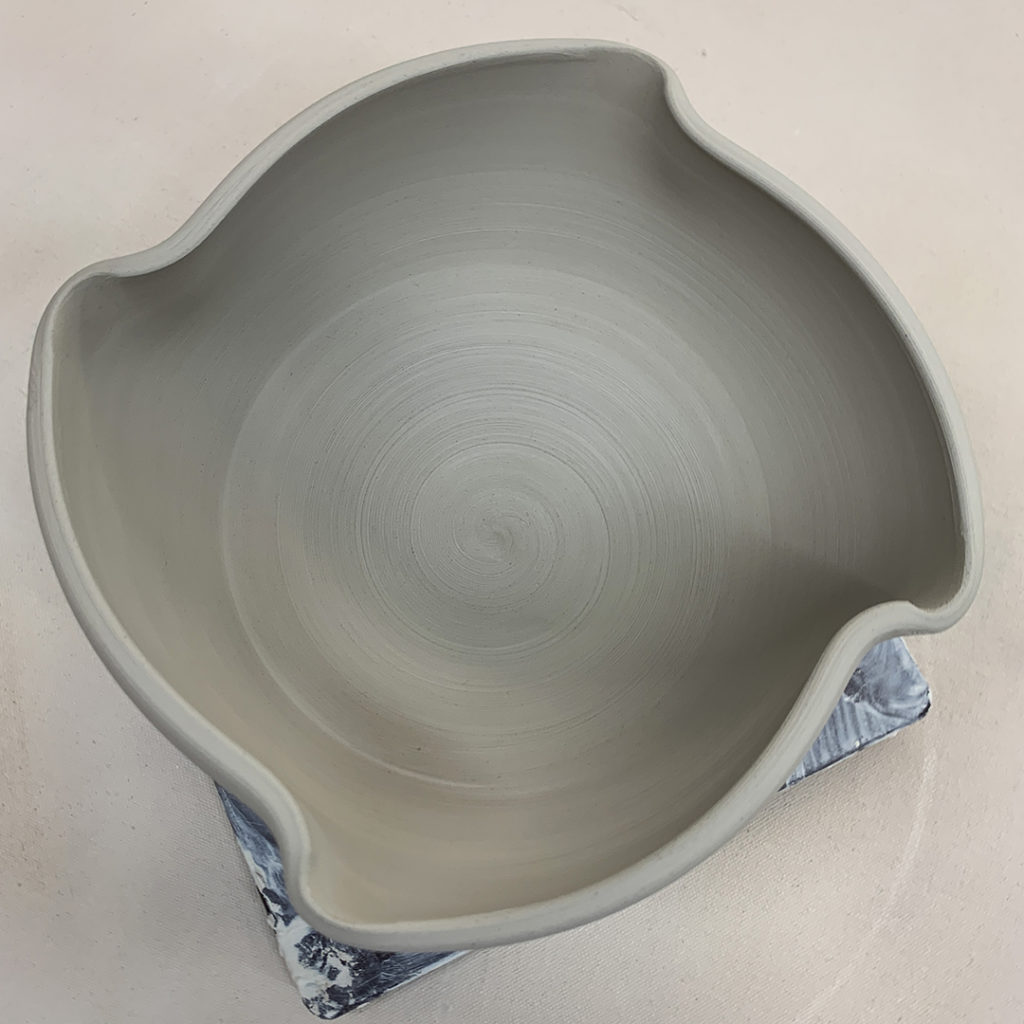
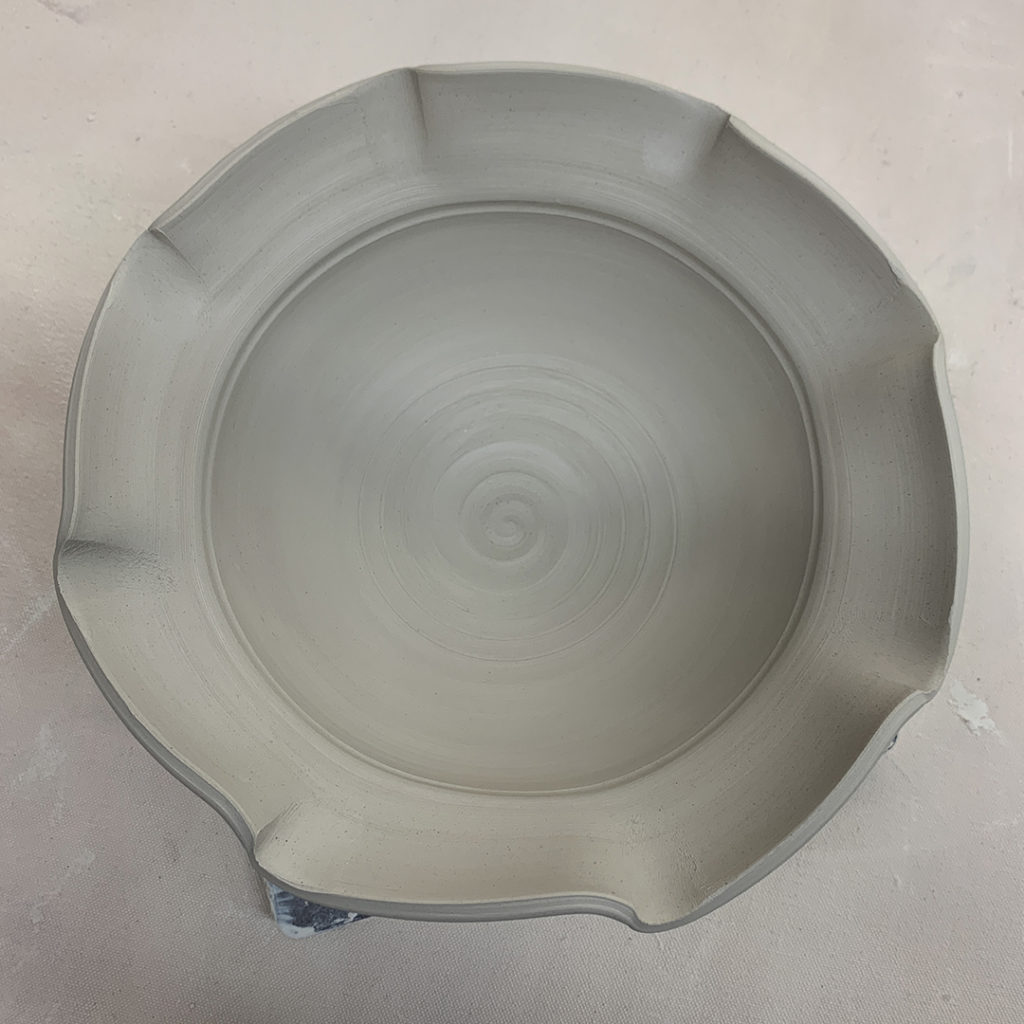
Bowl #1 – Four fluted edges
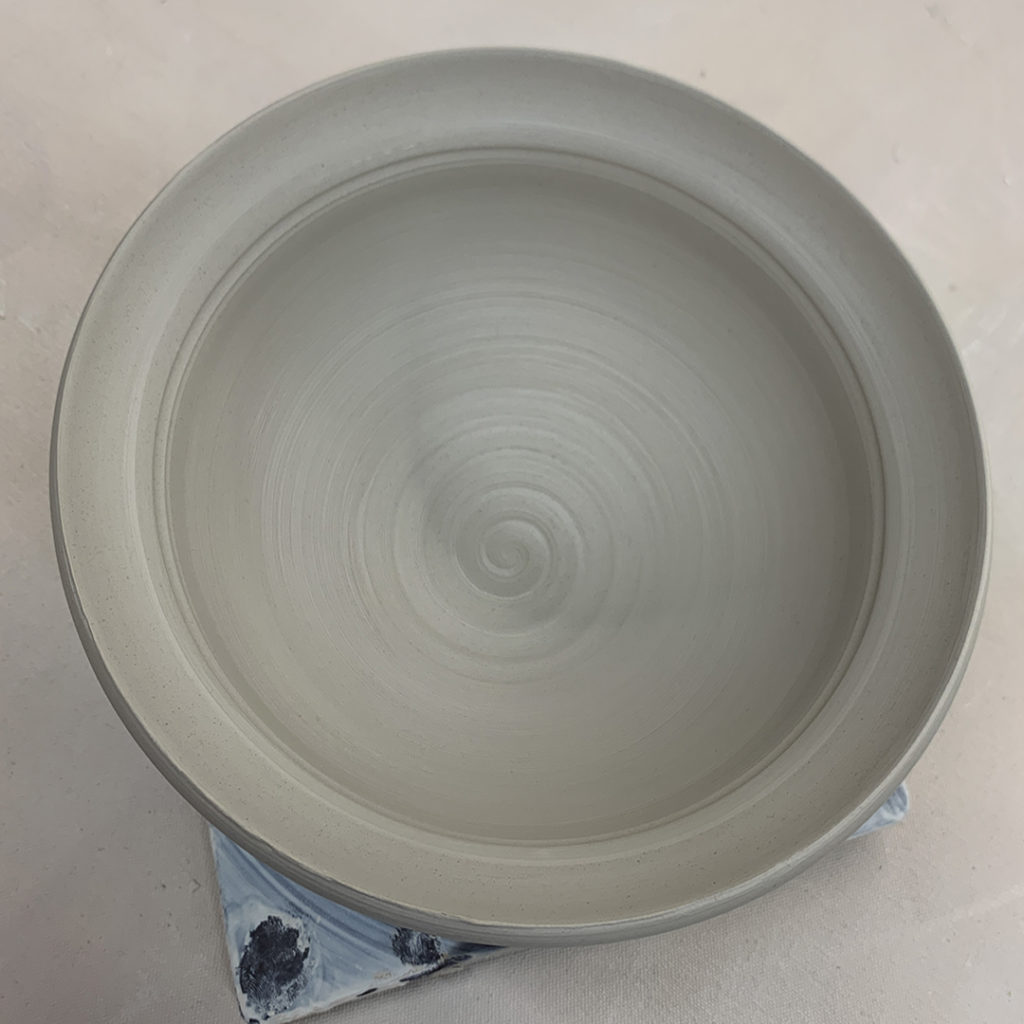
Bowl #2 – Flared flange
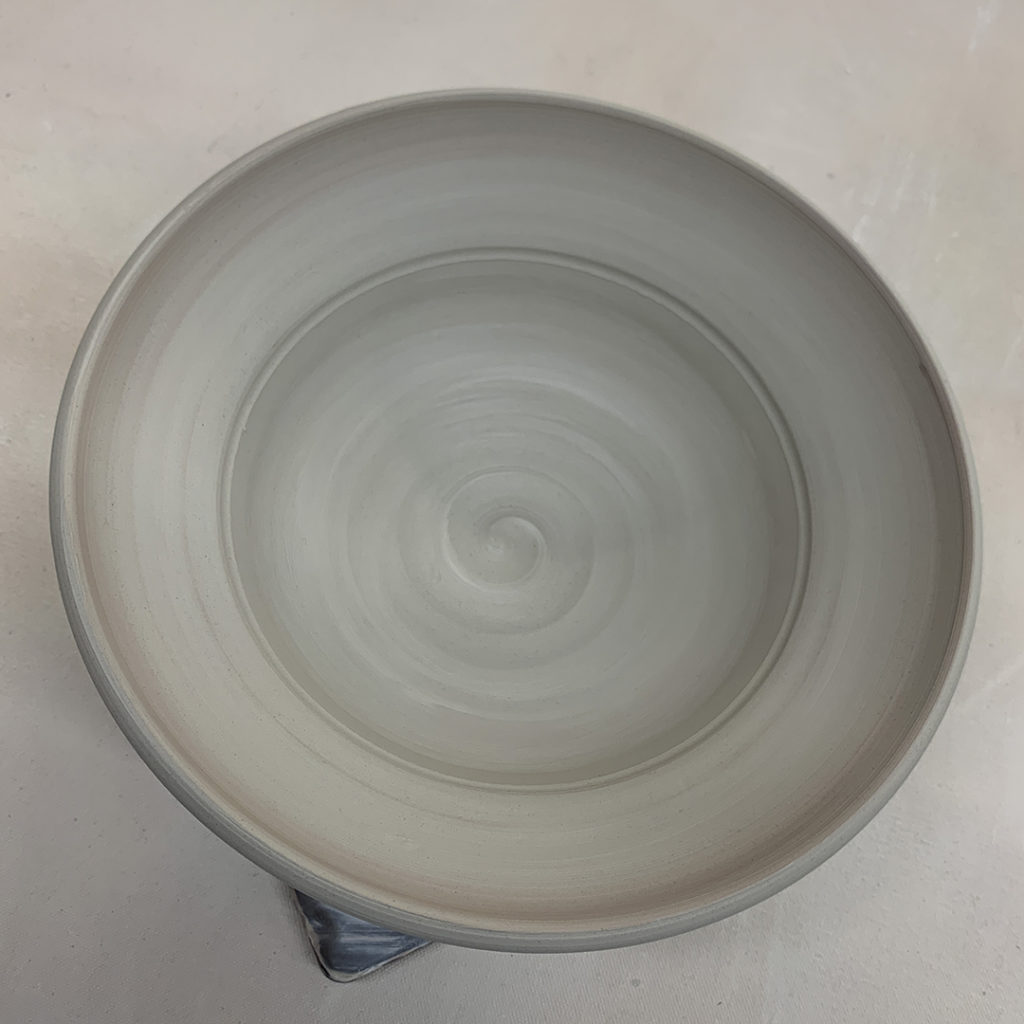
Bowl #3 – Wider flared flange
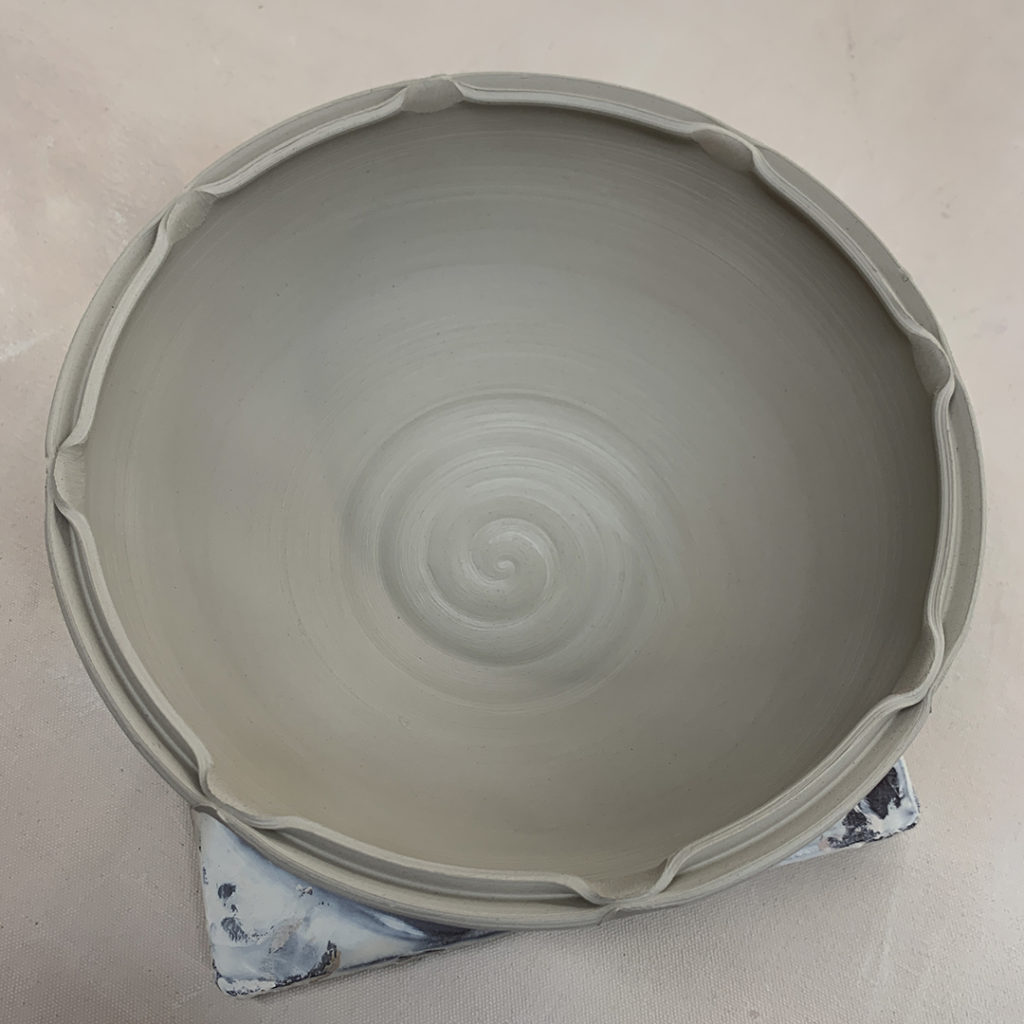
Bowl #4 – Flared flange with fluted edges
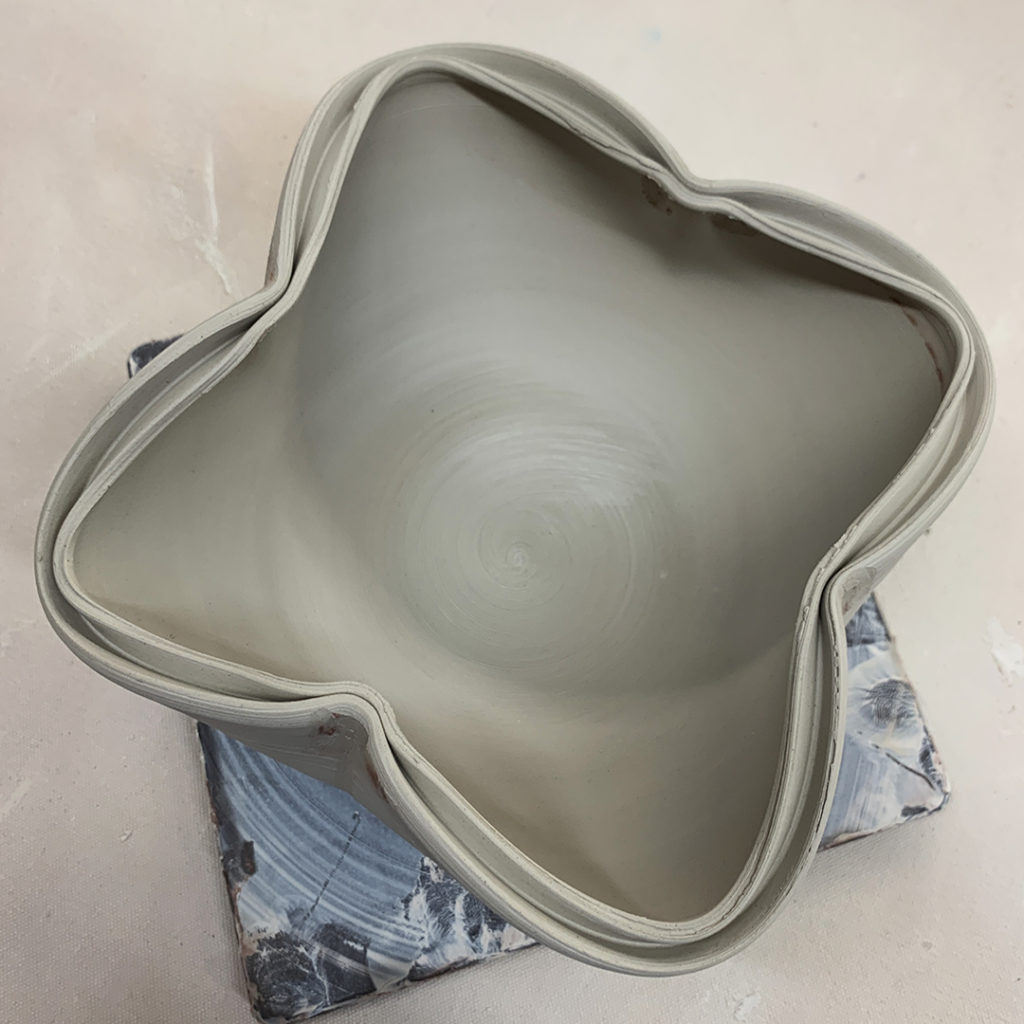
Bowl #5 – Split-rim with pinched accents
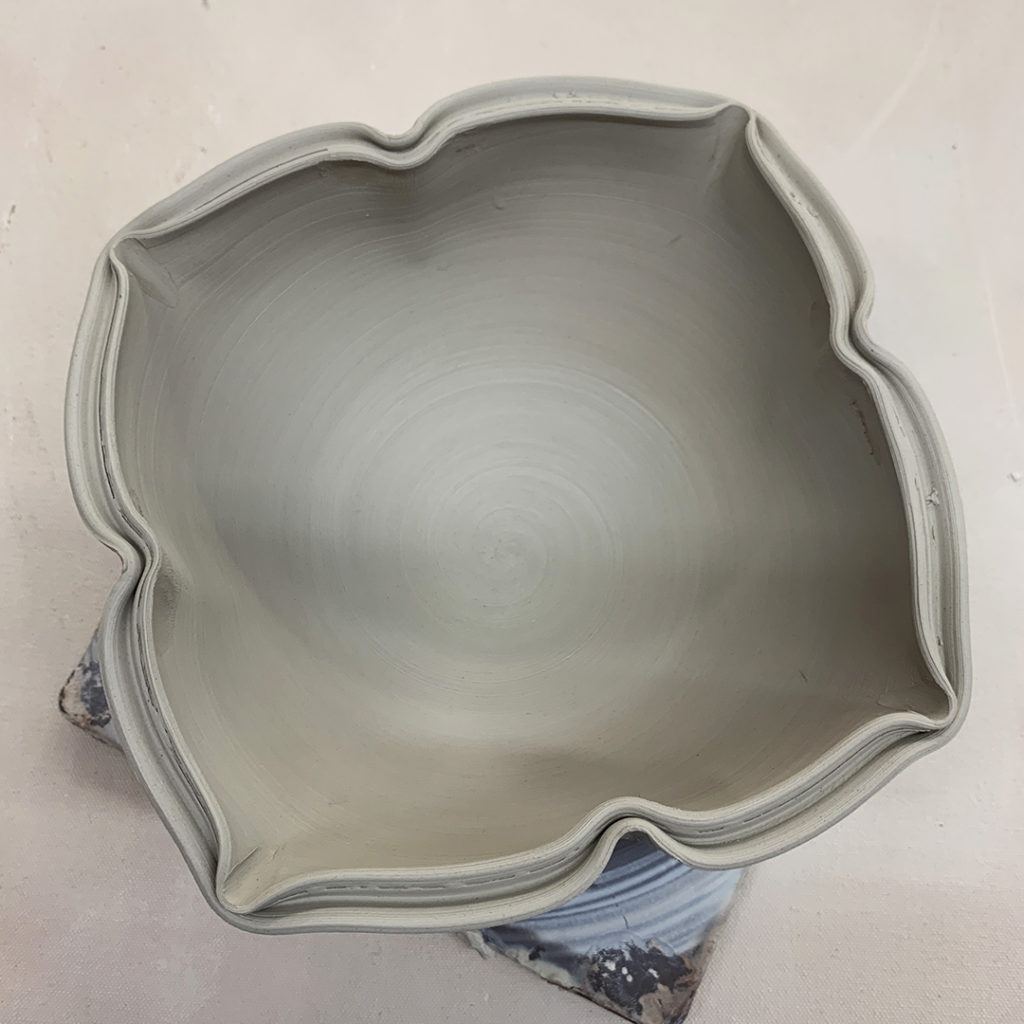
Bowl #6 – Split-rim with dented & squared-off perimeter
Bowl #7 – Split-rim with pinched dents in & out
And then I introduced my new students to colored slips as an option for surface decoration! I explained to them that colored slip is clay… and basically a colored “skin” that you paint on the outside of your thrown pot. I was EXCITED to try out the new Holiday Red slip we have at Lillstreet. It was introduced towards the end of Summer Camp… and this is the first time I’ve really gotten around to trying it on a “real” pot of any kind!
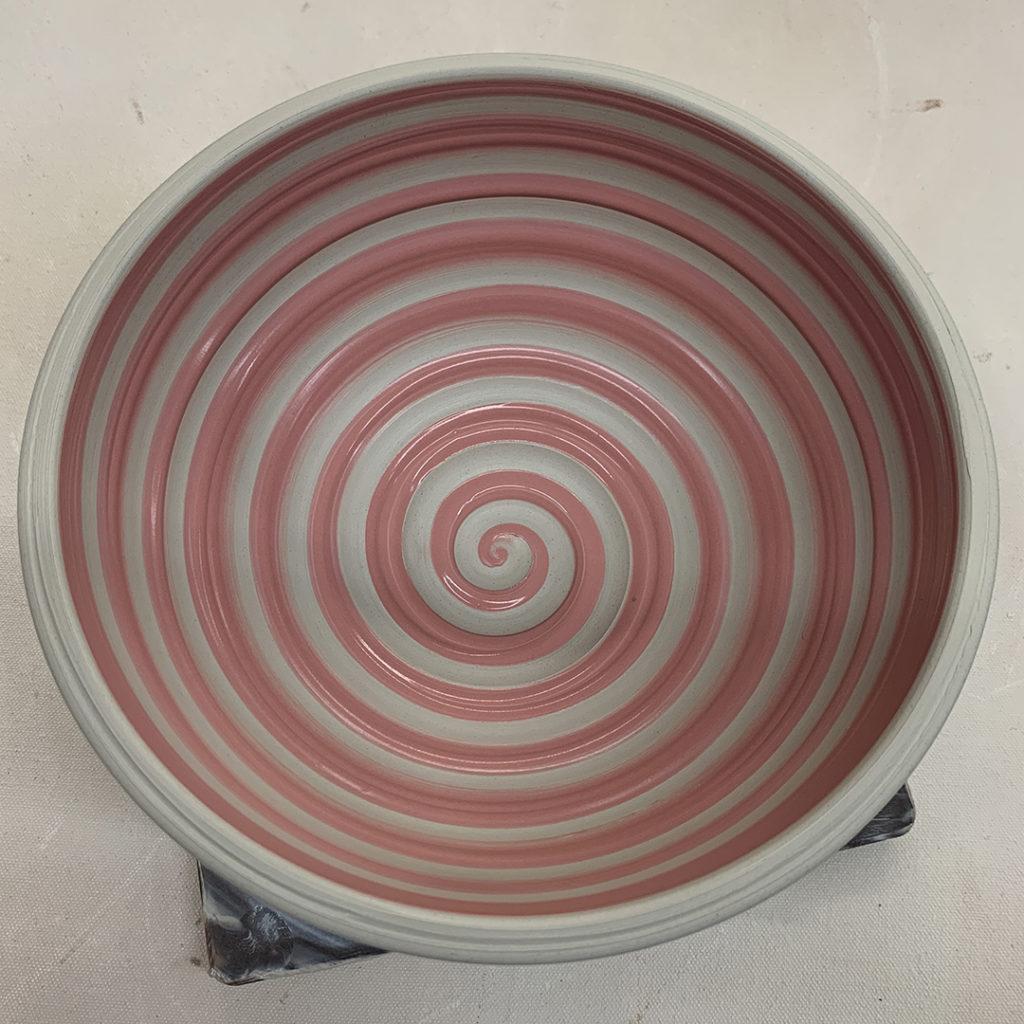
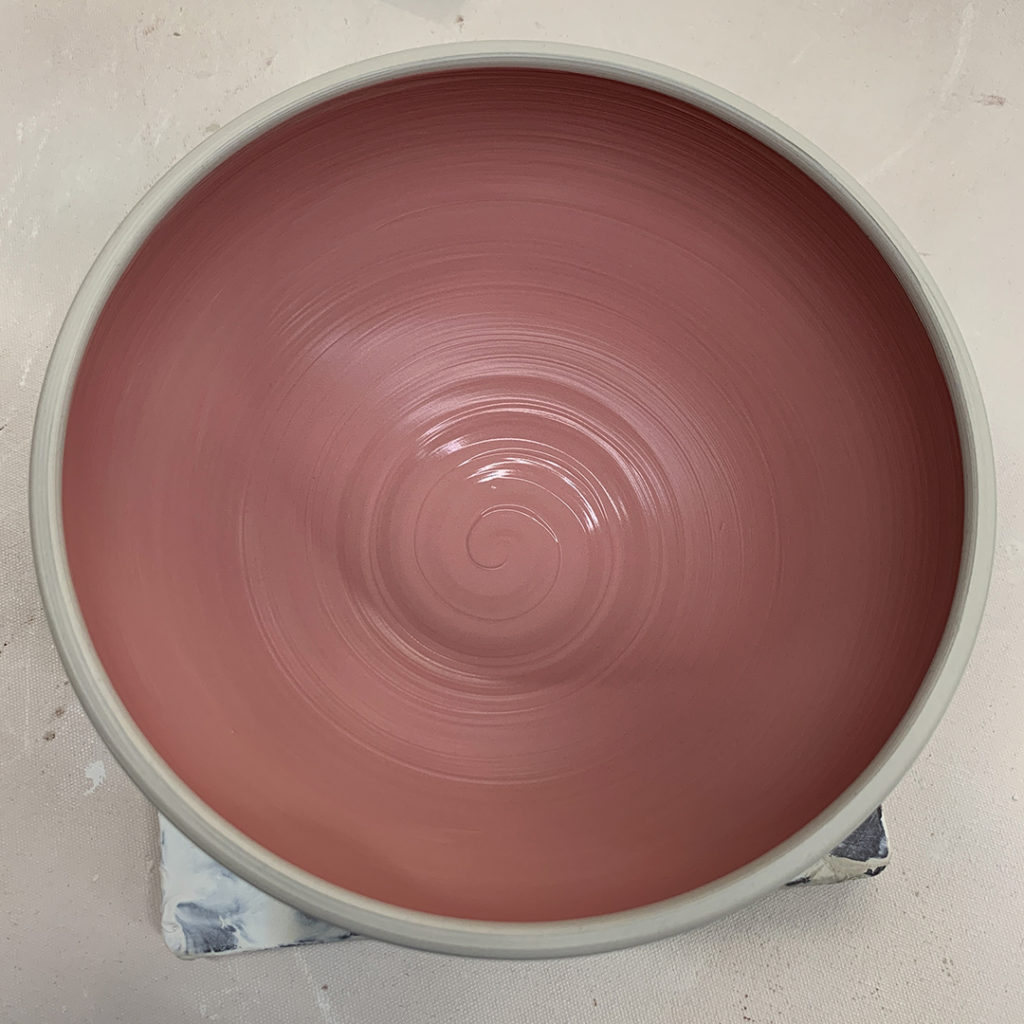
Bowl #8 – Plain bowl with a colored slip spiral
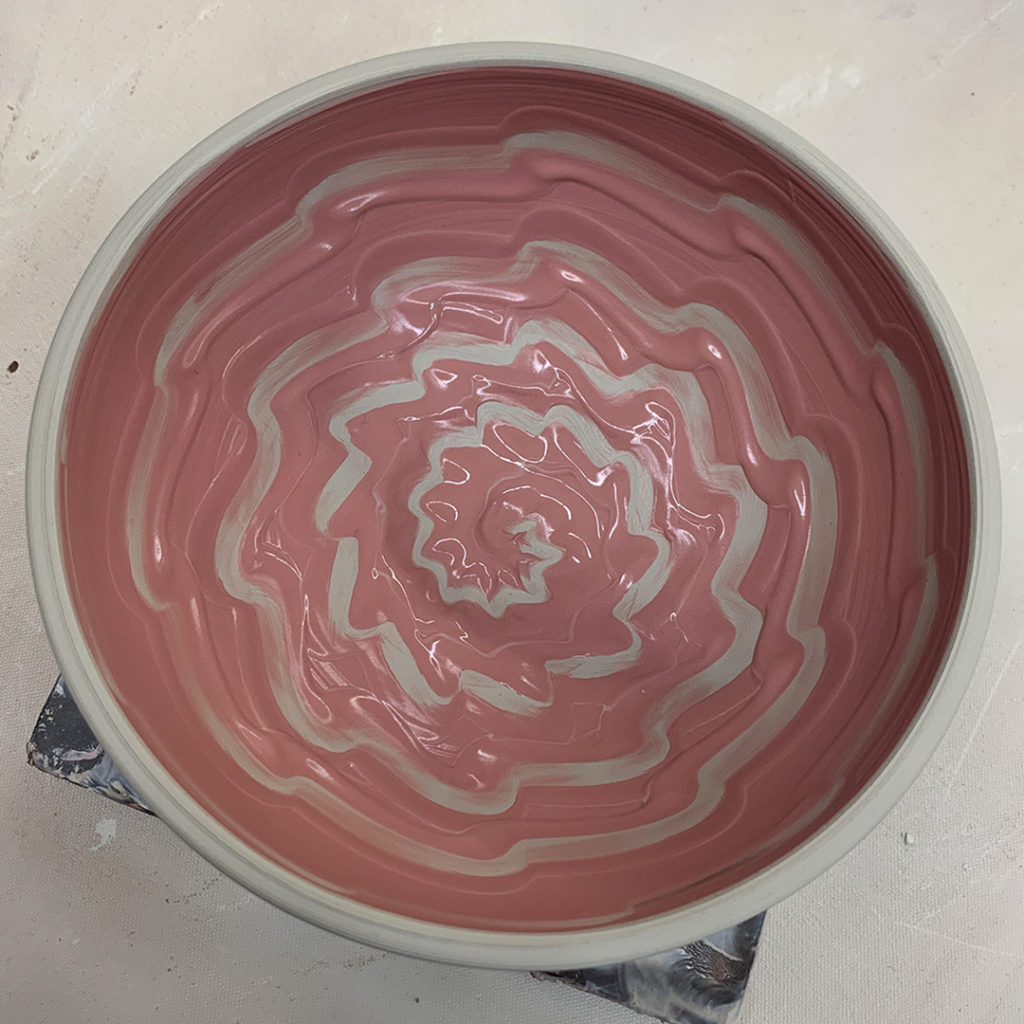
Bowl #9 – Plain bowl with a squiggles with the wheel spinning… ala finger-painting!!!
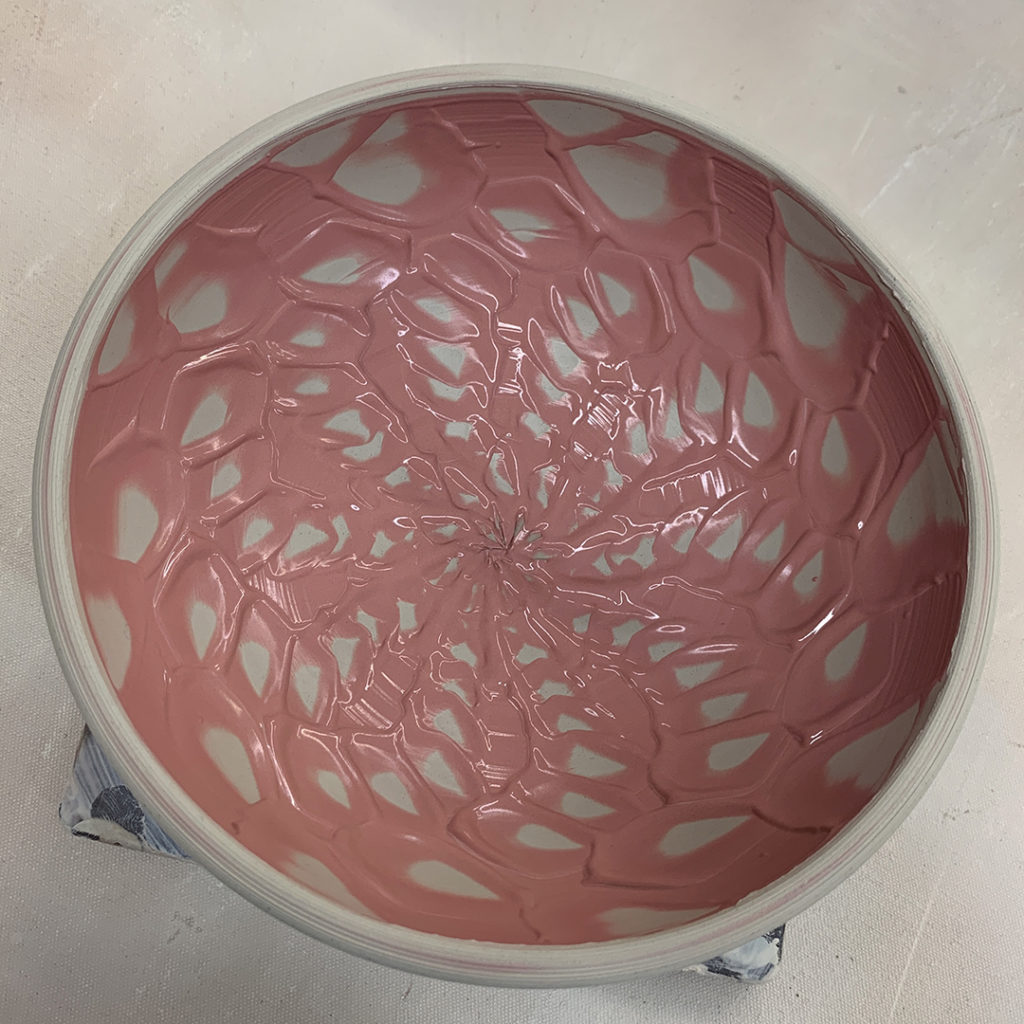
Bowl #10 – Plain bowl with decorative chattering… rhythmic tapping of a rubber rib through the slip as the wheel was spinning.
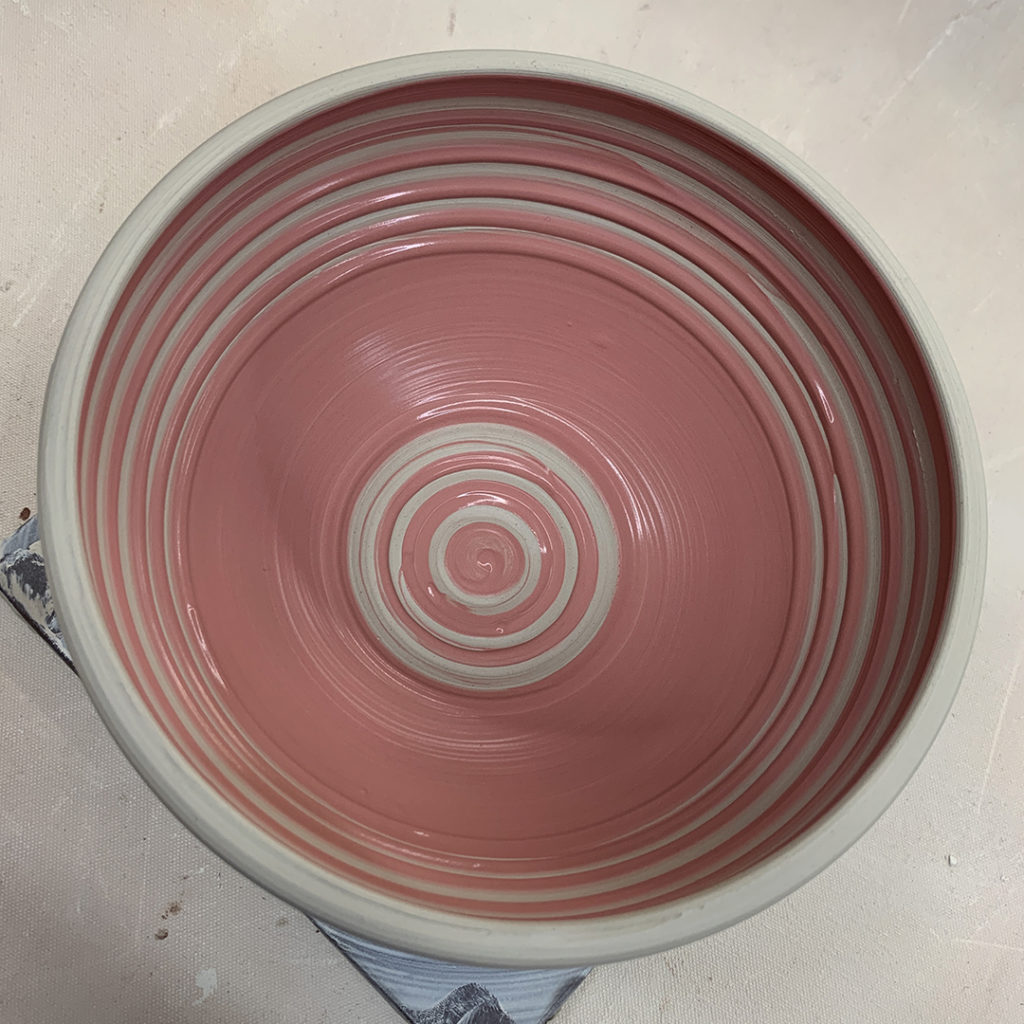
Bowl #11 – Another plain bowl with bands of colored slip… I left the thick band in the center so I can do some carving in that area later when the slip dries up a bit.
Bowl #12 – The last bowl we left plain with a simple coat of red slip. The plan is that my teaching assistant Susan will do a demo next week of how she does her sgraffito technique.
So here the are… all done for the night! Twelve bowls with twelve different techniques to make them each a bit more special.

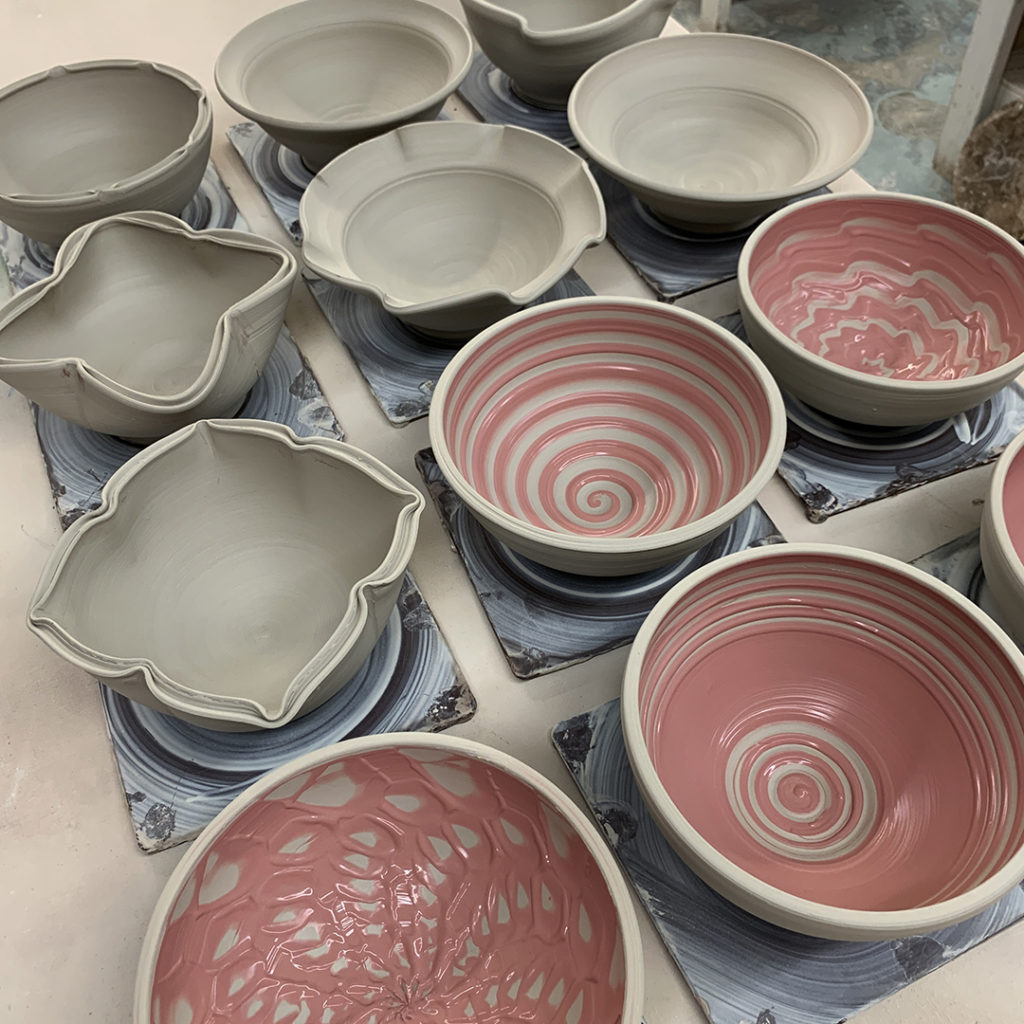
And then I covered them with plastic up in my studio for the night. I told my students I would try to keep these bowls “viable” and ready for some stamping & detailing in class next week. I hope I can wait long enough… you know how I like to stamp everything!