One of my favorite things to make… mugs!
Many potters despise the process; mostly because of their fear of handles.
But I enjoy making the smaller, personal items that become part of people’s
everyday rituals. The morning coffee, the winter’s hot chocolate, the cup of tea
for those feeling under the weather… or in my case… ice cold grape pop!!!
So I’ve spent the past few days working in the studio on a new batch of mugs.
Nothing fancy – just trying to get back into the swing of things and restock
the “art fair inventory.” And I thought I would try to show you some of the steps
along the way.
First, I start by throwing the basic cylinder shapes. I prefer to work
in “batches” instead of singles. I like the production aspect of it all.
Creating a quantity of something… then moving on to the next.
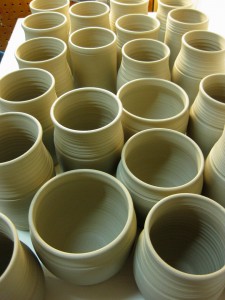
When they are a fairly damp “leather-hard” I begin the stamping decoration.
I make my own stamps out of a piece of clay. I roll it into a coil, carve a pattern
into both ends and bisque the stamp. One stamp pressed in repeatedly can create
a wonderful pattern around the cups. The trick is to get the pattern to line up
when you get back to where you started!!!
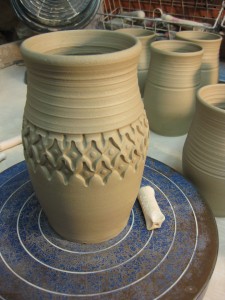
After they are stamped, the bottoms are trimmed. It’s a fairly simple process
where you turn the cylinder upside down on the wheel, center it, attach it,
and then trim away the excess clay while it is spinning. Think of it as very
similar to a wood lathe. Spinning fast, trimming fast. Trimming helps remove
the excess clay where it attached to the wheel, as well as allowing me to trim out
the bottom to create a finished looking foot ring.
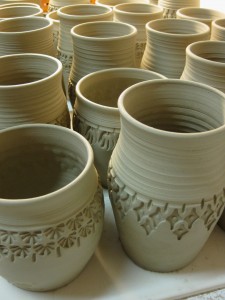
After trimming, the handles are pulled and allowed to stiffen up.
Once they are no longer sticky, wet or mushy, I can apply them
to the side of the cylinders to create a “not-quite-so-instant” mug!
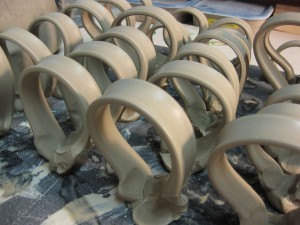
To attach the handles, I cut out the section of the strap that I need…
then scratch & slip both the ends of the strap and the attachment points.
The scratching works like Velcro, the slip works like clay glue. Together,
it creates a strong bond when attaching clay to clay.

After attaching the handles, I take a few extra moments to smooth them out
and give them a finished look. I then set the mugs aside and cover them with
plastic to help them dry more slowly. I like to keep them covered for at least a day
to help the moisture level of the mug and handle equalize a bit before full drying.
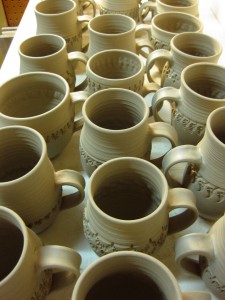
Once the mugs are done and all handles are attached, I will paint some colored slip
on the mugs that are going to be soda-fired. The colored slip will help add some color
to the final mugs – as well as reacting to the soda environment of the kiln to create
some wonderful flashing effects.
After slip painting, the mugs are allowed to dry slowly. They then need to be bisque fired
to approximately 1850-degrees. This makes them hard yet porous. Next they are glazed,
wadded and fired again. The final soda firing takes around 13 hours to reach the top
temperature of 2350-degrees. The kiln will cool for a full day, and be unloaded the next.
All of that for a simple mug.
Every single morning, you are a part of the jump start of my day. Lucky me if dear husband has set the timer on the coffee pot, and the aroma is already enticing. Bummer if my mug is still in the unrun dishwasher from the night before.
Grumble…grr…Grumble.
I’ll pull it out and wash it by hand then, careful to rinse all the soapsuds out. Making sure to use extra hot water because it warms the mug so nicely. Pouring that first cup, and it cradles proportionately in my hands. I’m convinced this mug was made just for me. It was, wasn’t it?
Ahhh.
Glad you love making mugs. The world needs more quality mugs and yours are a great contribution! It is one of my favorite forms as well, but I can remember back to when they weren’t, mostly, as you say, because I feared pulling handles. Why ruin a perfectly good cup with an incompetent handle? I guess as with everything unfamiliar it takes some experience before you can get it to work satisfactorily. At one point, in order to get my students over this fear, I used to start each class lesson with a handle pulling exercise. They often grumbled, but very soon were all able to pull decent handles an no more cups were sacrificed as a result. Thanks for your great blog!
Are your handles pulled or slab rolled? They look so uniform. I’m a beginner and love mugs – I LOVE warm liquid (coffee, tea, hot chocolate, etc.)
I just read your description of your handles. Thanks. I could stay on your site forever–I’m learning so much.
Catherine
CATHERINE – All of my handles are pulled in the traditional style. I pull them from a small ball of clay and then set them up to dry a bit before I attach them to the mugs. Some people like to attach the clay to the mug first and then pull then handle off the side of the cup. I find I either warp the mug or squish the handle in weird ways. So I’ve always stuck with the pull, soft-leather, score, slip, attach method. And I too LOVE MUGS!!! If I could only make one form for the rest of my ceramics career, I do believe it would be MUGS!!!
Be sure to check out the “PROCESS” page. There’s a lot of information in there, as well as the “GLOSSARY.” Both of the pages can be found at the top right of the blog. Have fun… I’ll keep blogging… and making more pots in the New Year!!!