Gary Jackson: Fire When Ready Pottery
A Chicago potter’s somewhat slanted view of clay & play
Categories: classes, color, porcelain, process

After playing with black slip on white porcelain, we started wondering how we could add more color to it. So we decided to try using some colored clay under the crackled black slip!!! And I started making a batch of GREEN PORCELAIN!!! Not really sure if the green mason stain would stain my hands or not… but I was willing to take one for the team!!!

And or the record… my hands are no longer green!

Categories: classes, porcelain, process, textures

This week in my Thursday morning class, we continued with some more crackled slip fun… with Heidi asking for a crackled black slip demo. So I did another one using black slip with sodium silicate on white porcelain clay!!!

Categories: kiln firing, process, production

A bisque it, a basket…
a kiln full of soon to be bisqued baskets!

And a few other things…
four & a half layers of mugs, flower pots & more fun!

Categories: food, friends, platters, stamped, textures

Pretty perfect puffed & powdered pastries
on a pinkish-purple patterned pottery platter!

Now say THAT ten times fast!!!
Thanks for sharing your yummy treats with all of us Julie!

Categories: bowls, classes, process, surface decoration

Here’s my class demo bowl after wiping away the background from the shellac pattern. If you look close, you can see the raised edges along the sides of the pattern. When the piece gets bisque fired, the shellac will burn away and “reveal” the raised pattern that has a orange flashing slip top surface. My plan is to do a tenmoku liner glaze on the inside of the bowl and then soda-fire it “raw” on the outside to see what happens. I’m kinda excited… you know I love a good challenge… and it’s always fun to see where it takes us!

Categories: bowls, classes, process

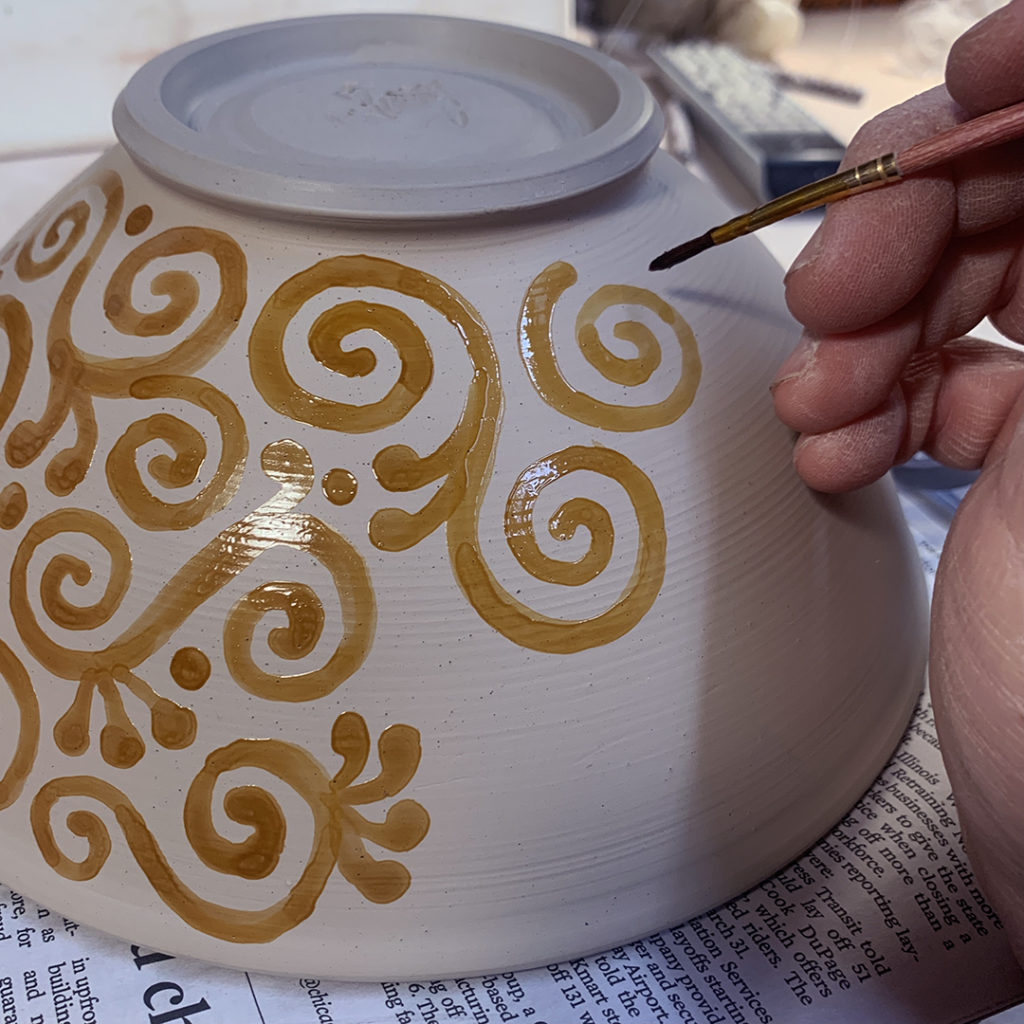
After the shellac pattern had dried, I started wiping away the background during my Monday night class with water and a sponge. The basic idea is that you wipe away the exterior surface of all the areas that are not protected by the shellac. As you wipe away, the unprotected surface goes down leaving raised surfaces under the shellac. You can wipe as much away as you want… but be careful as the shellac will start to wipe away eventually too!

And mental note to self… if you’re going to do a colored slip under the shellac like I did, it would be a lot easier to see what’s happening if the slip was a better color contrast to the clay body. The orange flashing slip I used is very similar to the B-clay color… so it was tough to see sometimes if I had wiped it all away. The color you see here is amber shellac. My fear is that there might be areas where the background wasn’t wiped away enough?! We’ll find out after bisque firing… but by then it’s too late to fix. Fingers crossed.

Categories: bowls, classes, process

After doing my first class demo with the water etching technique, I decided to go one step further with another demo piece. My first bowl was more random with multiple patterns kinda like a “sampler” just on the B-clay surface. This time I first covered the exterior with an orange flashing slip, then painted on this swirly pattern with shellac. My hope is that when I “wash away” the background, the pattern will be raised and the orange slip will POP more after soda firing… and the raised edges will catch some soda too!!!

Categories: food, friends

Looks like I wasn’t the only one “salivating” over our pizza party last night! Here’s Roscoe up in Minneapolis looking like he’s ready for some pizza too! Good boy!!! Thanks for sharing your puppy & pizza Sarah & Jules!

Categories: food, friends

A wonderful pizza night with my good friends Pam & Sarah!
Yummy pizza from Lou Malnati’s & great conversation…
sure, it was virtual over ZOOM… but I’ll take pizza with friends
any way I can these days!!!

Categories: flowers, seasons

Under the snow…
a little glimmer of Spring popping up as the snow continues to melt!!!